Number Normalization Rules in Lync or Skype For Business
Microsoft Lync/SFB (Skype for Business) uses .NET Framework regular expressions to specify numeric match patterns to translate dialed digits into the E.164 format. A Tesira VoIP endpoint can also utilize normalization rules to allow it to translate to the E.164 format. The purpose of supporting these rules in Tesira is to allow a user to dial a number in a manner to which they are accustomed and have Tesira convert the number to a format that Lync requires. The addition of these rules will resolve situations where dialing from a Tesira endpoint results in a "Forbidden" message displayed in the software dialer block. To use this feature, your system must be running Tesira software/firmware version 2.6 or later.
The majority of Tesira connections to Lync/SFB will make use of normalization rules. The procedures below will detail how to export a file from the Lync/SFB system and import that file into Tesira for use. However there are cases where Tesira will not be required to perform digit translations. The determination of whether or not rules need to be applied should be handled on a case by case basis and under the consult of the Lync Administrator. If you are unable to determine if normalization rules need to be applied you can perform the following test.
- Register the Tesira VoIP endpoint to a Lync/SFB system.
- Attempt to dial a call without normalization rules in place.
- If you are able to dial normally this document will not apply to your configuration.
- If the Tesira software Dialer displays a "Forbidden" message it is likely the case that number translations are required within the Tesira endpoint. As a further test that you can manually add the (+) symbol to the dial string from the Tesira software dialer and attempt to place the call again. If the call connects with the addition of the (+) symbol it is further confirmation that normalization rules must be in place.
If it is found that normalization rules are required in a particular system, the Tesira VoIP endpoint will require the creation of multiple rules to meet the Lync/SFB dialing requirements. In these deployments you will need to work with the customer's VoIP Admin. to generate a normalization rule XML file from Lync/SFB. The Tesira software can then be used to upload this file and translate user entered numbers to Lync/SFB required formats.
Determining the Dial Plan Policy
The following section will determine which Dial Plan the Tesira endpoint's Lync/SFB user account is associated to. 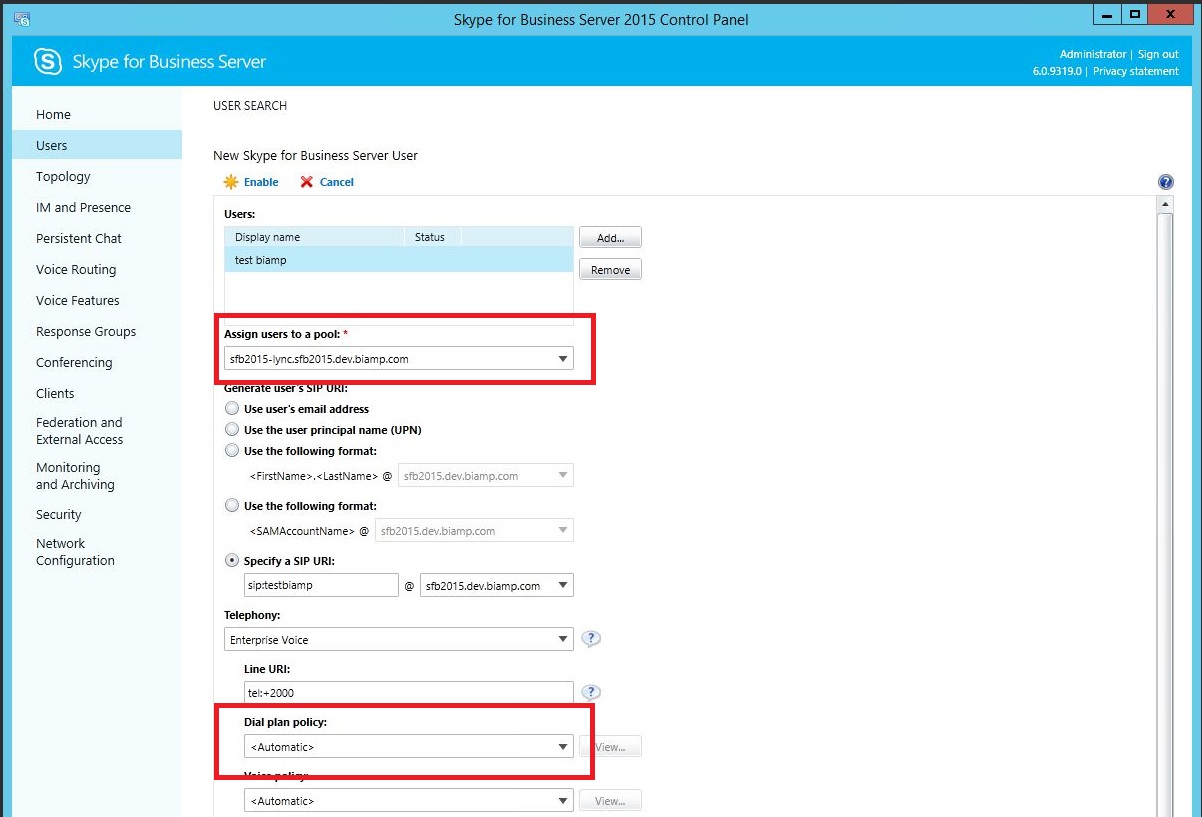
- Open the User Account Page in the Lync/SFB Control Panel.
- Take note of the Dial Plan Policy applied to the User account. If the Dial Plan is set to a specific user plan, note the plan name and proceed to "Option 3" of the "Determining the Proper Dial Plan to Export "section of this Tech Note. If the Dial Plan is set to "Automatic" continue these steps.
- Take note of the assigned Pool that the user has been assigned to.
Determining the Site
In some systems Dial Plans are setup on a Site basis as opposed to a Pool basis. If this is the case you must determine which Site the User Pool found in the previous section is assigned to. This process of determining the Site is a bit different in the Standard Edition and an Enterprise Edition of Lync/SFB. Because of this both methods will be detailed, you will only be required to follow the steps needed in your particular implementation.
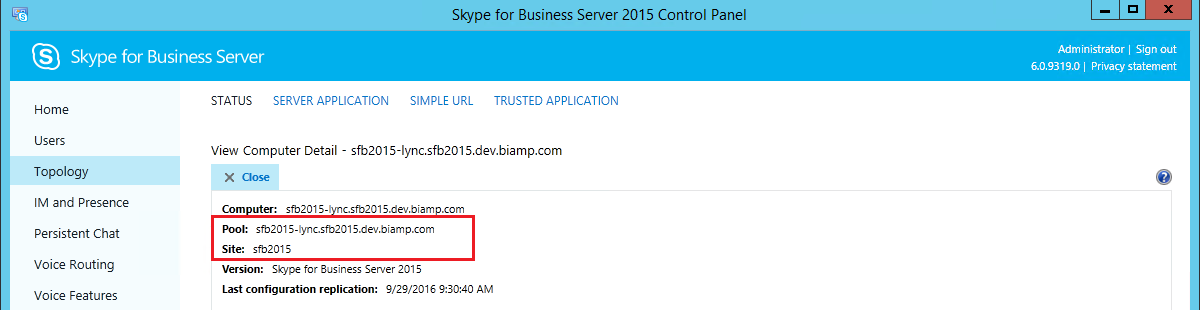
Determining the Site in Standard Edition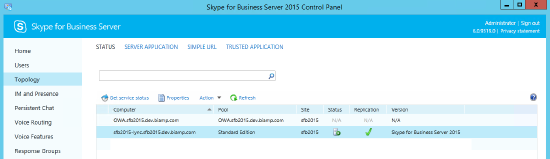
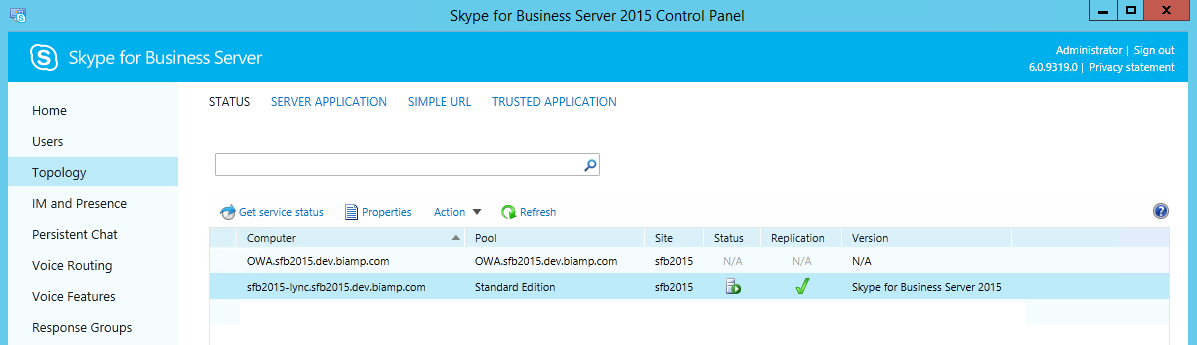
- Open the Topology page in the Lync/SFB Control Panel.
- Locate the Pool that the Tesira User account was assigned to.
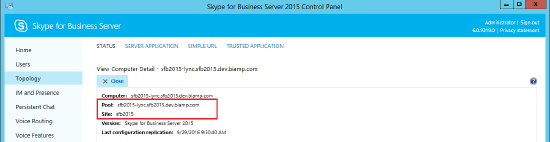
- Double click on the pool to open it.
- Take note of the Site the Pool is associated with.
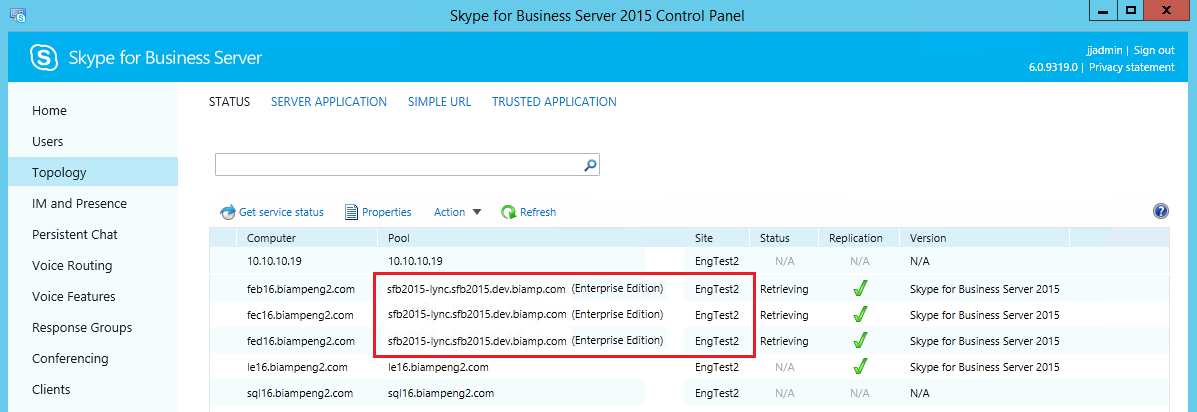
Determining the Site in Enterprise Edition
- Open the Topology page in the Lync/SFB Control Panel.
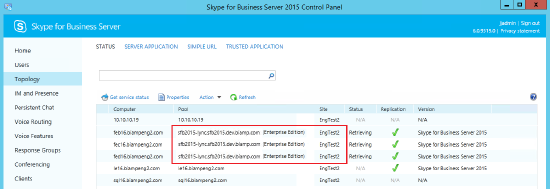
- Locate the Pool that the Tesira User account was assigned to.
- Take not of the Site the Pool is associated with.
Determining the Proper Dial Plan to Export
There are different options when it comes to applying a set of dialing normalization rules in a Lync/SFB system. Before a file can be exported for use within Tesira the Dial Plan associated with the User account must be determined. Below are the options for selecting the proper Dial Plan to export, you should choose the one that best fits your system based on the information gathered in the previous steps.
Start by navigating to the Voice Routing/Dial Plan page of the Lync/SFB Control Panel.
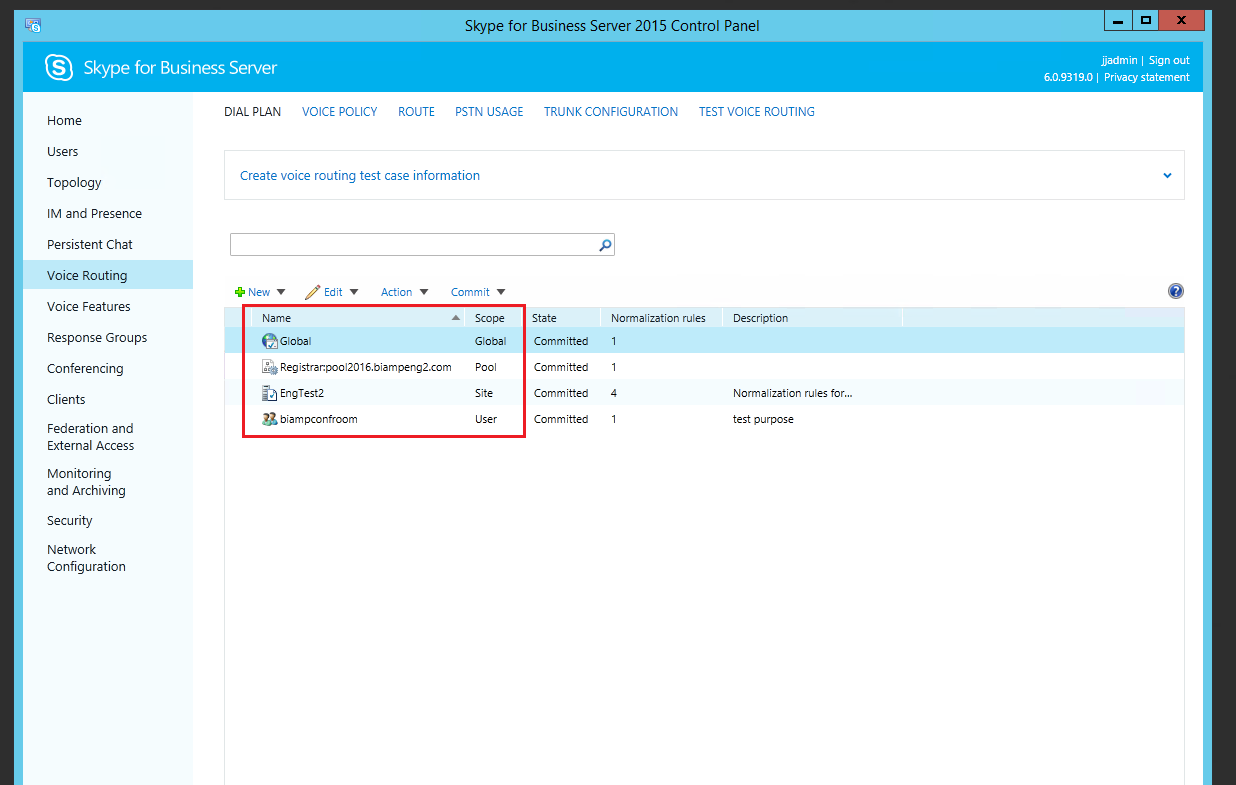
Option 1: The Dial Plan list shown above is empty
- If the Dial Plan list is empty there are no Dialing Normalization rules applied in the Lync/SFB system. No further action is needed and this Tech Note does not apply to your system.
Option 2: The User Dial Plan Policy was set to "Advanced"
- Verify if there is one or more "Pool" values in the "Scope" column. If there are, confirm that the name of one of these pools matches the assigned pool in the User Account of the Tesira endpoint. If there is a match you will need to export the Pool Dial Plan in the next section. If you do not find a Pool match continue to the next step.
- Verify is there are one or more "Site" values in the "Scope" column. If there are, confirm that the name of one of these sites matches the name found in the Determining the Site section of this Tech Note. If there is a match you will need to export the Site Dial Plan in the next section. If you do see a Site match you will need to export the Global Dial Plan in the next section.
Option 3: The Dial Plan Policy in the User Account was NOT set to "Advanced"
- Confirm the Dial Plan Policy that was listed in the User Account of the Tesira endpoint page shows up in the Dial Plan list shown above. If a match is confirmed you will need to export the User Dial Plan in the next section.
Exporting the Dial Plan XML File
You must now export an XML file from the Lync/SFB system for upload to the Tesira endpoint.
- Open the Lync Server Management Shell
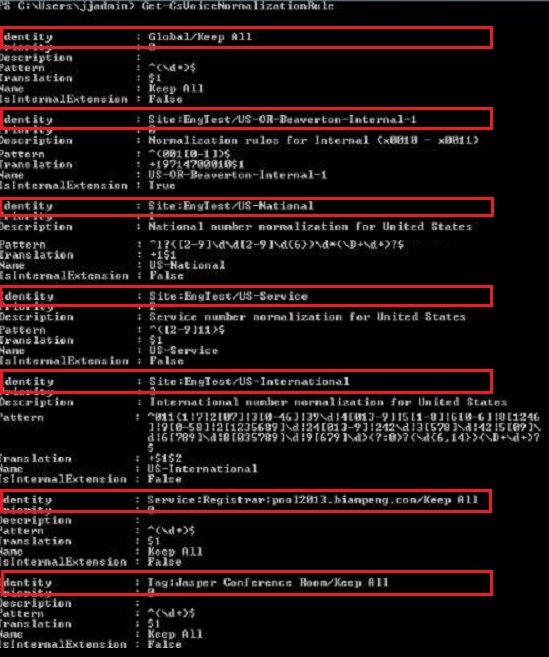
- Confirm the the Dial Plans exist in the Management Shell by typing Get-CsVoiceNormalizationRule. The resultant output will show all of the Dial Plans in place.
- Confirm that the Dial Plan Policy that you identified in the previous step shows an an Identity in this list. In the example below, plan identities are highlighted in red.
- Export a Dial Plan:
In the Lync Management Shell you will need to type a command to export the Dial Plans to an XML file. You will need a unique command based on the specific dial plan you identified in the previous section. Certain parts of the command will require a specific name obtained from your system, these areas will be highlighted in RED. There are also areas that identify the location the exported XML file will be saved to. It is possible to modify this location by specifying a new path in the area highlighted in GREEN. Once the command has been run in the Management Shell locate the file on the computer and send it to the Tesira programmer.
- Exporting the Global Dial Plan:
Get-CsVoiceNormalizationRule -identity "global" | Export-Clxml -Path "c:\tmp\global.xml"
-
Exporting a Site Dial Plan:
Get-CsVoiceNormalizationRule -identity "site:engtest" | Export-Clixml -Path "c:\tmp\engtest.xml"
-
Exporting a Pool Dial Plan:
Get-CsVoiceNormalizationRule -identity "service:registrar:pool2013.biampeng.com" | Export-Clixml -Path "c:\tmp\2013pool.xml"
-
Exporting a User Dial Plan:
Get-CsVoiceNormalizationRule -identity "tag:Jasper Conferece Room" | Export-Clixml -Path "c:\tmp\jasper.xml"
Here is an example of a Global Dial Plan export in the Lync Management Shell

Importing the Normalization Rules into Tesira VoIP Line Properties
 Open the Tesira software, and open the .tmf file for your project. Remain in an offline state.
 - Right-click on the VoIP Control/Status block and select “Properties”. At the top of the Properties Sheet, select DSP Properties.
- Under the “General” category in the Properties Sheet, click on the “…” symbol next to Line Properties. This will open the VoIP Line Properties window.
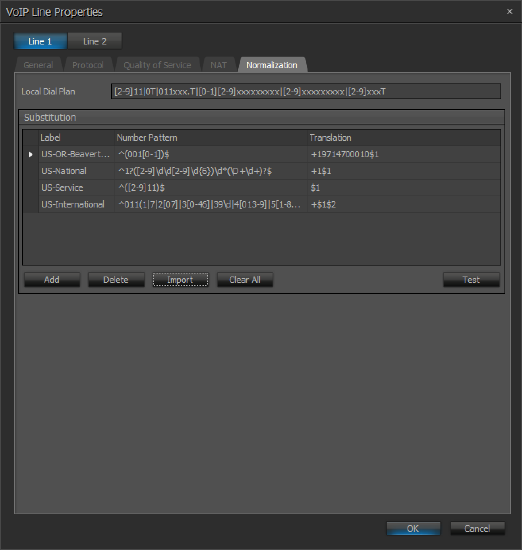
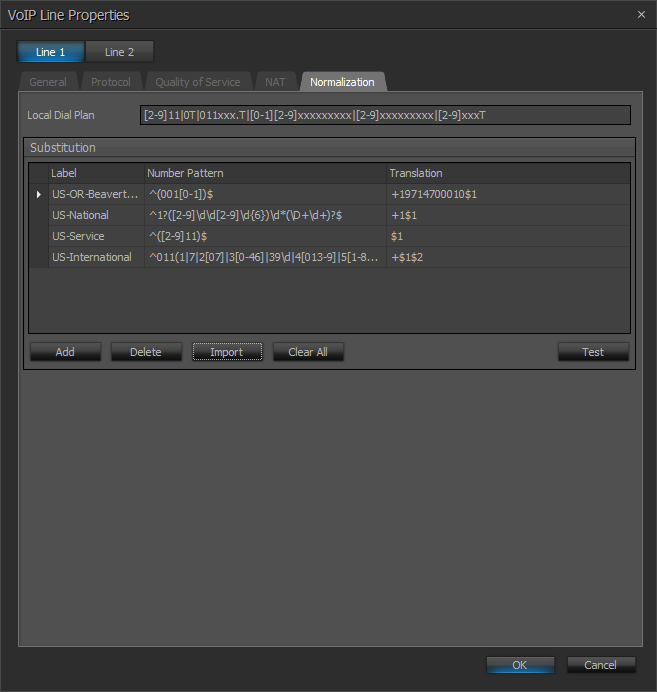
- Select the Normalization tab.
- Select import, and browse to the file to be uploaded and choose open.
- Confirm the rules are showing up as expected.
- Send the system configuration to the Tesira server (File—>Network—>Send Configuration).
Final Testing
 Once completed with the loading of the XML configuration, the final step is to test the normalization rules to make certain they are valid.
If the rules do not match then the numbers dialed will fail, and the dialer will issue a "Forbidden" message. Further analysis of the rules will be needed to see if the XML file was created correctly or if the customer dial plan rules are not accurately matching what we are needing to dial.
Included in the normalization tab is a "Test" function to confirm the regular expressions match the rules and translate.
- Select the "Test" button
- Select the rule to be tested from the "Substitution" table
- Type in the dial pattern to be tested into the "input"
- Confirm the input number pattern is translated