Impera Qt X Control
After completing this how-to, you will know how to control a configured Qt X system from a Biamp Impera control system, including using source selection and volume adjustments for each zone.
Export Qt X system file:
Because each Qt X system is different, Project Designer needs to use the configuration information of the target system. To obtain the configuration in a form Project Designer can use, access the web server on the Qt X.
Note: In this example https://10.38.12.127 was used.
The first time you access this web server, you may have to clear a security warning in your browser. The Qt X comes configured with a self-signed certificate to initiate secure communications over HTTPs. While sufficient for establishing encryption with the device, browsers tend to warn about any non-CA signed certificate. Choose the ‘continue’ option that is specific to your browser of choice.
Once the Qt X web pages have been accessed, navigate to System Settings and to the System Info tab:

To export the configuration for Project Designer, choose Download Configuration. A file named ‘ConfigurationBackup.json’ will be saved in your Download folder. This file may be renamed if desired.
This file contains all the configuration information for the Qt X system. Next open Project Designer.
Adding Qt X driver to your project:
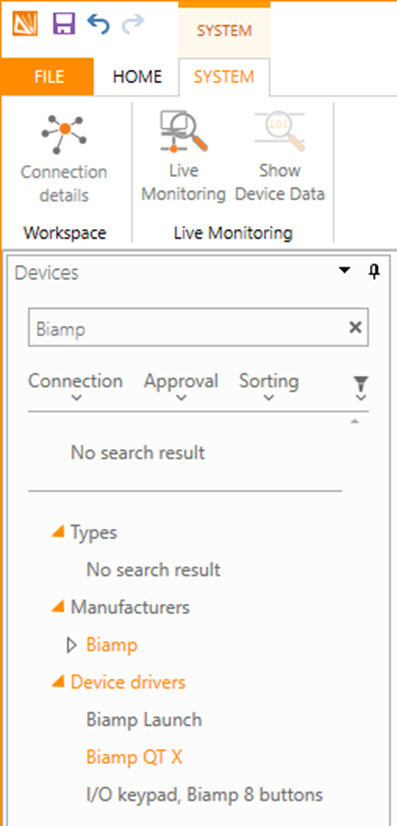
Open the System view and search for the Biamp Qt X device driver. There is a space in “Qt X” between Qt and X. Search for "Biamp" for the most concise results.
Note: Do not confuse the Qt X with the Community Qt300 or Qt600. The previous generation of Quiet Technology Sound Masking systems use a different protocol than the new Qt X systems.
Drag the Biamp Qt X device driver onto the LAN port of a controller. The Impera Tango and Apprimo Touch 8i control systems support the new device driver.

Selecting the Biamp Qt X block reveals the properties for the Qt X connection. Set the target IP address for the Qt X and any other relevant information.

Import Qt X JSON file:
Import the ConfigurationBackup.json file, saved in downloads, exported from the Qt X system. To do this, click the QT X Block Edit button, then click Import. From the standard file selection dialog find the ConfigurationBackup.json file and click Open.
The Import function will extract the zone names and valid background music sources.

Adding QT X Source Selection, Level and Mute controls to your project:
Open the Function tab. The Biamp Qt X has controls for source selection, background music level and mute, sound masking level, and paging level.

Each of these controls is on a per-zone basis. Drag one of these controls to the interface, a dialog box that allows you to select the appropriate zone to control.

Assign the controls to the user interface. Once this is done it is ready to deploy.
