Licenses: Assigning Licenses to Locations in Organizations
This article covers how to assign licenses to locations within a Biamp Workplace organization.
- For more information on License types and the Workplace functions they enable, please see: Workplace Licenses Overview
Viewing available licenses
Licenses that have been purchased and successfully assigned to an organization are visible under the License page in the Biamp Workplace administrative portal. The Licenses Tab is located under the Admin tab.


Assigning available licenses to locations
Licenses are assigned under the Locations tab in the Biamp Workplace admin portal. To assign a license to a location:
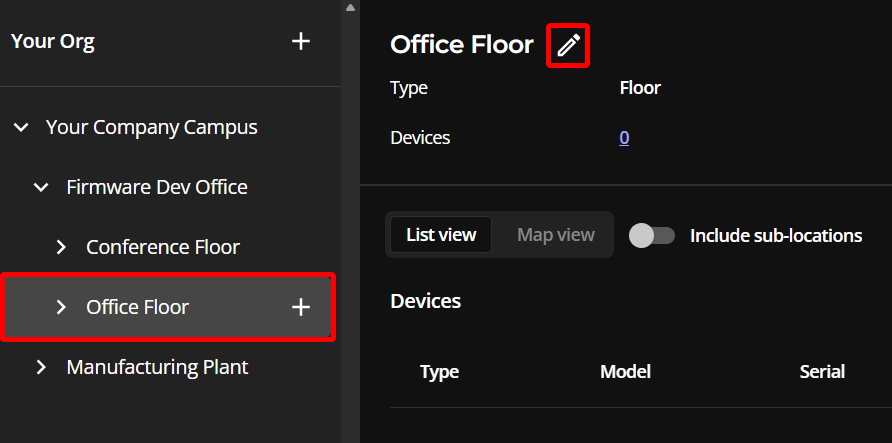
1. Navigate to the location you wish to assign a license to under the Locations pane in the Workplace admin portal, and select the location's edit pencil icon.

Here, we have selected the floor location in the Locations pane. We will be adding a Monitoring & Management license to cover the audiovisual devices that make up the floor's AV system.
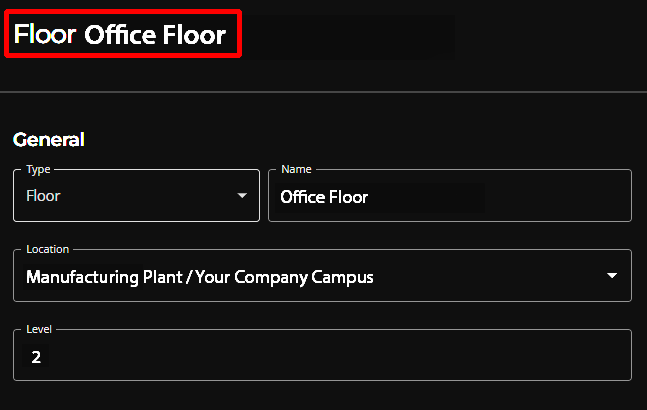
2. Before assigning a license, make sure you have opened the correct location by verifying the location name at the top of the editing form.

3. Click on the dropdown menu in the License section of the form to show a selection list with all available licenses that can be assigned to the location.
- You may need to scroll down the form to find the Licenses section.
- If the location already has a license assigned to it, a license information block will be visible in the Licenses section. In this example, no information block is present.


5. Select the appropriate license for the location and then click the Assign button.
- Only one license is required per Workplace location.
- Reminder: Please see the Workplace Licenses Overview article if you have any questions about which type of license to assign to a location.

Only one license will be assigned: Only one of the two available licenses in the dropdown menu example above will be assigned to this location. Licenses are grouped by expiration date in the user interface to help reduce the length of the list.
A license assigned message will appear to indicate a successful assignment, and a license information block will appear on the location's page.
- The information block for an active license will be green.

