Register oAuth with EWS for Microsoft 365 and Evoko Home
This article is for new installs of Evoko Home only. If you have an existing install that is using Microsoft 365 with basic authentication and want to change to modern authentication, please see this article instead
To use oAuth with EWS for Office 365, you have to register a custom application in the Azure Active Directory for the Office 365 tenant. When installing Evoko Home you will need both the Tenant ID and Application ID from Azure to complete the configuration with O365.
Please follow the guide below to gather/create that information.
1: Preparations
Make sure you run the latest version of Evoko Home. You must be running v2.6 or newer of Evoko Home in order to successfully connect to O365 using oAuth. All supported Evoko Home versions can be found here: https://download-liso.evoko.se/
If you haven't done so already, please visit the Booking system preparation guide for Office 365 to create your service account and get the Application Impersonation management scope applied to it. When you have done that, please continue below.
2: Configure the Azure App and collect Tenant/Application ID.
Find the tenant name or ID for your Office 365 Tenant in Azure Active Directory
You can use either tenant name or ID in the Evoko Home configuration wizard. Note this down for use in the Evoko Home configuration wizard.
Alternative 1: Use the tenant ID
- Navigate to the Azure Active Directory Admin Center by going here and logging in with your Admin Account: https://aad.portal.azure.com/
- Navigate to Azure Active Directory in left panel and click Properties under Manage section.
- Open notepad/text edit on your computer and write down the Tennant ID for your organization. We will need this ID in a later step when we connect Evoko Home to O365. It is shown here in this screenshot:

3: Register App for use with oAuth in EWS
1. Navigate to App Registrations to open the App registrations page.

2. Click the New Registration button.

3. Fill in the Name add a Web Redirect URL for https://localhost We recommend the naming scheme to identify it is for the Evoko Home Application so it can easily be referenced in the future. Once complete - click Register

4. Once the application is created, you can see the details page. Add this Application (client) ID to your notepad as we will need this too during the Evoko Home configuration wizard that will be needed in a later step.

5. Navigate to Authentication.

6. Scroll down and enable Allow Public Client Flows by selecting Yes.

7. Press Save
8. Navigate to API Permissions

9. Click Add a permission button.

10. Click on APIs my organization uses. Search for "Office" and Press "Office 365 Exchange Online

11. In the permission selection page, select “Delegated Permission”, which will open the list of permissions for Delegated access. Expand “EWS” and select “EWS.AccessAsUser.All”. Click the Add permission button.

12. You should now see the application permissions.

13. The last step is to Grant Admin Consent for your Organization.

14. Press Yes

15. You should now see the permissions granted.

4: Login using OAuth in the Evoko Home Configuration Wizard
| Note: If you are already using Evoko Home with Basic authentication, please log on to Evoko Home, go to Global Settings, and click the Change button under your booking system credentials in the top right corner of the global settings. Then, continue from here. |
- Select “Modern (OAuth)” from the drop down on the credentials page.
- Copy and Paste the Tenant ID and Application ID from the previous steps for the appropriate fields and click “Login”

3. The wizard will now wait for you to log in using the provided URL (https://microsoft.com/devicelogin) and provided code.

4. On the provided URL, enter the code from the wizard and click Next

Notice the application name you configured for this and log in with your service account and password.

5. Once you sign in using service account credential, it will prompt for the consent dialog. This happens only for first login to this application, subsequent login remembers the consent. Review the dialog and click "Accept".

6. You should now see the following screen which informs you to safely close this window.

7. Switch back to the Evoko Home Setup Wizard and continue to the next step. Your screen should look like this:

8. The Default Port for Evoko Home is 3002 - if you do not wish to change that or upload any of your own certificates, press next.
9. Here you will prompted to enter an NTP Server Address for Evoko Home to use. We recommend using 0.pool.ntp.org if your organization allows access to it. Some larger organizations may have their own internal NTP server. Press next when ready.

10. Here you will be prompted to accept the Evoko Terms of Service. Press Accept!
11. Here on the final page you will be presented with the Username and Password that will be used to log into Evoko Home as an Admin. Its very important that you copy this information to notepad before hitting finish as the text will disappear!

12. Once the information is copied to notepad Press Finish
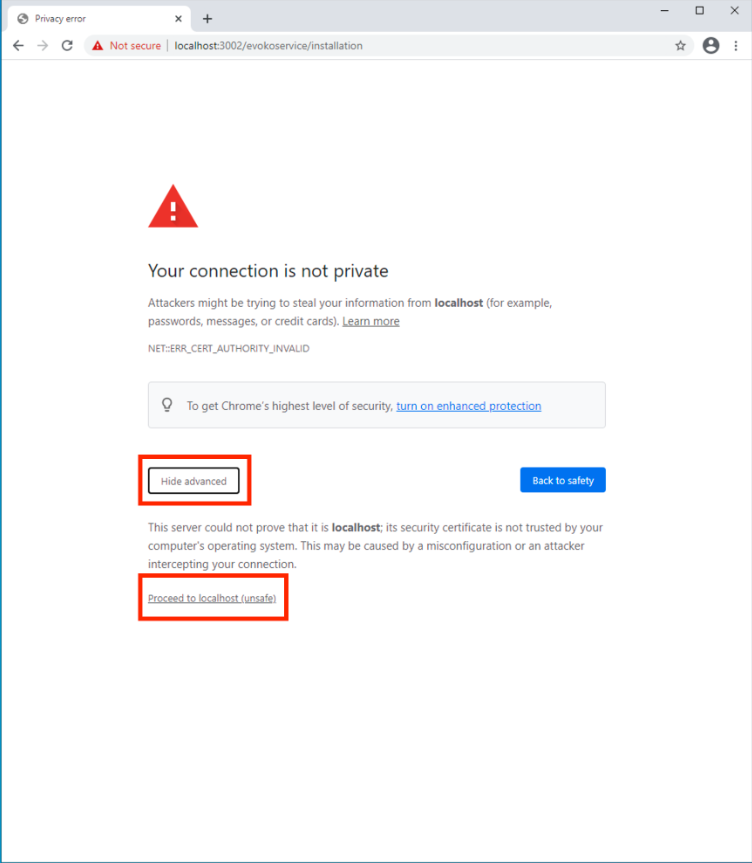
13. If you did not upload your own Security Certificates during the wizard you may get a message indicating that your connection is not private. If you do get this message press Proceed to Localhost.
14. You will want to log in with the Username and Password that Evoko Home prompted you at the end of the wizard (this should be the information you copied to the notepad).

15, Success! You have now completed the setup with Modern Auth and you can now move through Setting Up Your Global Organization in Evoko Home! This will let you add locations, and room resource accounts from O365!
