Preparing a Tesira VoIP endpoint for configuration
There are several different ways that a Tesira VoIP interface can be configured to register to a VoIP phone system: via Tesira software, via SageVue software, or via a web interface that is hosted on the VoIP interface itself. Depending on which method is used to configure Tesira VoIP, there are some considerations and preparations that should be made to ensure that the configuration goes smoothly using the desired method.
Please find the section below that matches the desired method for VoIP configuration, and follow the steps to prepare for that method. Once these preparation steps are completed, then find the appropriate article that provides instructions for the specific VoIP manufacturer that you are integrating with. An index of those articles can be found at the main VoIP page.
Using the Tesira software
Tesira software is the original and traditional method for configuring a Tesira VoIP endpoint. The administrator of the VoIP system will need to provide some information in order to properly configure the VoIP endpoint. A checklist document is available here to facilitate obtaining all of the required information.
In order to use Tesira software to configure the VoIP endpoint, you must obviously have Tesira software installed on a PC. Additionally, it is strongly recommended that Tesira software is only used by users who have completed Biamp's online training for Tesira and/or TesiraFORTE. Finally, a network connection to the Control network port(s) of the Tesira device(s) is required to configure those devices.
Using SageVue
There are a few requirements for using SageVue to configure a VoIP endpoint:
- The Tesira device must be running firmware version 3.6 or newer.
- The Tesira system must be running a configuration file that includes a VoIP block.
- The server running SageVue must have network access to the Tesira device's Control network port.
- The SageVue account used to configure the endpoints must have read/write permissions for VoIP settings. More information on setting SageVue user roles can be found within the SageVue help file.
For further guidance on installing and configuring SageVue, see the SageVue Deployment Guide and the SageVue help system.
Using Tesira VoIP Webpage
Tesira VoIP endpoints can be configured to run a web server that can be accessed by any device with network access to that VoIP interface. This webpage allows for full configuration of the VoIP endpoint. There are a few requirements for using the VoIP webpage to configure a VoIP endpoint:
- The Tesira device must be running firmware version 3.8 or newer.
- The Tesira system must be running a configuration file that includes a VoIP block.
- Since the web page is running on the VoIP interface itself, network access to the VoIP port on the Tesira device is required.
- The web page on the VoIP interface is only accessible if the Tesira device has been configured. If the Tesira device is unconfigured, the VoIP web page will not work.
- VoIP web access is only enabled over HTTPS (secure) by default. HTTP access (unsecure) is not enabled by default. To manage HTTP/HTTPS web access, follow the instructions in the section below:
Managing web access via the Control Status block
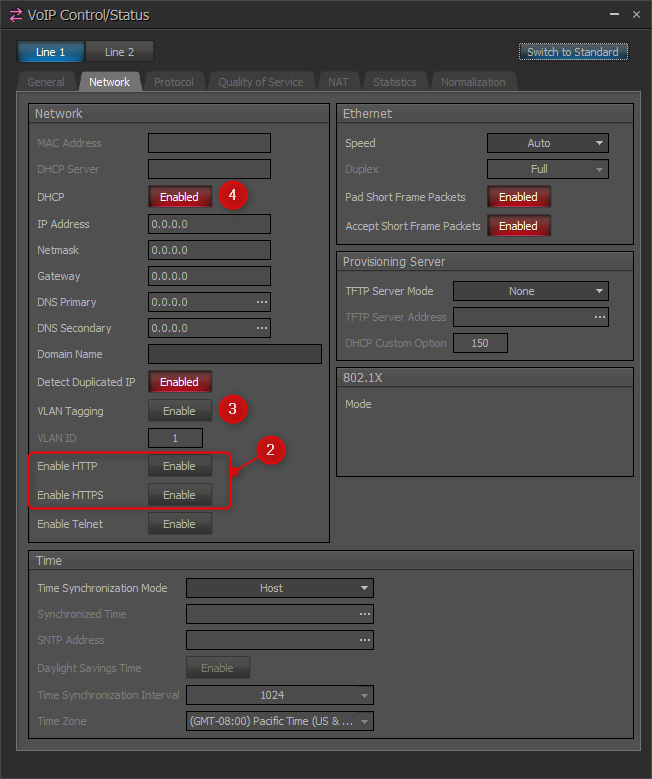
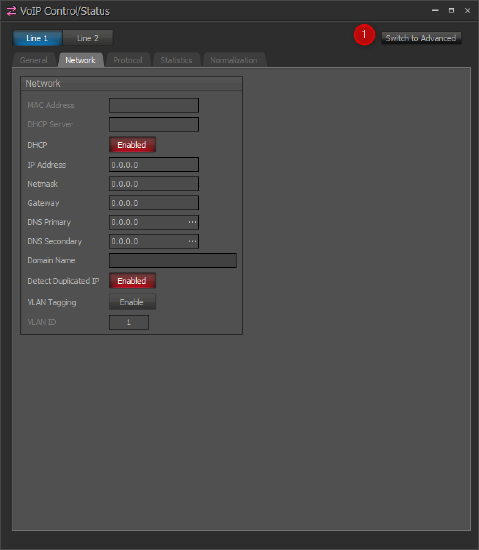 In Tesira software, open the Tesira configuration file, double-click on the VoIP Control/Status block in the software, and click the "Switch to Advanced" button in the top-right of the window.
- Navigate to the "Network" tab and locate the "Enable HTTP" and "Enable HTTPS" buttons. Enable the desired protocol(s) by clicking the Enable button to turn it red. The HTTP protocol operates on port 80, and the HTTPS protocol operates on port 443. Both protocols can be enabled at the same time. The HTTPS protocol uses a self-signed certificate. It is not currently possible to load a custom certificate for HTTPS access.
- Under the Network tab, set “VLAN” to “Enabled” if your VoIP network uses a tagged VLAN. If the network uses an untagged VLAN or no VLAN, leave this value as “Disabled”. If VLAN is enabled, enter the correct VLAN ID.
- Also under the “Network" tab of VoIP Control/ Status, leave “DHCP” set to “Enabled” if the Tesira VoIP interface will obtain an IP address automatically from a DHCP server. Otherwise, set “DHCP” to “Disabled”, and manually enter an appropriate static IP Address, Subnet Mask, and Gateway for the Tesira VoIP interface.
- Send the updated configuration to the Tesira device. Once configuration is complete, the VoIP webpage will be accessible. Note the IP address that has been assigned to the VoIP port, as it will be needed to access the web page. To access it, connect a computer to the VoIP network, open a web browser, and enter the IP address of the VoIP port. If both HTTP and HTTPS are enabled, be sure to specify which protocol you'd like to use by adding either "http://" or "https://" at the beginning of the address.
- SignOn page will prompt for User Name and Password. Default username is admin and default password is admin.
Further reading
After making the above preparations, find the appropriate article on the VoIP page to begin configuring the VoIP interface.