Configuring SageVue email alerts with Office365
Biamp SageVue can be configured to send automatic email alerts in response to faults. This article describes how to configure SageVue to use Office 365 and Exchange Online as an email back-end to automatically send notifications via email.
After completing this how-to, you will have configured SageVue to send email notifications using Office/Microsoft 365 or Exchange Online. These instructions assume you have successfully installed and activated SageVue, you can log in to the SageVue Web UI successfully, and you have an existing Microsoft 365 or Exchange Online system.
Office 365 SMTP Settings
To integrate SageVue with your Exchange Online email server, open the web UI and complete the following steps.

- Expand the Settings menu.
- Select SMTP from the list.
- Enter the Office/Microsoft 365 SMTP server hostname (usually outlook.office365.com).
- In the From Address field, enter the address from which emails will appear to be sent.
- In the Port field, enter the port number for SMTP (usually 587 for TLS based systems).
- Move the Use SSL switch to the 'Yes' position.
- In the User Name field, enter the account user name in the format your_username@your_domain.com
- In the Password field, enter the password for the account*.
- Click Save to apply the settings and enable the SMTP interface.
*If your Microsoft account is set to use multi-factor authentication (MFA), you will either need to create an app password or ask your administrator to disable MFA to use SMTP with SageVue and Office 365.
Enabling email notifications
Once you have entered the information required to connect SageVue with Office/Microsoft 365 using SMTP, you'll need to enable email notifications and decide how often emails should be sent.
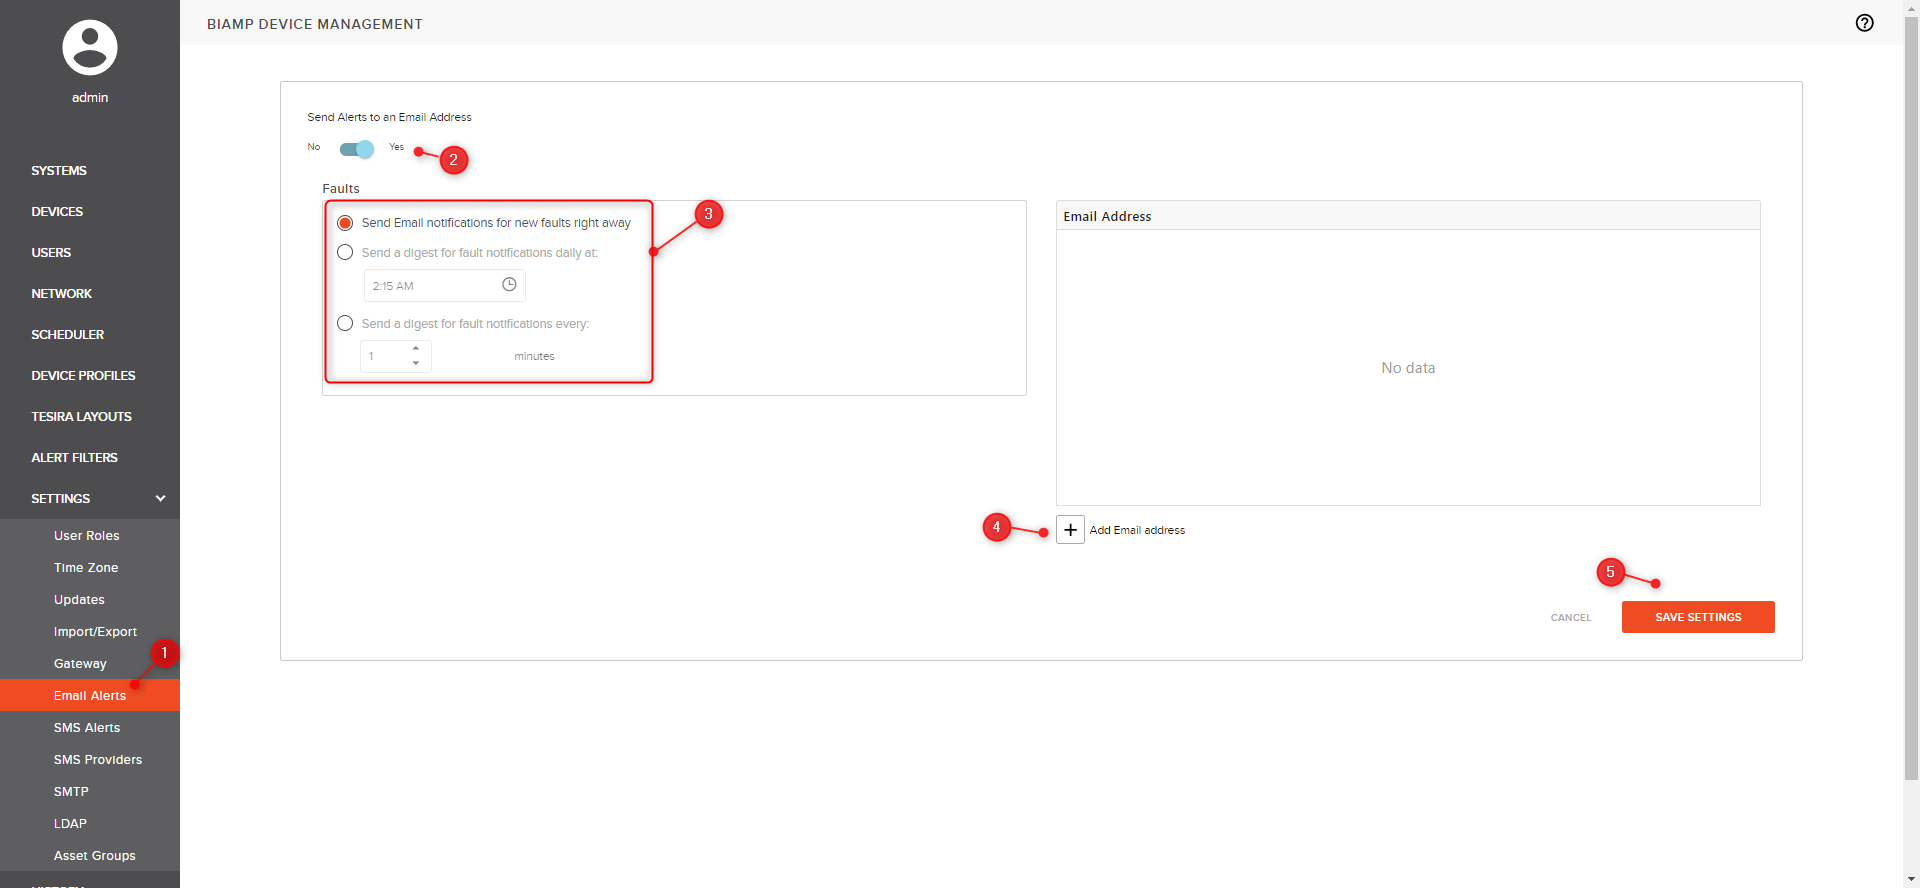
- Select Email Alerts from the Settings Menu
- Move the Send Alerts to an Email Address switch to the 'Yes' position
- Choose whether you would like to send email notifications:
- as soon as events occur
- as a digest, once a day
- as a digest, on a configurable time interval
- Enter one or more email addresses to which notifications should be sent
- Save your settings
Troubleshooting
If email alerts are not being received it may be helpful to test the connection to the SMTP server and validate that the credentials entered are correct. This can easily be done using PowerShell. There are just two lines of code required.
- Open PowerShell on the machine running SageVue
- Copy/Paste the following command $msolcred = get-credential
- When prompted enter the same username and password that were entered in SageVue
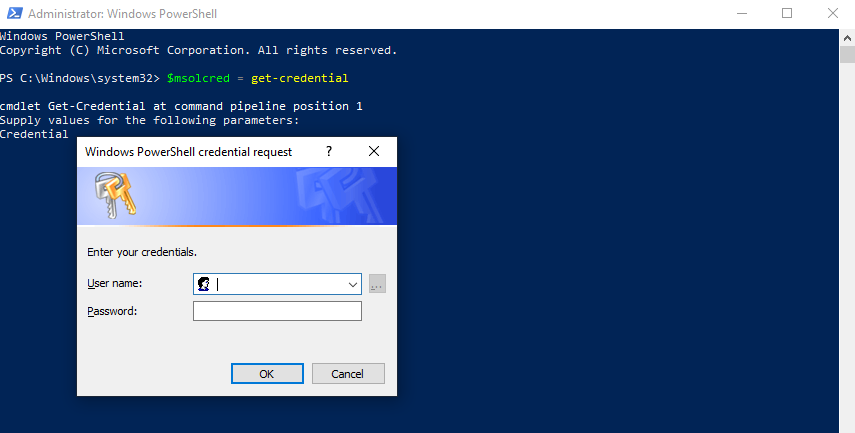
- Copy/Paste the following, replacing the From address with the same address entered in SageVue and the To address with the intended recipient (these can be the same)
- Send-MailMessage -From O365 email address entered in SageVue -To recipient email address -Subject "SageVue SMTP Test" -Body "Test SMTP Server Connection" -SmtpServer smtp.office365.com -Credential $msolcred -UseSsl -Port 587
If all is correct PowerShell should skip to an empty prompt and the identified recipient should receive the test email. If there are issues with any of the data entered a corresponding error message should be received. For example, if there is a problem with the authentication credentials you may see a response such as:
