VenueTune: How to create a user preset for Voltera D/M amplifiers
Overview
Biamp provides an extensive ALAMOS speaker preset library within VenueTune and Tesira platforms, but you may run into a situation where you need to create a speaker preset based on a specification sheet or other published data.
Example procedure
Creating a user preset is done in the Design phase
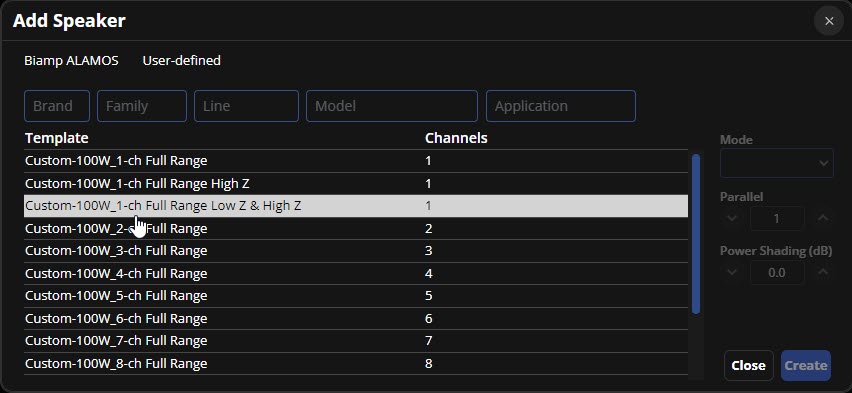
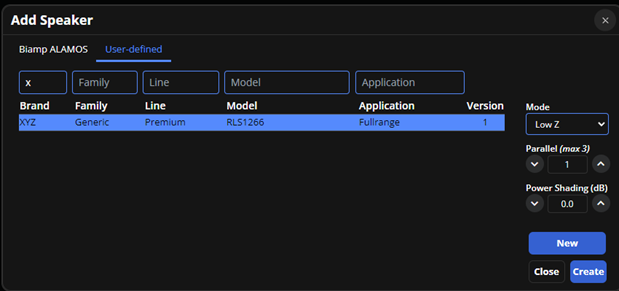
1. Go to Design > Speakers > Add > User-defined > NEW

2. Let’s select the third template option in the list since our speaker supports 8 Ohm and 70/100v operation.
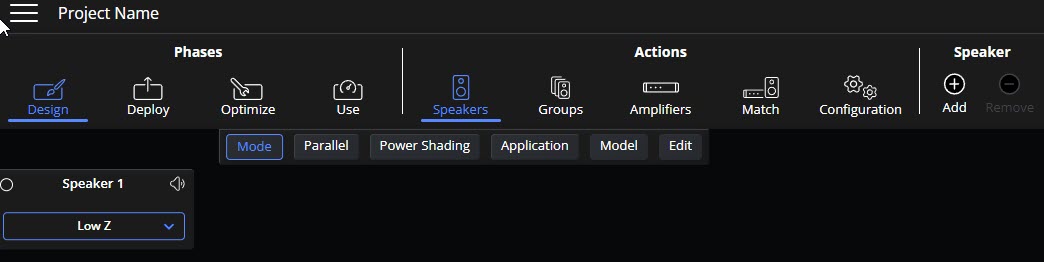
3. The speaker will be added to the workspace and default to Low Z operation.
4. To edit it with the speaker parameters/information, select Edit on the ribbon, then select ”Edit Profile” for speaker 1.
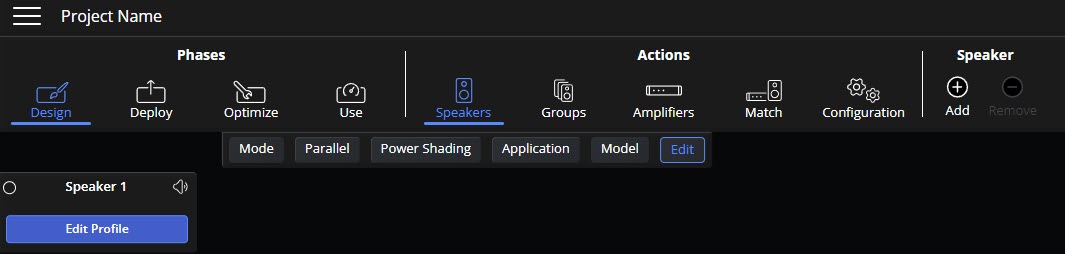
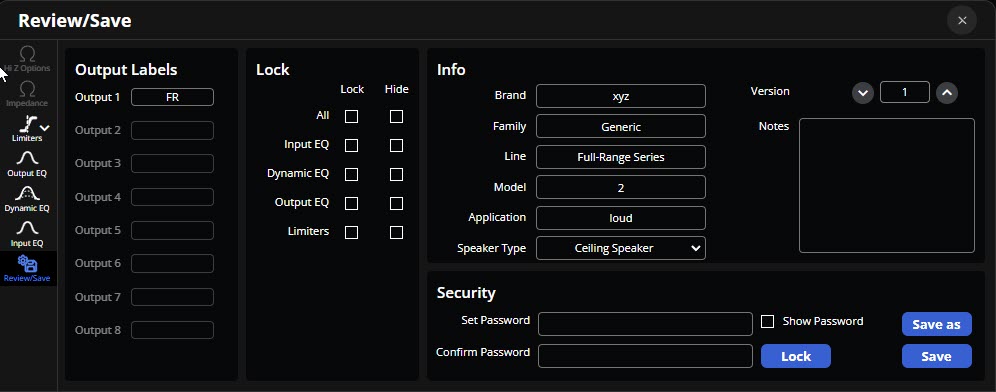
- A pop-up will open with an actions ribbon on the left side.

5. Fill in the Info on the speaker first and any notes you care to include.
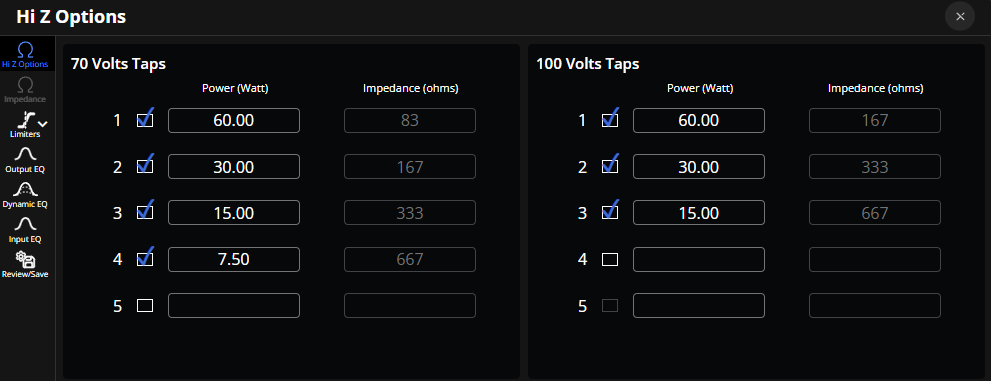
6. Next, we will define the 70/100v taps.
-
You only need to enter the top tap, which in this example is 60w @ 70v.
-
Do the same for 100v if needed. The lower tap values will auto-fill, but can be adjusted if needed.
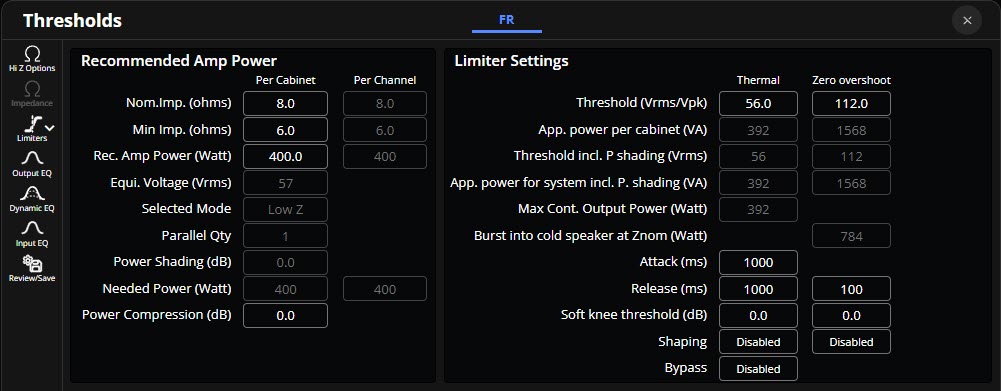
7. Next, let’s set our limiters to protect the speaker.
-
Note that for 70/100v operation, the limiters are pre-set if you select that operating profile. We only need to set the limiters for the system's low-Z operation parameters.
-
The specification sheet states the speaker is capable of 400w RMS (56v) and has a peak capability of 1200w (112v) at 8 Ohms. We enter this into the Thermal (RMS) and Zero Overshoot (Peak) threshold settings. Nominal attack and release times are inserted; consult with the speaker manufacturer on these settings to ensure it is properly protected.
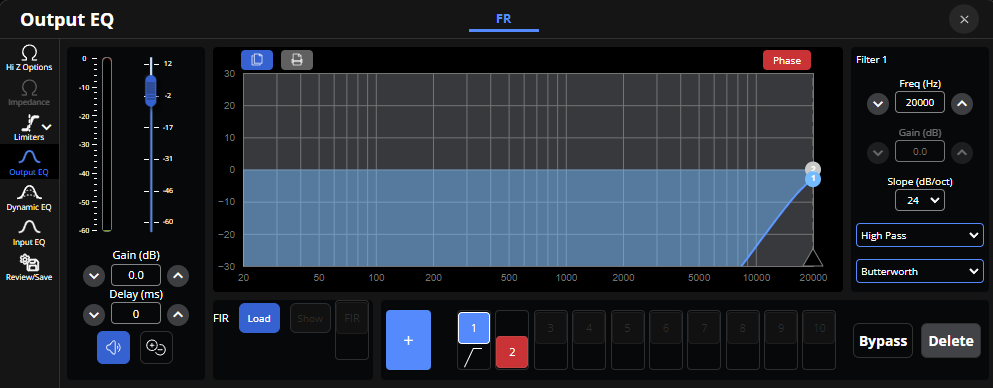
8. Output EQ settings:
-
Voltera D/M supports 10 input and 10 output filters of your choosing. Parametric, 6-48dB slope band pass, High/Low shelving, and All Pass are available. Note that Raised Cosine filters are implemented for frequencies below 160 Hz for increased accuracy.
-
A note about EQ filters. From DSP to DSP the math used to determine the filter shape or “Q”, especially at the edges of the filter varies by manufacturer. Voltera user preset filters are expressed in “Q” rather than Octave Bandwidth. A handy conversion chart can be found here: LINK
-
It’s beyond the scope of this article to dig deep into this subject, but rest assured, translating one manufacturer's PEQ and shelving filters in Voltera will generally produce “Close enough” results for a system commissioning person to work with. Ensure you correctly translate the supplied parametric filter settings in if necessary, from Octave Bandwidth to Q.
-
Typically, we suggest placing speaker correction filters on the output and allowing the on-site/user/commissioning adjustments on the input filters.
-
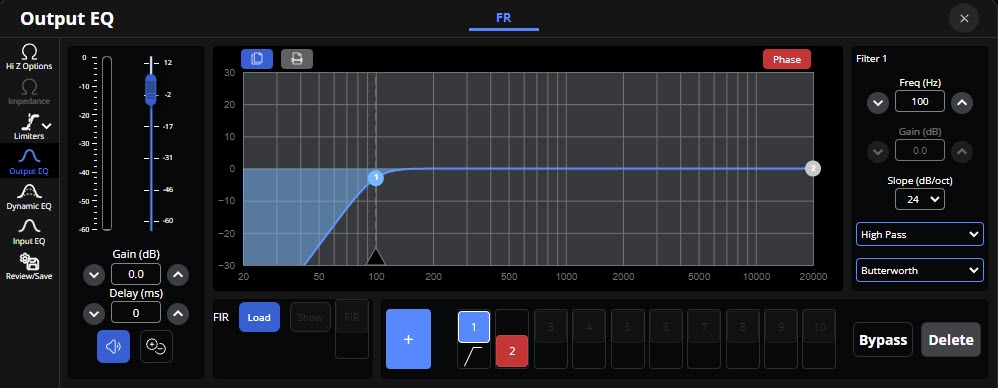
Note that the preset high-pass and low-pass filters are set to 20Khz. Activate the high pass by double-clicking the #1 filter set.
- You may adjust the frequency by typing in a value or dragging the #1 pint with your mouse.
- You may add additional filters by clicking the
 button.
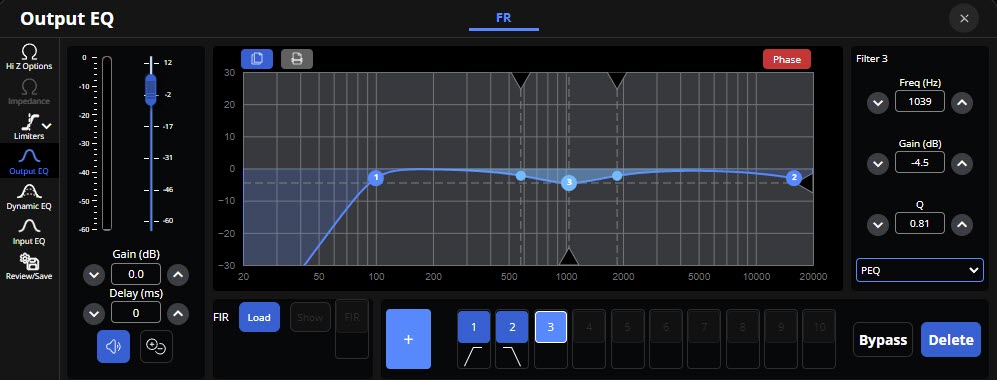
- FIR filters may be loaded below on the FIR tab. Note that you must double-click the FIR tab to engage it once loaded. It will change from red (Bypass) to blue (active). Voltera D/M supports up to 2048 taps @ 48Khz. Please see this article on formatting FIR data for Tesira.

- You can see the visual representation of the FIR by clicking the “Show” button.

- We have the option of adding dynamic EQ filters to affect the response based on the signal being above or below a threshold determined by the boost or cut. Perhaps we want to reduce the system HF output over some bandwidth when the system is playing at levels over 50%, or we could develop a loudness contour to emphasize LF and HF at low levels, but flatten out that curve as the level increases.
- This is an artistic tool, and care should be taken when implementing dynamic equalization.

9. Once you finish adding your filters, you may choose to lock the entire file by setting a password or just select sections.
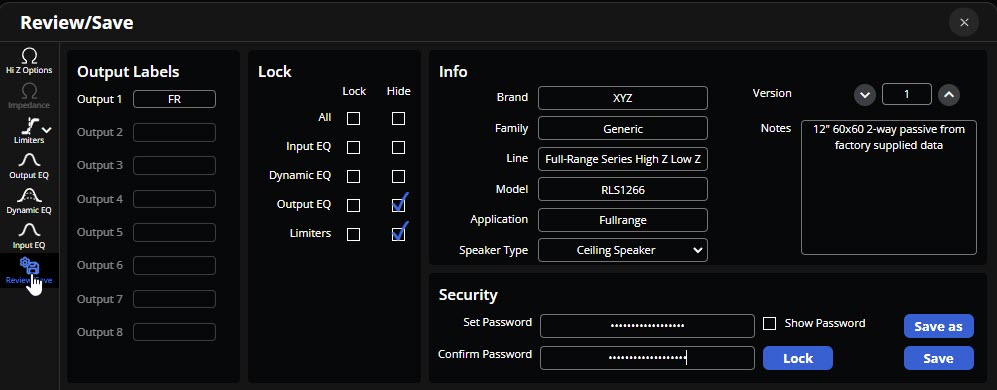
10. Save your loudspeaker using the Save function or Save As to change the name to something other than the default model name.
- Once saved, the speaker profile can be found in the User-defined tab of the Add Speaker dialog box.
User speaker presets are stored in your Documents folder: C:\Users\User.name\Documents\Biamp\Loudspeakers

You may retrieve the .tsp files from this folder for archiving or use on other machines running the same or later versions of VenueTune software
What's next
The process above enables the creation of a user speaker preset. Greater detail can be found in the VenueTune help system by pressing F1 during the optimization/Speakers action phase.