Avaya Aura Session Manager configuration for Vocia MS-1
The BiampVocia Message Server (MS-1) includes functionality to allow pages to be initiated over VoIP system that adhere to the Session Initiation Protocol (SIP) standard. This functionality is obtained by configuring a SIP Trunk between the two systems. This document details the steps required to configure a SIP Trunk in Avaya Session Manager to interface with the Biamp Vocia MS-1.
Avaya system verification
This section describes the steps needed to verify Communication Manager can route and receive calls over the SIP trunk to Session Manager to support calls between Session Manager and the Vocia MS-1. If any part of this verification is found to not be in place, the SIP Trunk connection between Communication Manager and Session Manager must be established before moving on. Contact the Avaya system Admin or Avaya Tech Support for further information on enabling these features.
Verifying trunk capacity
- Log into Avaya Communications Manager.
- In the Administration menu, choose the Native Configuration Manager.
- Log into Native Configuration Manager.
- In the command line, type:
display system-parameters customeroptions - Navigate to Page 2.
- Ensure that the Maximum Administered SIP Trunks allowed total is greater than the used total. (Figure 1)
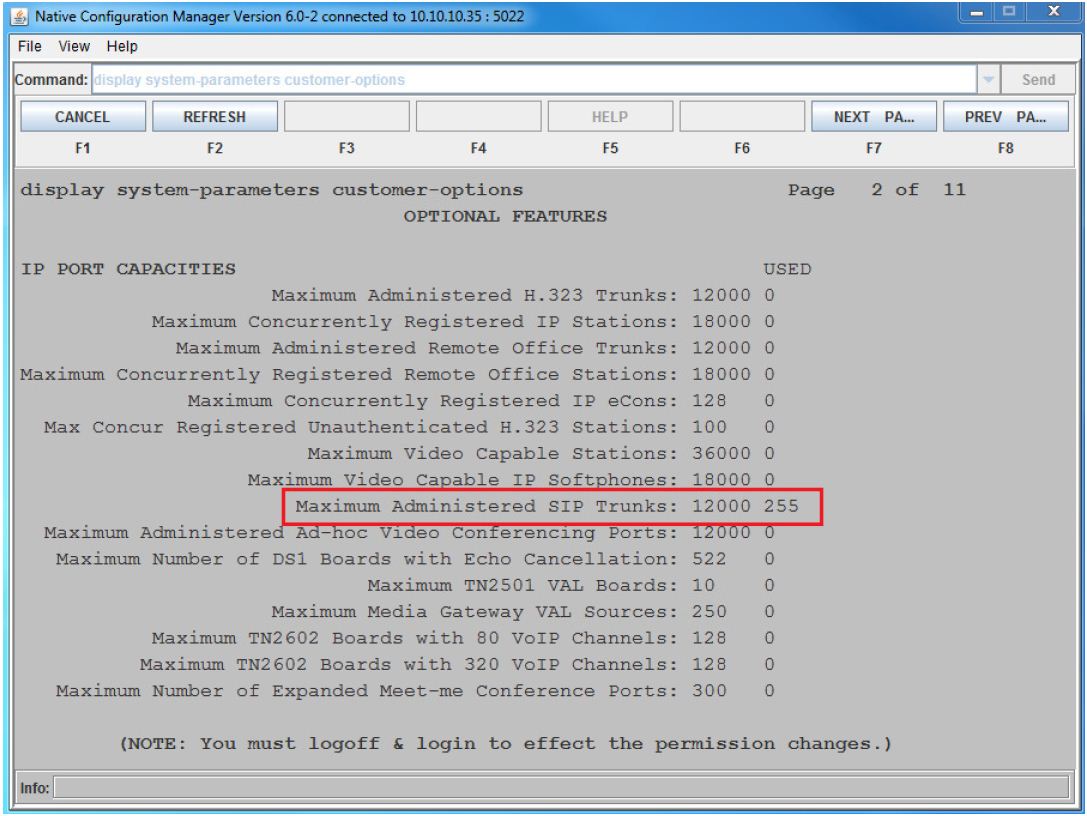
Figure 1 – Media Resource Group screen
Verify IP codec set
- In the command line type:
display ipcodec-set nwherenis the number used to identify the Codec Set to be used. - Ensure that at least one of the supported MS-1 Codecs is listed in the selected Codec Set (Figure 2).
MS-1 Codec's include…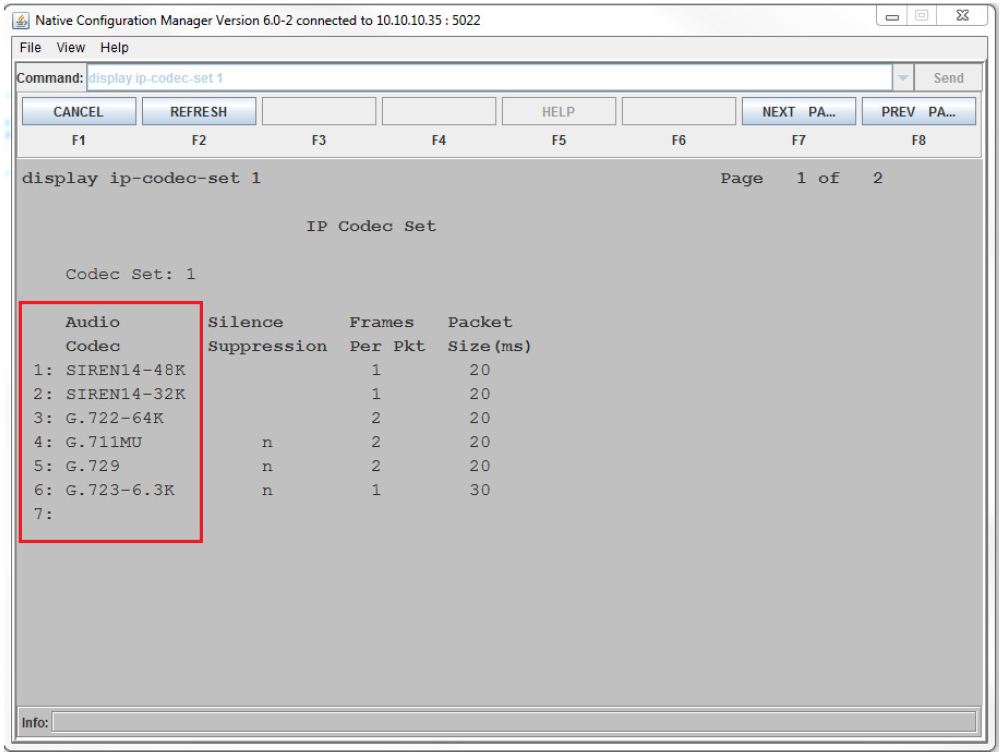
- G.722
- G.711a
- G.711u
- GSM
- G.726
Figure 2 – IP Codec Set
Verify Session Manager link
- In the command line type:
display node-names ip - Ensure that an IP Address is assigned for the Session Manager (SM) link (Figure 3).
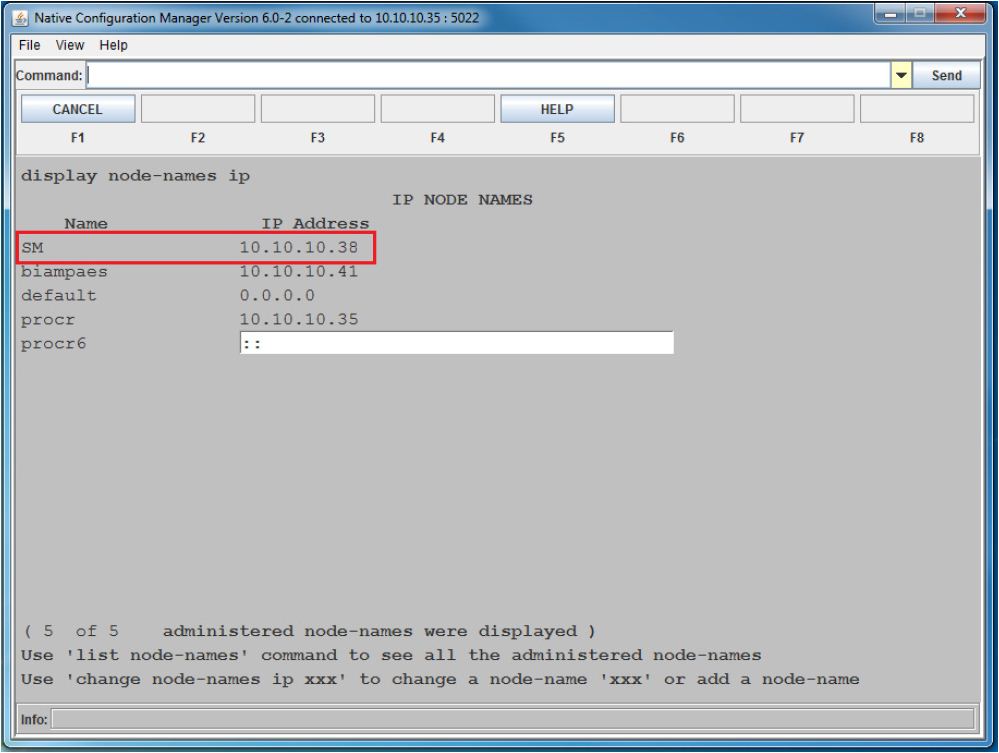
Figure 3 – SM Link
SIP Trunk setup
Create a Trunk Adaptation
- Log into System Manager.
- Under Elements select the Routing menu.
- Select Adaptations.
- Create a new Adaptation (Figure 4).
- Enter an Adaptation name.
- The Module name MUST be specified as DigitConversionAdapter. If this is not an option to be selected by default, choose the <click to add module> selection then enter this Module name.
- Enter
fromto=truein the Module Parameter field.
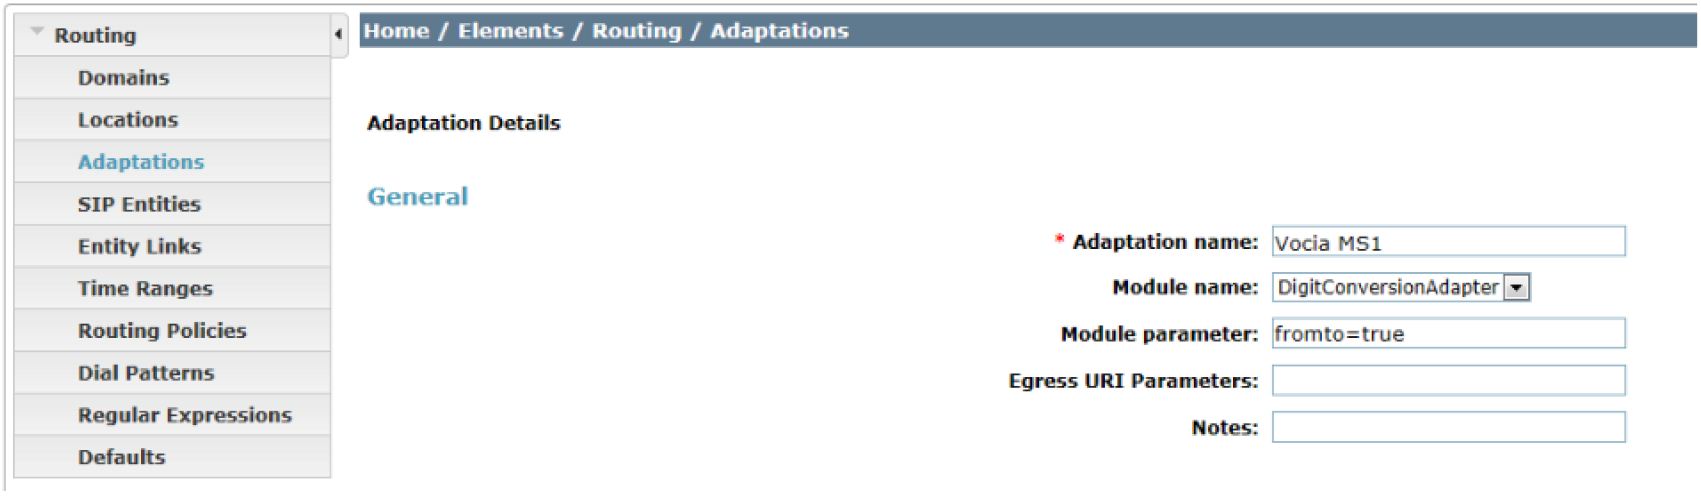
Figure 4 – Trunk Adaptation Settings
|
A note about Digit Conversion The MS-1 requires a single user name to be provided in the “from” address in the SIP header. To facilitate this, the Avaya system can be configured to modify the SIP origination field of the SIP Header for any call placed through the trunk line. Here is a basic overview of the required Digit Conversion options listed in Figure 5 on the next topic.
|
Digit Conversion
- Proceed to the Digit Conversion for Outgoing Calls from SM section of the Adaptations page and click add (Figure 5).
- Specify the Matching Pattern, Min/Max settings, Delete Digits, & Insert Digits fields based off of the unique settings in the phone system. Note that the Insert Digits field must match the SIP User Name entry of the MS-1.
- Change the Address to modify setting to Origination. PLEASE NOTE: This field may need to be set to Both instead of Origination.
- Repeat steps 8-9 for any additional conversion patterns that need to be put into place.
- Click Commit.

Figure 5 – SIP Entity Settings
SIP Entity
- Select the SIP Entities Menu.
- Create a new SIP Entity (Figure 6).
- Name the new Entity.
- In the FQDN or IP Address field, enter the IP Address of the MS-1.
- Select SIP Trunk in the Type menu.
- In the Adaptation menu choose the adaptation created in the previous Create a Trunk Adaptation step.
- Select the applicable Time Zone setting.
- All other sections of the SIP Entity Detail can be left at default.
- Select Commit.

Figure 6 – SIP Entity Settings
Entity Links
- Proceed to the Entity Links menu.
- Create a new Entity Link (Figure 7).
- Enter a name for the new Entity Link.
- In the SIP Entity 1 field, select the Avaya Session Manager that will support the SIP Trunk.
- In the protocol field, select UDP.
- In the Port field, enter 5060.
- In the SIP entity 2 field, select the SIP Entity created in the previous SIP Entity Setup step.
- In the Port field, enter 5060.
- All other Entity Link settings can be left at default.
- Click Commit.
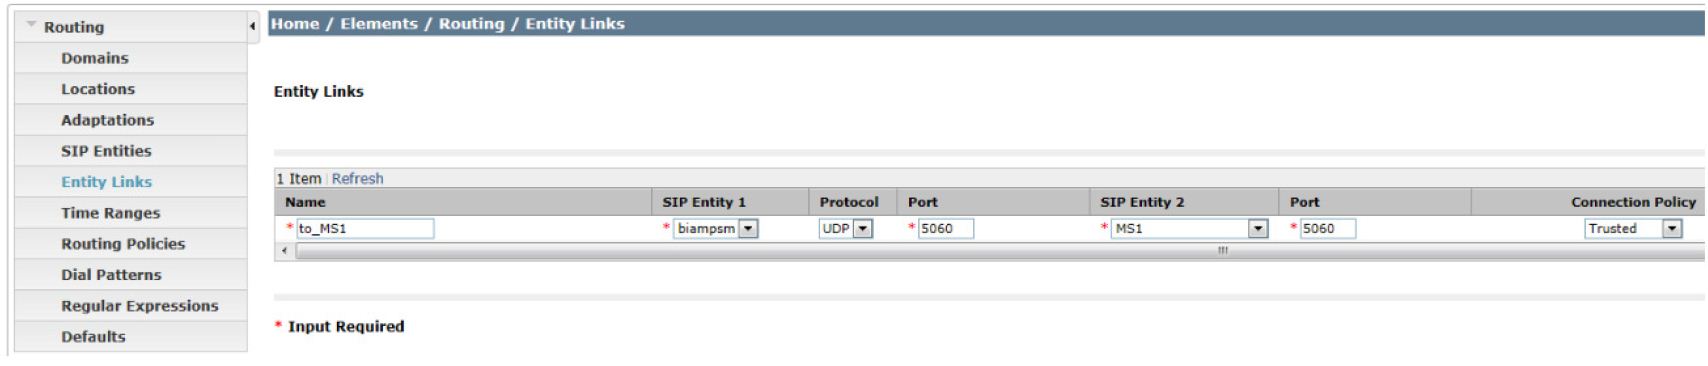
Figure 7 – Entity Links Setup
Routing Policy
- Proceed to the Routing Policies Menu.
- Create a new Routing Policy (Figure 8).
- Add a name for the new Routing Policy.
- Ensure the Disabled box is unchecked.
- Enter 0 in the Retries filed.
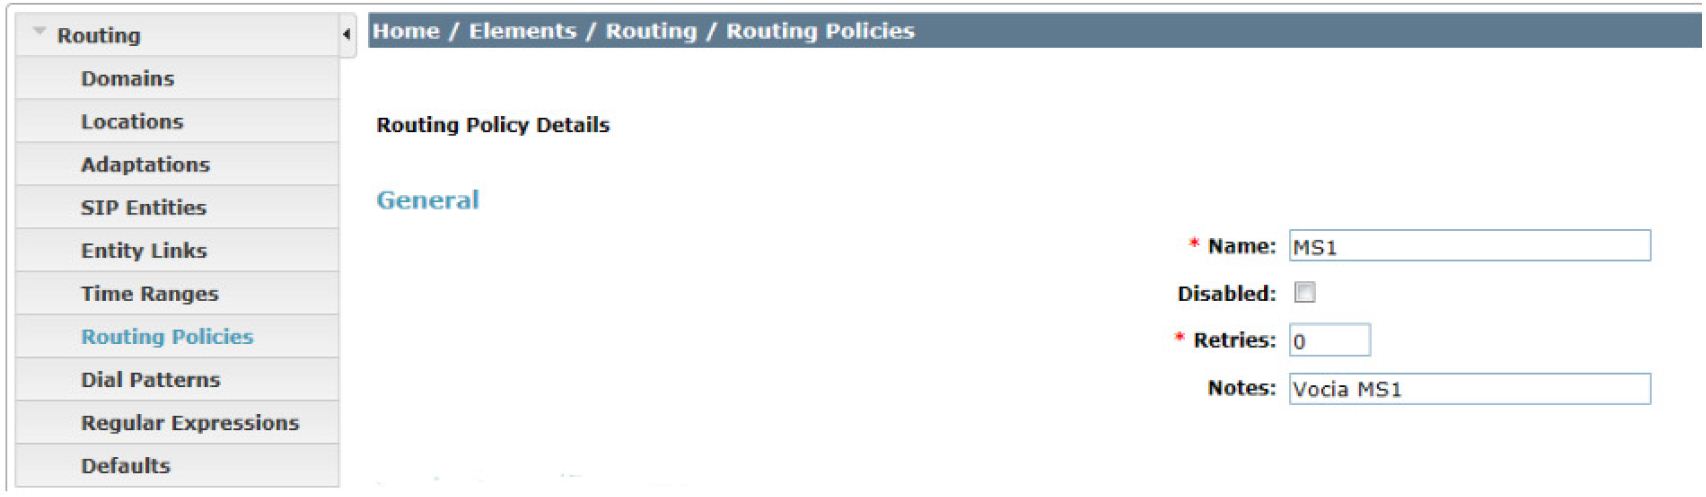
Figure 8 – Routing Policy General Settings
SIP Entity Destination Route
- Click Select in the SIP Entity as Destination section.
- Choose the SIP Entity in the previous SIP Entity Setup step.
- Click Select to return to the Routing Policies page.
- Under Time of Day settings, enter the ranking order of the new route. The default of 0 indicates a high priority ranking and is sufficient under most circumstances (Figure 9).
- All other Time of Day settings can be left at default.
- Click commit to save the Routing Policies setup.
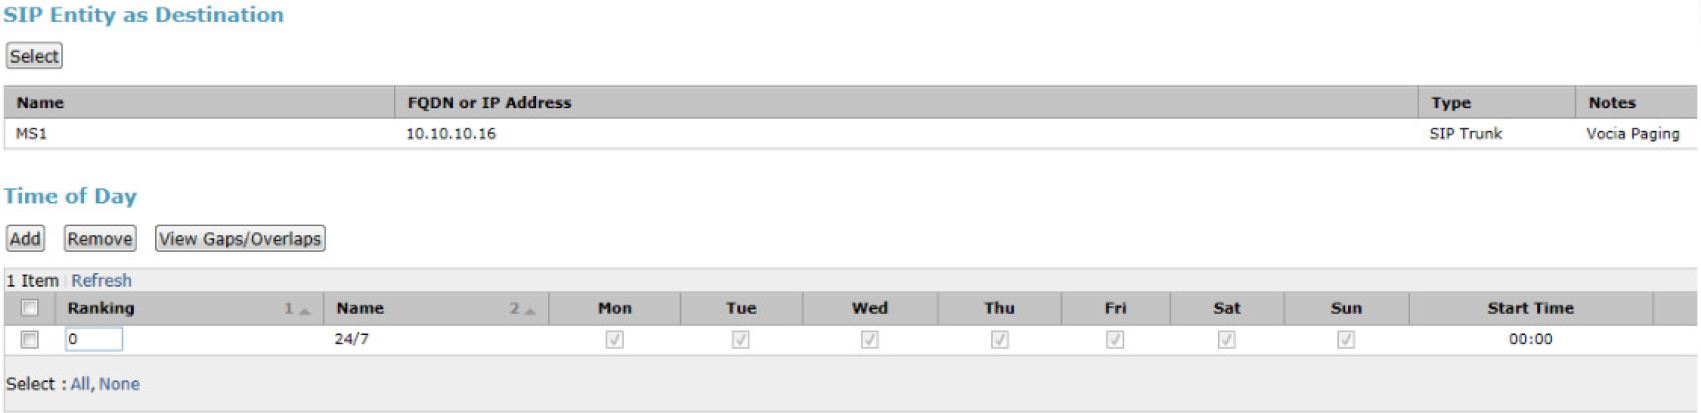
Figure 9 – SIP Entity Destination / Time of Day Settings
Dial Pattern
- Proceed to the Dial Patterns Menu.
- Create a new Dial Pattern (Figure 10).
- Define the Matching Pattern for all page extensions setup in the MS-1 (VoIP Extensions Tab Step 2). Note that the Pattern used in conjunction with the Min/Max settings may cover more than one extension with a single Dial Pattern. In the Figure 10 example shown below, it is assumed that the MS-1 has been programmed to provide paging on extensions 5000000-5000009. The example matching pattern has been set to cover all of these extensions.
- Select the SIP Domain that will support this Dial Plan. The Default selection of All means that any domain in the VoIP system would have access to this Dial Pattern and is sufficient under most circumstances.
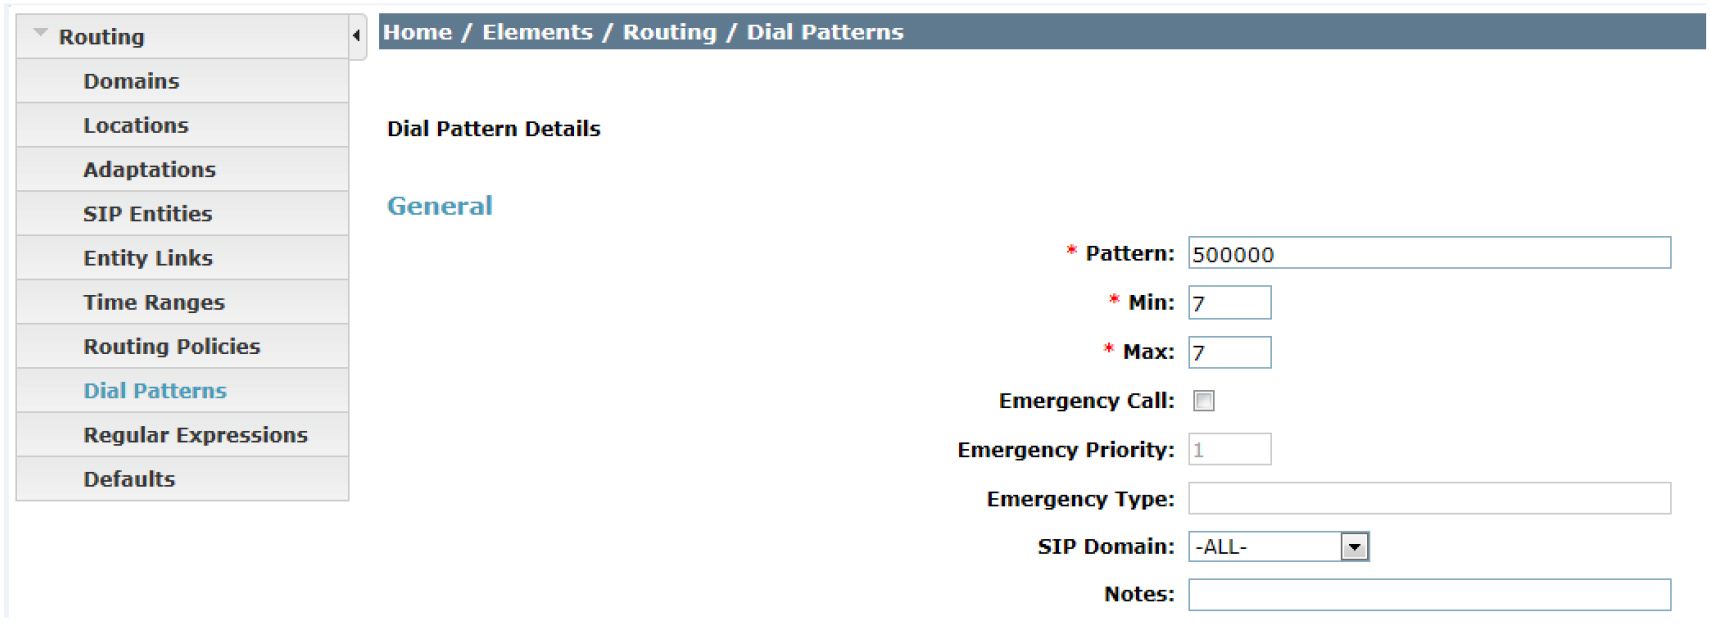
Figure 10 – Dial Pattern General Settings
Originating Locations and Routing Policies
- Click Add to create a new originating Location and Routing Policy (Figure 11).
- Check the box for all Originating Locations you want to make the SIP Trunk accessible to. At least on selection must be made from this list. If there are no locations shown contact your Avaya Admin or Avaya Tech Support.
- Check the box of the Routing Policy that was created in the previous Routing Policy General Setup step.
- Click the Select button to save this Location and Route Policy and return to the Dial Pattern page.
- Click commit to save the Dial Pattern setup.
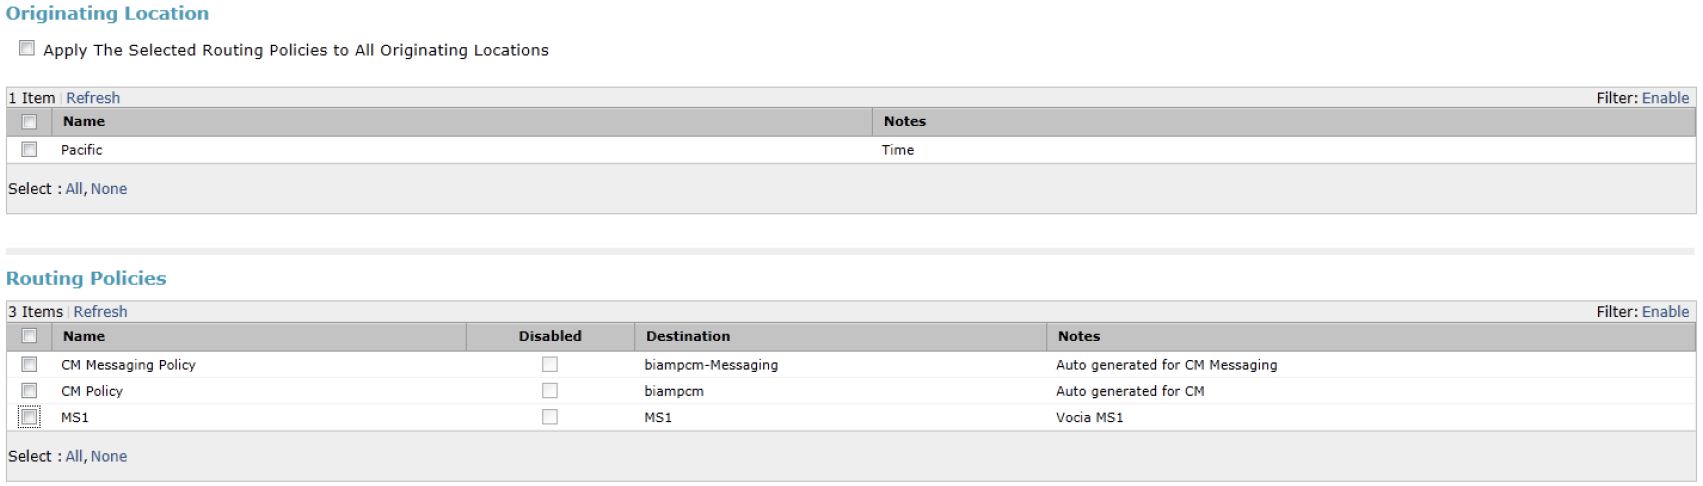
Figure 11 – Dial Pattern Origination and Routing
Configuration synchronization
- Navigate to the Home→Elements→Inventory→Synchronization menu and choose Communication System (Figure 12).
- Select Now to sync the new setting to the running system.
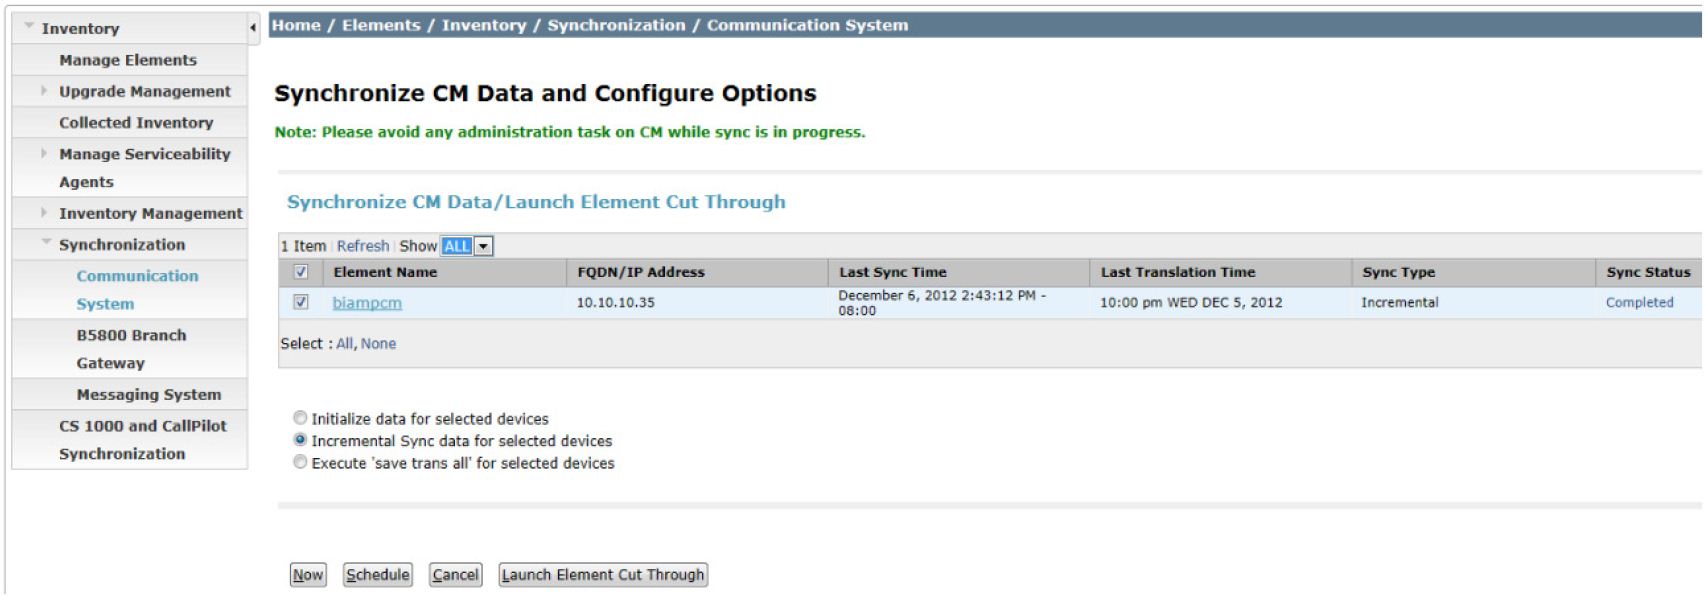
Figure 12 – Synchronize Data Page
MS-1 setup
MS-1 General tab
After completing the configuration within Avaya System Manager, several options in the MS-1 will need to be set to match the Session Manager settings.
- In the Vocia software, open the MS-1 dialog.
- In the General tab, check the checkbox for VoIP Enabled.
- Check the checkbox for Use Dedicated VoIP Network Connection (LAN 3).
- Enter the IP Address for the MS-1 VoIP Port. The IP address entered here must match the IP address entered into System Manager. (SIP Entity, step 4)
- Enter an appropriate Subnet Mask & Gateway. If you’re not sure what this should be, contact the VoIP system administrator.
- Set the SIP User Name field to the Insert Digits number used in Digit Conversion, step 2.
- Avaya does not support the use of Digest Authentication on a SIP Trunk line. However the MS-1 does require this field to be populated in the software, even if a password is not required. Simply enter a dummy password in the SIP Password field.
- Click Save.

Figure 13 – MS-1 VoIP General Tab in Vocia Software
VoIP Extensions tab
Extension mapping is required in the MS-1. A minimum of 1 extension must be setup in the MS-1 for proper operation. Additional extensions can be added to map extensions to specific page codes. For more information of the setup of individual MS-1 extensions, reference the Vocia Help File or contact Biamp Applications Engineering.
- Select the VoIP Extensions tab.
- Enter an extension number in the Extension Field. All extension listed must be covered in the Avaya Dial Pattern section, step 3.
- Enter additional extensions as required.
- Note that the MS-1 VoIP paging feature supports the use of PIN groups. To enable this, first create the PIN Group(s) in the Universe Properties window, and then select the appropriate PIN Group(s) in the VoIP Options tab of the MS-1.
- Click Save.

Figure 14 – MS-1 VoIP Extensions Tab in Vocia Software
VoIP Advanced tab

Avaya does not support the use of Digest Authentication on a SIP Trunk line so the MS-1 must be set to not challenge a call received. To disable digest authentication:
- Select the VoIP Advanced tab.
- Set the Call Limit to a number higher than the Number of Trunks setting in Step 6 of the Adding The Trunk section.
- Set the Insecure pull down menu to Invite + Port.
- Check the box labeled Allow Call From Any User. *
- Click Save. **
* If you do not see this option you need to upgrade Vocia to version 1.5 or higher.
** The Vocia Configuration must be loaded to the MS-1 in order for changes to take effect.
Figure 15 – MS-1 VoIP Advanced Tab in Vocia Software
Load MS-1 configuration
The revised configuration must be uploaded to the Vocia system for any changes to take place. Once both the Avaya System and the MS-1 have been updated the VoIP paging functions can be tested.