Creating multi-page RED-1 configurations
This article explains how to create the effect of having multiple pages on a RED-1 controller screen.
The RED-1 screen can be used to create the effect of having multiple selection pages, or a selection menu where each selection can transition to a different “page”. This article describes how to achieve this effect.
First step
In this example we will create a 'Home' screen selection for choosing controls for Room 1 and 2. Each of those provides access to another page which has all the sources in that room listed, where you can select and control levels.
-
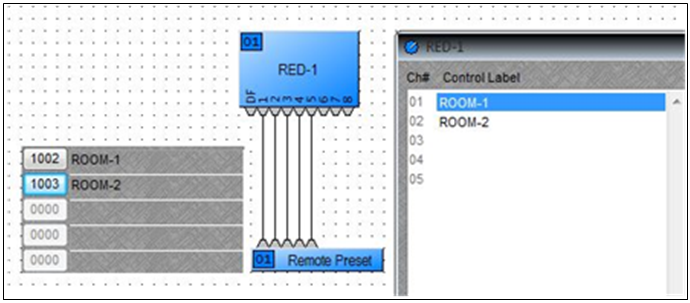
Add a RED-1 block and multi-channel Remote Preset block in the program. Connect the Remote Preset block to the RED-1 block.
-
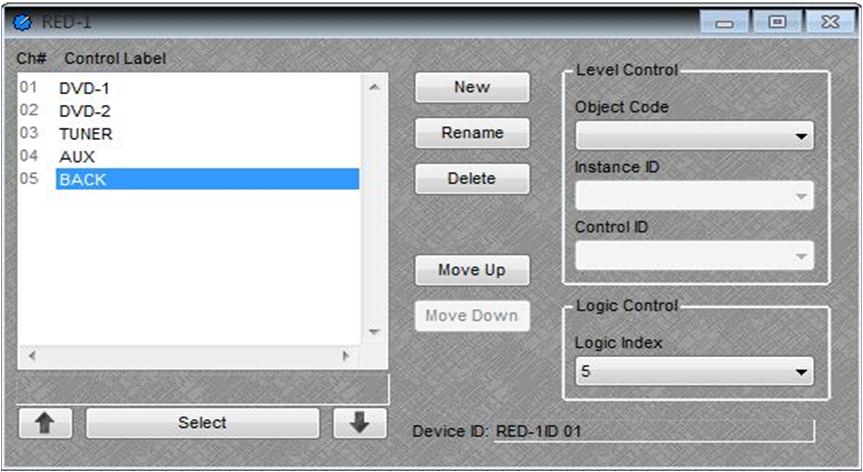
Open up the RED-1 control dialog and create a ‘page’ for Room-1 by creating control labels for the different sources.
-
Map level controls for each of the sources by selecting appropriate Instance ID/Object code/Control ID.
-
Add a ‘Back’ control to provide a way back to the Homescreen. Select a logic index for ‘Back’.
-
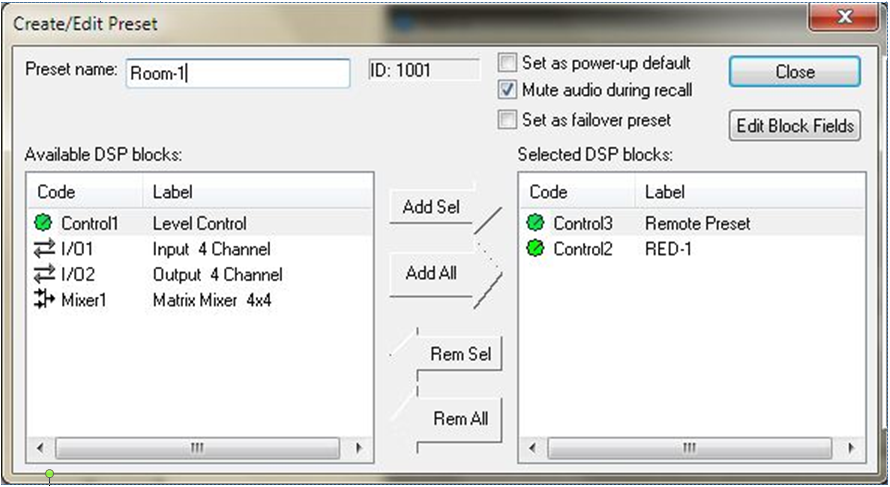
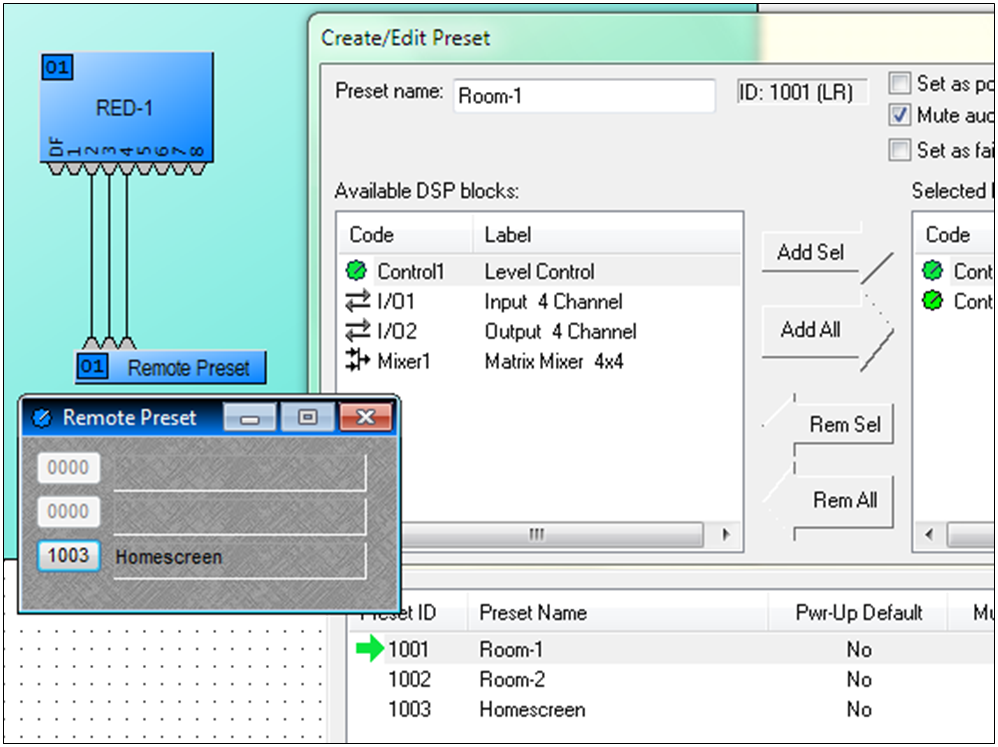
Go to Create/Edit/Preset and create a new preset by including the RED-1 and remote preset block in the Selected DSP Blocks field. Name the preset Room-1 and save it.
-
Repeat the process for Room-2 by populating the RED-1 with sources for Room-2 and create ‘Room-2’ preset including both the remote preset block and the RED-1 in the Selected DSP Blocks field. Save Room-2 preset.
Second step
-
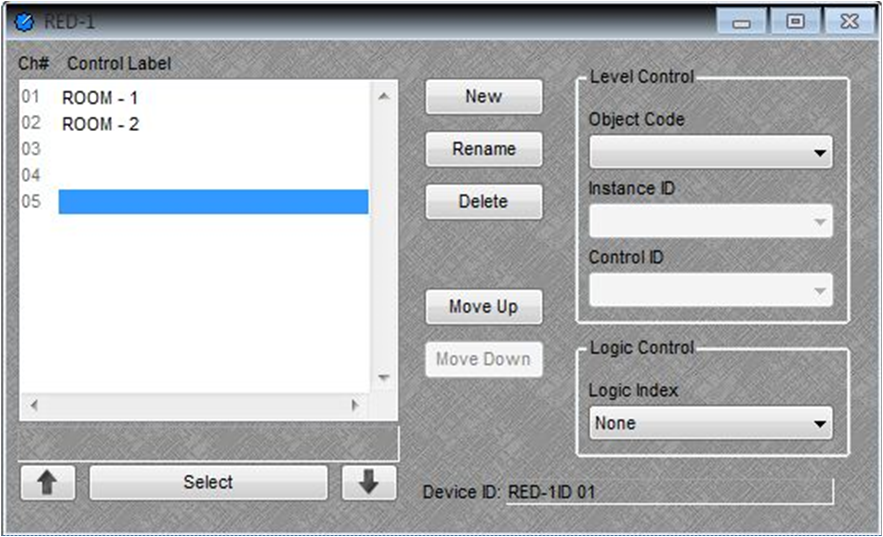
To create the Home screen, rename control labels 1 and 2 as Room 1 and Room 2. Make the rest of the control labels blank by adding ‘space’ in place of the text. Assign logic indexes to control label 1 and 2, in this case 1 and 2.
-
Open control dialog for the Remote preset block and assign Room-1 and Room-2 presets for the first two nodes (which connect to the first 2 logic outs of the RED-1 block).
-
Save these settings into a ‘Home screen’ preset, making sure to include the RED-1 and remote preset block in the Selected DSP blocks field.
Third step
-
In the Create/Edit/Recall presets window, Recall Room-1 preset.
-
Open the remote preset block control dialog and assign the ‘Homescreen’ preset so that it ties in with the logic index for the ‘Back’ control label.
-
Hit Save in the presets window to save this change into Room-1 preset.
-
Repeat the same procedure for Room-2 preset.
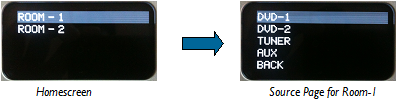
Example
The example below illustrates a simple 2 page interface. The concept can be expanded to create an extended menu with virtually unlimited number of page transitions.