daVinci basics
This article describes the basics of daVinci, like building a daVinci file and connecting to a Audia or Nexia system with daVinci software.
Building a file
There are a couple of ways to associate Audia/Nexia layout files to a DaVinci control panel:
Method 1
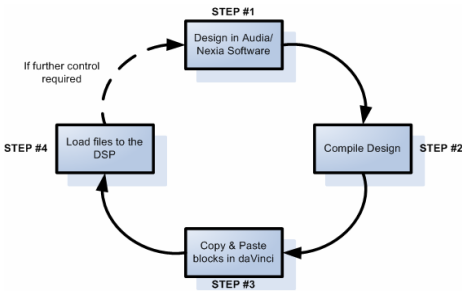
This method is the easiest and most efficient way to create a daVinci panel.
-
Complete your design configuration in Audia/Nexia software as much as possible.
-
Compile your design to insure that a unique Instance ID is assigned to each processing block.
-
Upon successful compilation, copy and paste blocks from Audia/Nexia software directly onto your daVinci panel. You can then ungroup and manipulate control graphics as required (including: arrange, delete controls, add graphics, change appearance, etc).
-
Save and load the Audia/Nexia configuration and then the daVinci file.
Method 2
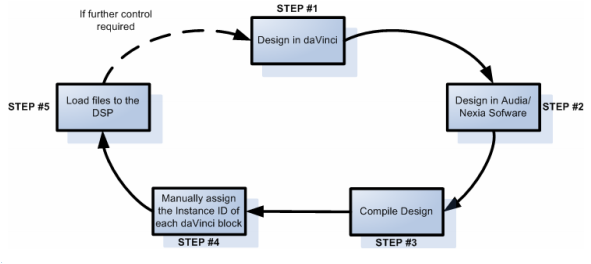
The alternative way of building daVinci panels involves manually assigning the Instance ID for each daVinci block. This method is a bit more tedious than the one previously described. On the other hand, it does bring the advantage of being able to start building the GUI even before the DSP design has been completed. (A Similar approach to touch panel/control processor programming)
-
Design your daVinci panel using the control blocks contained in the object toolbar.
-
Design in Audia/Nexia software and compile the configuration in order to get an instance ID assigned to each block.
-
In daVinci, manually enter the corresponding Instance ID for the matching block from the DSP attributes in the Property sheet .
-
Load the Audia/Nexia configuration and daVinci file into the DSP unit.
Connecting
Discovery and configuration of DSP units in daVinci follows a similar process as in Audia/Nexia software.
Sending
-
Once the .dap/.nex configuration file is loaded into the DSP unit, “Connect to Network” in daVinci.
-
The System Connect dialog box appears.
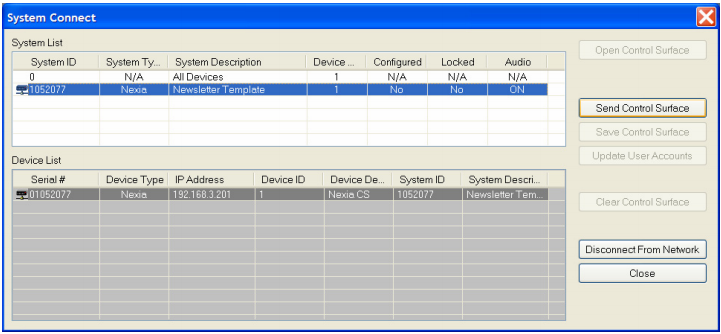
Note: System ID and IP address of the unit are displayed in the device list.
-
Click on “Send Control Surface” to load the daVinci panel into the unit.
-
You are now connected to the system and in control of your user interface.
Retrieving
To retrieve a daVinci file from a unit, simply follow these steps:
-
Connect to the Network
-
In the System Connect dialog box, click “Save Control Surface” to download the daVinci file to your PC.
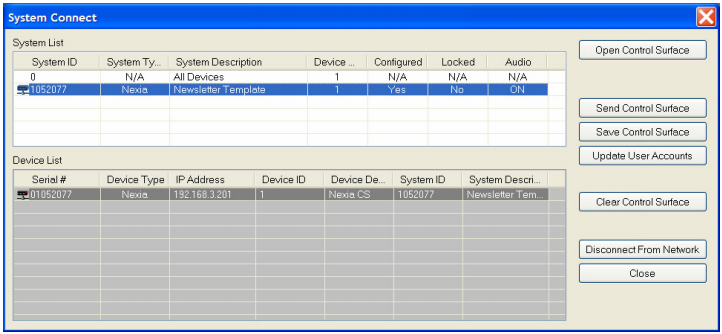
Note: “Clear the control surface” and “Update user accounts” information are also available from the System connect window.