Modifying an existing preset
This article explains how to modify an existing preset in an Audia or Nexia system. There are two primary ways of modifying an existing preset. One way is to add a block to the last recalled preset. The second way is to fully redefine the preset. Both methods are described below.
Adding a block to the last recalled preset
Once a preset created, it is possible to add blocks to that preset without even opening the Preset Create/Edit/Recall dialog.
- Recall the preset you would like to update. Presets can be recalled from a Preset Button block, a Remote Preset block, or from the Presets menu.
-
Find the block that you'd like to add to this preset, and ensure that it is correctly set up.
-
Right click on the block to select Add to last recalled preset.
-
The block is now part of the preset.
Redefining a preset
In order to make deeper changes to an existing preset, the Create/Edit/Recall dialog must be used.
- Go to the Presets menu and select Create/Edit/Recall...
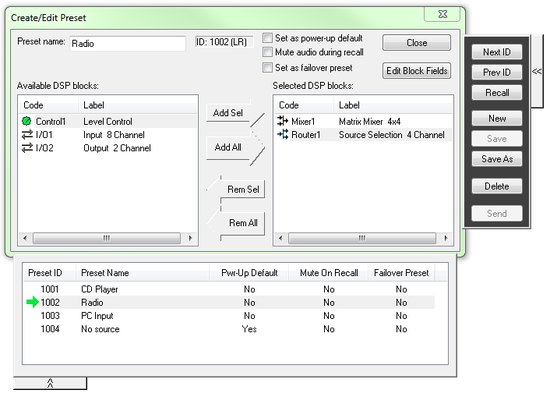
- Expand the tray on the bottom of the Create/Edit Preset window by clicking on the tab that extends from the bottom of the window. This tray displays a list of all existing presets.
- Double-click on the preset that you'd like to modify. This will recall the preset and put a green arrow next to it in the list.
- Make all desired changes to the preset. You must leave the Create/Edit Preset window open while editing the preset.
- Click the Save button when you're done making changes to the preset. If you're connected live to the system while making these changes, also hit the Send button after hitting the Save button. You can now close the Create/Edit Preset window, or recall another preset to modify it.
Further reading
If you'd like to create a preset from scratch instead of modifying an existing preset, see How to create a preset.


