How to Combine / Separate rooms
Where a room is partitioned by folding walls, users can choose to combine two adjacent rooms into one larger space simply by opening the walls.
Flexibility and multi-functionality are enhanced when rooms can be combined in various shapes and sizes. Unfortunately, the complexity of room combining increases with the need for more and more AV devices and connectivity.
Biamp supports two ways of managing how the AV equipment of the rooms can be combined.
- Dedicated buttons on a keypad / Touch Panel
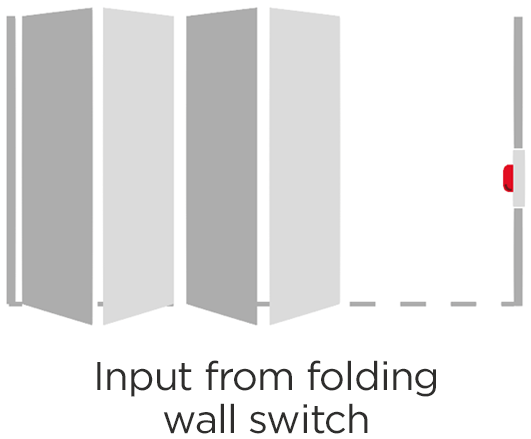
- Input from a switch built into the folding wall.
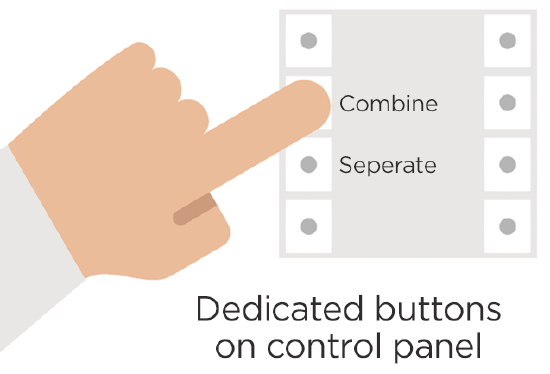
Dedicated button(s) on a control panel
On a keypad or using Touch Panels, you can dedicate some buttons for controlling the combine/separate feature.
Folding Wall switch
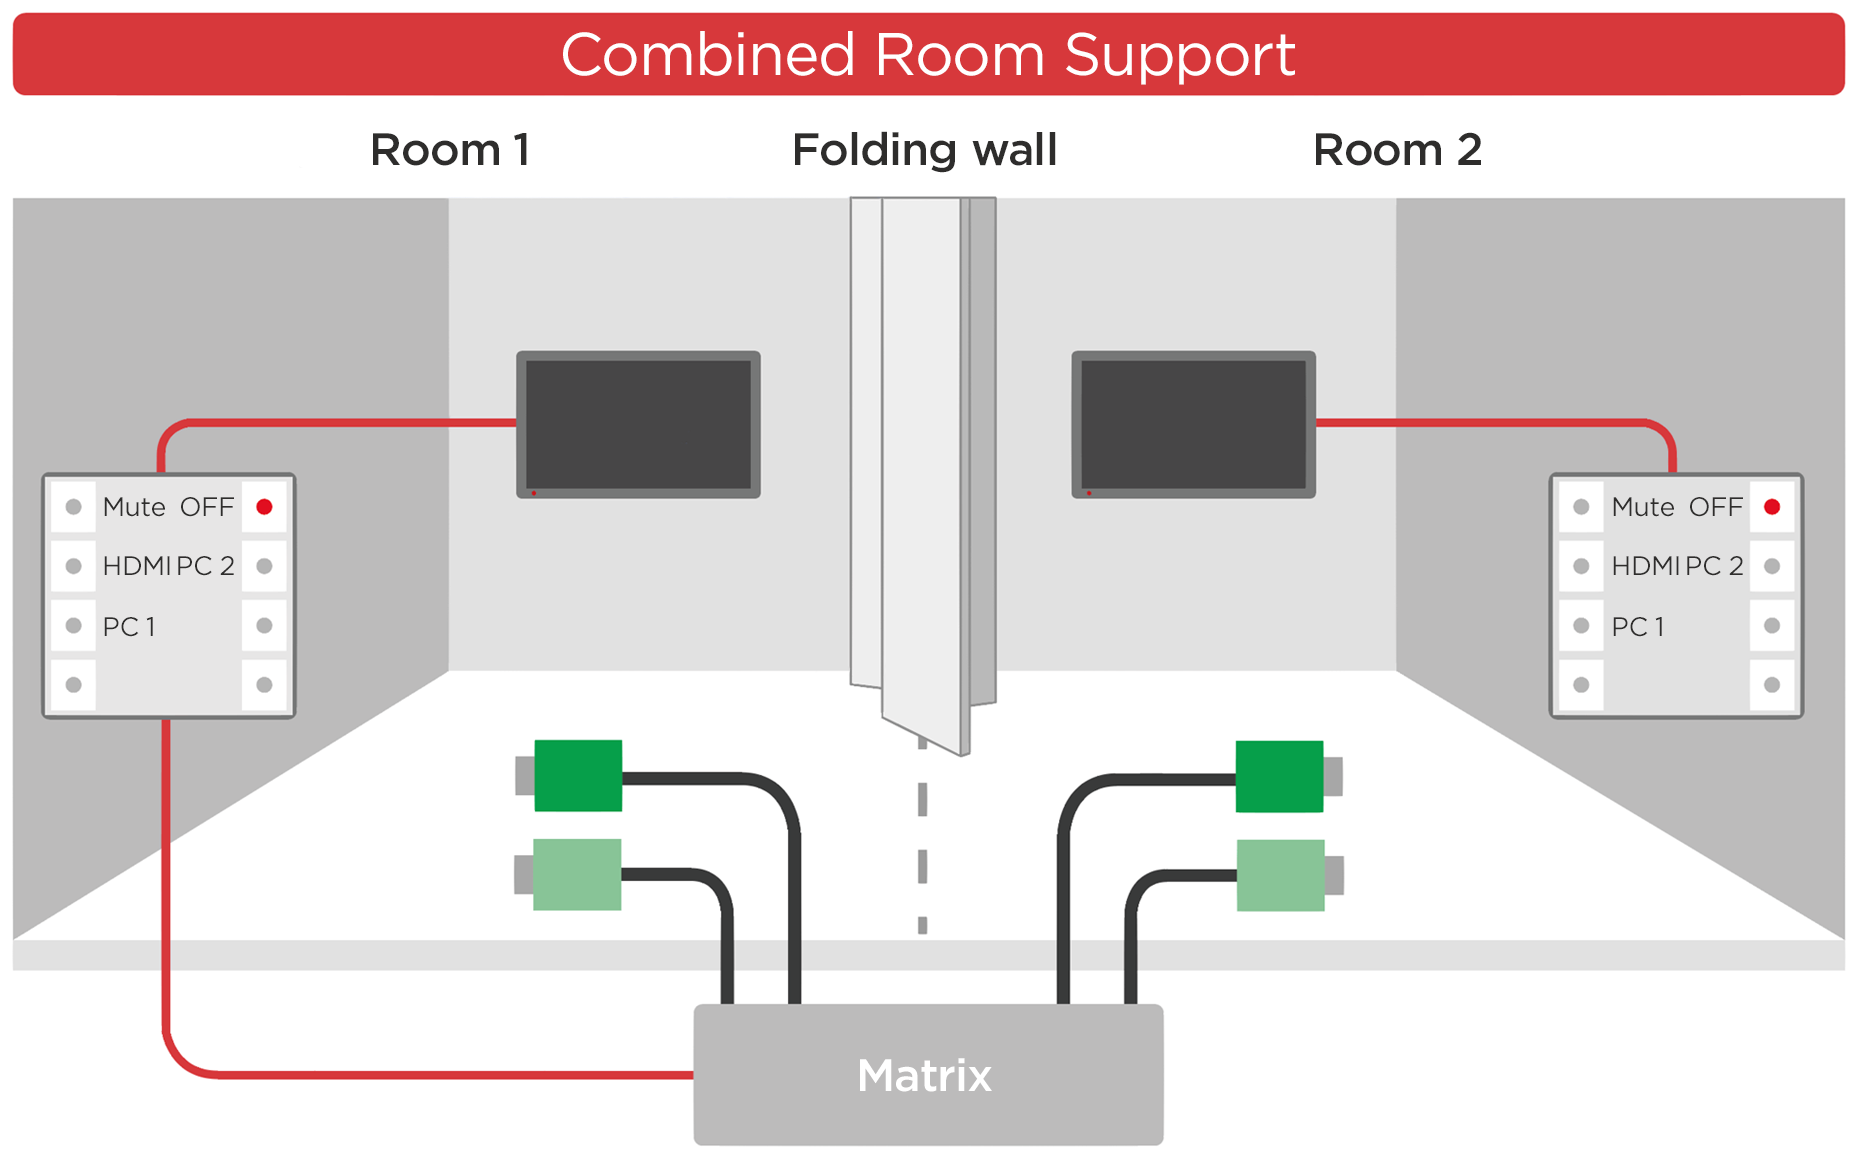
When the folding walls are open, all AV devices – including functions such as audio volume and lighting – are shared throughout the combined rooms speakers and displays from one central location. When the walls are closed, each room has a completely independent AV functionality.
Button behavior
Buttons can then change behavior based on, if in the combined use-case or separated.
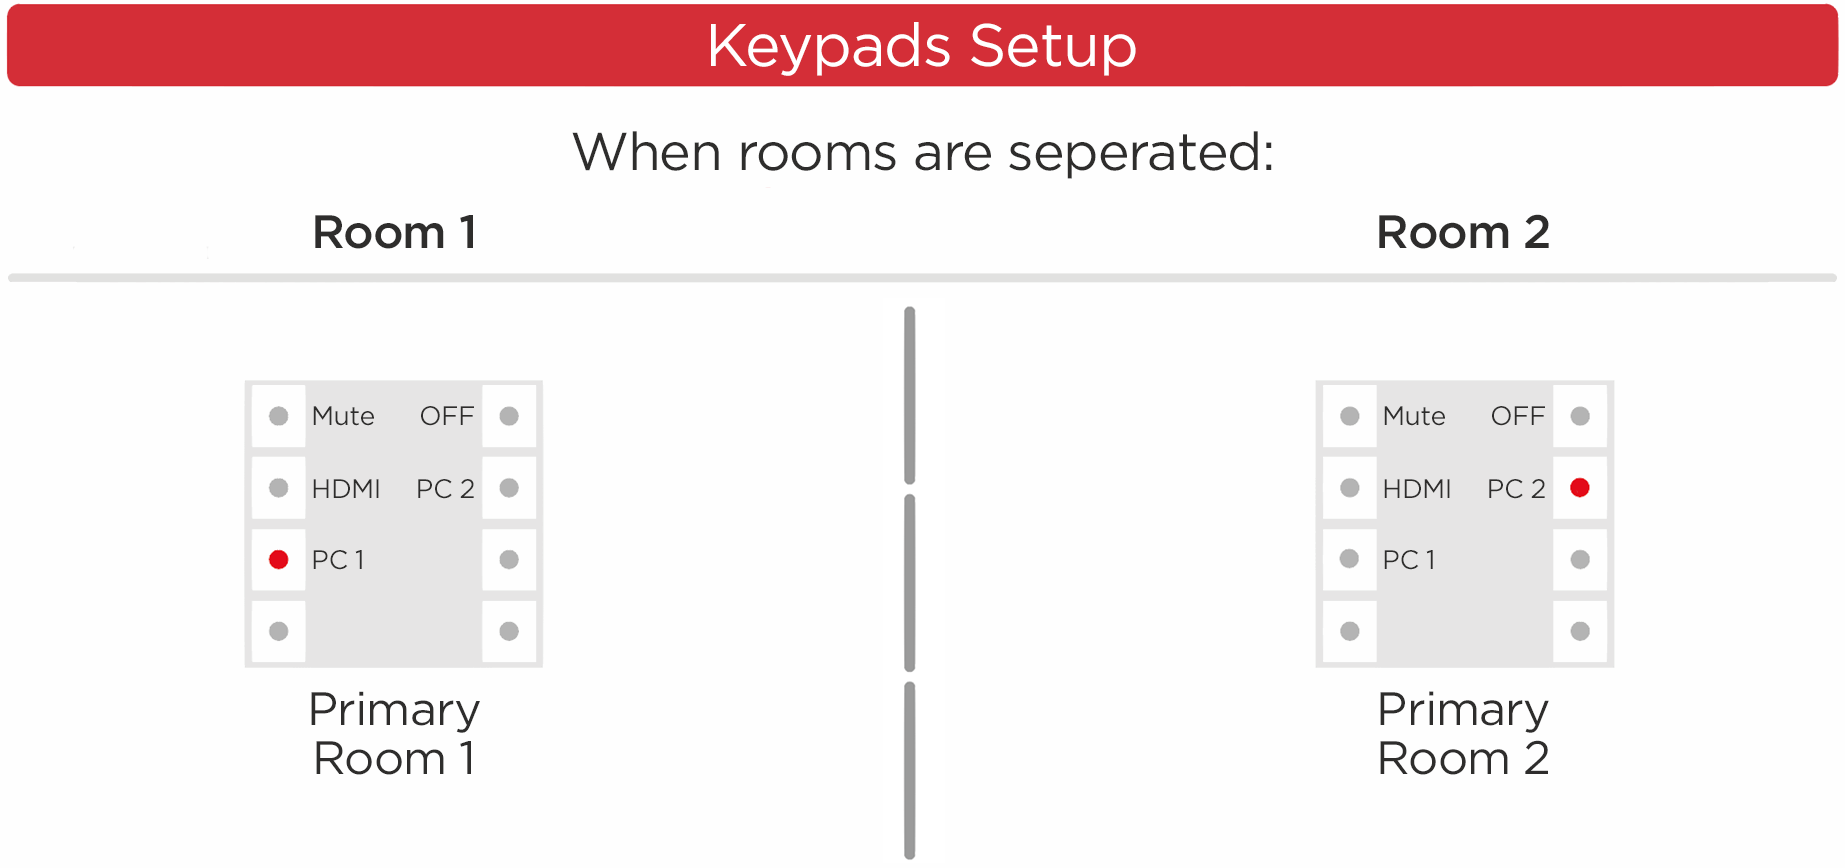
The combined mode has two methods of operation between the two keypads, the first shown below is where you lock off the second keypad
In the second mode is where you mirror the buttons, so when you press the buttons in Room 2, the operate similar to Room 1.
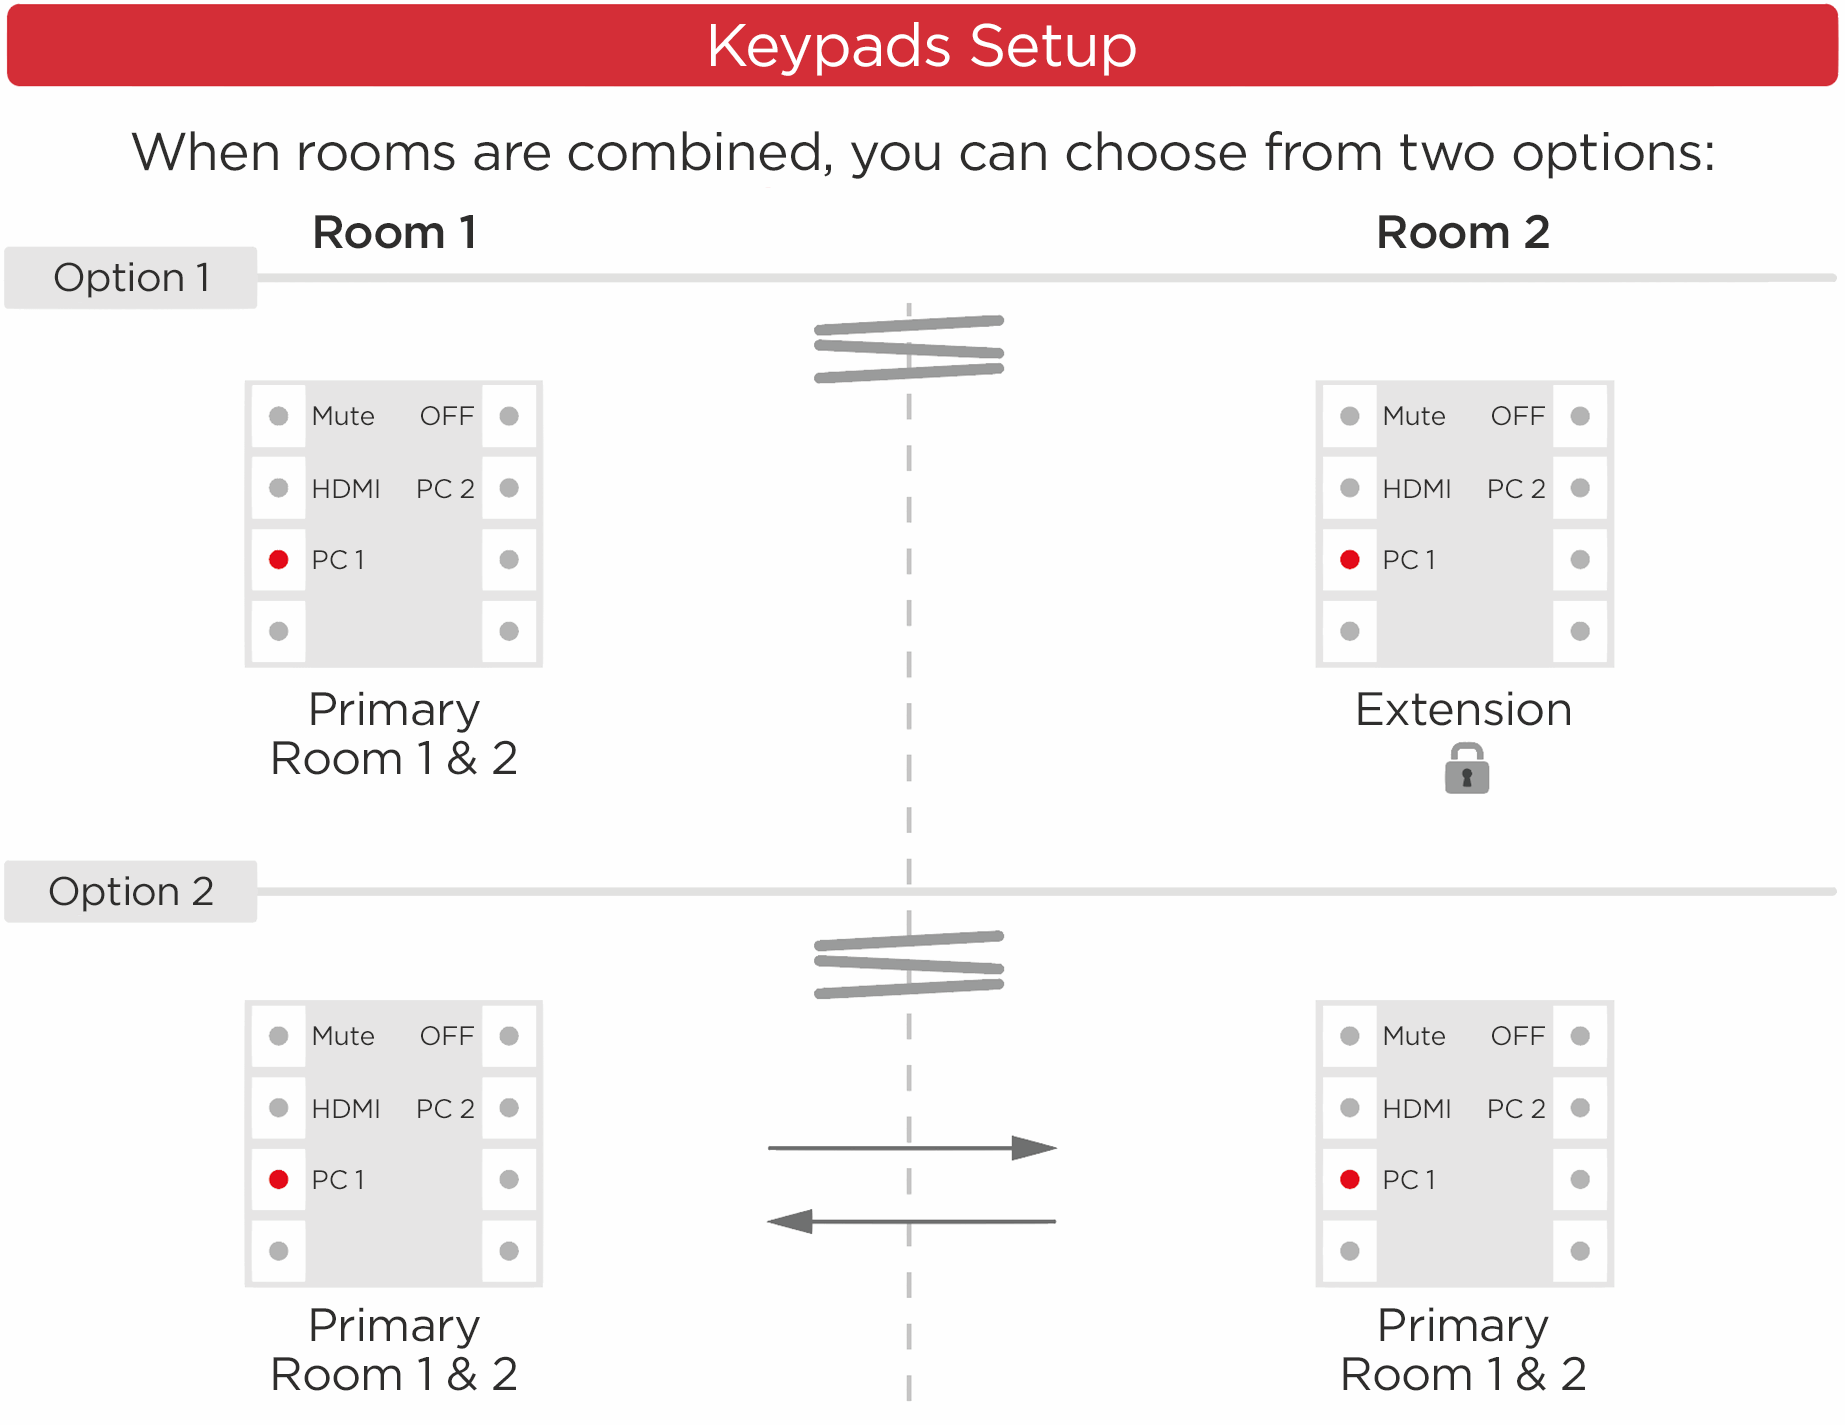
When the rooms are separated, then rooms will act as individual rooms.
Quick configuration time
Previously, it could take hours of programming when doing a combined room project for an AV system. But by implementing Combined Room Support in Project Designer 1.9 and newer, the function is simple to create and use.
You can, as mentioned above, use a button on a control pad, to switch between combined and separated state. In this example one button is has the toggle function added (1), then "Set RoomsCombined" from Functions is added to the two states, with true on the "first" state and "false" on the second state (2).
Now in order to indicate the change of state, add "Change button appearance" to the two states and change the LED colors (3).
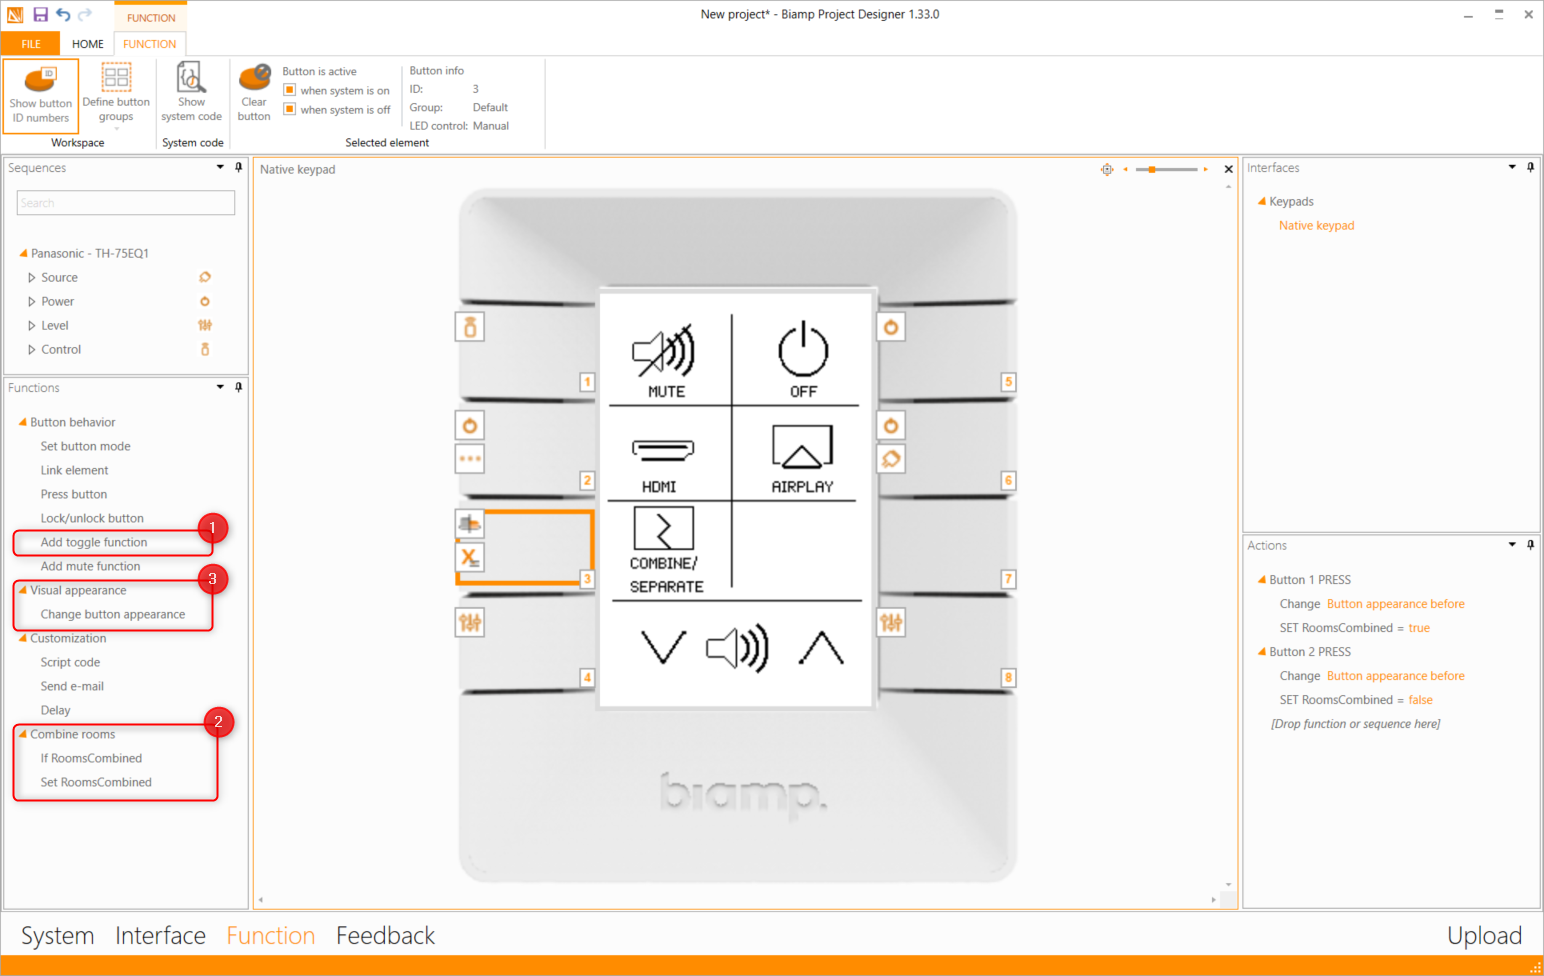
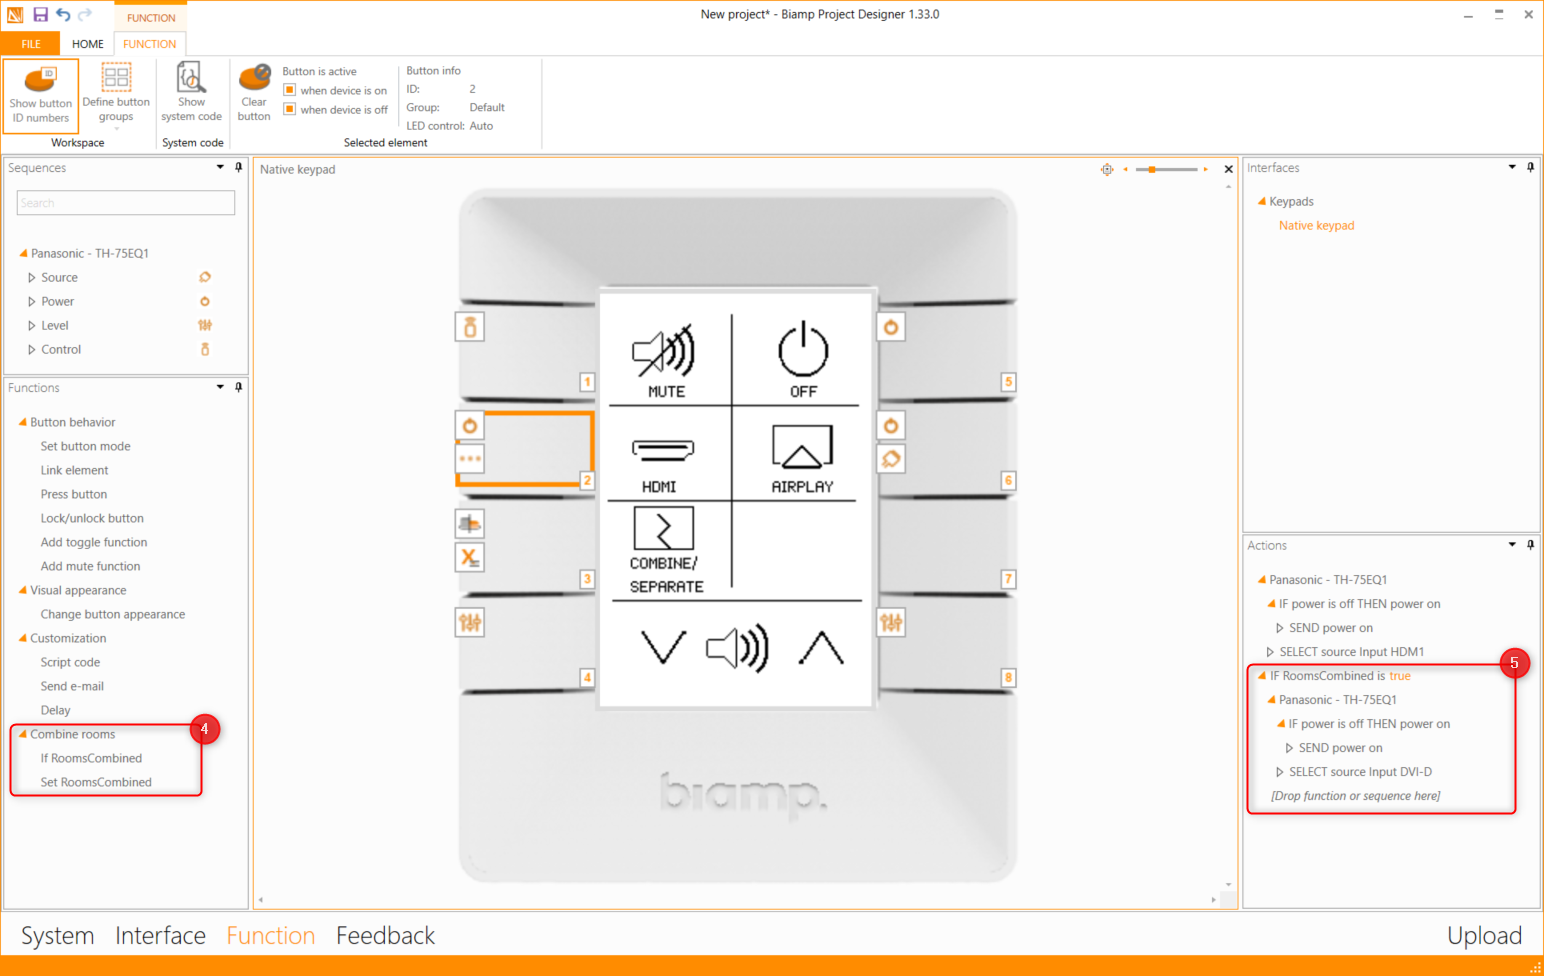
Now, on the buttons, where you wish different behaviour, you simply add the "If RoomsCombined" (4) and drag the different sequence to that logic as shown below (5)
This can also be used on touch panels, although the limitation is that it only works for two rooms being combined. There is only two logic states in this way of using Set RoomsCombined. When using Touch Panels and Control Panels, you can create 5 individual operating UI's, and it might be smarter, when having more than two rooms, to use buttons on the touch panels to change the combinations of rooms.
Have a look at the video below, how you can easily configure two rooms that can be combined into one large room.