

Updating the app on an Apprimo Touch Panel
Keeping the Biamp Control System up to date on your Apprimo Touch Panel is an important step to making sure your device benefits from current bug fixes, security features and other improvements. Listed below are best practices when updating an Apprimo 4", 7" and 10" Touch Panel, along with troubleshooting methods to help get back on track if issues occur. In most cases, images between the three different Touch Panels will be similar enough, but in cases where there's a departure, additional visual examples are provided.
The Apprimo Touch panel will need to be powered via PoE during the update process, and you must uninstall the older app before installing the newer one. You can download the latest .APK app for the 4", 7", and 10" Touch Panel on biamp.com Downloads or the release notes page here:
Note: As of Project Designer v1.37.0 (Firmware v3.37.0), Impera Controllers utilize HTTPS. The Apprimo 4, 7 and 10 panels must be updated to at least v1.7.0 for HTTPS Support.
There are two methods that can be used for updating the touch panels...
USB Type A to Micro USB cable
1. While the Apprimo Touch is connected to the PC, the panel is expected to appear in Windows as NEETS:

2. Double-click the drive to see Internal Storage folder.

3. Double-click on Internal Storage to show all folders within.
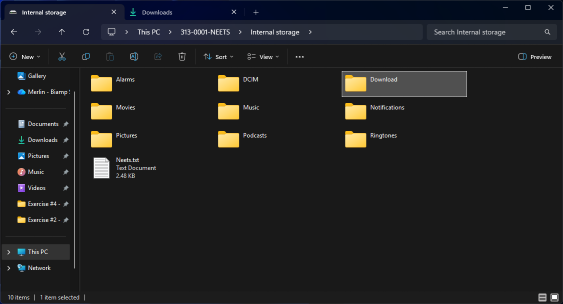
4. Double-click the Download folder to open it.
5. Drag and drop the .apk file into the Download folder.

6. Disconnect the USB cable from the PC and Apprimo device.
7. On the Apprimo Touch Panel, insert the pin to press the internal pinhole button which will access the device's settings menu.


8. Scroll to the bottom of the Biamp Control System menu and select Application settings.


9. Choose the Biamp Control app, scroll down and press Clear defaults.


10. On the same screen, scroll back up and press Force stop, then OK to stop the application.
11. Press the central Home button at the bottom of the screen, choose Launcher as the home app, and select Just once.


12. On the Launcher screen, press the Settings gear. On Apprimo 4" and 10" this will be accessible behind the six-dot App Drawer icon.


13. From Settings, choose Apps. On Apprimo 4" and 10", Biamp Control should be selectable on the next menu.


14. Choose Biamp Control app, and this time, choose Uninstall. Press OK.
15. Press the Home button at the bottom of the screen, then choose the File Manager folder on the top-right. On Apprimo 4" and 10", this will be accessible after pressing the six-dot App Drawer icon.


16. Navigate to the Download folder and select the .apk to install it.


17. Once more, insert the pin to press the pinhole button which will access the device's settings menu.
18. Press the Home button, choose Biamp Control, then press Always.
19. The Touch panel is now updated and ready to deploy.
USB thumbstick with a USB OTG Micro USB adapter
1. Insert thumb drive into PC and then drag and drop the .apk file into the main folder.
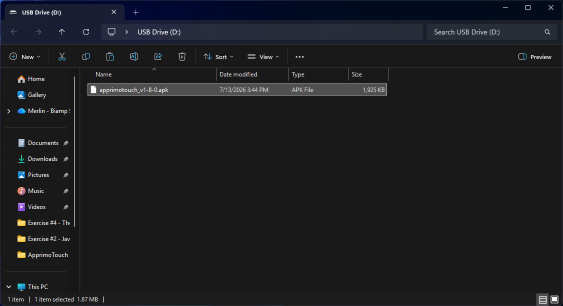
2. On the Apprimo Touch Panel, insert the pin to press the internal pinhole button which will access the device's settings menu
.
3. Scroll to the bottom of the Biamp Control System menu and select Application settings.
4. Choose the Biamp Control app, scroll down and press Clear defaults.
5. On the same screen, scroll back up and press Force stop, then OK to stop the application.
6. Press the central Home button at the bottom of the screen, choose Launcher as the home app, and select Just once.
7. On the Launcher screen, press the Settings gear. On Apprimo 4" and 10" this will be accessible behind the six-dot App Drawer icon.
8. From Settings, choose Apps. On Apprimo 4" and 10", Biamp Control should be selectable on the next menu.
9. Choose Biamp Control app, and this time, choose Uninstall. Press OK.
10. Insert the USB drive with micro USB adapter into the Apprimo device.
11. Press the Home button at the bottom of the screen, then choose the File Manager folder on the top-right. On Apprimo 4" and 10", this will be accessible after pressing the six-dot App Drawer icon.
12. Choose the USB icon tab and navigate to the .apk file to install it.


13. After installation, disconnect the USB thumbstick from the Apprimo device.
14. Once more, insert the pin to press the pinhole button which will access the device's settings menu.
15. Press the Home button, choose Biamp Control, then press Always.
16. The Touch panel is now updated and ready to deploy.
How to confirm which version of Biamp Control is installed?
1. On the Apprimo Touch Panel, insert the pin to press the pinhole button which will access the device's settings menu.
2. Scroll to the bottom and select Application settings.
3. Choose Biamp Control and verify the version in the top-left corner.
Troubleshooting
Problem: Every time I choose to Clear cache or Force stop in Biamp Control app, I'm taken back to the Apprimo welcome screen.
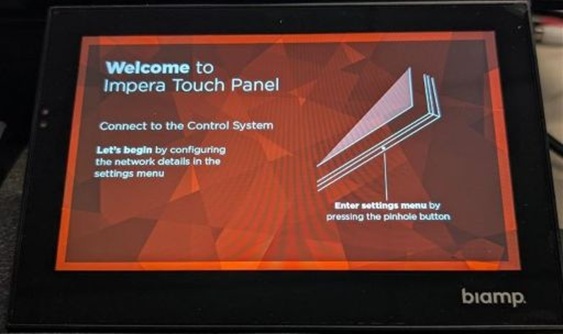
Solution: Biamp Control needs to be temporarily disabled as the home app.
Press the internal pinhole, and within Biamp Control System, scroll down and press Application Settings. In Apps, click the three-dot menu in the top-right corner and choose Reset app preferences.

Press Reset apps button which will take you back to the Apps screen.

Now you can select Biamp Control to Clear data, Force stop and Uninstall without being pulled back to the Apprimo main screen.
Problem: The app doesn't connect to the Control system.
Solution: The IP address needs to align with the current Control IP scheme.
Press the internal pinhole, and within Biamp Control System, scroll down and press Application Settings. Select Biamp Control app.

Click the Clear data button and confirm. This will take you to the boot screen again. Once more, press the internal pinhole.

Click Control system address, input an appropriate IP (example: 192.168.10.100) and press OK. Lastly, select Connect to the control system and it should establish the connection and load the GUI.