Using Docklight for troubleshooting
You can download the software from here: https://docklight.de/
Docklight is available in both a paid and free version. The free version doesn't let you save your files and you are not able to copy/paste strings either. The paid version is very helpful when developing drivers in Biamp Device Editor and the pricing is fair.
You can watch the video below to get an idea of what the software can do. In many cases, here or on our website, we will add a Docklight file for our products to help you trouble shoot or create a driver for a third party controller.
You can add commands, send/receive, change COM ports and much more with ease in the software!
The only thing you'd need for sending serial commands is a RS232 port, which many modern laptop doesn't have, but all you need then, is a USB to RS232 adapter.
Simulating a LAN Device
In the event that you wish to simulate one of the TCP devices in your project and see what happens when data is sent from the control system use Docklight Scripting in the following manner.
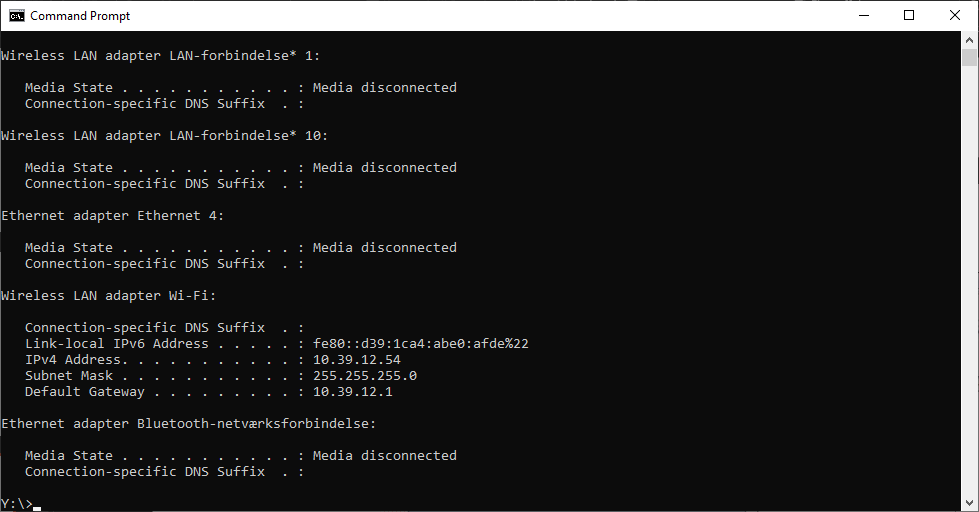
1. Find the IP address of your computer
Use ”ipconfig” e.g.:(10.39.12.54)
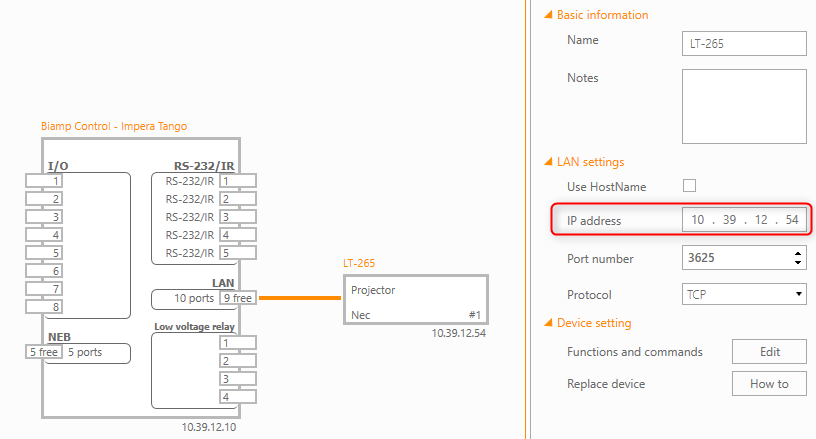
2. Adjust the project file and upload it.
3. Startup Docklight and configure it
SERVER:3625
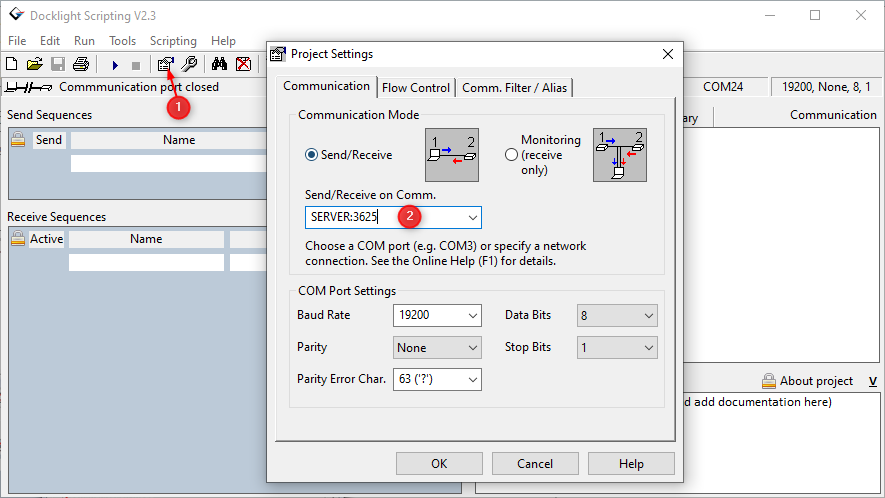
4. Start the LAN server session in Docklight Scripting by pressing the "Play" icon

Simulating the control system
When you are in doubt if the control system is sending a command correctly, you can use Docklight Scripting as a second opinion. We also use it as a sandbox to test the commands before implementing them in Device Editor.
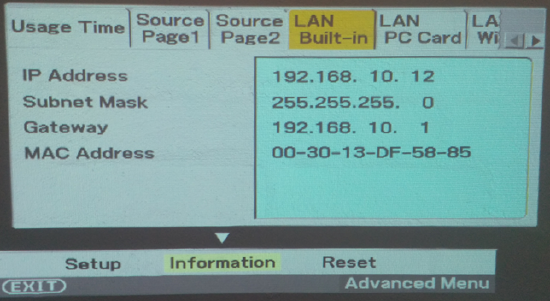
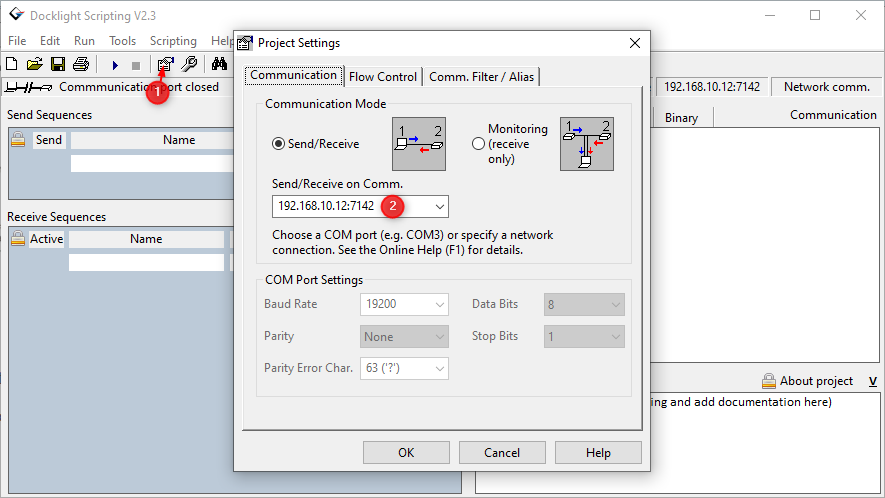
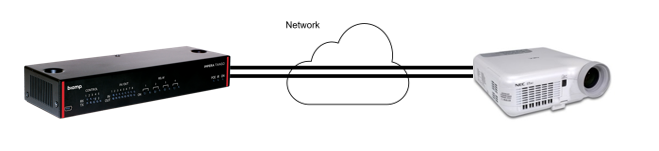
1. Find/setup the IP address of the device i.e. Projector LT-265 in this case 192.168.10.12
2. Find the port number of the device in the manual
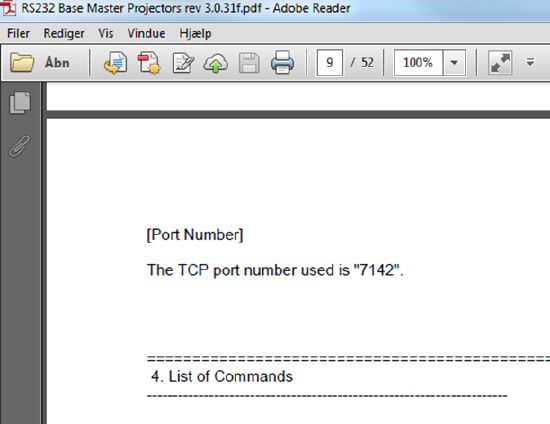
3.Setup the Docklight to make a TCP connection 192.168.10.12:7142
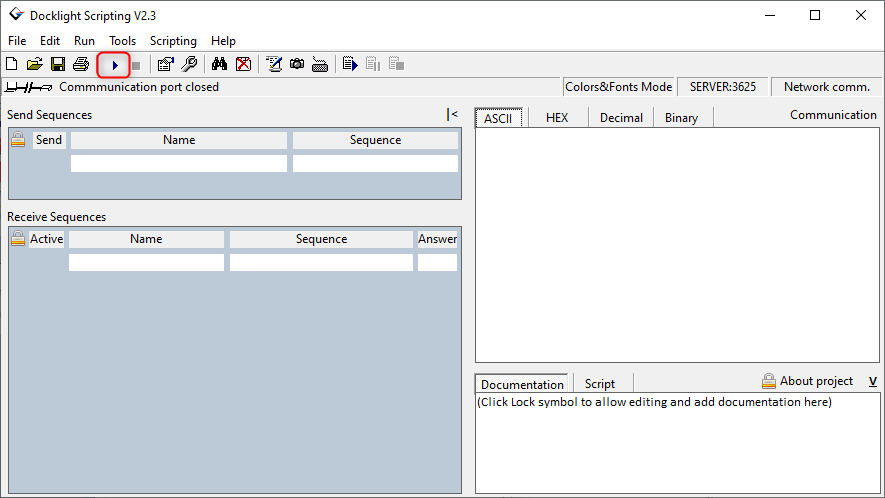
4. Open the connection to the projector by pressing the "Play" button
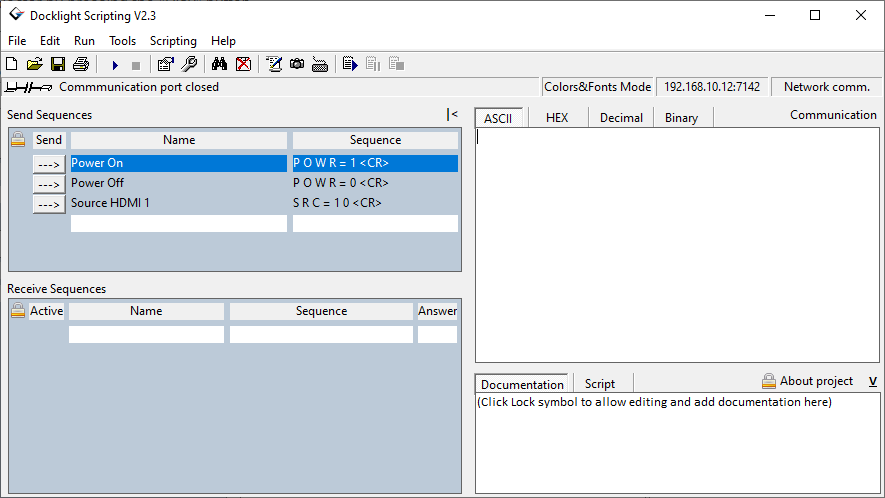
5. Add the Commands you want to send and test
Monitor a connection
When trying to understand what is going wrong between the communication of a control system and a device Docklight Scripting has a monitoring function that works really well. So like in the example below you wish to monitor a connection between the control system and a projector over LAN, your can create a "tunnel" using Docklight that can be monitored.
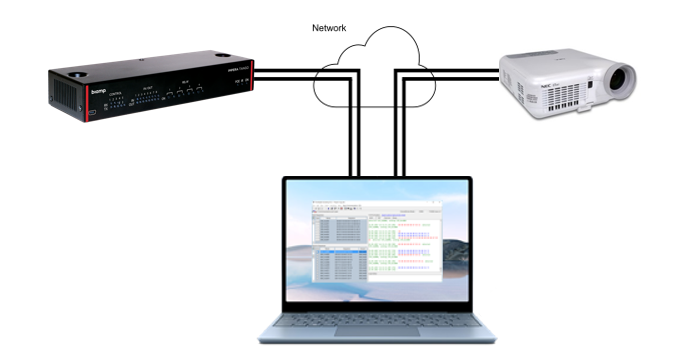
Configure Docklight like this so that it creates a TCP server that the control system can connect to and at the same time connect to the projector instead of the control system.
