Connecting to Devio with the System Administration Utility
The majority of a Devio system's configuration will take place within the Devio System Administration Utility (SAU) software. The latest version of the SAU will always be available for download on our Devio Software and Firmware downloads page. There are a few steps required in order to begin configuring the Devio system, and these are detailed below.
Setting your computer's IP address
To access your Devio unit via the SAU, you will first need to set your computer’s IP address to be in the same range as the Devio. By default, the Devio will be set to DHCP. Your first steps will depend on whether or not you have a DHCP server present with which to assign the Devio an IP address.
With a DHCP server
If a DHCP server is present, consult with your network or systems administrator to learn the IP address of the Devio. In order to discover a device in the SAU, it will be necessary for the SAU's host computer to be set to the same IP range as the Devio.
Without a DHCP server
If there is no DHCP server present, the Devio will automatically obtain a “Link Local” IP address. This is an IP address of 169.254.xxx.xxx with a default gateway of 255.255.0.0, in which the "xxx" octets are variable. Your computer will also need to have an IP address in the 169.254.xxx.xxx range (whether obtained automatically or set statically) in order to communicate with the Devio.
- Connect a computer to the same network as the Devio. This can be done directly by connecting a standard straight-through Ethernet cable between the computer and the Devio, or by connecting both the computer and the Devio to a shared network switch.
- Navigate to the network options section of your computer
- Right-click on the Local Area Connection corresponding with the Ethernet network port you will be using to connect to the Devio, then click on “Properties”
- Select “Internet Protocol Version 4 (TCP/IPv4)” and click on Properties
- At this point, you can do one of two things:
- Select “Obtain an IP address automatically," then press OK to apply this change. The computer should automatically obtain a Link Local IP address on this network interface
- Select "Use the following IP address," then set the IP address to 169.254.xxx.xxx, with a default gateway of 255.255.0.0
Installing and configuring the System Administration Utility
- Download and install the Devio System Administration Utility (SAU) from the Devio Software & Firmware downloads page.
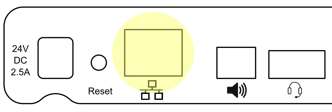
- Connect a network interface port on your computer to the LAN port on the back of the Devio.

- Ensure that this network interface on your computer is set to the same IP range as the Devio.
- Launch the Devio SAU software.
NOTE: Depending on your computer's configuration and security settings, it may be necessary to launch the software with administrator rights in order to successfully connect to and configure the Devio unit. To do this, right-click on the Devio software icon and select "Run as Administrator."
- Ensure that the Device Password is correct (by default, it will be “devio”).

- Ensure that the correct Network Adapter has been selected.

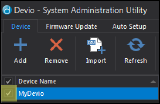
- Your unit should automatically pop up after a few seconds in the device list below these settings. It should have a green circle indicating that it is connected.

- If the unit does not automatically appear, click on the Refresh button to search for the unit with the current password and network adapter settings.

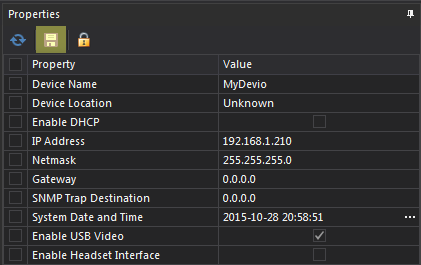
- Once you have connected to the unit this way, you can select it in the device list to begin editing its properties on the right.

- Click the save disk icon to apply any changes made to the device’s properties.

