How to add floor plans in Evoko Workplace?
If you have an image of your office floor plan you can upload this image to help end users navigate the Desk booking application. This guide walks you through the process of adding a floor plan to a floor and assigning desks.
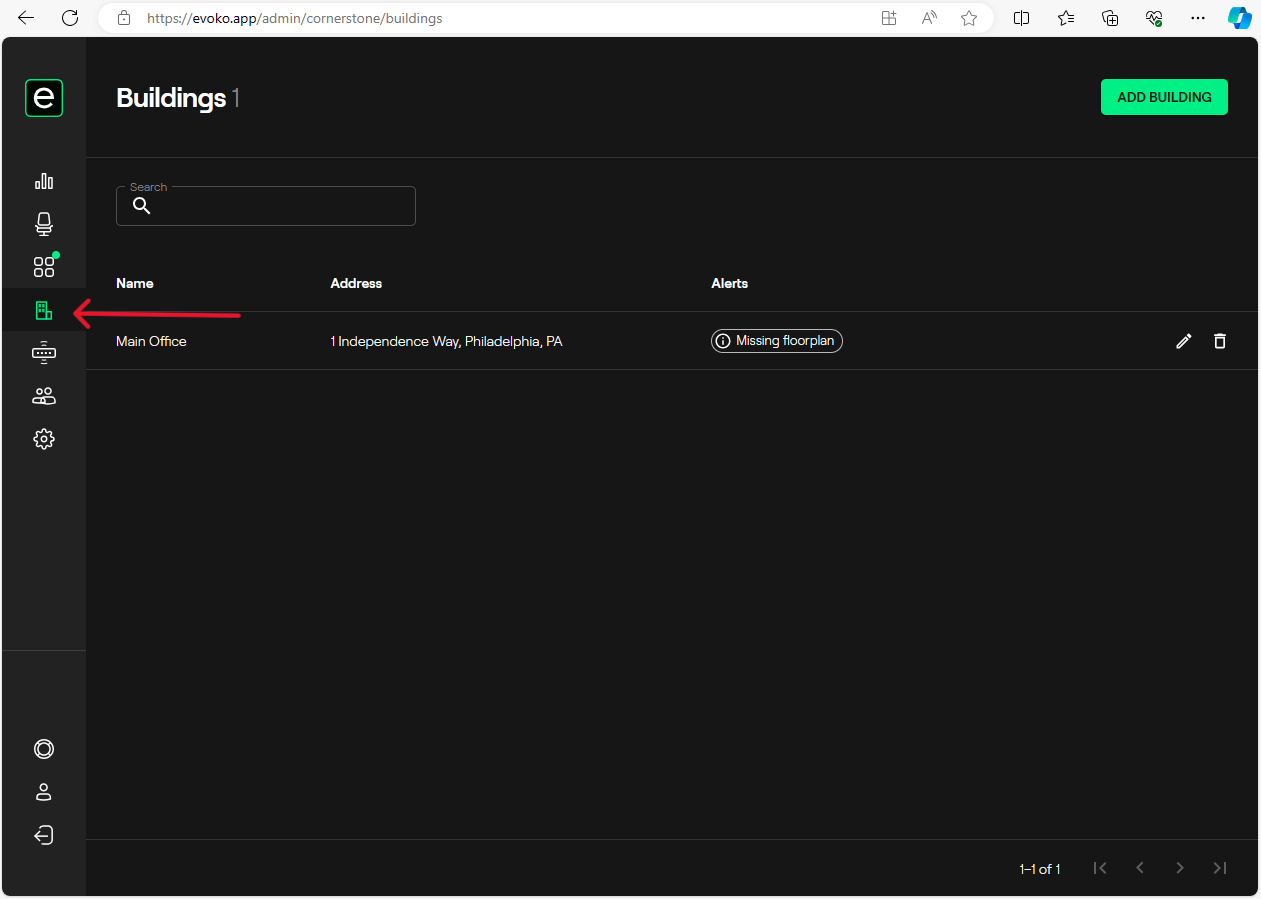
- Navigate to the buildings tab in the Evoko Workplace Admin Center on the left hand side.
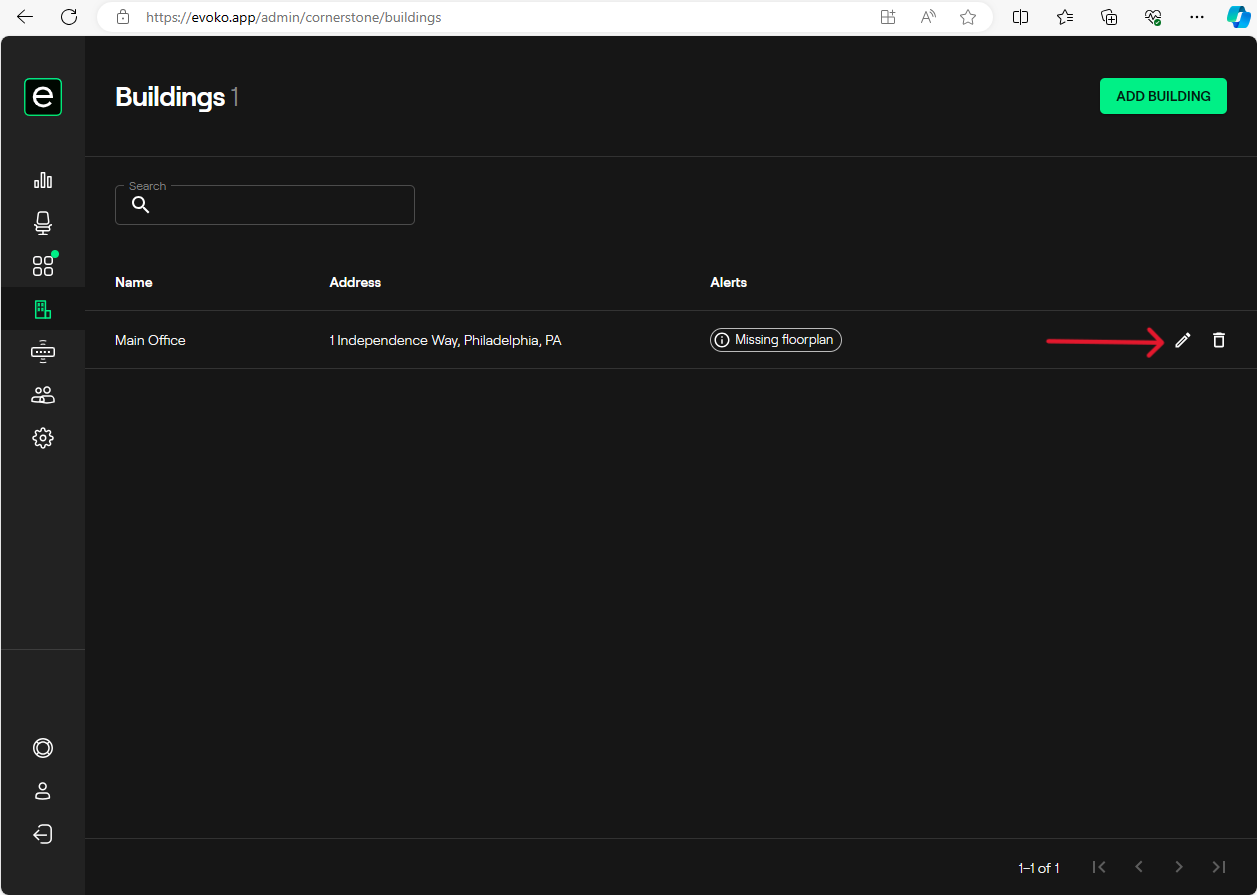
- Find the building you would like to add a floor plan to and press the edit button (pencil). In this example, we will be using the Main Office.
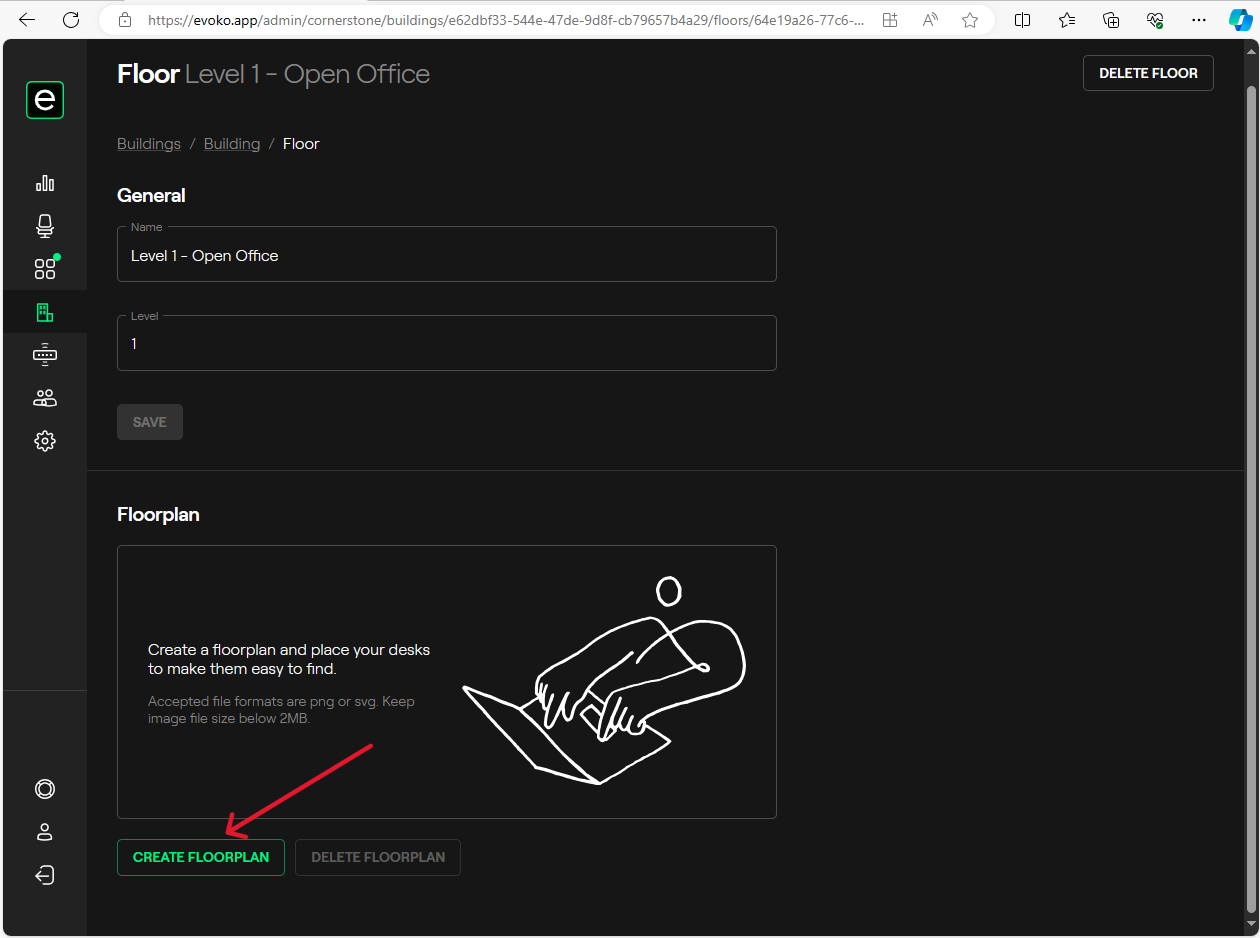
- Navigate to the level/floor that you want to assign the floor plan to and press the edit button (pencil).

- Select CREATE FLOOR PLAN on the bottom left hand side of the screen.
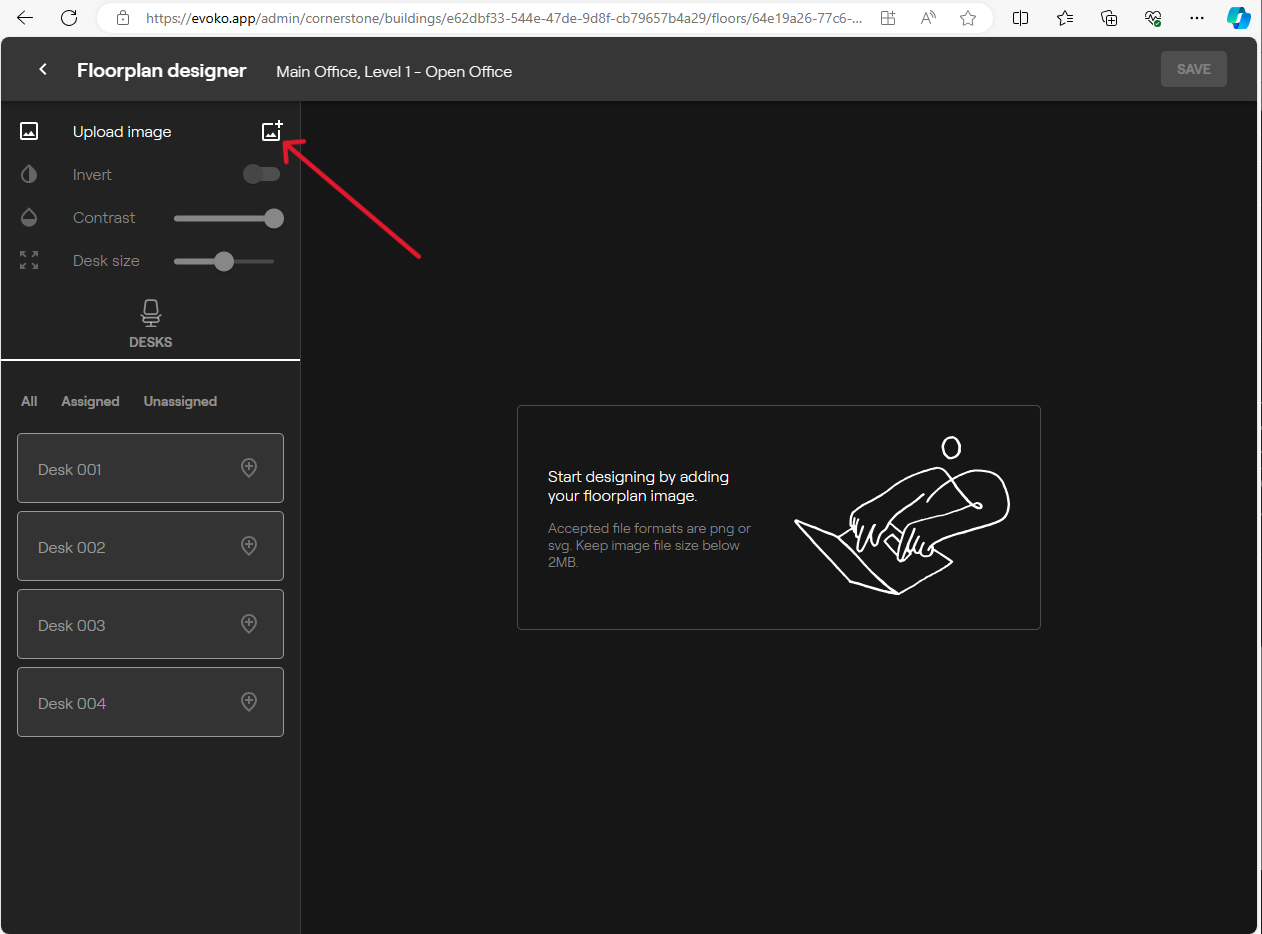
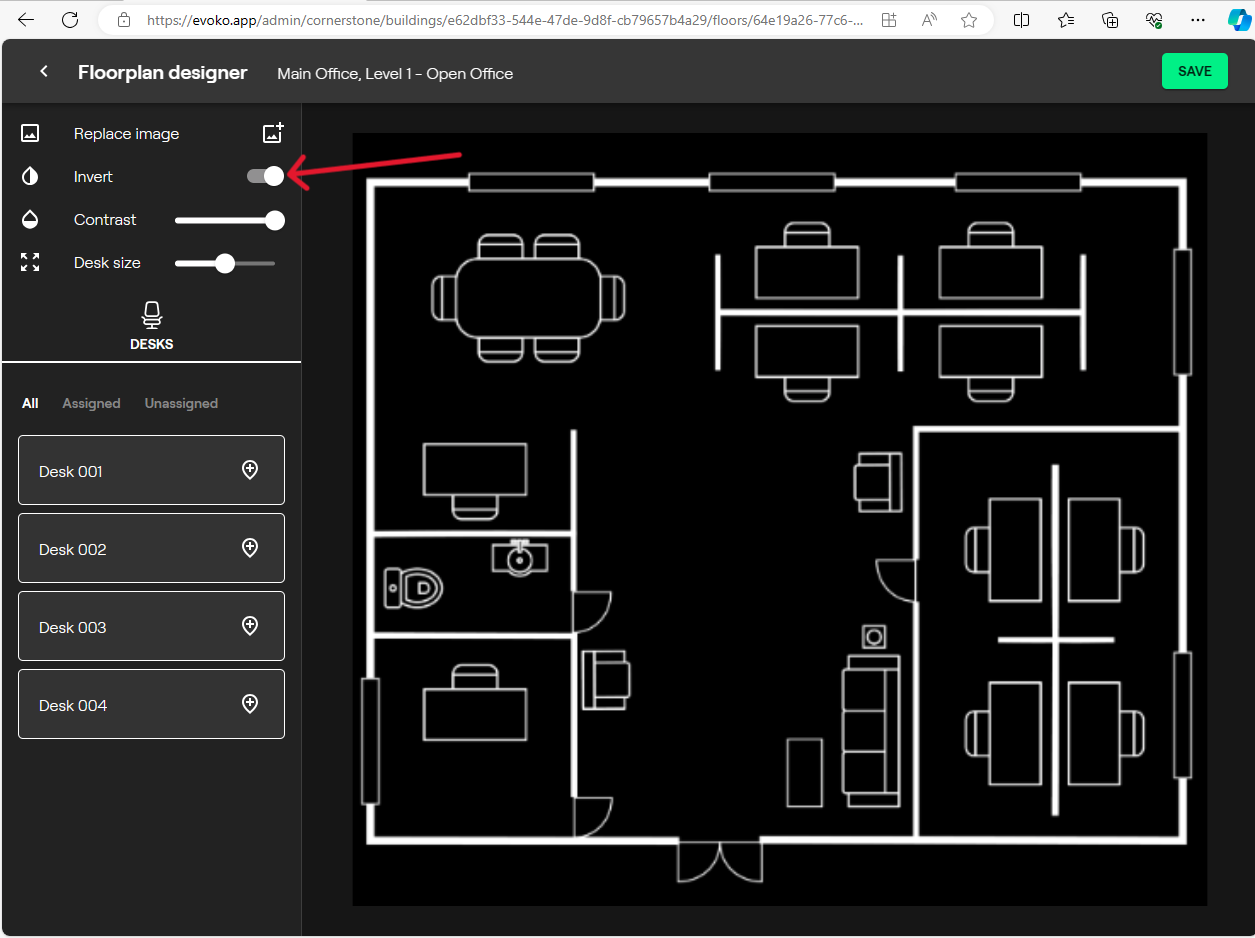
- Select the Upload Image button and find the correct floor plan image to upload. JPEG and PNG are supported.
- We will upload our floor plan and invert the image color to have a dark theme.
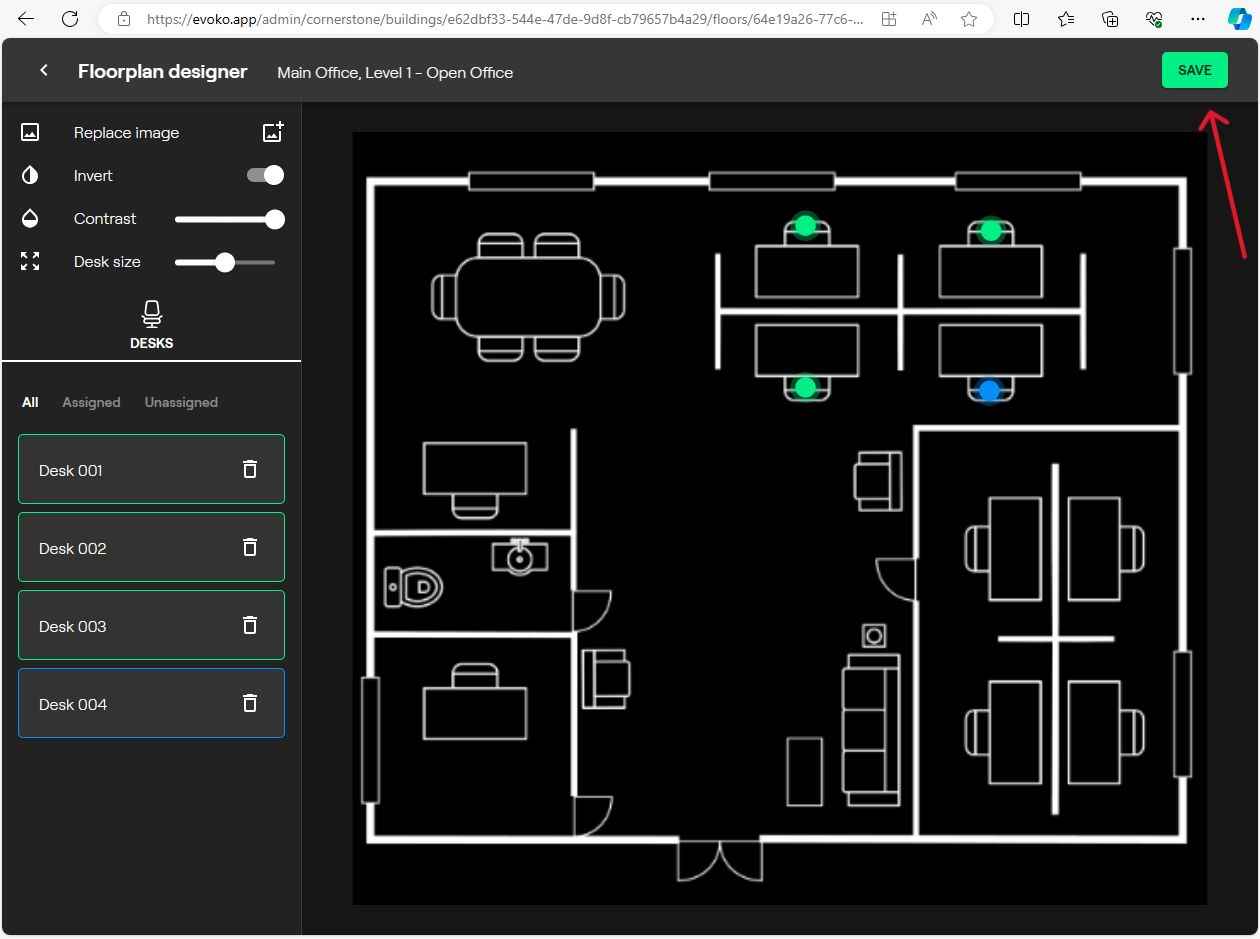
- Now we will click and drag the desks on the left to the respect space on the floor plan. When complete we will press SAVE.
- You should be acknowledged with a successful message in the bottom left hand corner.
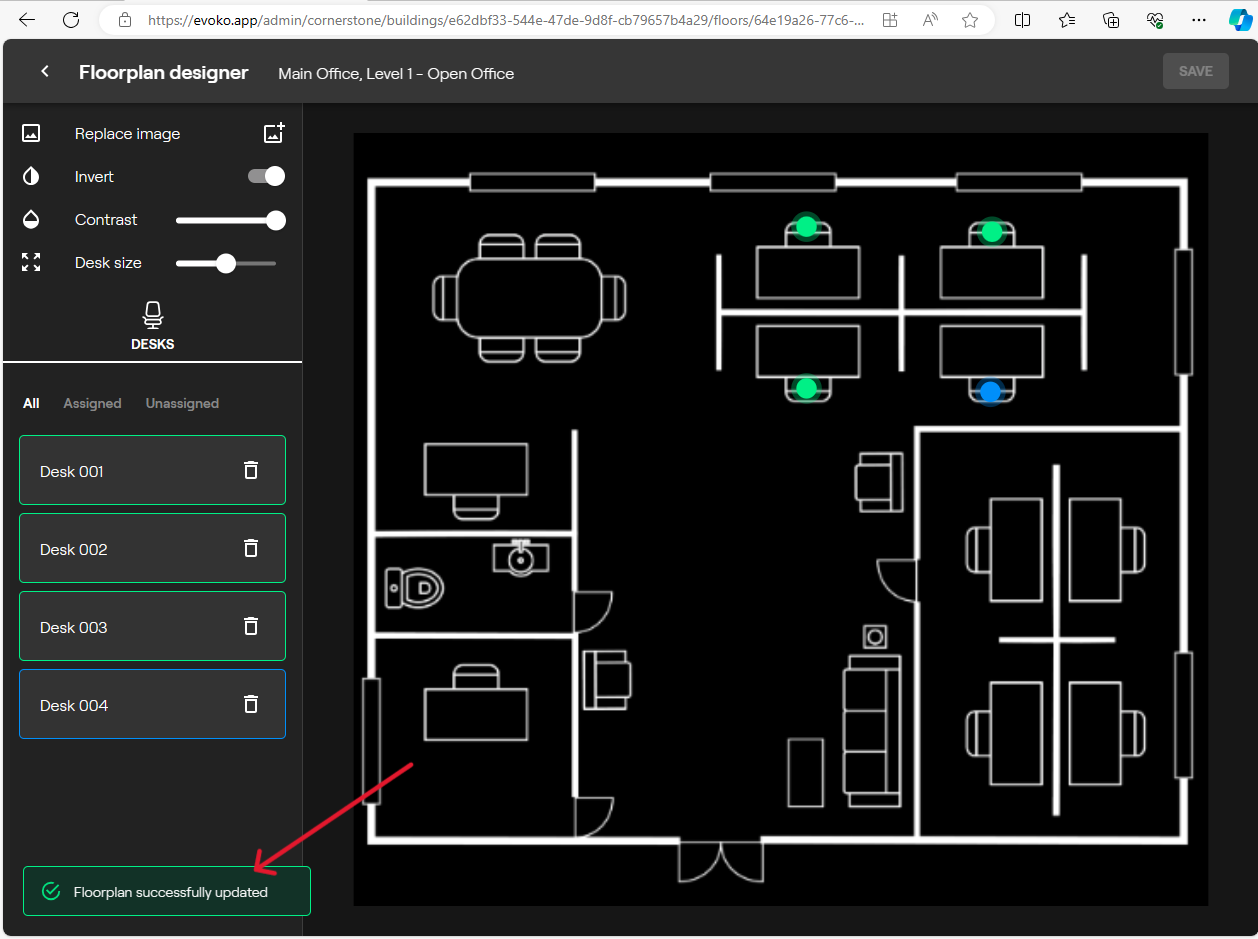
- You have successfully added a floor plan!
- You will repeat the previous steps for each additional floor plan you would like to upload.