Pinging an IP address
This article explains how to ping an IP address for a device. The goal of pinging a device is to find out if a device is reachable at a particular IP address.
Ping is a computer network administration utility used to test the reachability of a host on an Internet Protocol (IP) network and to measure the round-trip time for messages sent from the originating host to a destination computer.
A device on a computer network should respond to a echo request (ping) with an echo reply (pong) confirming it is online. This reply should come within milliseconds. If a reply does not come it is said to have "timed out" because the predefined wait time for a reply has been exceeded. If no reply is seen we typically assume that no device is present at, or assigned with, that IP address.
Getting connected
For the purposes of this article we will use a computer running Windows 7. Other Microsoft operating systems since Windows XP will use approximately the same procedure.
Connection is made via an Ethernet cable either directly between your computer's NIC and the Biamp device via a crossover cable, or via a network switch to a Biamp device on a network. Either connection type will allow you to Ping the device's presumed address and see if a device responds from that location.
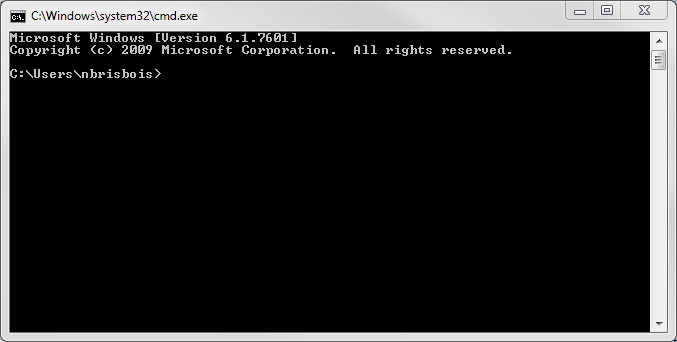
cmd.exe
Begin by going to the Windows start menu.

Type the letters "cmd" into the Search box and hit Enter.

This will ask the Windows OS to run cmd.exe, commonly referred to as the "Command Prompt" interface. The following window should open on your desktop.
Ping
The Command Prompt allows various commands and queries to be sent to the system. For a Biamp device with the default IP address you will use the command "ping 192.168.1.101". If the device is at a different IP address, replace 192.168.1.101 with the address you are trying to poll.
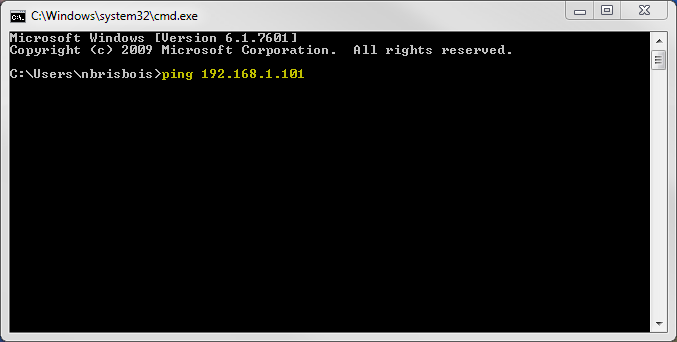
After you hit Enter the request will be sent 4 times, generating either a time out failure or a reply with round trip statistics.
To try again, hit the UP arrow key once to refresh the last command, then Enter.
Failures can present in a few ways, here is what you might expect to see back:
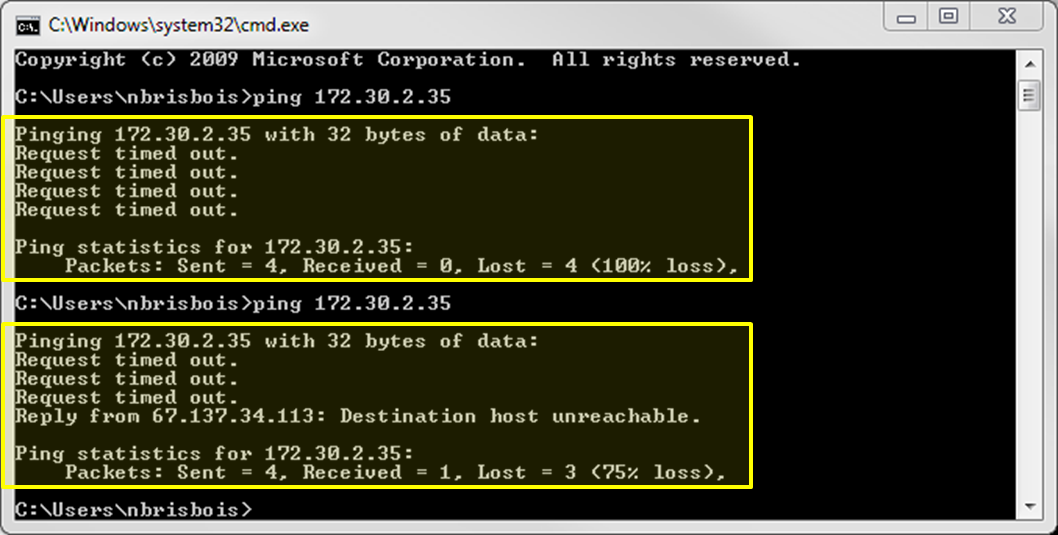
Two Ping failures are shown with slightly different feedback but no response from the intended device.
Check the cabling, ensure the physical path to the device is sound, and try again.
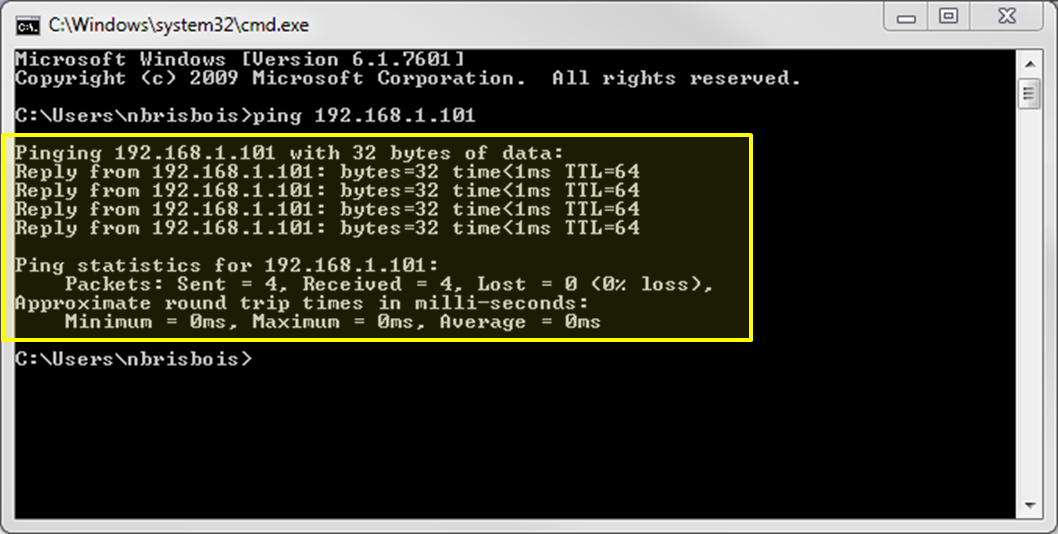
Success!
4 responses with good, quick response times.
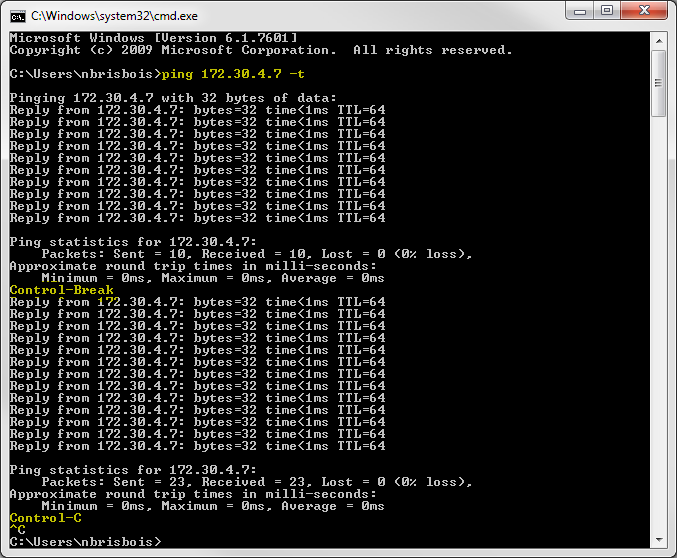
Continuous ping
Use the command "ping 192.168.1.101 -t" to initiate a continuous ping. Again, replace the IP address with one specific to your device as needed. The -t can be placed before or after the IP address.
Interrupt the pings with Ctrl-Break to see statistics on the captures.
Stop the pings with Ctrl-C.
"ping –t 192.168.1.101 >PingLog.txt" will output the ping results to a txt file called “PingLog.txt”, it will not show a scrolling trace in the cmd prompt window. It will be placed in the C:\Users\username directory. Change the file name so each is unique. Pings will happen once a second. control-C will end the ping and close the file.
Things you can ping
Ping is not limited to nearby hardware, you can also ping websites.
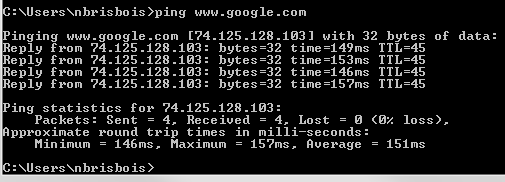
A ping to google.com
Or ping your own NIC.
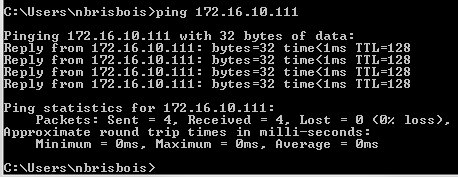
Note that the maximum round trip time for your own NIC is typically about 0ms.
Ping a range of IP addresses
In some situations you need to ping a device but don't know where it lies within the subnet range. This method can help narrow down the list of addresses being used.
In Windows, open the command prompt (Windows start menu > Search > type "cmd")
Fast ping time
From the command prompt, type....
for /l %i in (1,1,254) do @ping 192.168.1.%i -w 10 -n 1 | find "Reply"
This will ping all addresses from 192.168.1.1 to 192.168.1.254 one time each, wait 10ms for a reply (more than enough time on a local network) and show only the addresses that replied.
Variables:
- Change the IP address after @ping to reflect your network's IP range.
- Syntax for for /l is (start,step,end) if you want to change the range to scan.
- The -w 10 tells it to only wait 10 ms for a reply before moving on. If your network is slow you will have to increase this value or take it out all together, although this will make it very slow.
- The vertical line character before find is typed as shift-\ on the Windows keyboard.
Also, note that the Windows find is case sensitive, so make sure you capitalize "Reply" or you won't get any output. Optionally you can just type "eply" and it will automatically add the capital R in the response.
Longer ping time
This is the same as above, with the -w variable changed to allow a 100ms reply window.
for /l %i in (1,1,254) do @ping 192.168.1.%i -w 100 -n 1 | find "Reply"
This will ping all addresses from 192.168.1.1 to 192.168.1.254 one time each, wait 100ms for a reply and show only the addresses that replied.
Ping from a specific NIC
To specify the source interface to use, use the -s option. (You use the interface number, not the IP address). To identify the NIC interface number use the command "netsh int ipv4 show interfaces"
To force IPv4 or IPv6, use -4 or -6.
To ping 192.168.0.1 using ipv4 from interface 1, use the command "ping -4 192.168.0.1 -s 1"
Ping to test MTU size
A standard ping packet is 32 bytes. The ping command supports a length (-l, lowercase L) attribute which allows you to define the ping packet size. This allows you to test the maximum packet size you can send between 2 devices. The -f attribute sets a Don't Fragment (DF) flag in the packet (IPv4-only) which keeps the packet size intact.
Multiple small TCP packets may be aggregated by a switch to optimize transmission speed and latency. If the aggregating switch builds a packet of 1500 bytes and the transmission path has another switch which only allows a maximum of 1492 bytes the packet will be lost en route, as it will not be able to pass the restriction. The lowest MTU (maximum transmission unit) seen on a path will be the restriction. All switches on a path should allow the same MTU size.
A ping packet contains some overhead data, 20 bytes are reserved for the IP header and 8 bytes are allocated to the ICMP Echo Request header. Add these 28 bytes to the length value you specify to get the total packet size. E.g. For a total packet size of 1500 bytes you would subtract 28 bytes from 1500 for a length of 1472
"ping 192.168.0.1 -f -l 1472"
Success looks like a standard ping response, failure yields the message "Packet needs to be fragmented but DF set."
C:\WINDOWS\System32>ping 192.168.0.1 -f -l 1472
Pinging 192.168.0.1 with 1472 bytes of data:
Reply from 192.168.0.1: bytes=1472 time<1ms TTL=64
Reply from 192.168.0.1: bytes=1472 time=1ms TTL=64
Reply from 192.168.0.1: bytes=1472 time=5ms TTL=64
Reply from 192.168.0.1: bytes=1472 time=1ms TTL=64
Ping statistics for 192.168.0.1:
Packets: Sent = 4, Received = 4, Lost = 0 (0% loss),
Approximate round trip times in milli-seconds:
Minimum = 0ms, Maximum = 5ms, Average = 1ms
C:\WINDOWS\System32>ping 192.168.0.1 -f -l 1550
Pinging 192.168.0.1 with 1550 bytes of data:
Packet needs to be fragmented but DF set.
Packet needs to be fragmented but DF set.
Packet needs to be fragmented but DF set.
Packet needs to be fragmented but DF set.
Ping statistics for 192.168.0.1:
Packets: Sent = 4, Received = 0, Lost = 4 (100% loss),
Pathping
The pathping command is a combination of ping and tracert using ICMP messages. It can be a helpful tool for testing a routed path between devices.
"pathping 192.168.0.1"
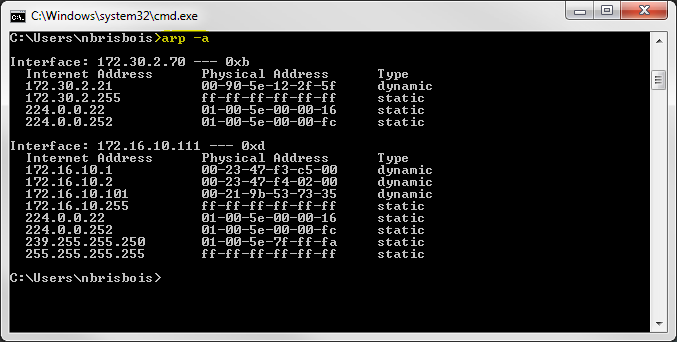
ARP
To discover the MAC address of the device at a specific address you can send the arp -a command followed by the IP address of the device.
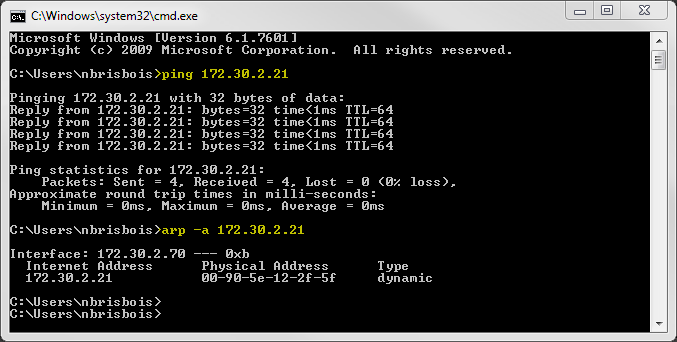
Alternately, you can arp for all devices on the network using just the arp -a command.
PowerShell
Open PowerShell (in the Windows menu search bar type 'Powershell') and copy / paste these commands with the appropriate IP address for the device under test.
If lines paste in reverse order using right-click it may be necessary to enable paste using CTRL+V in the PowerShell properties Options tab.
Continuous Ping
You can use Wndows PowerShell to create a continuous ping test.
Ping.exe -t 192.168.1.101
You can use Wndows PowerShell to create a logged continuous ping test.
Ping.exe -t 192.168.1.101 | ForEach-Object {"{0} - {1}" -f (Get-Date),$_} | Tee-Object C:\Temp\ping-192-168-1-101.log -Append
The continuous ping will run until the PowerShell window is closed. The log output will look like this (intermediate log data has been cut out)
12/22/2021 3:51:31 PM - Pinging 172.30.41.56 with 32 bytes of data:
12/22/2021 3:51:31 PM - Reply from 172.30.41.56: bytes=32 time<1ms TTL=64
12/22/2021 3:51:32 PM - Reply from 172.30.41.56: bytes=32 time<1ms TTL=64
12/22/2021 3:51:33 PM - Reply from 172.30.41.56: bytes=32 time<1ms TTL=64
...
12/28/2021 11:05:04 AM - Reply from 172.30.41.56: bytes=32 time=1ms TTL=64
12/28/2021 11:05:05 AM - Reply from 172.30.41.56: bytes=32 time=1ms TTL=64
12/28/2021 11:05:06 AM - Reply from 172.30.41.56: bytes=32 time=1ms TTL=64
12/28/2021 11:05:07 AM - Reply from 172.30.41.56: bytes=32 time<1ms TTL=64
12/28/2021 11:05:07 AM -
12/28/2021 11:05:07 AM - Ping statistics for 172.30.41.56:
12/28/2021 11:05:07 AM - Packets: Sent = 498410, Received = 498410, Lost = 0 (0% loss),
12/28/2021 11:05:07 AM - Approximate round trip times in milli-seconds:
12/28/2021 11:05:07 AM - Minimum = 0ms, Maximum = 124ms, Average = 0ms
Trace route
Trace route or trace route with hop latency. The -Hops variable limits how many hops are shown.
Test-NetConnection 172.30.41.50 -traceRoute
or
Test-NetConnection 172.30.41.50 -traceRoute -Hops 10 | select-object TraceRoute | foreach-object {test-connection $_.TraceRoute -count 1}
Open TCP port test
You can do a simple one time test of a port using the following command, be sure to enable HTTPS in Tesira Device Maintenance's Network Settings if a "true" result is desired::
Test-NetConnection -Port 443 -ComputerName 192.168.1.101 -InformationLevel Detailed | Format-List *
You can run an extended test of an open port using this command set. This example runs for 720 minutes (12 hours) testing the port using TCP once a minute and logging success (true) or failure (false) with the date and time.
$timer = new-timespan -Minutes 720
$clock = [diagnostics.stopwatch]::StartNew()
while ($clock.elapsed -lt $timer){
$command=Test-NetConnection -Port 443 -ComputerName 192.168.1.101 -InformationLevel Quiet | ForEach-Object {"{0} - {1}" -f (Get-Date),$_} | Tee-Object C:\Temp\check-192-168-1-101-port-443.log -Append
cls
$command
start-sleep -seconds 60
}
write-host "Timer end"
The continuous port test will run until the timer expires or the PowerShell window is closed. The log output will look like this (intermediate log data has been cut out)
12/28/2021 9:00:15 AM - True
12/28/2021 9:01:15 AM - True
12/28/2021 9:02:15 AM - True
12/28/2021 9:03:15 AM - True
12/28/2021 9:04:15 AM - True
12/28/2021 9:05:15 AM - True
12/28/2021 9:06:15 AM - True
12/28/2021 9:07:15 AM - True
12/28/2021 9:08:15 AM - True
12/28/2021 9:09:15 AM - True
12/28/2021 9:10:16 AM - True
A test for multiple open TCP ports on one or more devices can be run using the script below.
# Biamp Tesira port test
#
# Outputs a unique log file for each IP address saved in C:\Temp\PortTest-$Ipaddr.log
# To save one file per port per device edit the 2 appearances of C:\Temp\PortTest-$Ipaddr.log to C:\Temp\PortTest-$Ipaddr-$Port.log
# Output reports results show in real-time in Powershell window
# If a device/port fails to respond it will delay the next test as Test-NetConnection retries the device
#
$Ports = 22,23,80,443,61451 #TCP ports to test
# 22 SSH, 23 Telnet, 80 HTTP (open if HTTPS is activated), 443 HTTPS, 61451 Tesira discovery and communication
# for models that do not support HTTP/HTTPS ports 80 and 443 can be omitted
#
$Ipaddrs = '172.30.41.50', '172.30.41.53', '172.30.41.54' # IP addresses to test
#
$timer = new-timespan -Minutes 10 # test duration
# Duration of test in minutes 240 = 4 hrs, 480 = 8 hrs, 720 = 12 hrs, 960 = 16hrs, 1200 = 20 hrs, 1440 = 24 hrs, 2880 = 48 hrs, 4320 = 72 hrs
#
$clock = [diagnostics.stopwatch]::StartNew()
Foreach ($Ipaddr in $Ipaddrs){ # open welcome message
"Begin $timer test period for $Ipaddr ports $ports"| ForEach-Object {"{0} - {1}" -f (Get-Date),$_} | Tee-Object C:\Temp\PortTest-$Ipaddr.log -Append
} # close welcome message
while ($clock.elapsed -lt $timer)
{ # open test period
$elapsed = $clock.elapsed
$sofar = $elapsed.ToString("hh' hrs 'mm' min 'ss' sec'")
$i++
#
Foreach ($Ipaddr in $Ipaddrs){
"Test period elapsed time $sofar for $IPAddr. Test cycle $i" | ForEach-Object {"{0} - {1}" -f (Get-Date),$_} | Tee-Object C:\Temp\PortTest-$Ipaddr.log -Append # notes how long test has run so far
Foreach ($Port in $Ports){
$portelapsed = $clock.elapsed
$portsofar = $portelapsed.ToString("hh'h'mm'm'ss\.ff's'")
if
(Test-NetConnection -ComputerName $Ipaddr -Port $Port -InformationLevel Quiet -WarningAction SilentlyContinue)
{"PASS $Ipaddr Port $Port is OPEN at elapsed time $portsofar"| ForEach-Object {"{0} - {1}" -f (Get-Date),$_} | Tee-Object C:\Temp\PortTest-$Ipaddr.log -Append}
else
{"---- $Ipaddr Port $Port is UNREACHABLE at elapsed time $portsofar" | ForEach-Object {"{0} - {1}" -f (Get-Date),$_} | Tee-Object C:\Temp\PortTest-$Ipaddr.log -Append}
}
}
start-sleep -seconds 60 #Time to wait between port scan tests
} # close test period
Foreach ($Ipaddr in $Ipaddrs){ # open completed test message
"Test period duration $timer is complete for $Ipaddr after $i tests"| ForEach-Object {"{0} - {1}" -f (Get-Date),$_} | Tee-Object C:\Temp\PortTest-$Ipaddr.log -Append
} # close completed test message
$i = 0 # reset count
write-host "All tests completed." # completed test message, for terminal only