Using Dante and AVB protocols together on the Netgear GS724Tv4 switch
In testing, it has been found that using Dante and AVB transports on the same Netgear GS724Tv4 switch successfully requires some modifications to the default switch configuration. If AVB and Dante are used on the same GS72T4v4 without this change, Dante audio will not be reliably transmitted on the network. Dropouts and complete loss of Dante audio will be the result.
NOTE: At this time using Dante and AVB on a network of more than one GS724Tv4 switches is not possible. If a multiple-switch Dante and AVB network is used, all Dante endpoints must be connected to the same switch. If the Dante endpoints must connect to multiple switches, then Netgear GS724Tv4 switches cannot be used unless AVB and Dante are separated onto different physical networks (eg - Dante on one set of switches, AVB on another set of switches). If you create a physically separated GS724v4 network for Dante, note that Dante does not require an AVB license key on the switches..
Note also that this applies only to the Netgear GS724Tv4 switch. This is not an issue when other AVB-compliant switches are used, so the following steps are not necessary.
This article describes the process of disabling 802.1AS support on switch ports to which Dante endpoints (including the Tesira DAN-1) are connected. This will resolve problems with the Dante transport on the switch.
Log on to Management Console
This switch hosts a web interface for configuration. The switch will take on a DHCP address if a DHCP server is present; else, it will take on a default IP address of 192.168.0.239. If DHCP is employed, the Smart Control Center application is used to discover the switch on the network (CDROM included in box with switch). Using either method, entering the IP address into a web browser will reveal the switch management console.
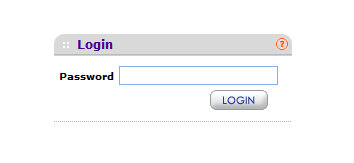
The default password is “password” (entered without quotes). Enter it and press the LOGIN button.
Navigate to 802.1AS Port Settings
When access to the management interface of the switch is granted, Click on the Switching tab. Click on 802.1AS, the last item in the switching menu bar. Finally, click on 802.1AS Port Settings in the top left of the resulting page.

Disable 802.1AS Support for all Dante devices
Select the ports with Dante-enabled devices attached by clicking on the boxes next to each port. All selected ports will be highlighted in the list.

Set the admin for the selected ports by choosing Admin Mode 'Disable' at the top of the Admin Mode column of the table. Click 'Apply' at the bottom right to make the changes permanent. This will allow Dante to flow freely to and from the selected ports.
NOTE: If the Biamp default configuration file loaded onto the switch after these settings are changed, the settings above will all be set to 'Enable'. 802.1AS support to any Dante ports will need to be disabled again using the procedure above after the default configuration file is sent.
Also, see our article on Enabling IGMP Snooping in the Dante VLAN.