Configuring IGMP Snooping on the Netgear GS724Tv4
This article explains how to implement IGMP snooping (on a VLAN) on a Netgear GS724Tv4 network switch for Dante.
IGMP Snooping can interfere with AVB device discovery and is not recommended for AVB networks.
Dante flows, by default, are always unicast. A Dante device sending the same audio to many receivers will create a separate flow for each, and it is possible for the transmitting device to simply run out of available flows. To solve this problem, a Dante device can be configured to transmit a multicast flow, which can be received by many devices simultaneously.
Multicast flows have their own limitations, however. A network switch will forward multicast traffic to every interface, regardless of whether or not it is relevant the connected device. While the load on the transmitting device is reduced, the load on the network and every other device is increased.
To avoid overburdening a link, or even the entire broadcast domain, IGMP Snooping can be implemented. IGMP snooping allows a switch to learn which of its ports are connected to the intended recipients of a Dante multicast flow, then remove the traffic from those ports where it is not wanted.
By selectively forwarding multicast traffic, the burden on every link of the network is reduced. When using multicast Dante flows, therefore, enabling IGMP snooping is recommended.
Important information
When using Dante on a Netgear AVB capable switch, the AVB timing protocol must be disabled on all ports connected to Dante devices. Please see this document for details.
Create Dante VLAN
The first step is to configure a VLAN on the switch for your Dante device. Please follow the steps in this document.
Log in to switch management console
The switch can be configured via its web interface. By default, the switch will request a DHCP IP address. If no DHCP server is present on the network, it will self-assign an IP address of 192.168.0.239. Netgear's Smart Control Center application can be used to discover the switch on a network, regardless of its IP address. The application can be downloaded from the Netgear website or installed from the CDROM included in the box.
Entering the switch's IP address into a web browser will open the management console. The first page is the password prompt.

The default password is “password” (entered without quotes). Enter it and press the LOGIN button. The first screen the switch will display is System Information.
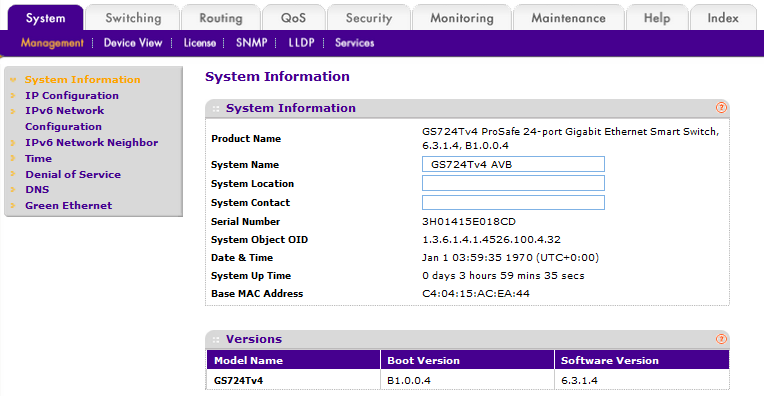
Figure 1 – Netgear GS724Tv4 System Information
Enable IGMP snooping on the switch
First select the Switching tab, then in the menu bar select Multicast. In the Multicast menu on the left select IGMP Snooping, which will open the IGMP Snooping Configuration page.
Select Enable as shown in the figure below

Figure 2 – Enabling IGMP Snooping on the switch
Click the APPLY button in the bottom right-hand corner of the screen to save the new configuration.
Enable IGMP Snooping on your Dante VLAN
In the IGMP Snooping menu on the left, select IGMP Snooping VLAN Configuration. In the VLAN ID field, enter the ID of your Dante VLAN (VLAN 11, in this example). Configure the remaining fields using the values shown in the figure below.
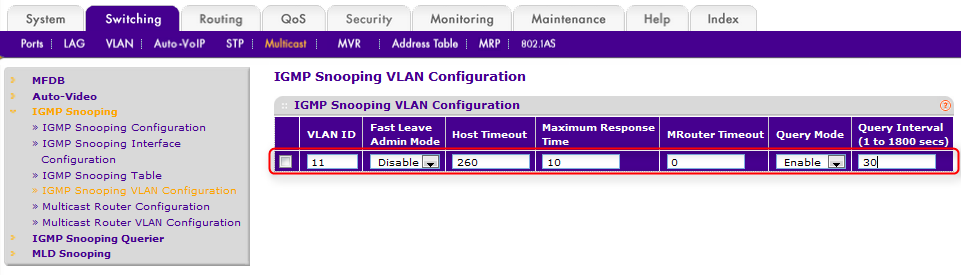
Figure 2 – Configuring IGMP Snooping on the Dante VLAN
Note: Query Mode is required only when working with multiple switches, but it can be safely enabled on a standalone switch.
Click the ADD button in the bottom right-hand corner of the screen, and the page should look like this:
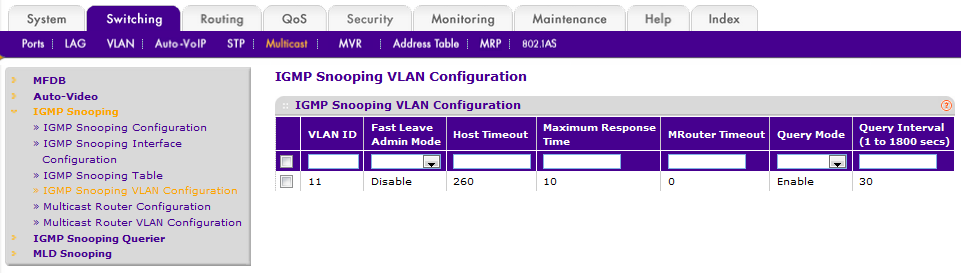
Figure 3 – IGMP Snooping configured on the Dante VLAN
IGMP snooping is now configured on your Dante VLAN. Multicast flows will no longer be forwarded to Dante devices which have not subscribed to them.
Summary
By placing all Dante devices on a dedicated VLAN, any multicast Dante traffic will already have been prevented from reaching non-Dante devices. Enabling IGMP snooping on the Dante VLAN takes this a step further, ensuring that multicast flows are sent only to those Dante devices which have been configured in Dante Controller to receive them. Overall network efficiency and Dante efficiency is increased.
Advanced - networks of two or more switches
Configure VLANs, including uplinks
First configure the Dante VLAN on all switches in the network. Configure the uplinks according to the steps in the advanced section.
Note: Because the VLAN is to be used with Dante, the uplink ports should be removed from the AVB VLAN.
Configure IGMP Snooping
Following the steps above, configure IGMP snooping on the Dante VLANs of all switches in the network.
For IGMP snooping to work on two or more switches, one switch needs to be the IGMP Snooping Querier for the whole network. It is possible to configure one switch to the querier, but is more robust to configure all switches as the potential querier - the switch with the highest configured IP address will automatically become the querier.
First select the Switching tab, then in the menu bar select Multicast. In the Multicast menu on the left select IGMP Snooping Querier, which will open the Querier Configuration page.
Select Enable then click the APPLY button in the bottom right-hand corner of the screen.
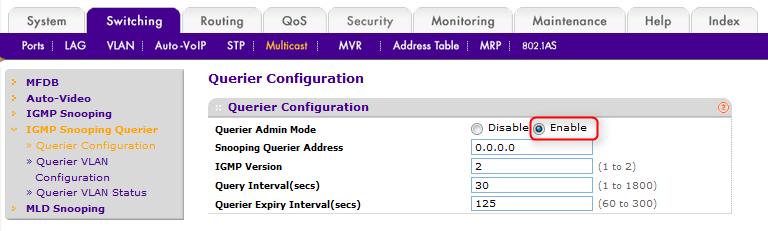
Figure 4 – Enable Querier Admin Mode
Next select Querier VLAN Configuration. Enter the number of the Dante VLAN, set Querier Election Participate Mode to Enable, then enter an IP addresses to be used for the VLAN's IGMP Querier communication. This should be a unique IP address on the VLAN.
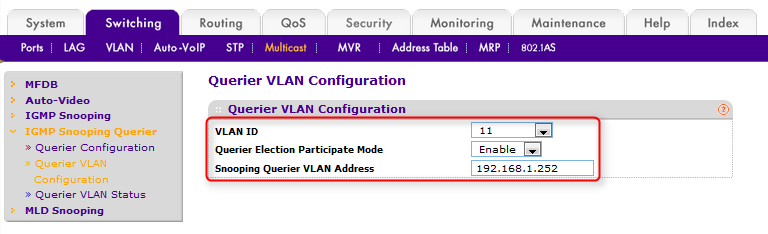
Figure 5 – Configure Querier on Dante VLAN
Click the APPLY button in the bottom right-hand corner of the screen.
IGMP snooping is now configured on the Dante VLAN of your multi-switch network.
Check IGMP Snooping Querier status
Once all switches have been configured, select Querier VLAN Status.
The switch with the highest IP address on the network should look like this, reporting that it is the Querier:
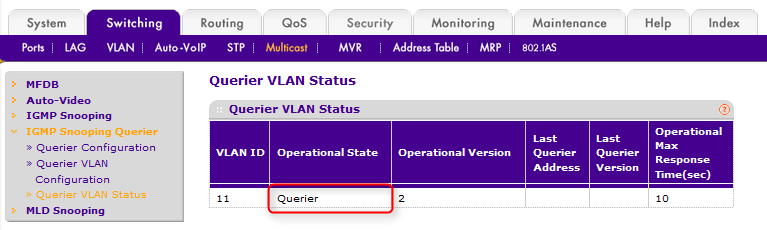
Figure 6 – Querier status
All other switches should look like this, reporting the status as "Non-Querier" and the IP address of the current Querier:
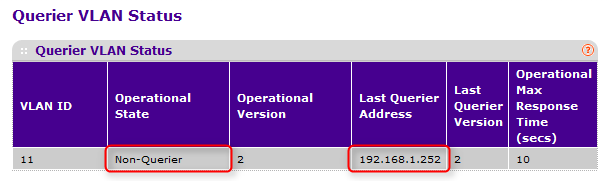
Figure 7 – Non-Querier status