Tesira Properties Export/Import
After completing this how-to you will have an understanding of the purpose for and process of exporting Tesira properties and importing them into Project Designer. Using this export feature reduces the chance of typographical errors by removing the need to manually transcribe the Instance Tag data.
Tesira Properties Export
Project Designer 1.36.0 now supports the export of controls from Tesira software. Tesira software 4.11 now has a ‘Project Designer Export’ field for each DSP block that allows you to include that block in the export.

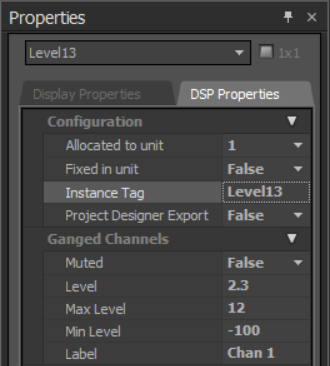
To start the export, navigate to the Tesira software design you want to control. To control a block, begin with the Instance Tag which is the handle for that particular DSP block. To find or set the Instance Tag, click on the block you want to control. In the Properties pane, select DSP Properties.
 \
\
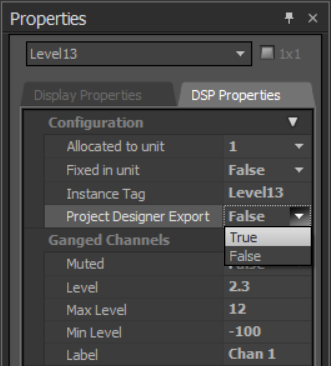
For this Instance Tag to appear in the export file, set Project Designer Export to True.
Select True for any blocks that are important for the control system. This allows for a curated list of controls for the designer and removes any guesswork about what to control.

Once all the relevant blocks have been tagged for export, navigate to the Object ID Inspector.

On the right-hand side of the Object ID Inspector dialog box, select the Export to Project Designer button. This launches a standard Save As dialog for naming the target and choosing a subdirectory.

Project Designer Import
Open Project Designer.

Click on the Tesira and hit the Edit button in the Properties for Tesira pane.
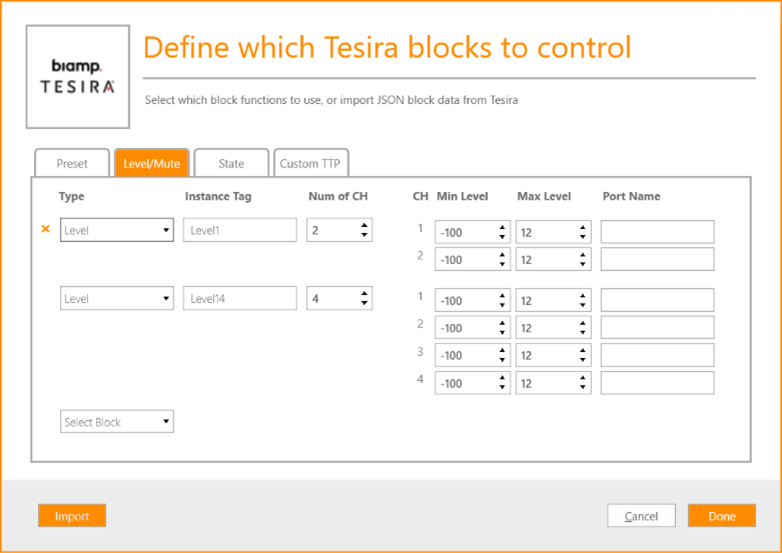
The Tesira dialog has an Import button for files made using Tesira software.

Click Import, then find and select the .json file created in the Tesira software. Once the file is imported, the Tesira configuration in Project Designer will be filled out.
Note: Project Designer only understands Presets, Levels and Mutes, and Logic States. Any blocks it does not understand are ignored, but will not cause errors when importing.

