Integrate Biamp control with UCC-Lenovo TSC - MTR
Lenovo Thinksmart Controllers along with any Microsoft Teams Room Controller (supporting installation of 3rd party software) can deploy Room Controls from their Biamp control devices via Microsoft Team Rooms (MTR) using Impera Tango and Project Designer version 1.35.0 or later.
Additionally, communication between the UC Compute and Biamp control devices requires the Biamp UC Connect application on the UC Compute. Biamp Controllers will need to be configured to control functionality. We recommend using the Project Designer MTR template file in Project Designer when doing so.
The Biamp UC Compute MTR room system must first run the Biamp MTR plug-in application on the MTR compute device via a single MSI installer package. The installer will place files in operating system (OS) standard locations (e.g., C:\Program Files) and will install all necessary prerequisites (e.g., .NET runtime).
Updates are handled by executing an installer with a newer plug-in version. The installer is compatible with IT device management platforms for remote deployment and updates.
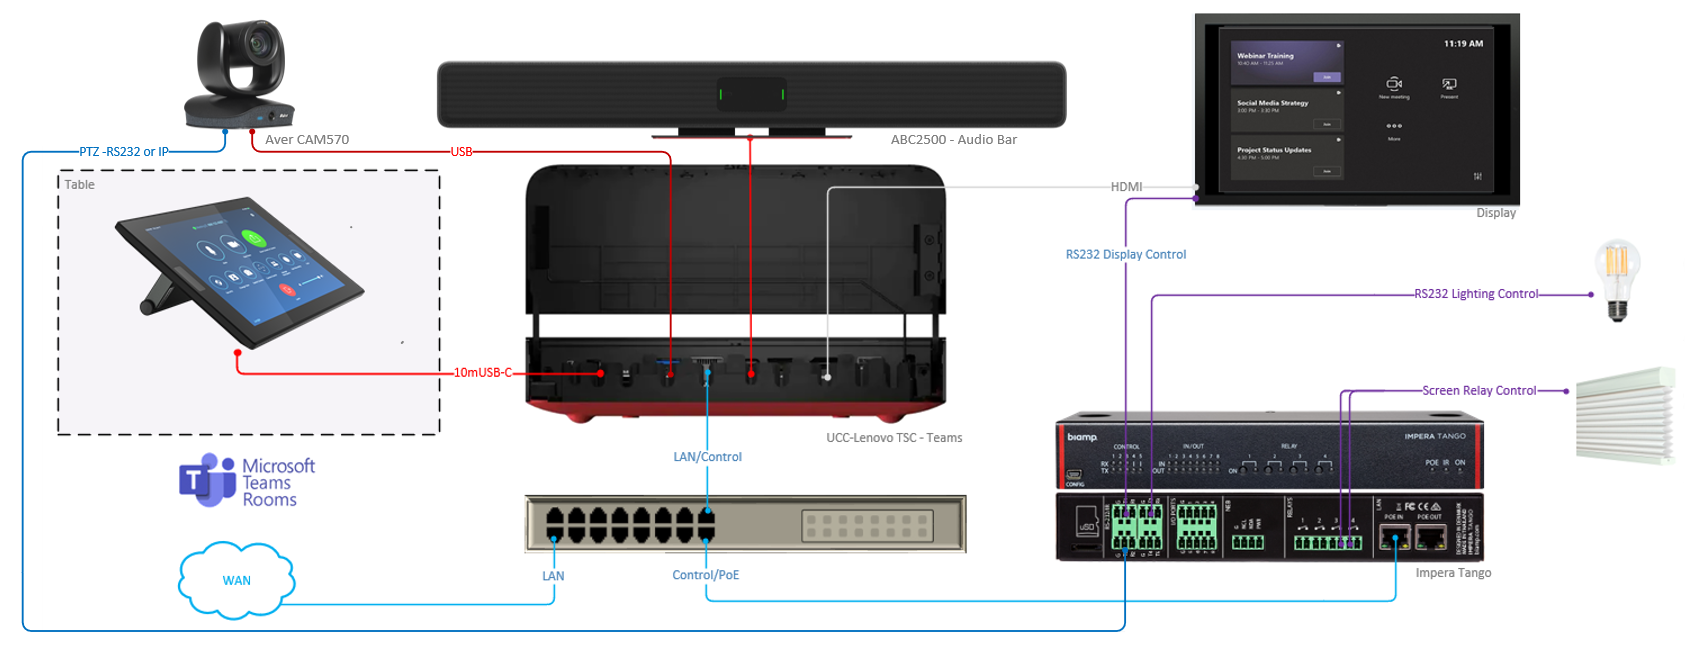
Sample Topology
Project Designer
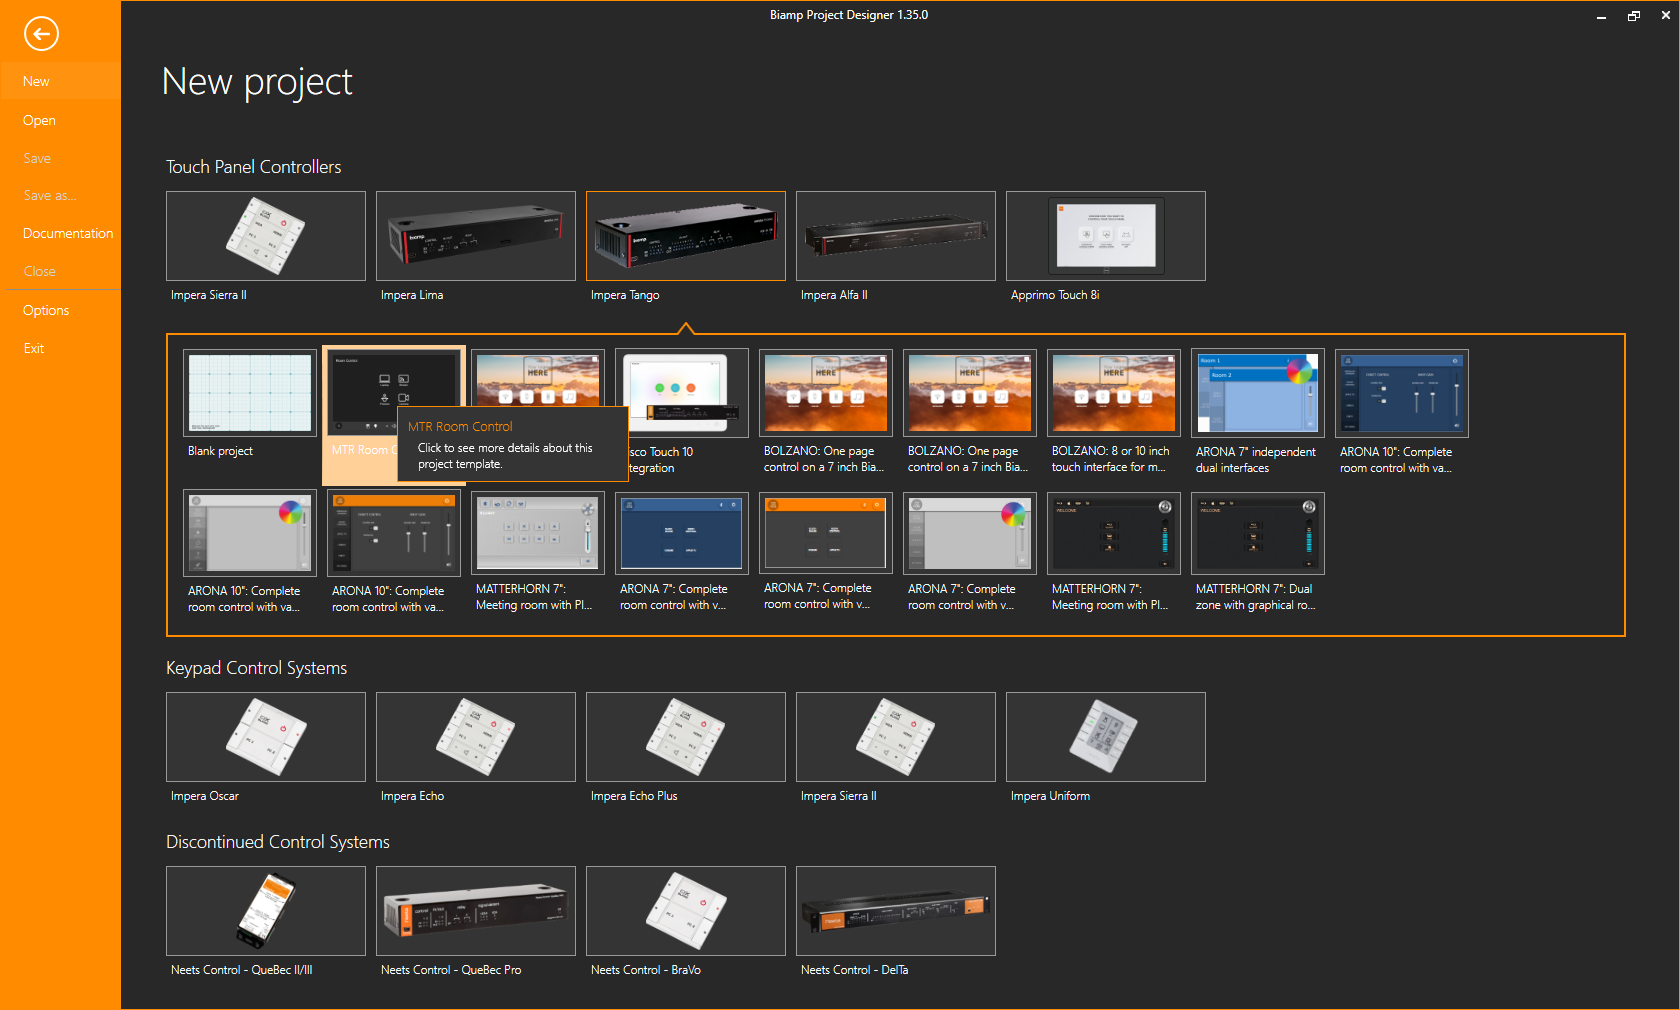
Open a new project in Biamp Project Designer, select the Impera Tango controller, and then choose the MTR Template.
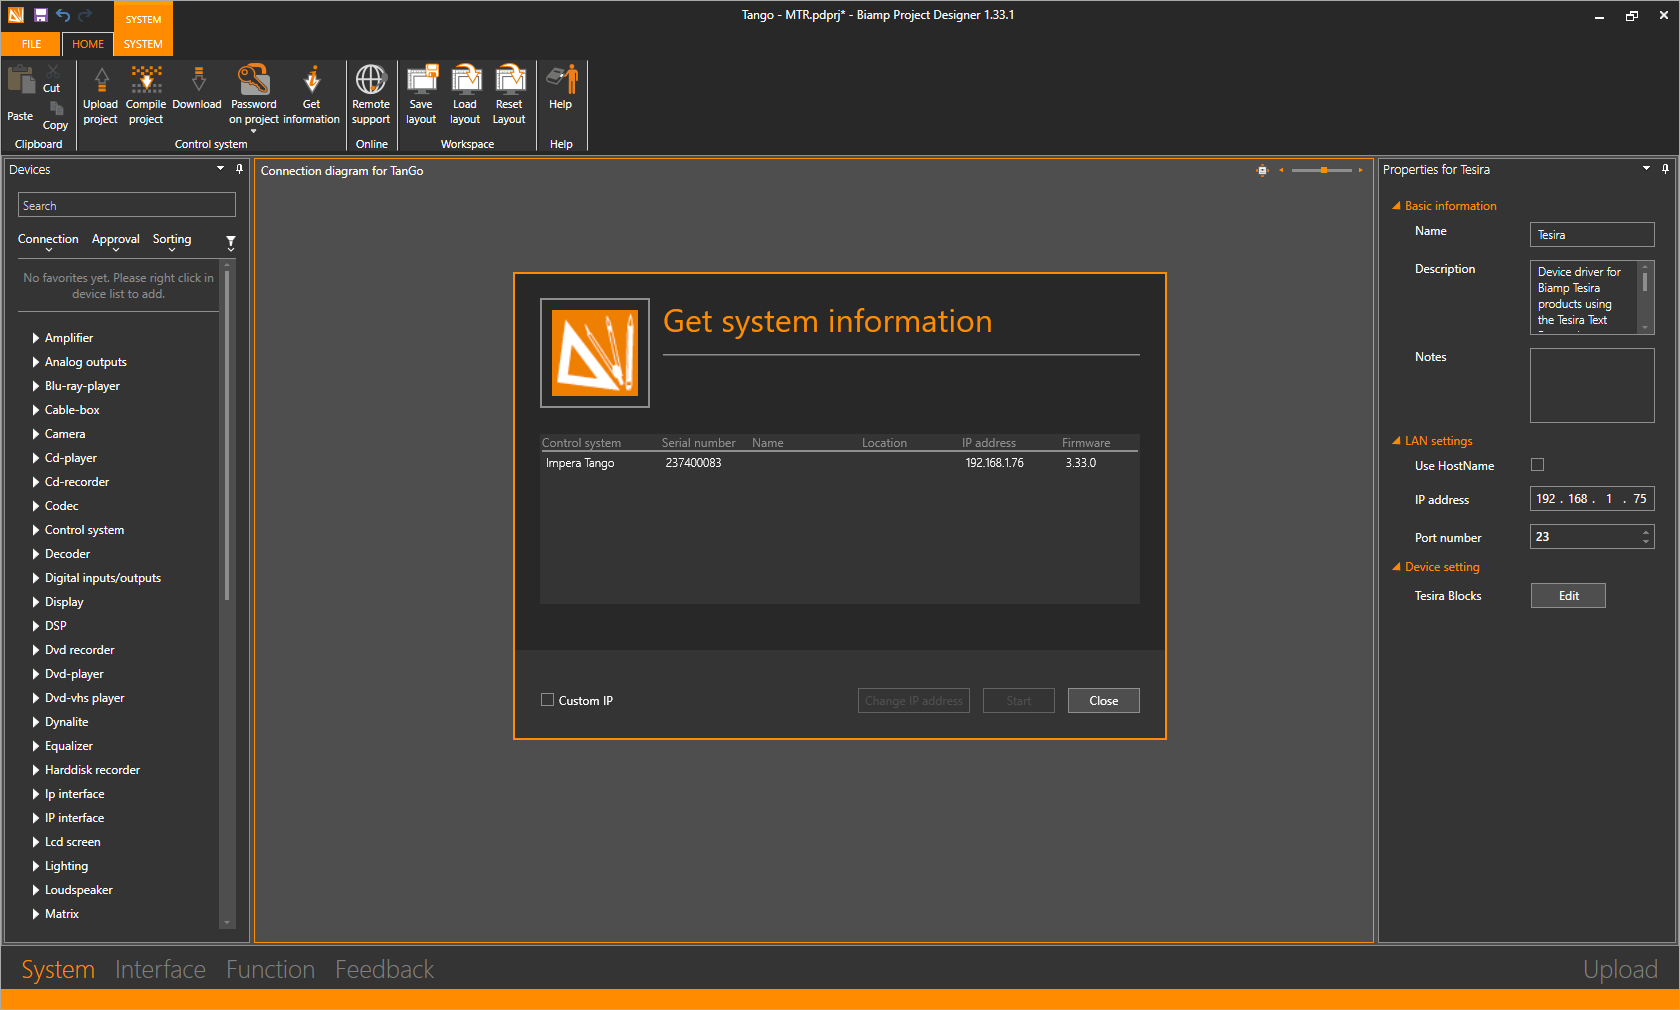
Set the controller IP address via the Properties section in the panel on the right.
Configure the project Room Control.

Upload the project to the control system.

MTR Plug-In Application
Out of Box Experience
After performing the Software Deployment Checklist, check that the Biamp UC compute runs Biamp UC Connect Application. The admin account username and password as well as the Microsoft Teams username and password are required.
NOTE: An external keyboard and mouse connected to the UC Compute is recommended in place of the on-screen keyboard and touch screen.
Plug-In installation
Start in the administrator account of the UC Compute.
If logged into the Teams account, go to settings in Teams and select settings. This will bring up a prompt to log in as the UC Compute Admin. Once login is complete, switch back to the admin account of the UC Compute to bring up the standard Windows environment.
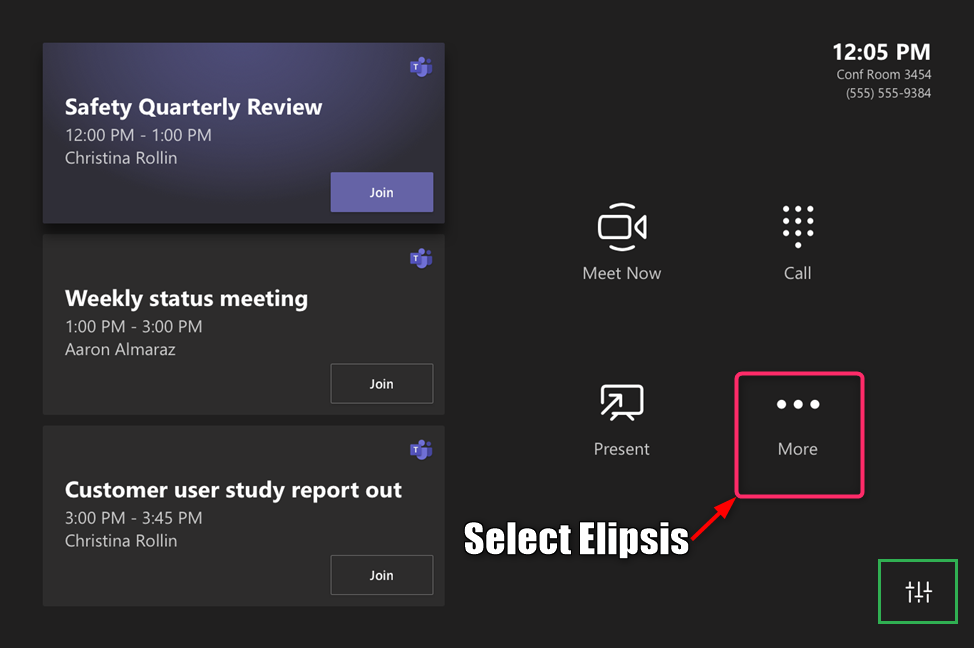
- On the UC interface home screen, select the ellipsis button (three horizontally aligned dots) on the right side of the page.
- On the menu that opens on the right, tap the "Settings" cog icon button.
- Enter the password created for the administrator account on the host PC.
- From here, you'll have access to the settings most relevant to conferencing like IP address and schedule management.
- The full range of Windows settings can be accessed from the "Windows Settings" Button at the bottom left of the screen.
NOTE: Determine if the UC Compute has an installed version of the Biamp UC Connect Application running. If it does, proceed to the Run the application and test connections section below.
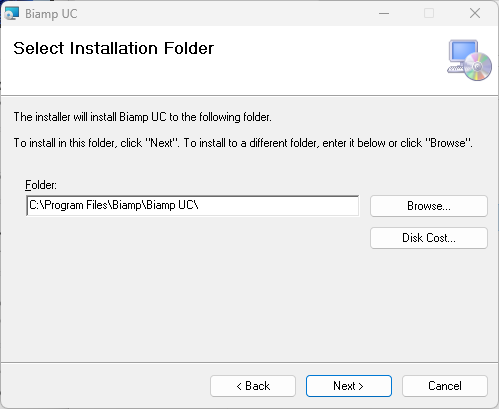
Use the Biamp UC Setup Wizard to begin the installation.
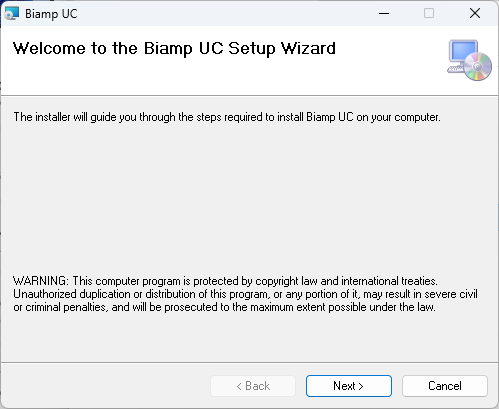
Select where to install the program. OS standard locations (e.g., C:\Program Files) will be selected by default
 .
.
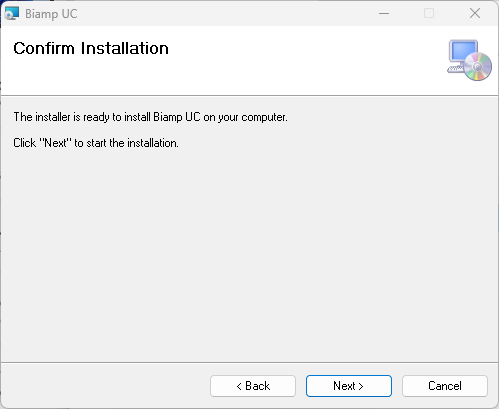
Begin the installation by clicking the Next button.
Run the application and test connections
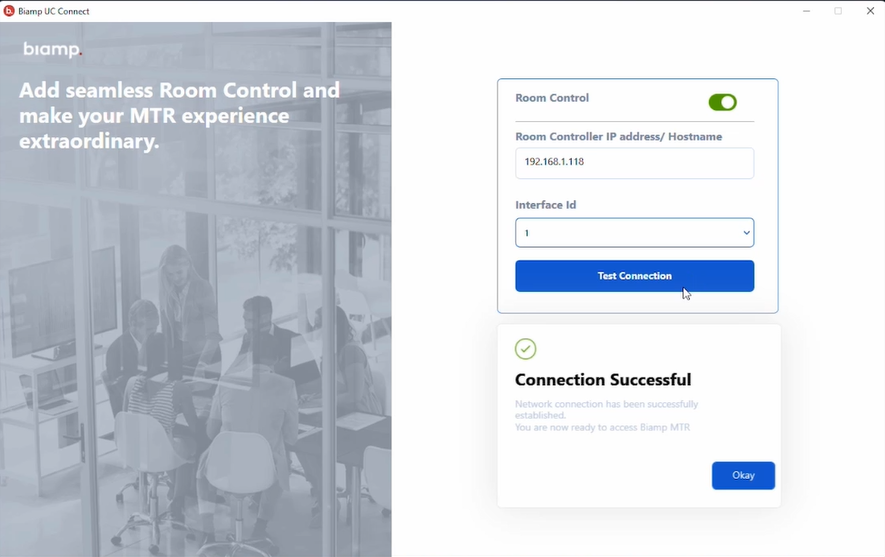
The operational details of the plug-in application are defined by a separate configuration application, Biamp UC Connect, that can be run from the local Administrator account of the MTR compute device. Options include the ability to enable or disable Room Control functionality, set the IP address/hostname of the target room controller, and the set of hosted control pages to display (Interface ID).
NOTE: If a successful connection is already established, proceed to the Verify functionality section below to confirm a controller is communicating with the touch panel.
Open the Biamp UC Connect.

Use the Room Control display to test the connection. Click the Okay button to proceed.
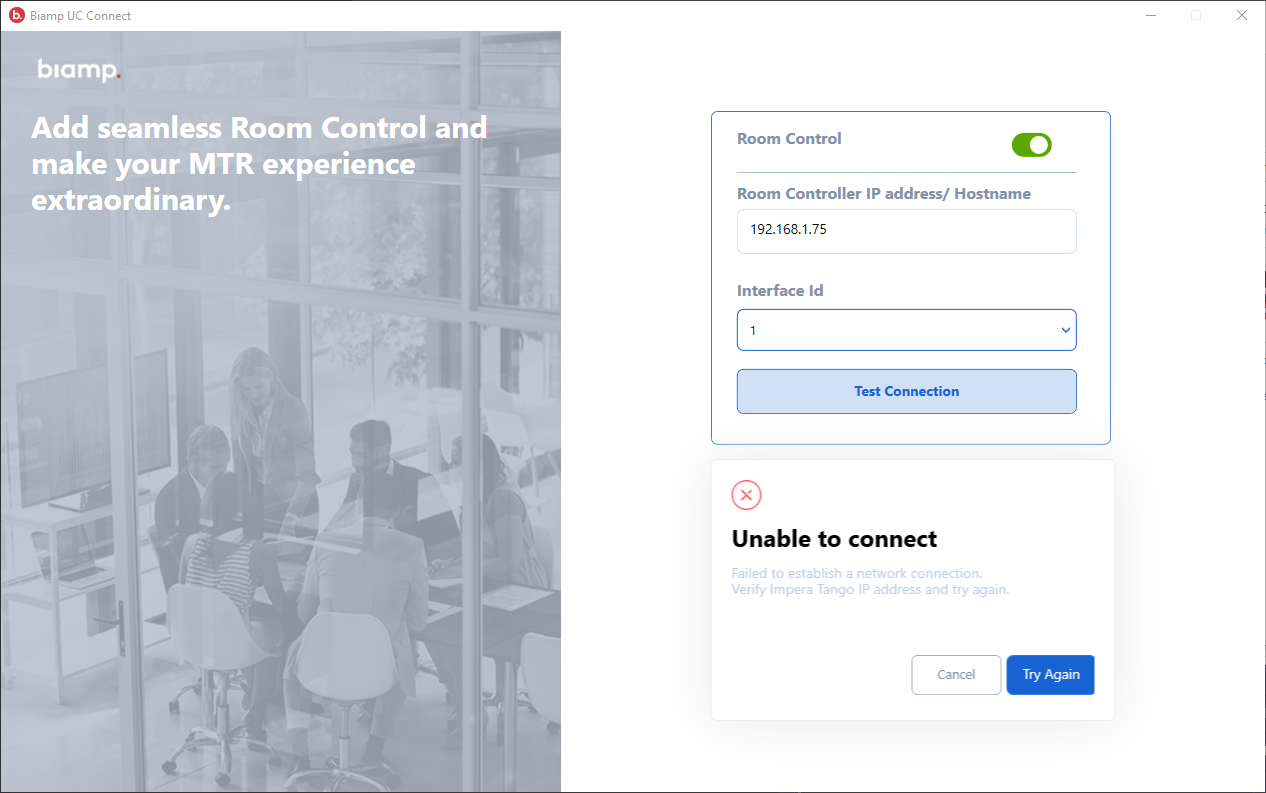
Connection test fails
If the connection fails, check the connections and IP address and try again.
Troubleshoot/Verify IP Addresses
Ping to and from the UC Compute as well as the controller on your network with the ping command prompt.
To ping using the Command Prompt, use the following steps:
- On the UC interface home screen, select the three-dot "More" ellipse button on the far right side of the page.
- From the menu that opens on the right, select the "Settings" cog icon button.
- Connect a keyboard to the system.
- Enter the password for the administrator account on the host PC.
- Open Command Prompt by pressing the Windows Key on the keyboard.
- Press the X key.
- Select Command Prompt (Admin) in the menu.
- Enter the following command replacing the x's with the IP address of the Biamp controller: ping xxx.xxx.xxx.xxx
- If not getting replies troubleshoot the network.
Test Functionality
Web GUI test
Once a project is configured, and a control interface design is in place, verify that everything is working as intended by accessing the web interface of the Impera Tango (connect using a web browser, and the IP address of the device).

Once functionality and the control interface design are established, connect to the Biamp UC Compute MTR system.
UC controller test
On the main screen, access the Biamp control interface of the Impera Tango using the settings button at the lower right corner.

A new Room Control entry is visible at the top menu bar. The control interface of the configured Tango is now accessible.

Summary
The above example highlights the easy integration between the two product families. Similar integrations may be made including the use of elements such as sub-pages, feedback, and more.

