Microsoft Skype for Business configuration for Tesira using the VoIP web interface
Biamp’s Tesira VoIP products allow Biamp Tesira digital signal processors to make and receive phone calls over a Voice-over-IP (VoIP) system that adheres to the Session Initiation Protocol (SIP) standard. Microsoft Skype for Business systems make use of an expanded version of SIP called MS-SIP or Microsoft SIP Extension. This document details the steps required to configure Biamp’s Tesira VoIP products to connect to a Microsoft Skype for Business (SFB) system.
Preliminary information
System support
The Tesira SVC-2 and TesiraFORTÉ endpoints have been tested against the following versions from Microsoft:
- Microsoft Lync 2010
- Microsoft Lync 2013
- Microsoft Skype for Business (SFB)
It should be noted that the screenshots used in this tech note were take from a SFB server. While older Lync versions use the same setup process the user interface layout may vary slightly.
Note: Office 365 implementations of Skype for Business are not supported by Tesira VoIP endpoints.
Microsoft license requirements
While full support for 3rd party endpoints is available in SFB out of the box, using these services requires you to purchase Microsoft license agreements for each line in use. The following is a list of Client Access Licenses (Cal's) that are required per line of a Tesira VoIP endpoint. Note that each Tesira VoIP endpoint can support up to two individual lines. Each line being used requires a set of the three licenses listed below:
- Standard User Cal
- A base license for all SFB clients
- Enterprise User Cal
- A license required for all VoIP endpoints
- Plus User Cal
- A license to access some advanced features of SFB.
There are no licenses required on the Tesira side of the exchange.
Microsoft configuration
First, we'll focus on setting up the Microsoft Skype for Business software.
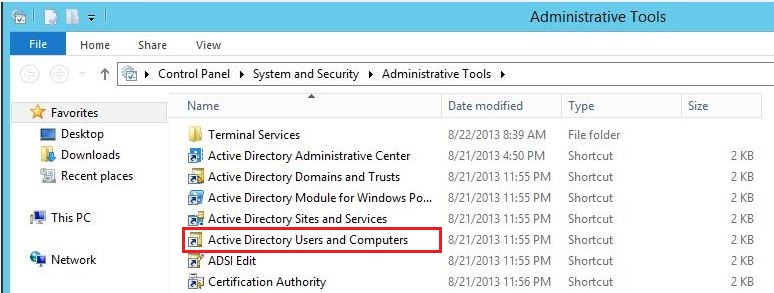
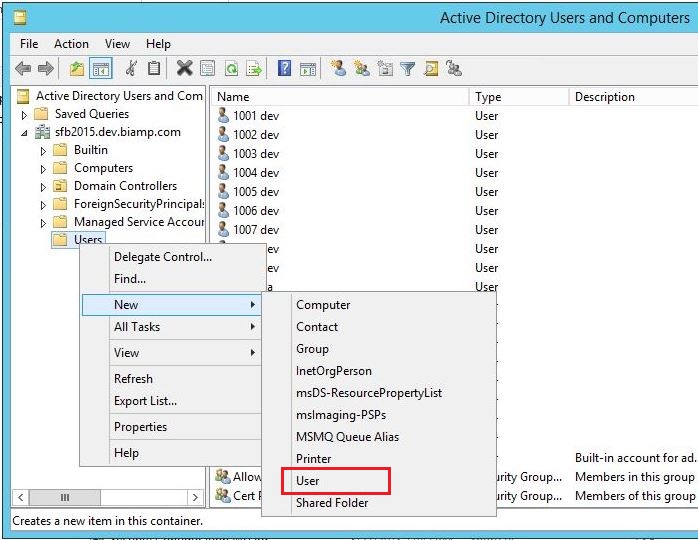
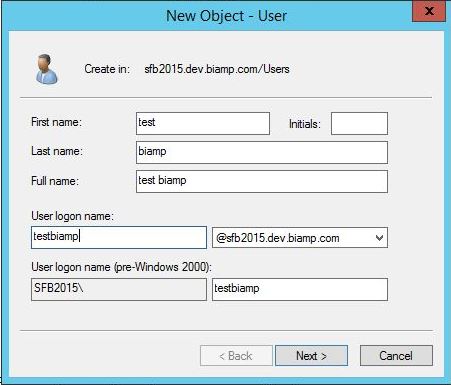
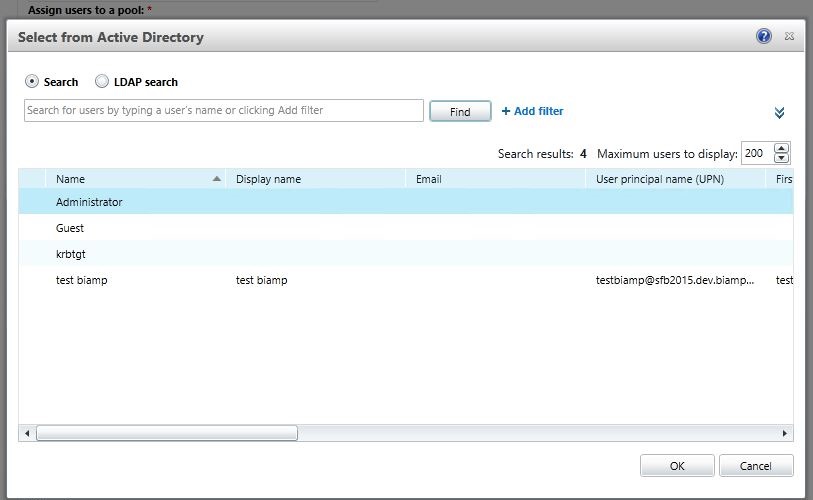
Active Directory settings

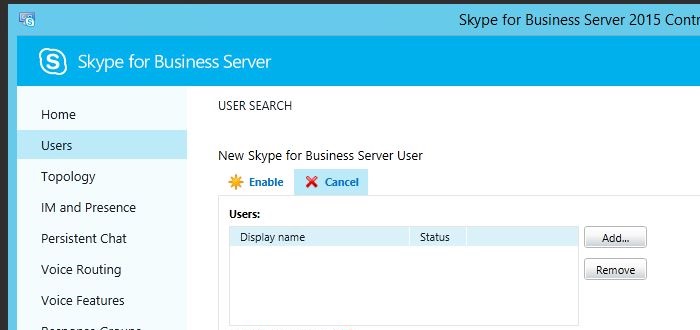
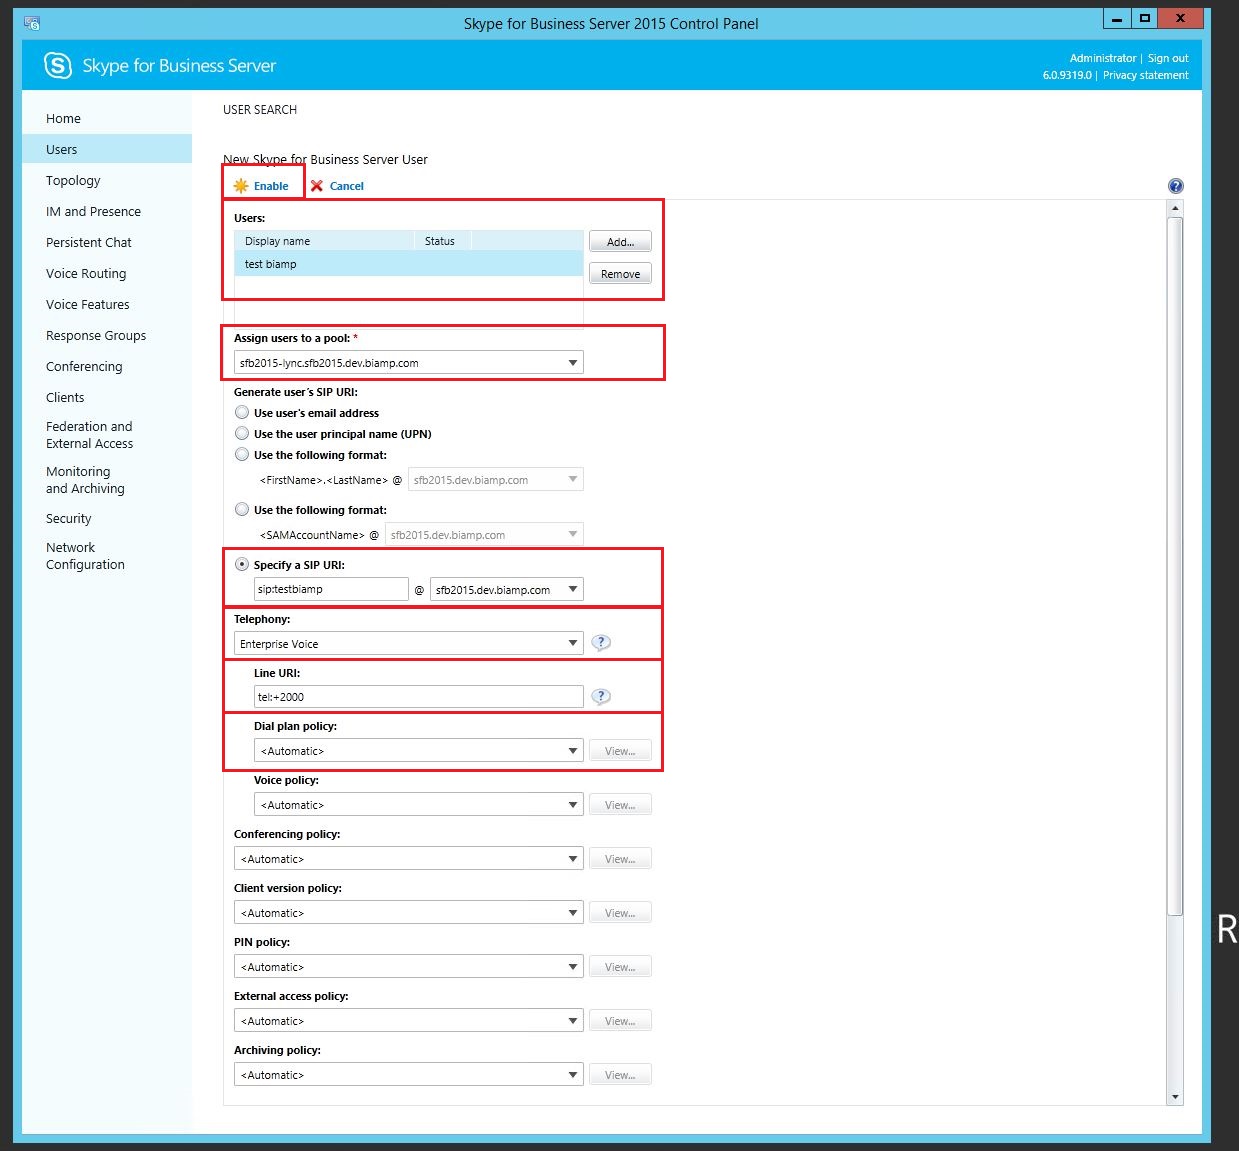
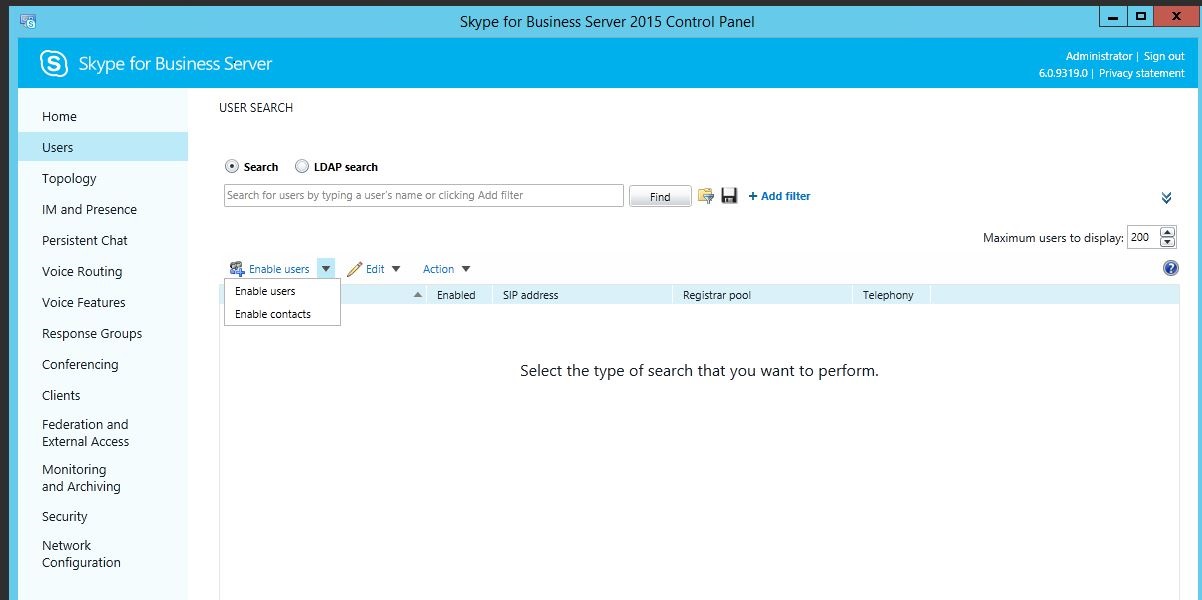
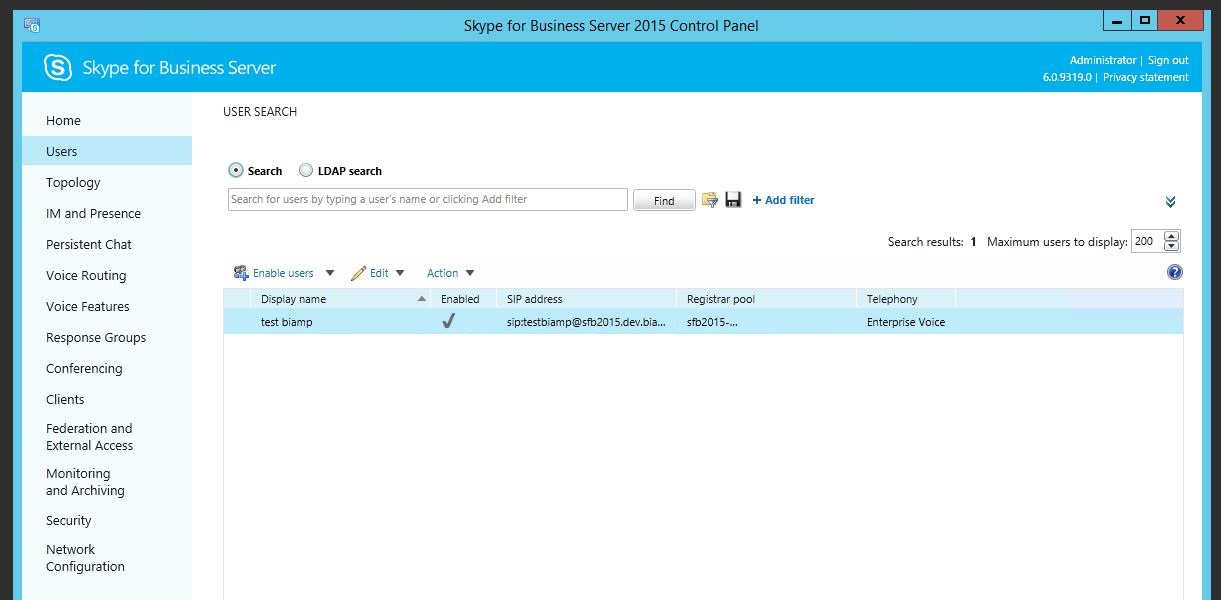
Skype for Business Server settings
|
|
|
 |
|
 |
|
 |
|
|
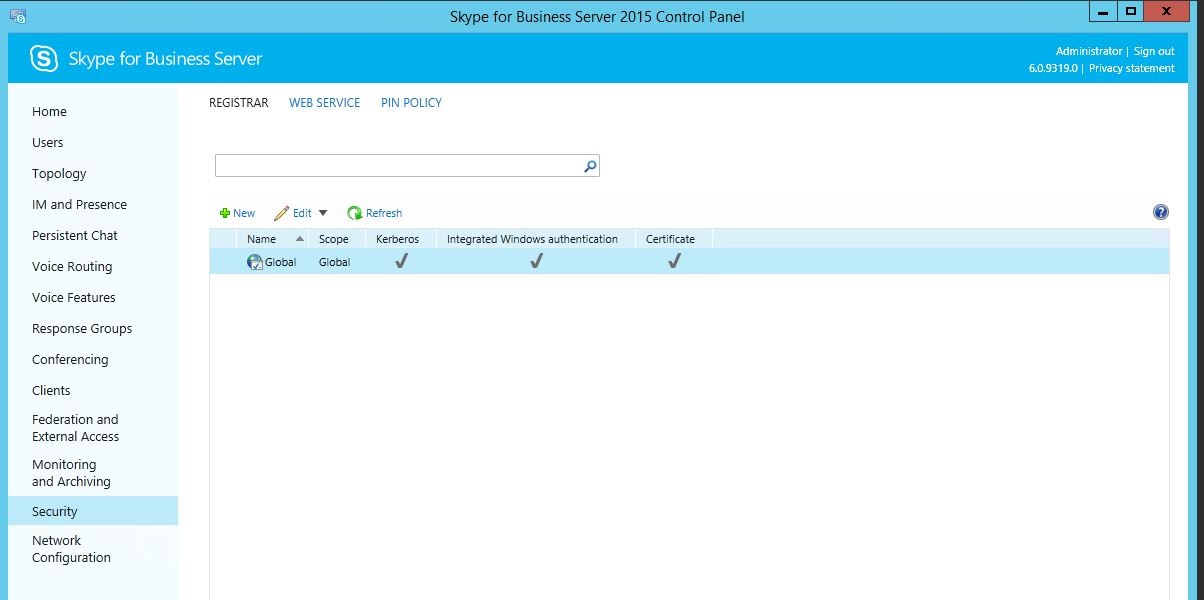
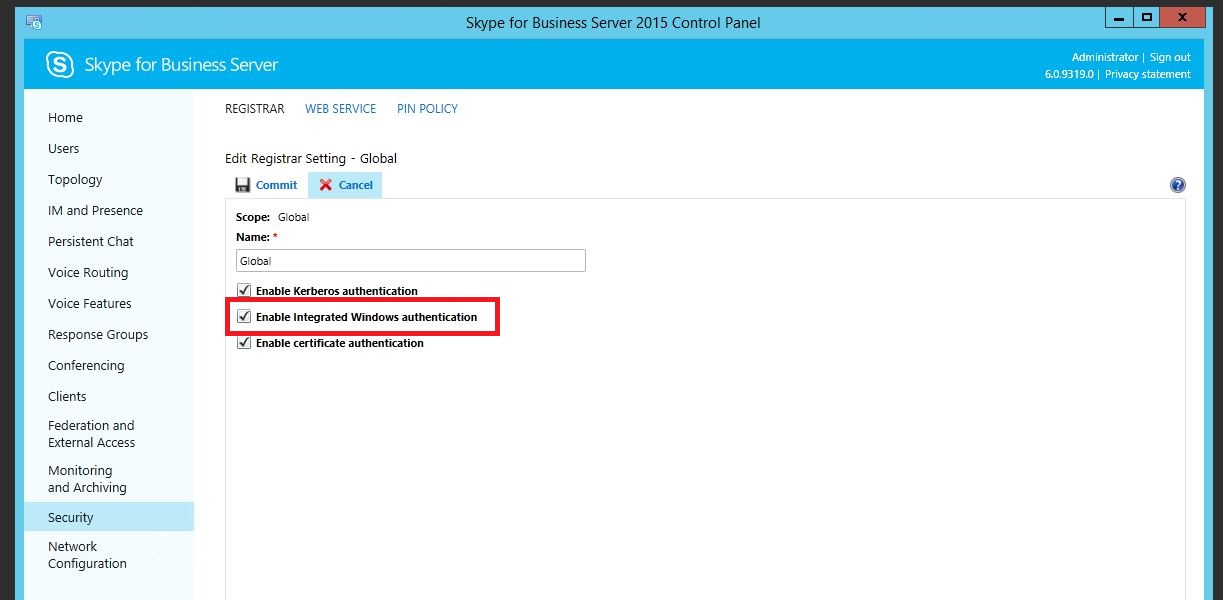
Security
SFB supports three different mechanisms for device authentication, however Tesira supports only one of these three. The following steps ensure that a mutually support service is enabled.
Note: In many circumstances the system may be set to only utilize the default "Global" security group. |
 |
|
 |
Tesira configuration
Next, we'll focus on setting up the Tesira configuration to match the settings that were used in SFB.
Accessing the VoIP web page
To access the VoIP web page, connect a computer to the VoIP network, open a web browser, and enter the IP address of the VoIP port. If successful, a login page will be displayed.
Default username: admin
Default password: admin
If you do not see a login screen ensure the following:
- The Tesira device must be running firmware version 3.8 or newer.
- The Tesira system must be running a configuration file that includes a VoIP block.
- This Tesira system must have either HTTP or HTTPS access enabled on the VoIP port, as described here.
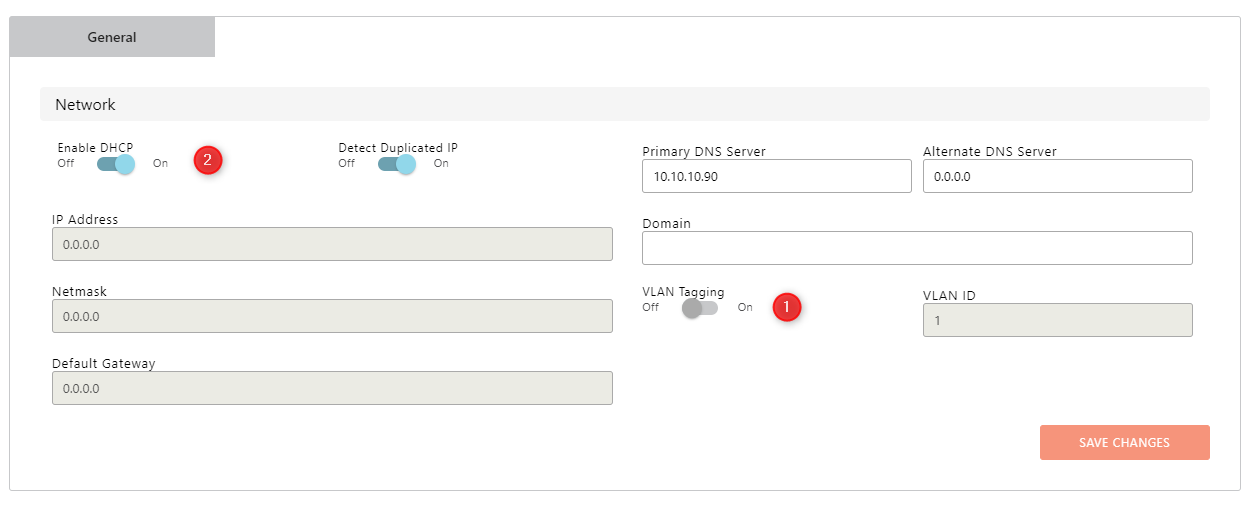
Network configuration
To access the optional advanced network features, click the "Switch to Advanced" button. |
 |
|
|

Note: TCP is a supported alternative to TLS in SFB, but it must be manually enabled. If registration issues occur between SFB and Tesira, temporarily configuring the system in TCP mode would allow a Wireshark trace to capture unencrypted data for troubleshooting. Additional troubleshooting can be done by downloading the Logs and saving them in the default .uccapilog format. These logs can be sent to Biamp Technical Support for review.
Protocol information
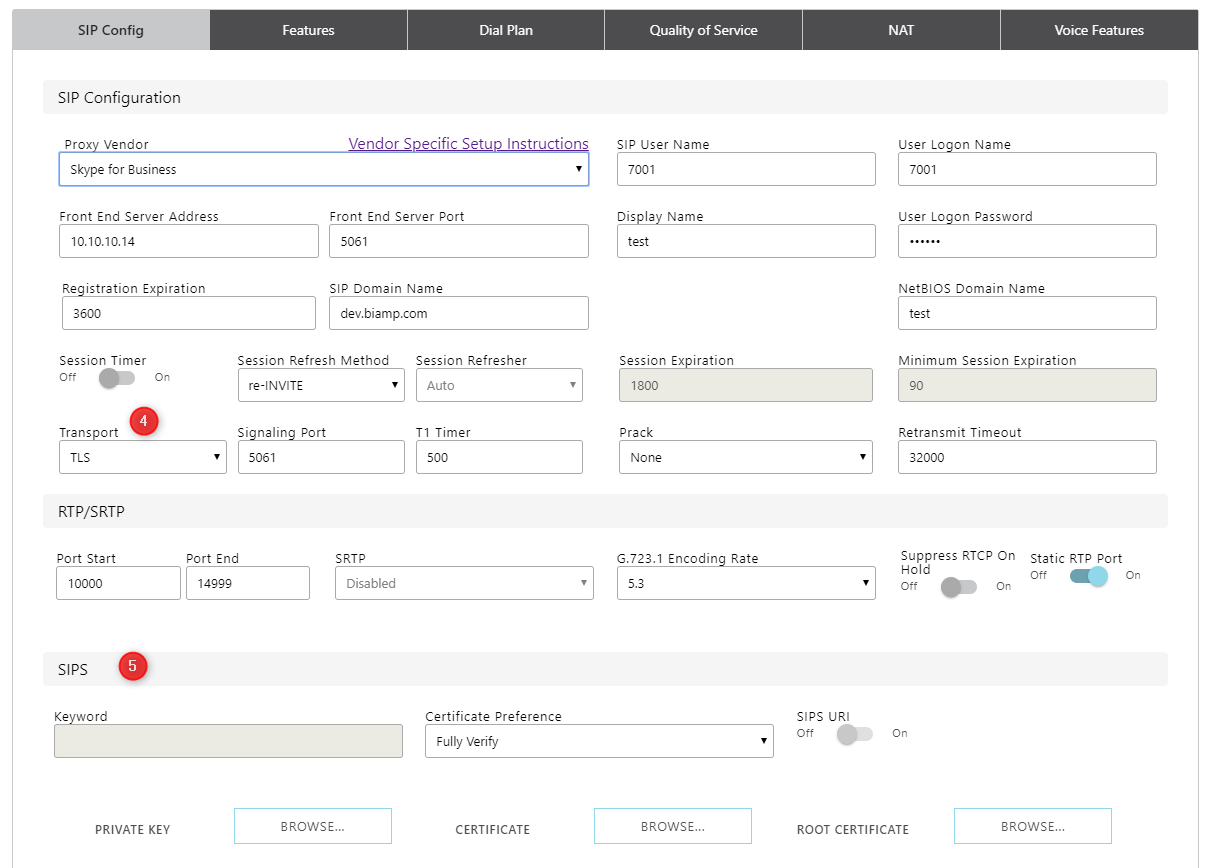
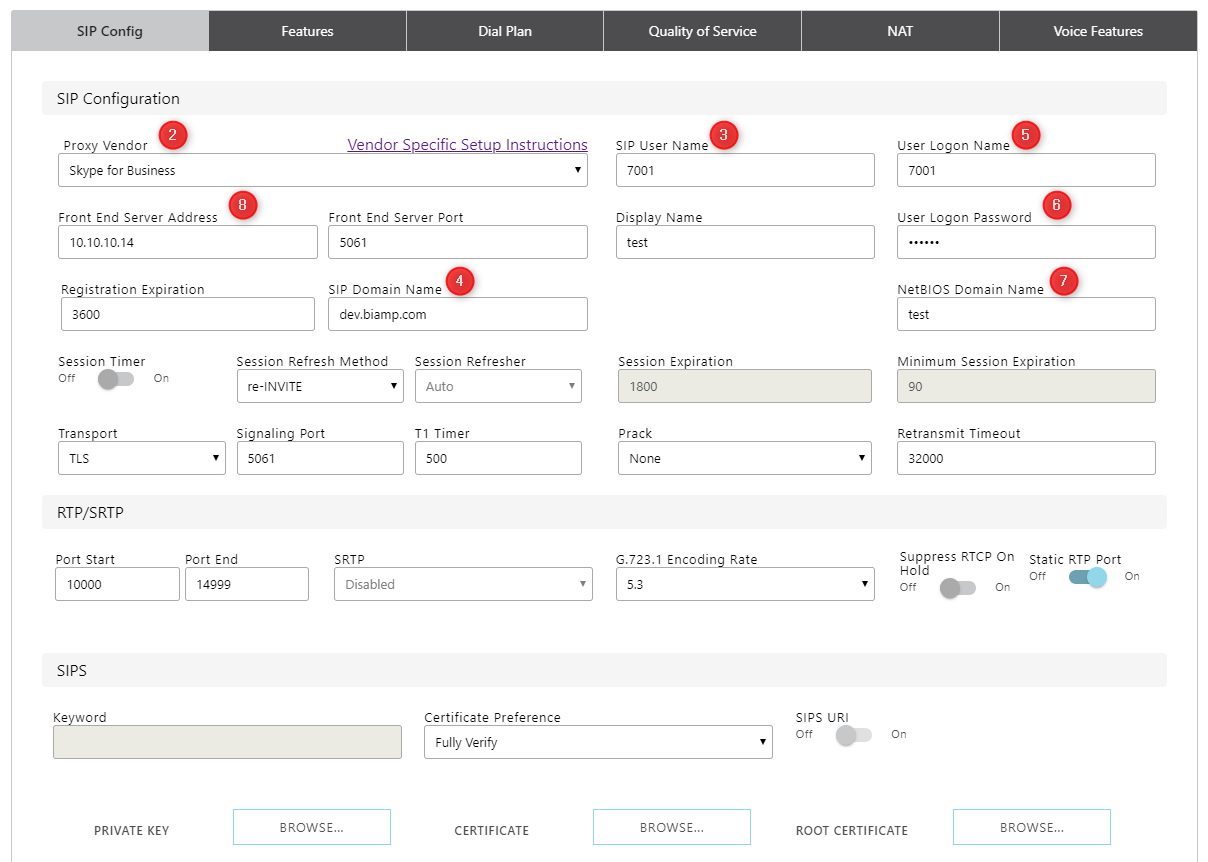 Select your line, Line 1 Setup and Line 2 Setup are on the left of the page
- Set Proxy Vendor to Skype for Business
- In the SIP User Name field, enter the SIP User Name portion of the SIP URI created in SFB User Dialog page.
- In the SIP Domain field enter the Domain portion of the SIP URI used in the SFB User Dialog page. Note that the @ symbol does not need to be entered.
- Enter the "User Log In Name (Pre Windows 2000)" created in the Active Directory User Page. (Note that this field must be 20 characters or less. This is a Windows limitation.)
- In the User Logon Password field enter the Password used in the Active Directory Password Page .
- In the NetBIOS field, enter the NetBios Domain located in the Active Directory User Page (the field is located to the left of the "User logon name (pre-Windows 2000)" field). Note that the "\" (backslash) symbol should be omitted from the Tesira configuration.
- Enter the Front End Address for the SFB server. There are two methods that can be used to set the Proxy Address:

|
|
The Tesira device will try each method in order and the first to receive a response will be used. Note that in order to make use of these settings the Front End Server Port must be set to 0. |
 |

- If you are configuring a second line, switch to "Line 2 Setup" and repeat steps 2-8
- All other settings can remain at their default values in most cases.
- Once all settings have been added, save the changes by clicking "Save Changes".
- To send the changes to the Tesira VoIP interface, click "Apply Saved Changes". This will send the new settings to the VoIP interface. The VoIP interface will then briefly reboot, and start working based on the new settings.