Cleaning air filters on AudiaFUSION
This article explains how to access and clean air filters on an AudiaFUSION.
Failure to clean or replace the filters regularly may result in premature failure of the unit due to overheating. Time between cleanings will vary based on the operating environment of the AudiaFUSION.
Filters can easily be serviced while the AudiaFUSION is mounted in a rack.
Required tools
The following items are required to clean the air filter:
- T-20 Torx screwdriver
- #2 Phillips screwdriver
- Vacuum cleaner or compressed air can
- If replacing the filter, order a replacement filter from Biamp (part number 446.0005.90C).
Step by step
- Unplug power to the Fusion.
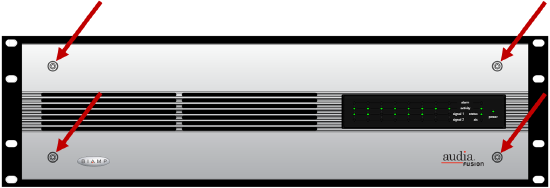
- Remove the four T-20 Torx screws securing the aluminum fascia on the Fusion, and remove the fascia.
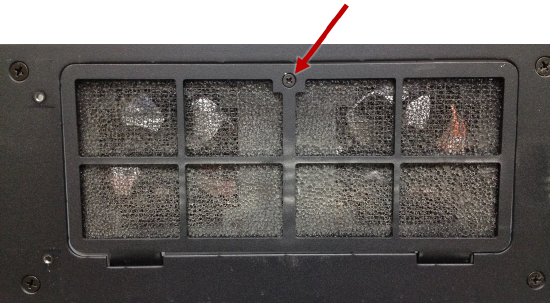
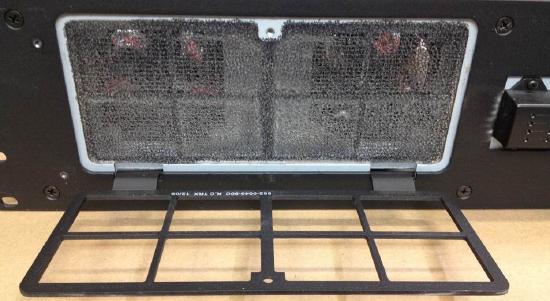
- Next, locate and remove the single #2 Phillips head screw securing the filter cover. The cover swings down allowing access to the filter element.
- Remove the filter element. The filter element can be cleaned with a vacuum cleaner with brush attachment, blown clean using compressed air, and/or hand rinsed in clean water. If cleaning with water, the filter must be dried thoroughly before being reinstalled in the Fusion. Failure to dry the filter completely before reassembly may result in shorting out the Fusion and poses an electrocution hazard to the technician.
- Reverse the steps above and replace the filter element and the five screws that you removed earlier.

Remove four T-20 Torx screws.

Remove one #2 Phillips screw.

Open the hatch and gently remove the thin foam filter.
