How to Import a Custom Certificate
Overview
Each Impera and Apprimo controller comes with an infinite self-signed certificate. You can replace this with a custom certificate using the following procedure.
Requirements
- You will need the IP address of the controller for this procedure. You can look up the device's IP address in Project Designer.
- You will need the serial number of your device, which can typically be found on a device information sticker on the device.
- A certificate in the following formats: PKCS#13.pfx or PKCS#13.p12.
- Certificate files of other types or malformed certificates will be rejected by the controller.
Procedure
1. Open a web browser on a machine connected to the controller.
2. Navigate to the following address, inserting your controller's ip address in place of the {IP} and serial number in place of {serial number}:
- https://{ip}/cert_import_{serial_number}.html
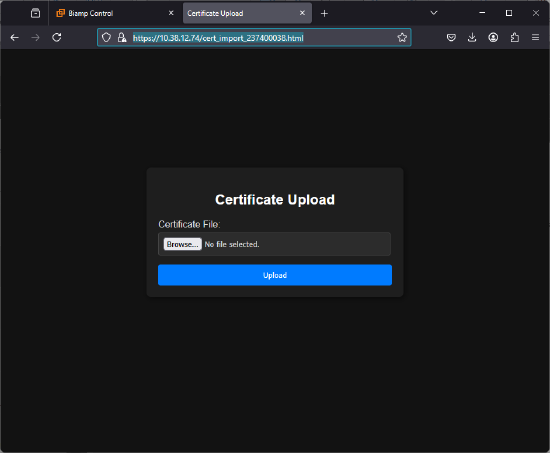
- For example, if your device's IP address is 10.38.12.74 and the serial number SN 11121314151617, you would enter: https://10.38.12.74/cert_import_11121314151617.html
Successfully connecting will bring up the device's Certificate Upload page.
3. Use the browse function to find the replacement certificate on your computer and upload it.
- Expiration or revocation will not be checked for.
- As mentioned in the requirements, unsupported certificate file formats and malformed certificates will be rejected.
A successful upload replaces the onboard Web UI's self-generated self-signed certificate.

