How to expand a control system
In this article you will find out how to expand a Biamp Impera Controller using different types of hardware.
Introduction
A Biamp controller is capable of being expanded in an easy way either via its RS232 port or via the network port located on the back of our controllers. You can connect a peripheral directly to the controller or through a network switch. By using Biamp Extensions it gives you the ports available on the back of the hardware, such as RS232 ports, I/O's for screens and lifts, but also the extra LAN ports are available to control third party hardware (only via LAN extension).
The great thing about using one of the compatible Biamp products to expand the system, compared to third party devices, is that the Biamp devices doesn't take up any of the available network units as shown below on an Impera Uniform connected to another Uniform. Another advantage is that Biamp extension devices needs very little setting up, you only need two things actually; enter the serial number of the extension (LAN only) and make sure it has the correct firmware.
You can connect up to 8 Biamp Extension devices in any configuration you need.

When connected to a network the main controller will auto discover the extensions in the project file based on the serial numbers you have entered.
Biamp Extension devices
The below devices are available to use as expansion for a network capable controller.
Impera Controllers
- Oscar (Neets Legacy)
- Echo Plus
- Sierra II
- Lima (Neets Legacy)
- Tango
- Alfa II
- Delta (Neets legacy)
- Touch 8i
Impera Expansions
- Connect-X MP6
Switching Relays
- Switching Relay 4
- Switching Relay 8
Amplifiers/Preamplifiers
- AMP-D225H
- PM4100
It is only the switching relays and the amplifiers which can be used to expand on the RS232 port an only one device can be connected, that is why LAN expansion is preferred.
In order to use keypads, touch panel controllers and Connect-X as expansion you will need to do it with the LAN connection.
How to setup Controllers as extension
In order to use a Biamp Impera Controller as extension you will need to upload an empty project to the controller, this is to ensure that the controller is cleared for any configuration and to make sure the extension holds the same firmware version as the main controller.
The procedure is to open a new project with the controller you have chosen as extension (2) and then select a blank project. Now press upload or F5 to send the project file to the extension.
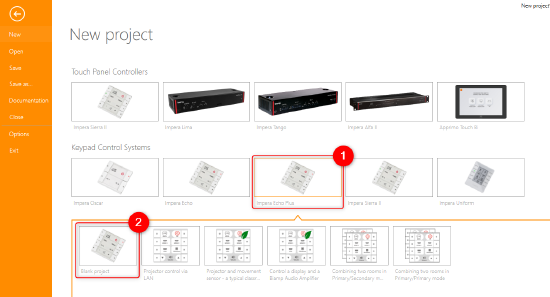
An exclusion is when you are using a Biamp Impera Uniform, because here you need to select the project template called "Extension Unit". But else than that, it is the same procedure, just upload to the controller.

If you wish, you can set the IP address for the extension, but in most cases it is not needed.
How to setup Connect-X MP6 as an extension
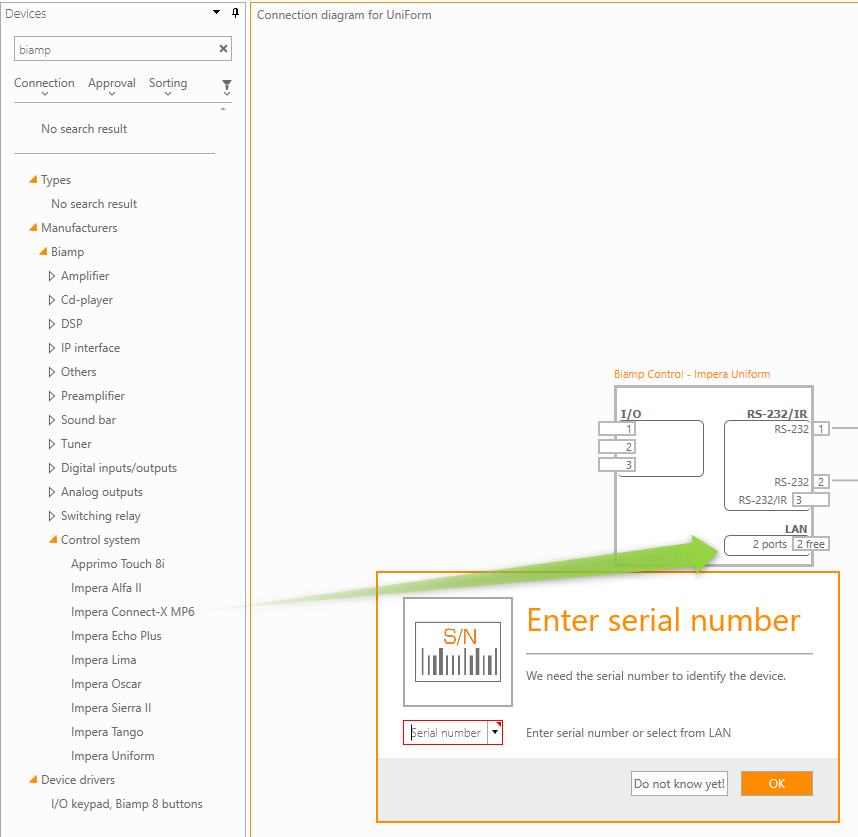
The controller will use multi-cast discovery to find the Connect-X by SN once on the network. If the SN is unknown, it can be entered at a later time.
How to setup a switching relay as extension
Biamps networked switching relays can also be used as an extension and gives you the extra IO's and RS232 to connect even more hardware to your setup. Of course the relays are available for controlling as well, for direct control of screens, lifts or lights perhaps.
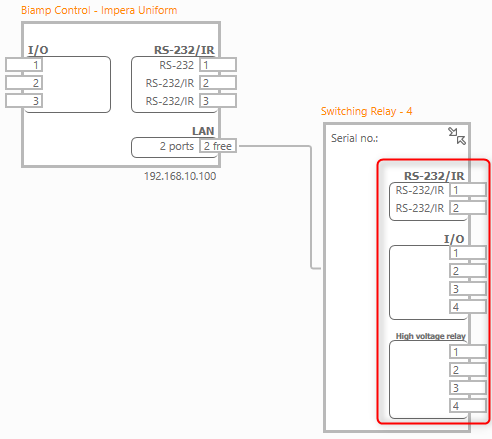
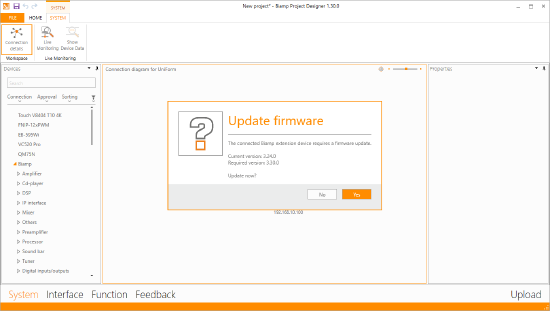
In order to ensure the switching relay has the same firmware as the controller, you simply connect the relay with a USB cable while Biamp Project Designer is running and you will get a pop up as shown below and you then accept to upgrade the firmware.
How to setup an amplifier/preamplifier as extension
Biamps networked amplifier (AMP-D225H) and preamplifier (PM4100) can also be used as an extension and gives you the extra IO's and RS232 to connect even more hardware to your setup.
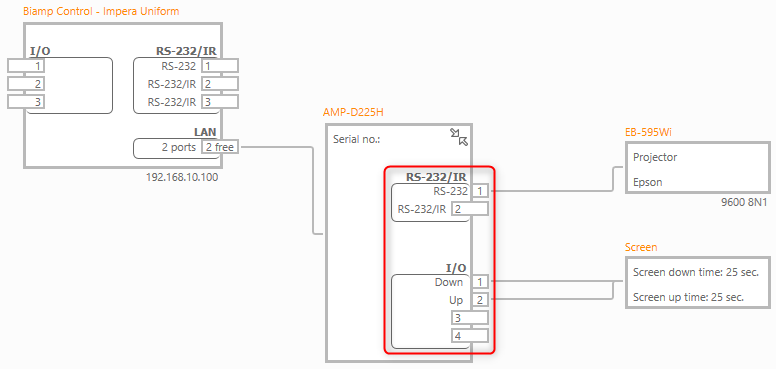
In order to ensure the switching relay has the same firmware as the controller, you simply connect the relay with a USB cable while Biamp Project Designer is running and you will get a pop up as shown below and you then accept to upgrade the firmware.

Limitations
When you connect two or more Touch Panel Controllers together, you will still only have one controller running UI, and the maximum amount of connected touch panels is still 5 and still only 5 individual interface ID's.
