Workplace Command: Interface and Controls
This article describes the Workplace Command interface and provides a list of compatible blocks and their typical functionality. The displayed controls mimic the blocks available in Tesira software, but control is limited to changing values, states, or switching between pre-configured options.
Block configuration requirement
Configuration of the blocks (presets, channels, sources, meters, etc) must be done in Tesira software. The Tesira device must have firmware v5.4.0 (or greater) for Command capability. The descriptions below show typical examples and indicate what properties can be changed or controlled within the Command interface. Full descriptions of the blocks and more information about Tesira Software can be found in the Tesira help file.
Refer to the Getting Started article for basic information about working with Workplace Command.
Accessing the Command app
On the organization's admin console in the Biamp Workplace admin portal:
1. Click on the Apps icon in the navigation ribbon on the left side of the console.
2. Select the Command App in the open Apps tab.
- Workplace Command will launch in a new browser tab.
3. Select a device, then select the applicable blocks to control.
Notes:
- An error message will appear if the device is not yet supported, or if the firmware needs to be updated.
- Once the user is signed into Workplace, they can navigate directly to command.workplace.biamp.app to initiate the Command screen. The device picker will appear for the Organization. The device address can also be bookmarked and the user can access it directly
App interface
The Command window has 2 sections,
-
The sidebar
-
The canvas.
Sidebar
The Sidebar shows all the available Tesira DSP blocks grouped by type. The sidebar can be hidden/shown by pressing the sidebar icon in the upper right of the sidebar. There is also a Search feature that will return group or element names matching the search term.

Canvas
The Canvas is the main window that contains the Command block elements as they are selected from the sidebar. The blocks fill the canvas from left to right in the order they were selected, and then will wrap down and add additional lines as necessary. The blocks can be deselected from the sidebar or closed by clicking the 'x' in the upper right corner of the block. Currently, there isn't a way to deselect all blocks at once.
- Layout presistance: The block layout is preserved from session to session for a given user when accessing Workplace Command from the same browser. A different user accessing that device will need to select the blocks they want to view or control at the start of their session.

There are 2 icons in the lower right of the canvas that will allow you to toggle Autofit or Fit-to-View [Ctrl+0 or CMD+0 in macOS]. These control how the selected blocks appear on the canvas. The canvas is also responsive to input device and keyboard navigation.
![]()
Duplicating the browser window and showing them side by side will allow a magnified view of a specific block while still seeing the effect of any changes on a larger set of blocks.
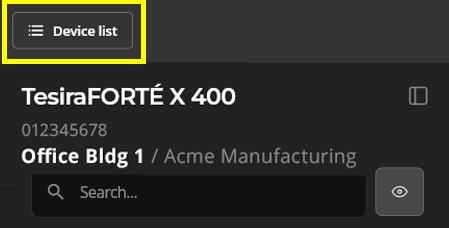
Switching Devices
To access a different device, click the Device list button at the top left of the screen to bring up the "Swap device" window. The Swap device window presents a list of available devices in your Organization and will indicate if any have reported faults or warnings. Select a device to open it in Command. Remember that when selecting a Tesira device, it will report Tesira DSP blocks for all Workhorse registered devices in the Tesira system.

Blocks
Workplace Command can only access Workplace-registered Tesira devices running a configuration created using Tesira software v5.4.0+. Available blocks are grouped by type and listed alphabetically. Typical examples of the block elements are shown below.
Command String
Provides access to a configured Command String Tesira DSP block. The Tesira Command String block can be configured to interact with any device which presents a Serial Control port or IP Network interface. Refer to additional information in the Tesira Software Help file here.

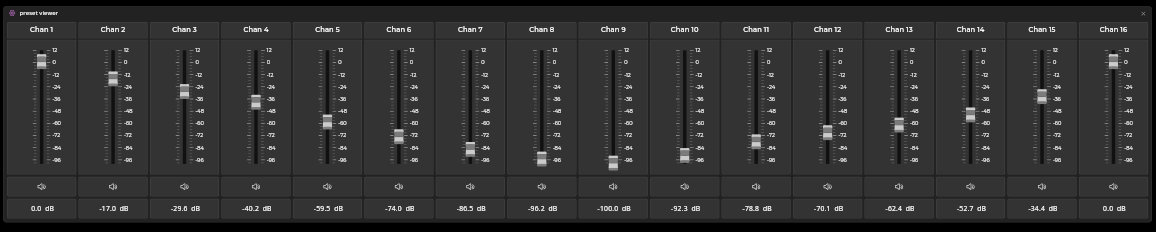
Levels
View and adjust the volume level of audio signals, and toggle the Mute state for the connected device. The Value can be changed by moving the slider or by direct entry by clicking on the numbers and typing a new value.


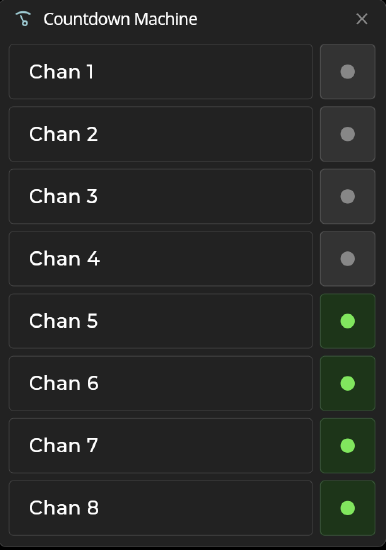
Logic Meters
Show a visual representation of the state (either HIGH or LOW) of a logic signal. Change the state by clicking on the item. Green (brighter circle) indicates an active state.

Logic Pulse
Generates a series of pulses for each channel. The On/Off duration and Count/Indefinite are configured in the software for each channel.

Logic Selector
Logic Selector control with corresponding selection meter showing to indicate the state.

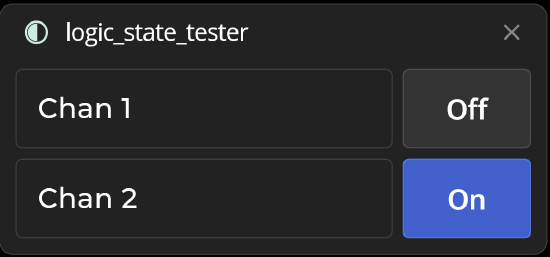
Logic State
Shows a logic signal generator. It outputs either a low or high logic signal depending on the state of its Set button. The Set button can be toggled by clicking it with the mouse or manipulating via presets configured in Tesira software.
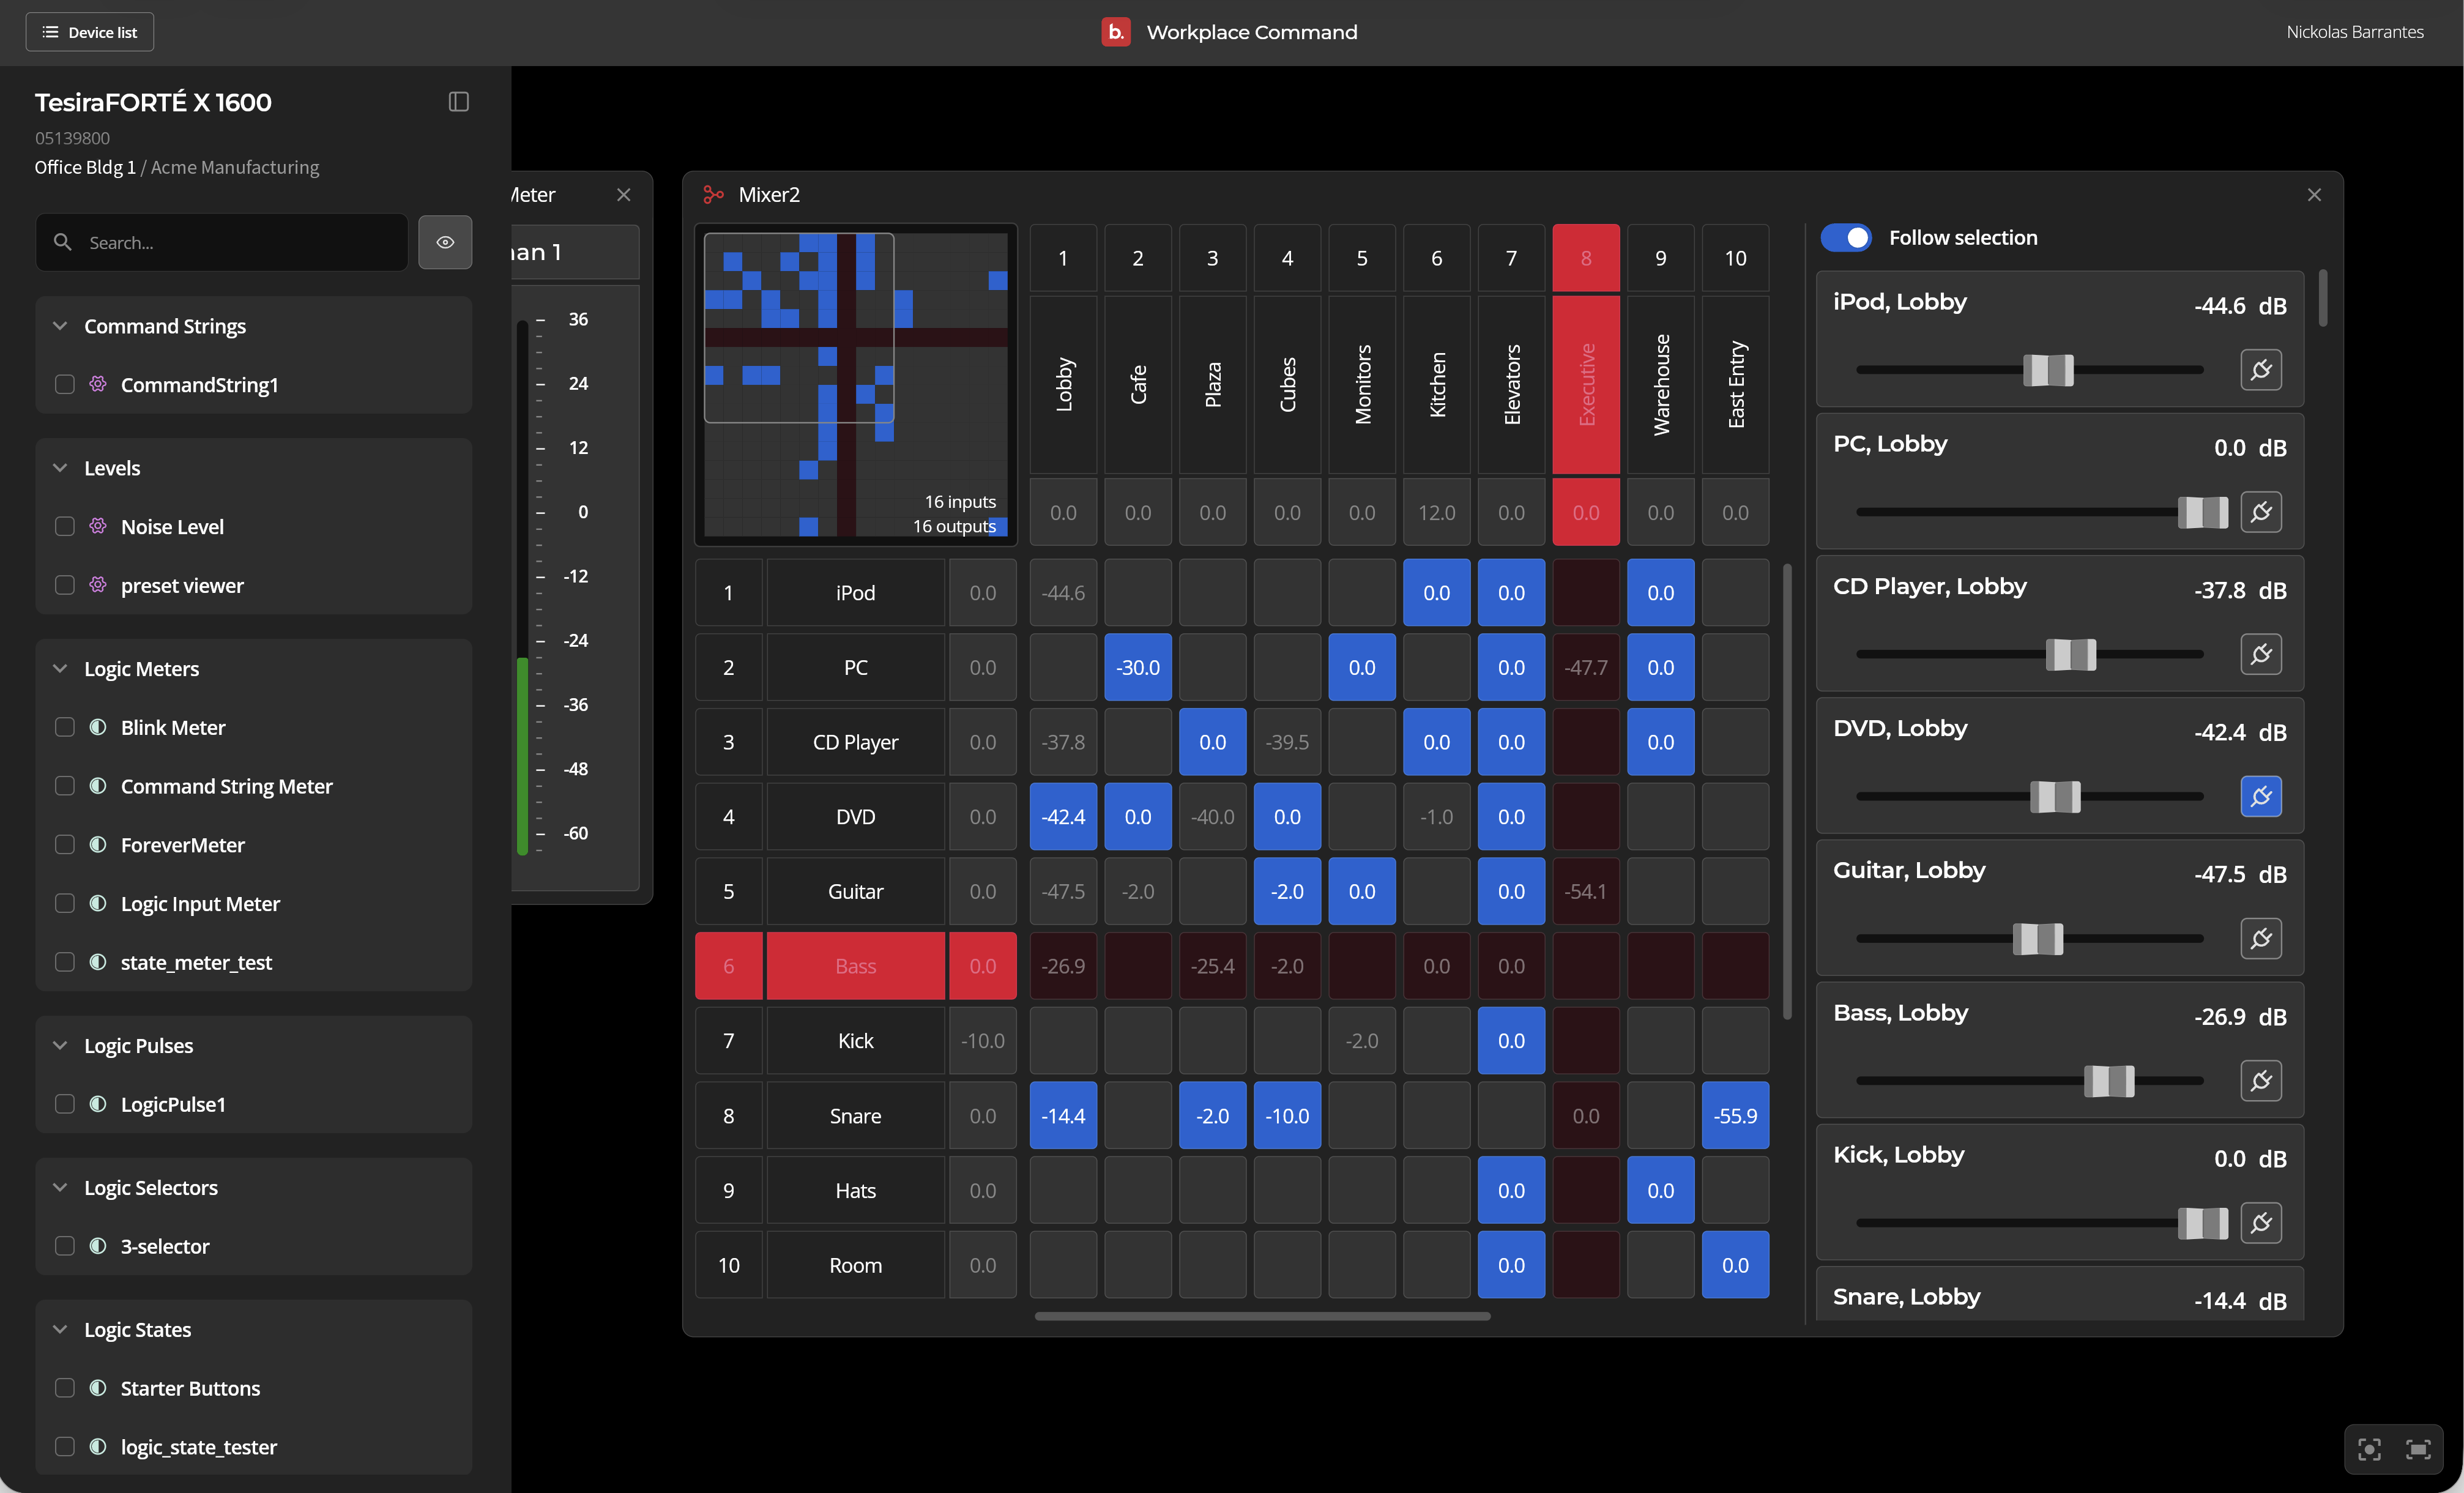
Matrix Mixer
Controls the Mute In and Out states, Level In, and Bus (assigns inputs to specific outputs - right clicking brings up a level adjustment). A maximum of 10 inputs and outputs are shown in the control window. If there are more than 10 inputs or 10 outputs, the mini-map in the upper left corner provides a visual frame of reference for the visible section of the patch area.
- To navigate a large matrix mixer, drag the grey box within mini-map, using the scroll bars or keyboard modifiers while scrolling. Ctrl + scroll will move up and down, and Shift + scroll will move left and right. Use Ctrl + scroll to move the matrix mixer sidebar. The user can also choose to display the corresponding meter next to the mixer and will see any changes in one reflected in the other.
- The full number of inputs and outputs is listed at the bottom of the mini map for reference.
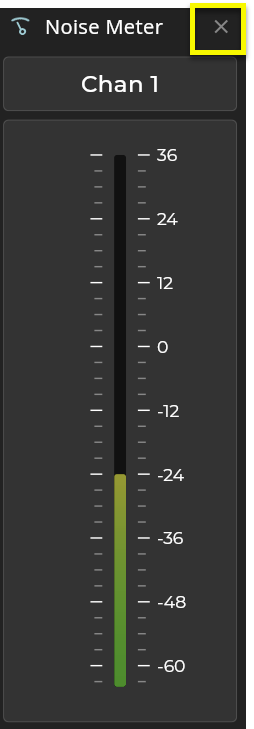
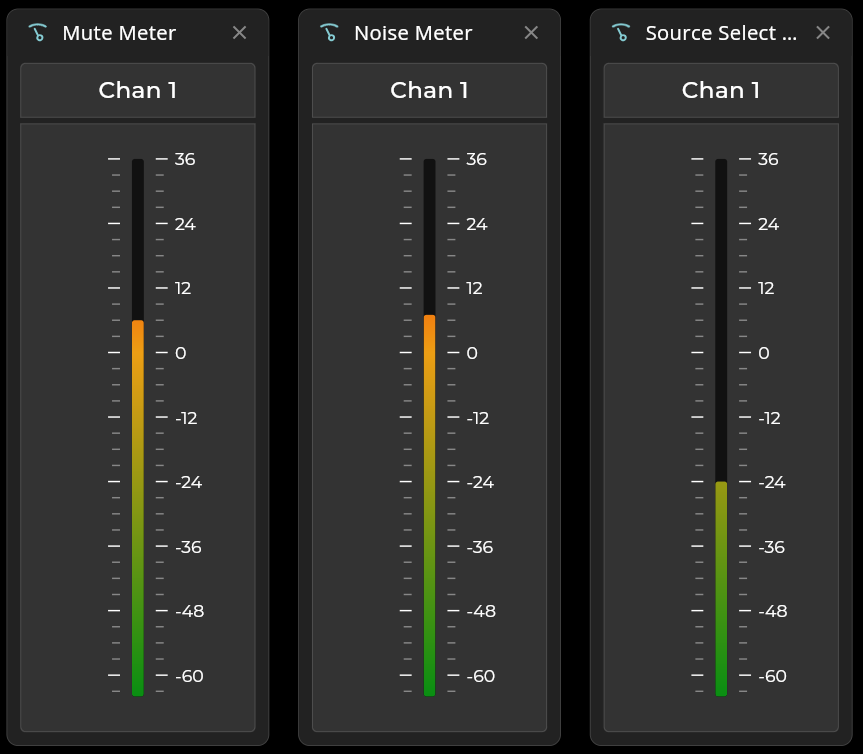
Meters
Audio Meters
View live levels for the element. Values are in dB. The color gradient goes green to yellow to red with yellow at 0 dB and red at 24 dB.

Signal Present Meter
A Signal Present Meter provides a simple visual indication when the level of an audio signal exceeds a specified threshold level. Signal Present Meters can also be configured with Tesira Software to generate a logic signal when that audio level threshold is exceeded.
Mute
Toggles the Mute state of an audio source. Pressing the Mute button will change the icon and the button color to red to indicate it is muted.


Presets
Displays configured Presets. Selection of a preset recalls it, and any Command blocks affected by that preset will update automatically.

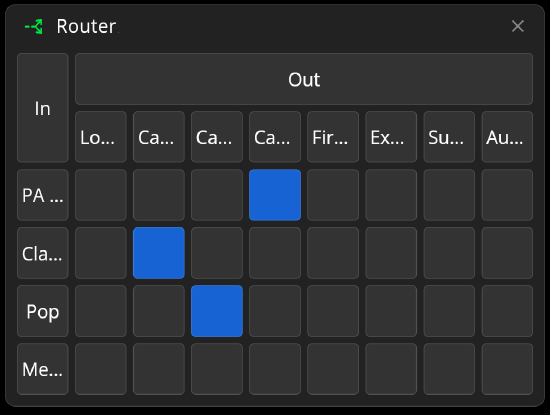
Router
Routers allow each input to be assigned to various outputs via In / Out. Each output allows only one input assigned at a time.
Source Selector
Noise levels for a chosen source can be changed by clicking on the desired noise level selection. The active selection displays green with a darker green background. If the user is unable to distinguish green, the dot will appear brighter than the others.
