Qt X Analog source programming via web UI
Analog audio sources including analog background music sources can be added to a Qt X Controller using the device's onboard web user interface and the steps described in this article.
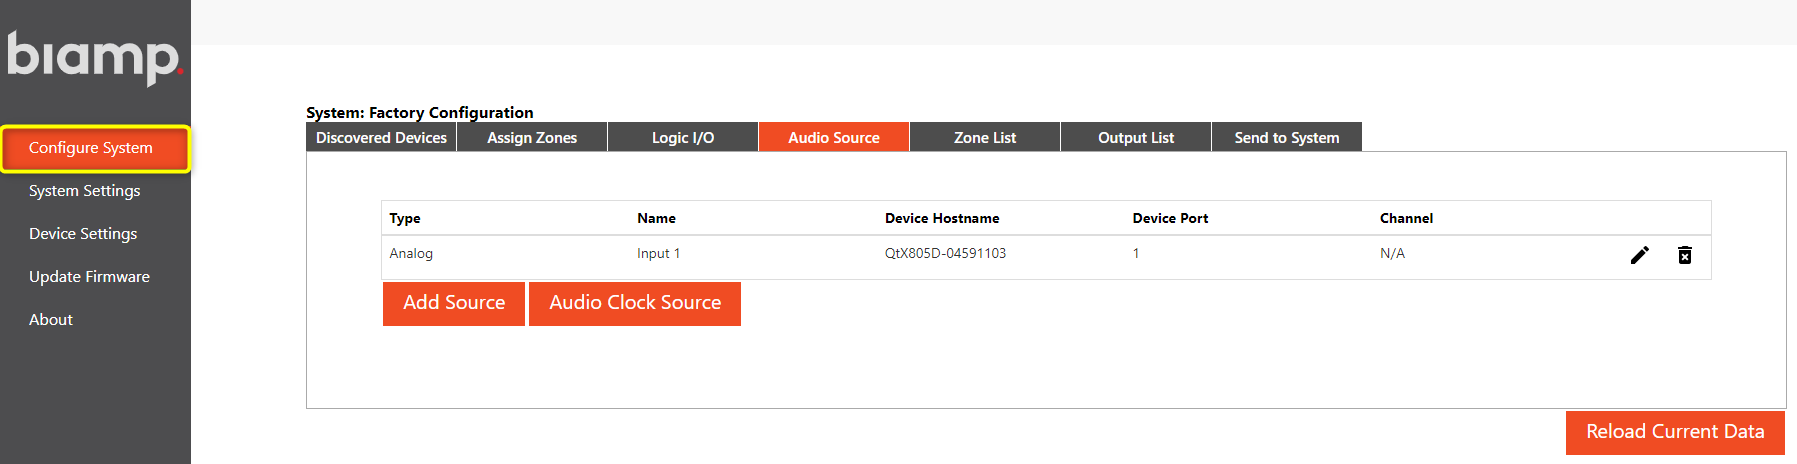
- Factory configuration has a single analog input included from input 1 and routed to all zones. Additional configuration is required to associate new analog sources with zones controlled by a Qt X controller.
- The Qt X supports a maximum of 2 analog inputs in its current firmware revision.
- Each analog source intents may be setup as paging, background, or both. This selection influences where sources are made available in other areas of the web UI to assign to zones.
-
Notes regarding the use Qt X 300/600D hardware with emitters and background music/paging sources.
The Standard Passive Emitter which has a maximum output of 56dBA for music and paging, and the Active Emitter, which has wider frequency range and has a maximum output of 74dBA for music and paging. Your source type and the environmental use case will determine which type of emitter you will need. For background music, environments with a very low noise floor, such as doctor's offices, law firms, or waiting rooms, can be approached with either type of emitter. If the environment has a higher noise floor and louder levels are needed from the emitter to produce audibly comfortable music, than the Active Emitter must be utilized as it is capable of producing higher levels of sound in the space.
If paging is required, only Active emitters are recommended as they produce a higher level of sound to better allow pages to be heard and understood. Standard emitters do not have enough output to effectively meet the needs of a paging system.
Adding an analog audio source
To add a source using the Web User Interface (UI):
Go to the Configuration System's Audio Source Tab
1. Open the Configure System menu.
2. Select the Audio Source Tab.
- The Configure System menu is used to initially configure a sound-masking system, assign it to a Qt X system zone, and then send the new configuration to the system.
Note: The System Settings page is used to view the status of and make changes to a system that has been configured.
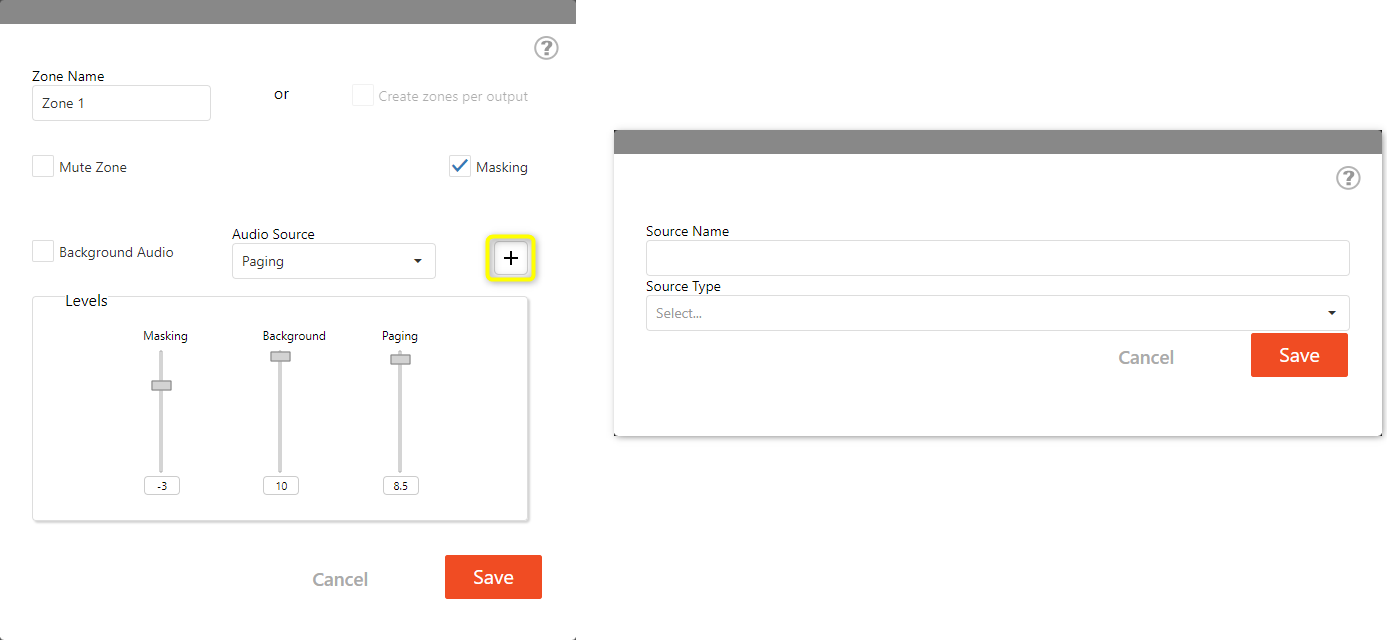
Add and configure the source
In the default factory configuration, no audio sources are assigned to the controller.
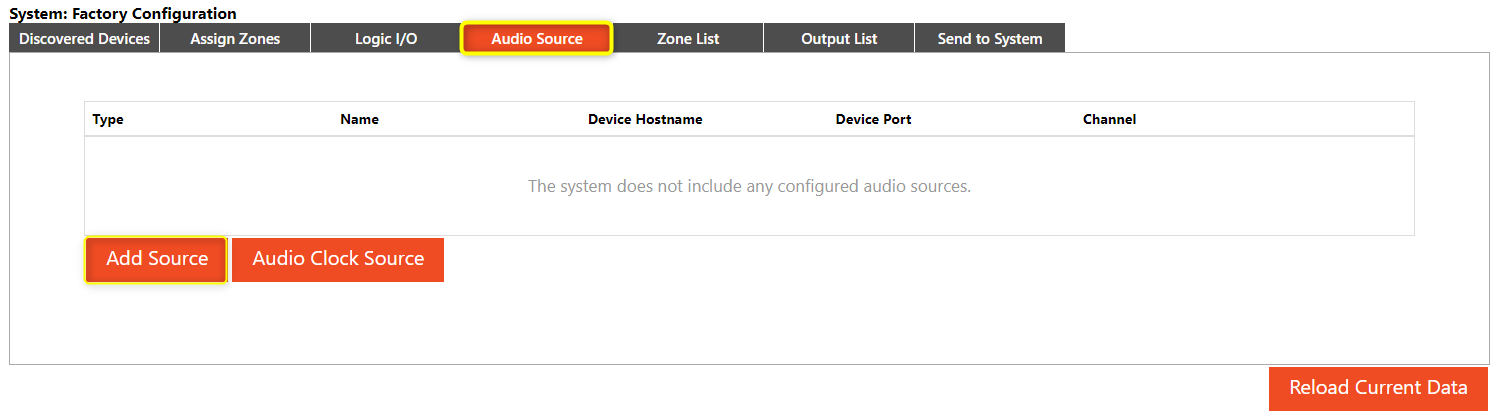
1. Click on Add Source button.
- A pop-up window form will appear.
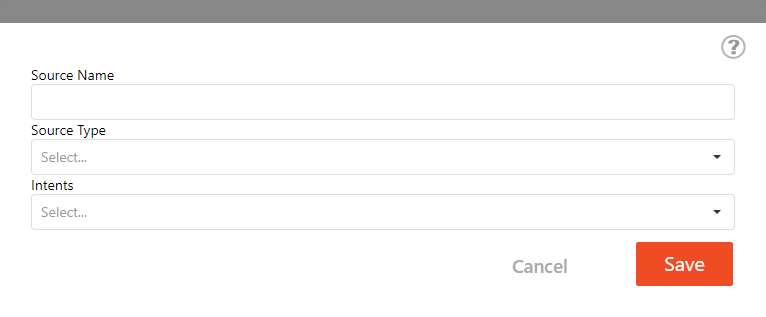
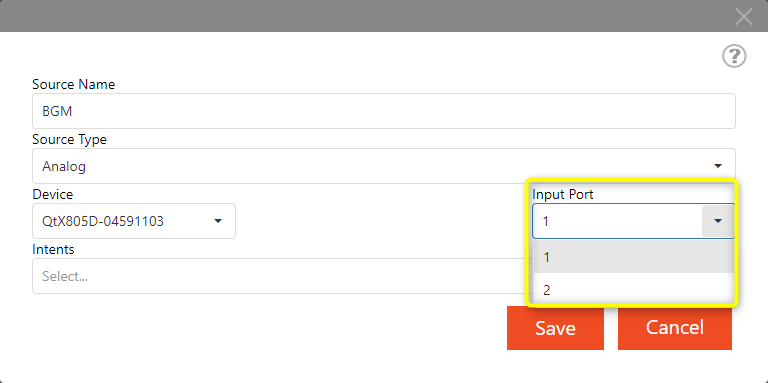
2. Enter the Source Name.
3. Select the Source Type.
- A Device Hostname and Input Port fields appear after the Source Name and Type have been entered.
4. Select the Device Hostname.
- If multiple Qt X controllers are on the network, verify the Hostname serial number matches that of your target device.
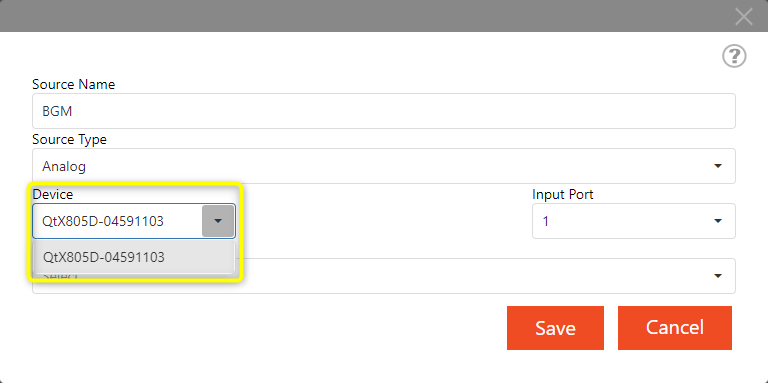
4. Select a physical Input Port on the device.
- Ports already assigned a function are not available.
5. Select Intents for new source. Choose Background and/or Page to allow this source to be available to select for Logic or BGM source programming. If a source is selected for Page only, the required logic functions of the GPIO will need to be assigned from the Logic I/O tab for this input.
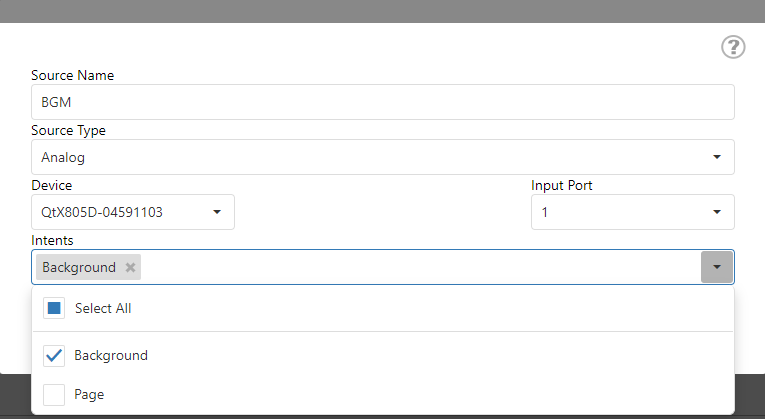
6. Click the Save button to save this audio source configuration.
- The source should appear in the Audio Source tab's central pane.
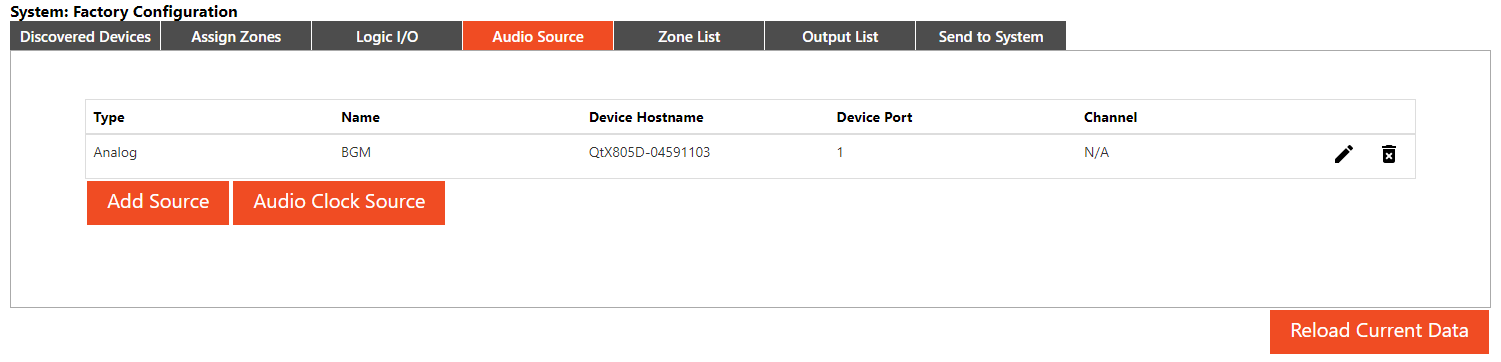
Repeat these five steps to add additional sources to the controller.
- Editing sources: Added sources can be edited or deleted using the pencil or trash icons.
- Zone assignments are done under the Zone List tab.
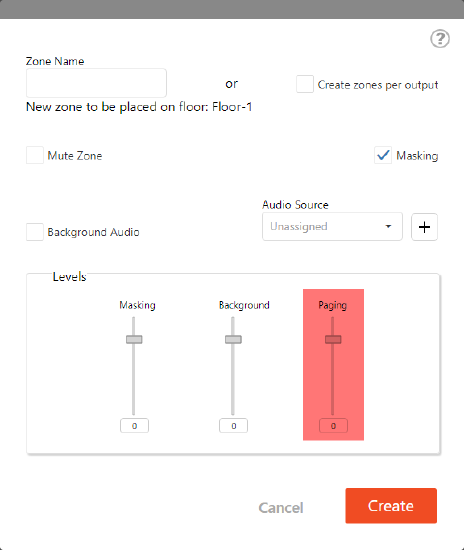
Assign the source to a zone
Once a source has been assigned to a controller, assign it to a zone in the system. Zones are individually configured, allowing for varying masking, paging, and background audio coverage throughout a building system.
1. Click on the Configuration System menu's Zone List tab.
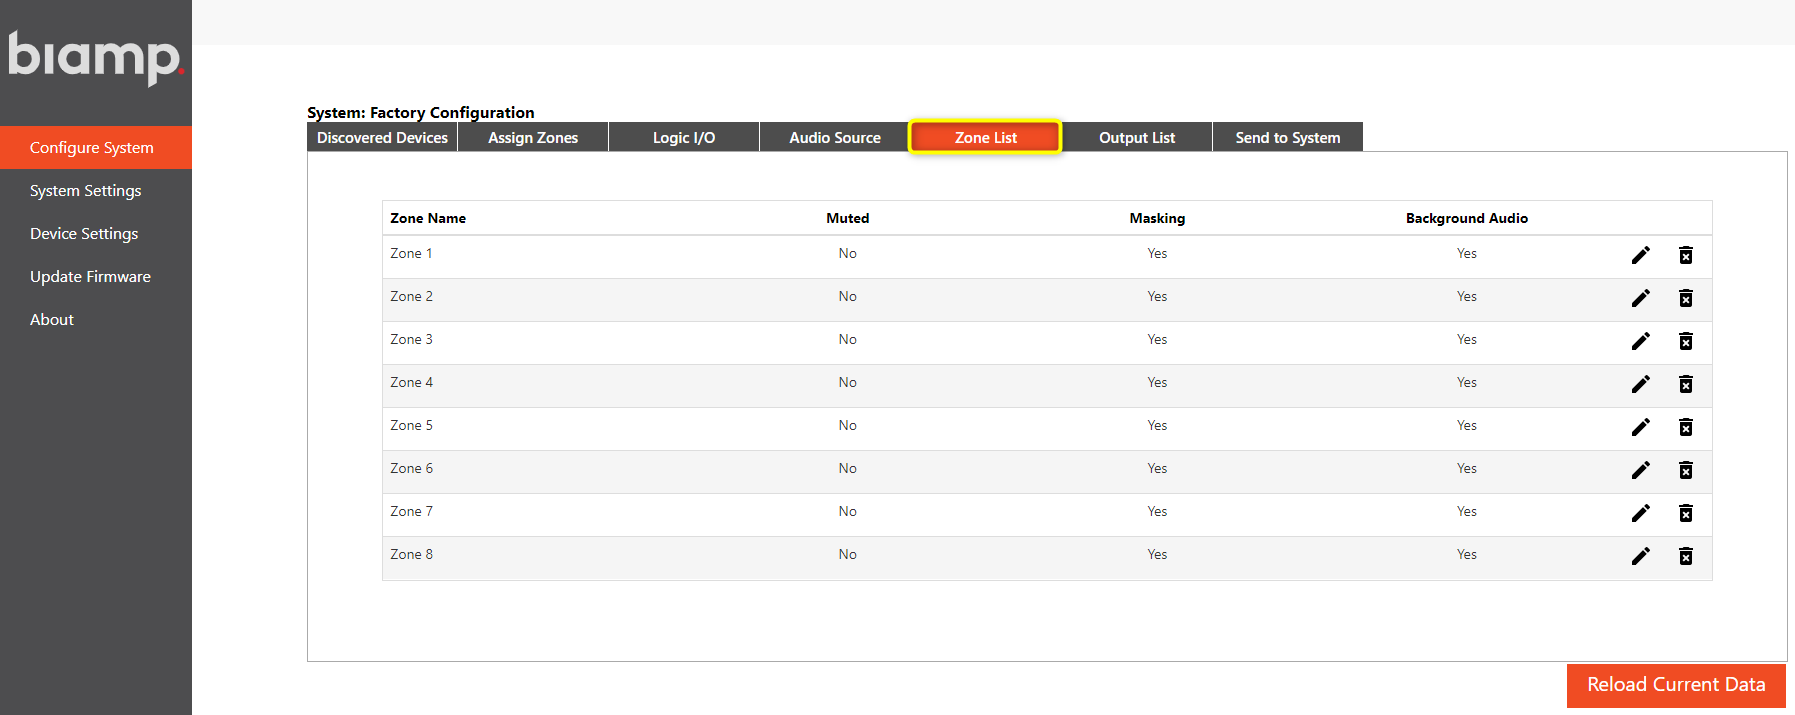
2. Click on the Pencil icon for the zone the source will be assigned to.
- This opens a pop-up form.
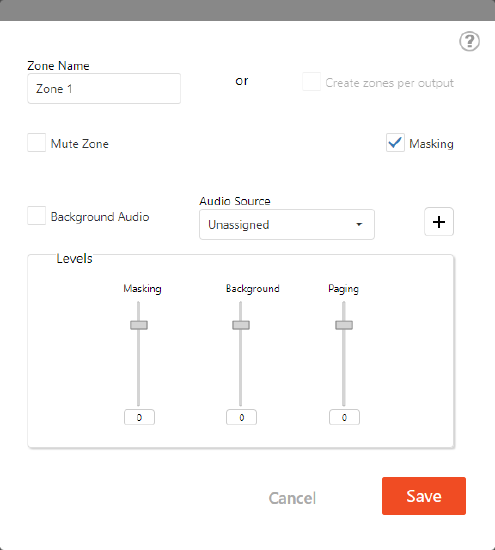
4. Select an audio source to assign to the zone using the Audio Source dropdown menu.
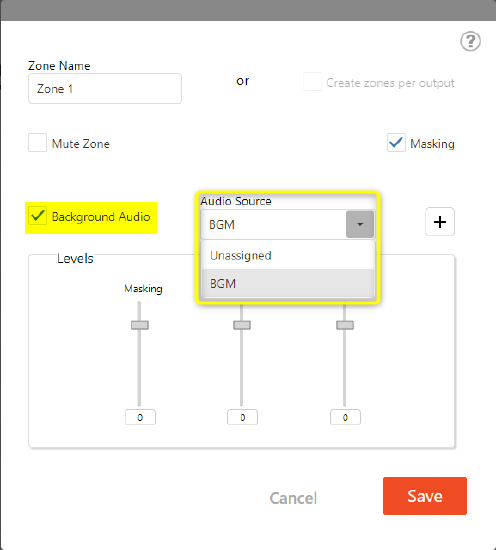
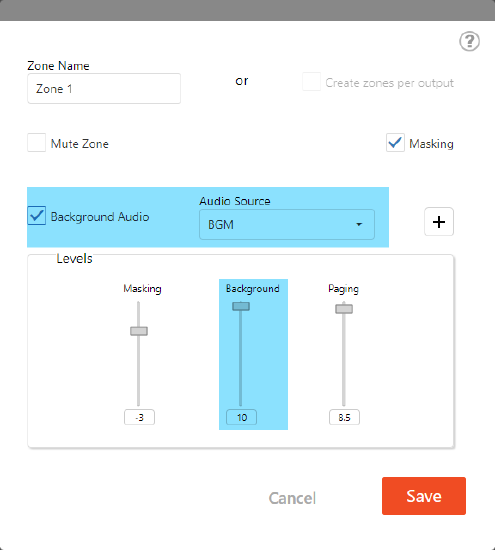
5. Optional: Check Background Audio
- With Background Audio is checked, the assigned source will play in the zone alongside the sound masking signal.
- Checking the Background Audio box prompts users to select an Audio Source if one is not already selected.
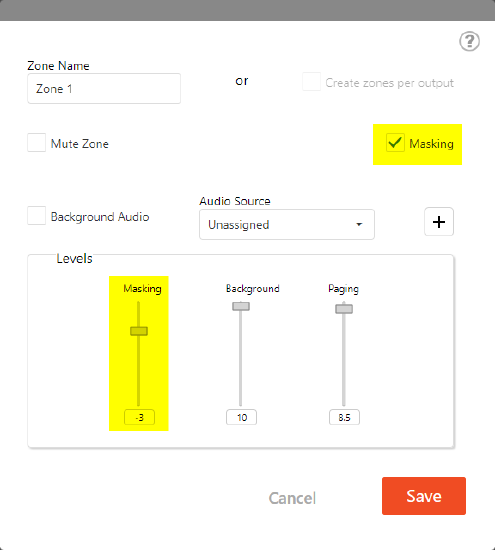
The Masking check box: The masking checkbox enables or disables the masking generator to the selected zone. This allows zones to be configured to have background music or paging without sound masking if desired.
6. Optional: Adjust the audio levels.
- Masking, Background, and Paging audio levels within a zone are individually controlled using faders and may be adjusted for balance.
Note: The audio level controls are assigned to faders by signal format. If a source is set as "background audio" in the checkbox, the level is adjusted via the background fader. If the source is controlled via GPIO logic, then its level is controlled by the paging fader.
Optional: Zone List Shortcut
Sources can be added and configured under the Zone List tab. This is a useful shortcut bypassing the Audio Sources Tab and is recommended for users who are already familiar with adding and configuring sources.
Adding a source
In any Zone List pop-up window, click on the "+" plus button to add, configure, and assign a source.
- This brings up the Source Assignment dialog window.
Reminder: The current Qt X supports a maximum of 2 analog inputs per controller.
Send the configuration to the controller
After all zones have been set up and saved, the configuration must be sent to the Qt X controller to put the system into use.
1. Click on the Configuration System menu's Send to System tab.
2. Click on Send Configuration to send the current source and zone configuration to the Qt X system controller.

Note: Sending configuration briefly stops any current sound masking while the controller updates.
Input gain adjustment
Once a configuration is sent to the system, the input levels of the assigned sources can be changed and updated in real time using the Input Data tab in the System Settings menu.
Preamp gain and phantom power are available if microphone sources are being used, and a peak meter is available to assist with proper gain structure.
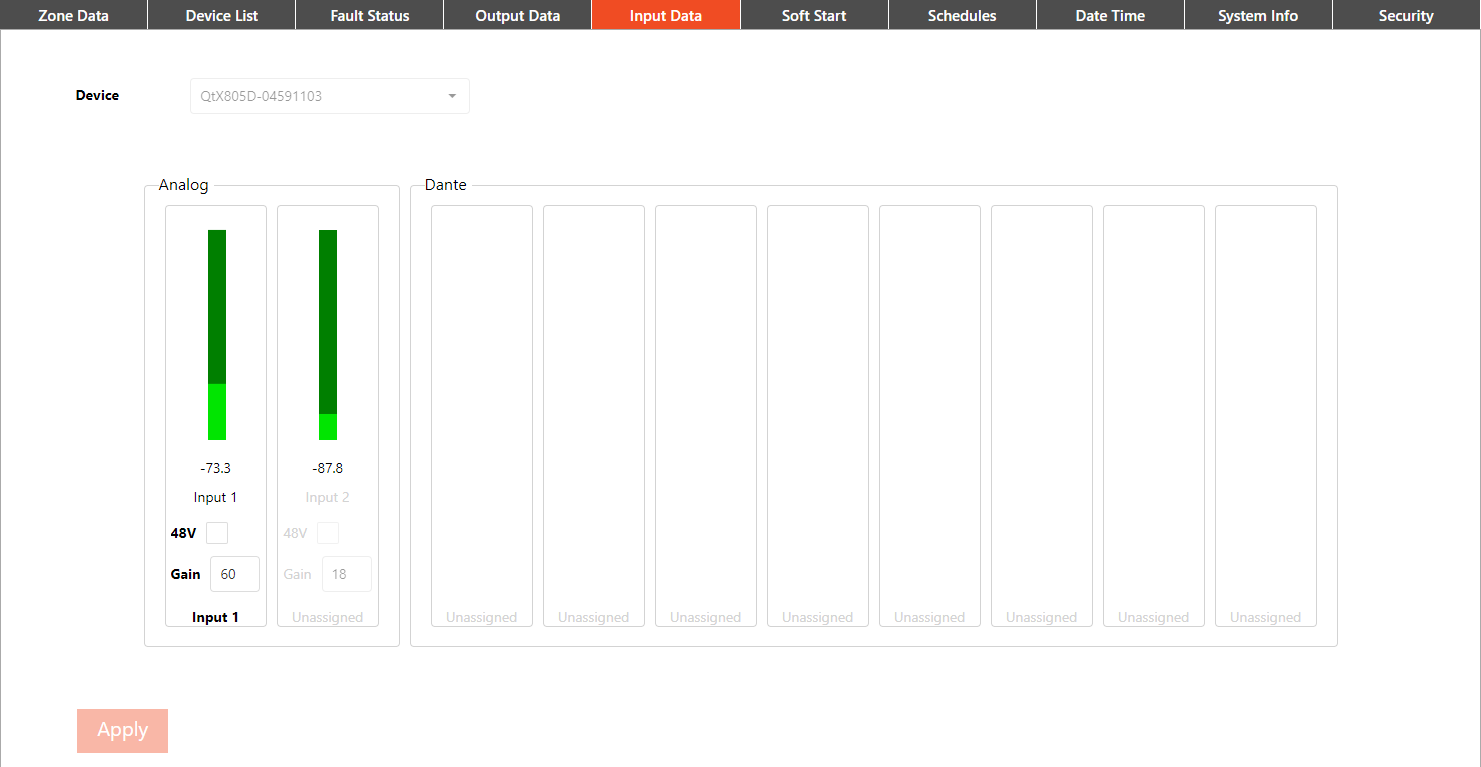
Some recommended starting source settings are as follows;
- Professional Audio Line Level = +6
- Consumer Audio Sources = +18
- Dynamic Microphone = +42 to +48
- Condenser Microphone = +48 to 54 (Phantom Power Required)