Configuring Skype for Business for use with Devio
In most cases, you should be able to connect the Devio to your computer, launch the soft codec of your choice, and the soft codec will automatically utilize Devio for all conference audio. However, it is sometimes necessary to manually configure a soft codec to use Devio, rather than its existing default audio device. This article will demonstrate how to configure this when needed.
Ensuring the computer recognizes Devio properly
When the Devio is connected to a computer via USB, it will enumerate as a speakerphone. This means that it will provide both a microphone and loudspeaker to the computer.
If you wish to confirm that Devio has connected and enumerated properly, you can open the sound properties for the computer using one of the methods below:
Windows
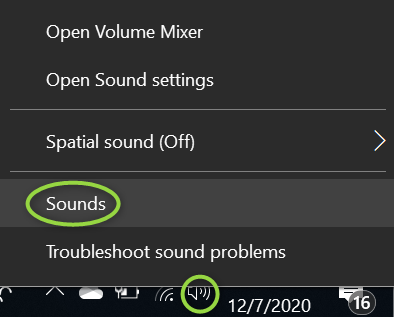
- Right-click on the speaker icon on the Start bar, then select Sounds
- In the Sound dialog that will appear, check under both the Playback and Recording tab.
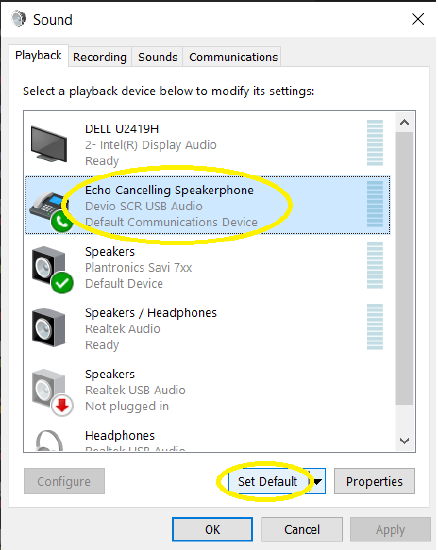
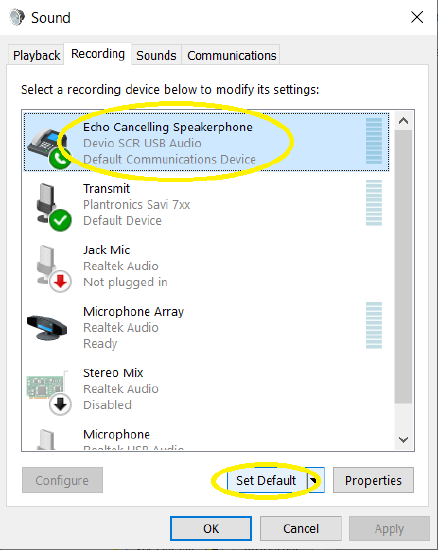
- Confirm that the Devio is listed in both of these places, and that it enumerates as a speakerphone
- In each of these places, select the Devio entry and click on "Set Default," then press OK to apply
- If the Devio does not appear properly, try the following:
- Ensure that your USB drivers are up to date
- Disconnect and reconnect the USB cable entering the computer from the Devio
- Power cycle the Devio
- Reboot the computer
Selecting Devio in Skype for Business
- Click on the gear icon on your Contacts list window to access Options.

- From the menu on the left, select Audio Device.
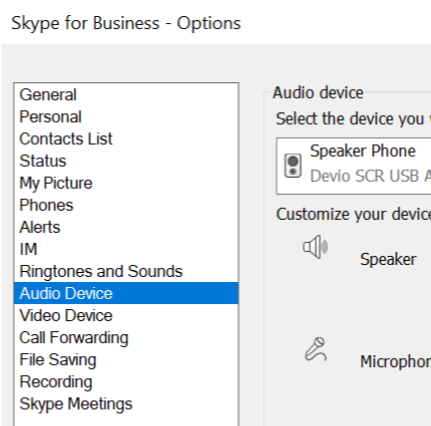
- From the drop-down menu, select "Devio USB Audio" (which will enumerate as a Speaker Phone). Also select the Devio as your option for the Secondary Ringer.
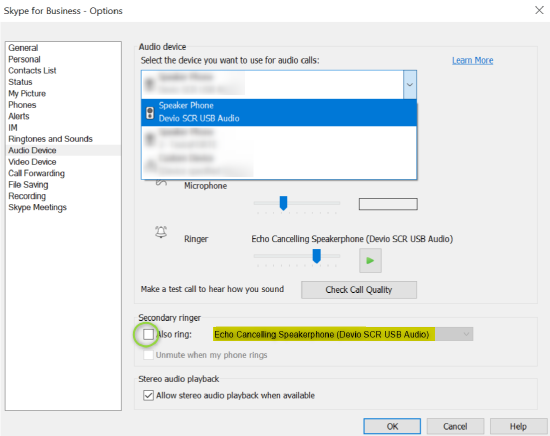
- Press OK to apply these changes.
