Devio SCR-10 - Windows / MacOS Installation Help
You will need to install a driver for the DisplayLink hardware inside our product.
The process will take a few minutes to complete.
Which operating system are you using on your machine?
Mac OS
Please follow these steps if you are using Devio SCR-10 with your MAC for the first time!
Find your OS version
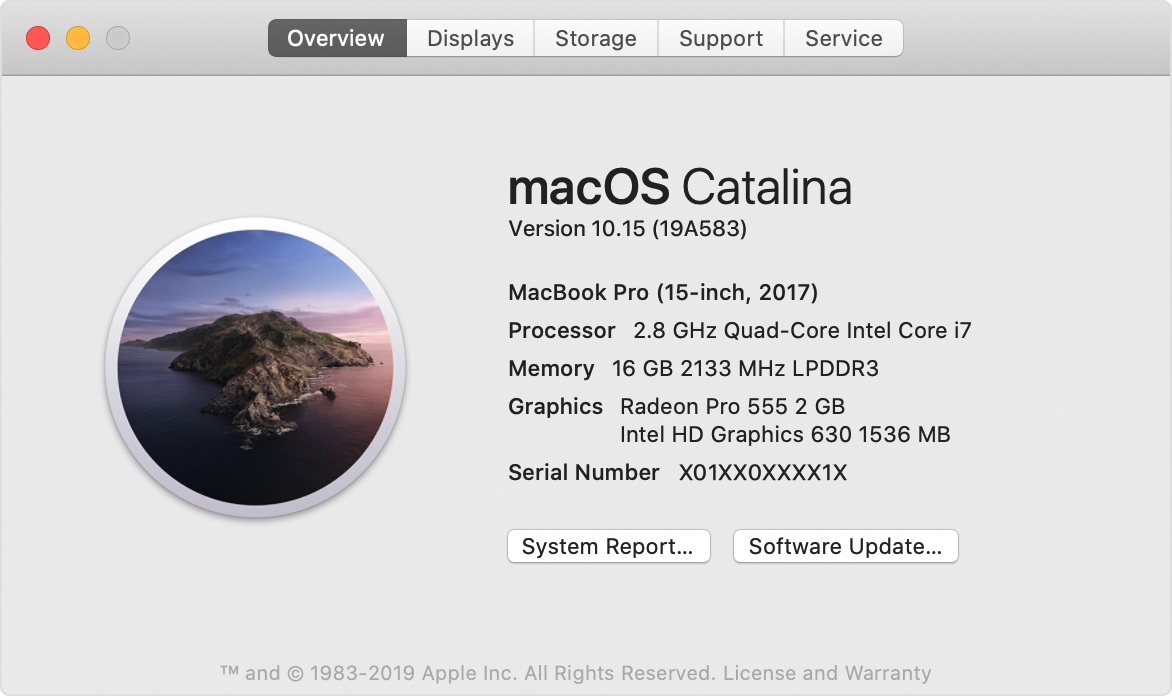
From the Apple menu in the top left corner of your screen, choose About This Mac.
You should see the macOS name, such as macOS Catalina, followed by its version number.
Download the DisplayLink driver from the link below
Please find the latest drivers for MAC here or use the links below to take you directly to the latest driver version based on your currently installed macOS version.
NOTE: The guide below is created for Mac OS Catalina 10.15 and DisplayLink Manager version 1.4 or later.
Make sure SCR-10 is disconnected!
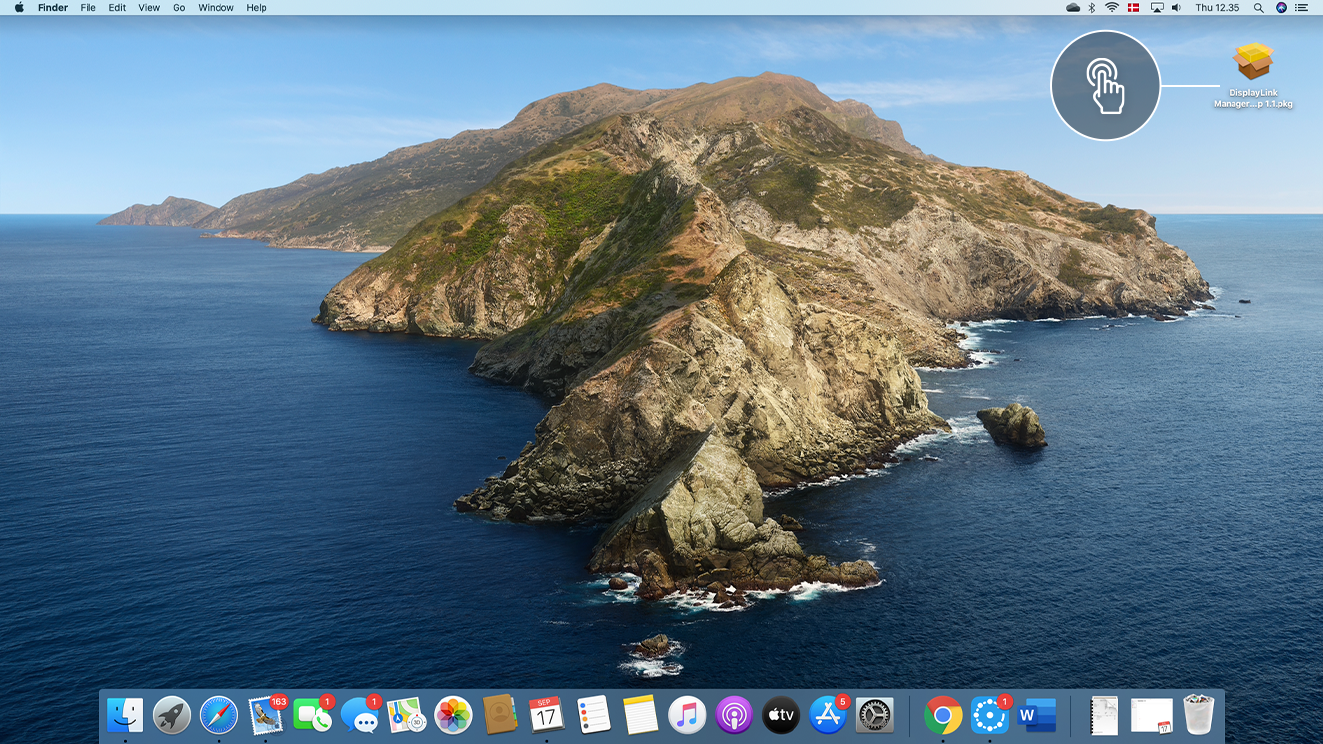
1. Find the installation file where you downloaded it to, and start the installation. Typically your 'Downloads' folder
2. Click Continue
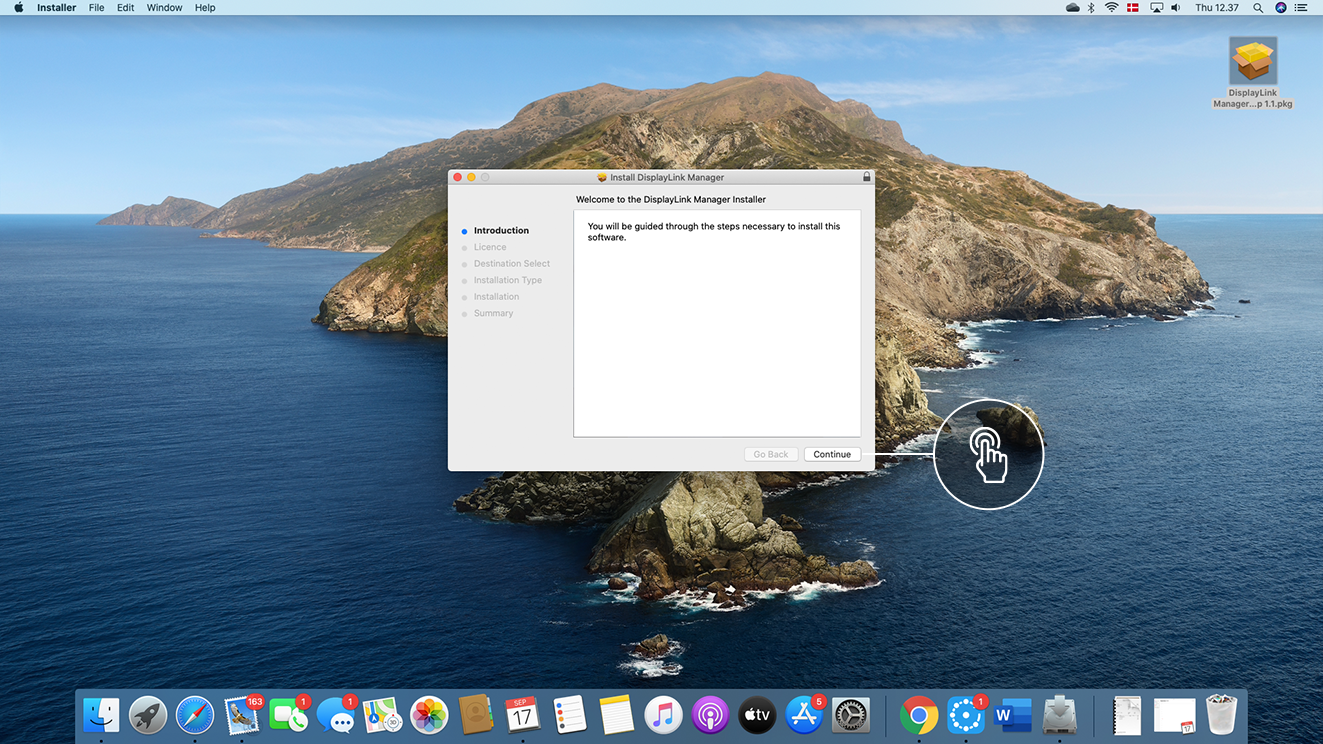
3. Click Continue
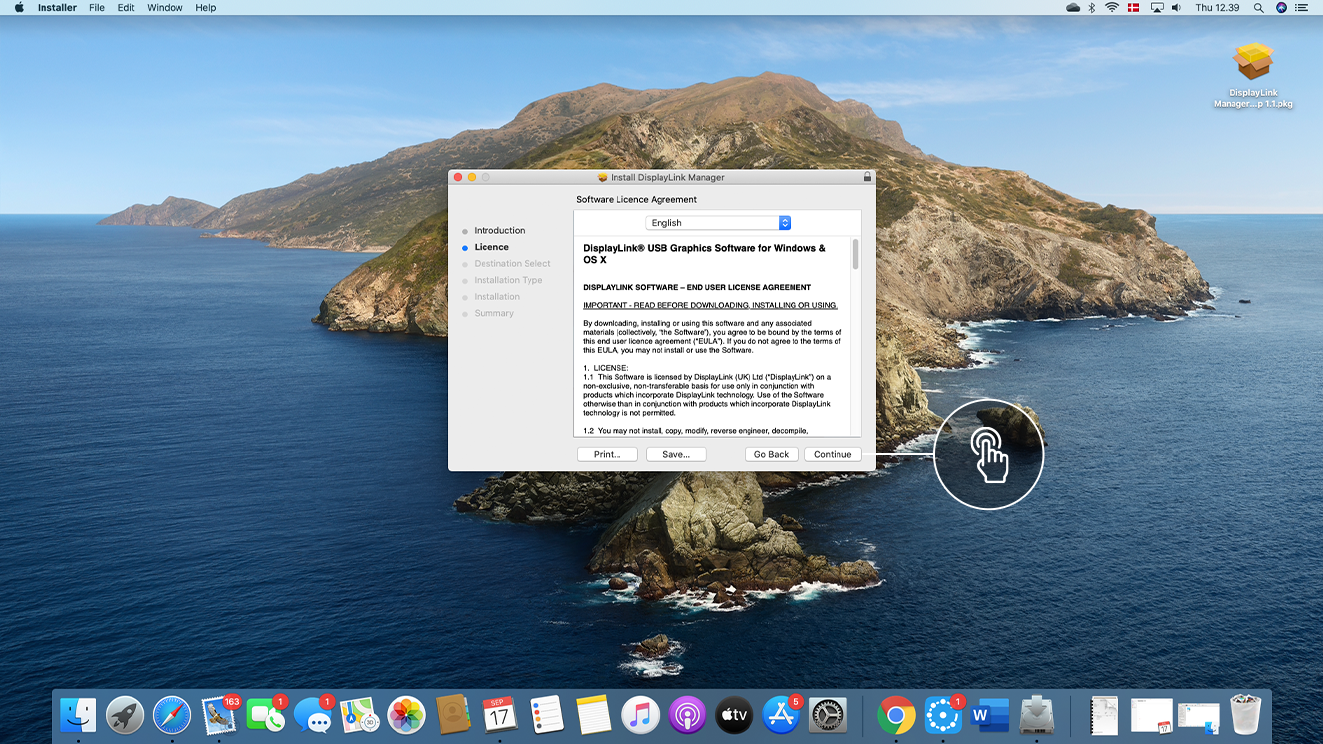
4. Review License agreement and click 'Agree' if you consent
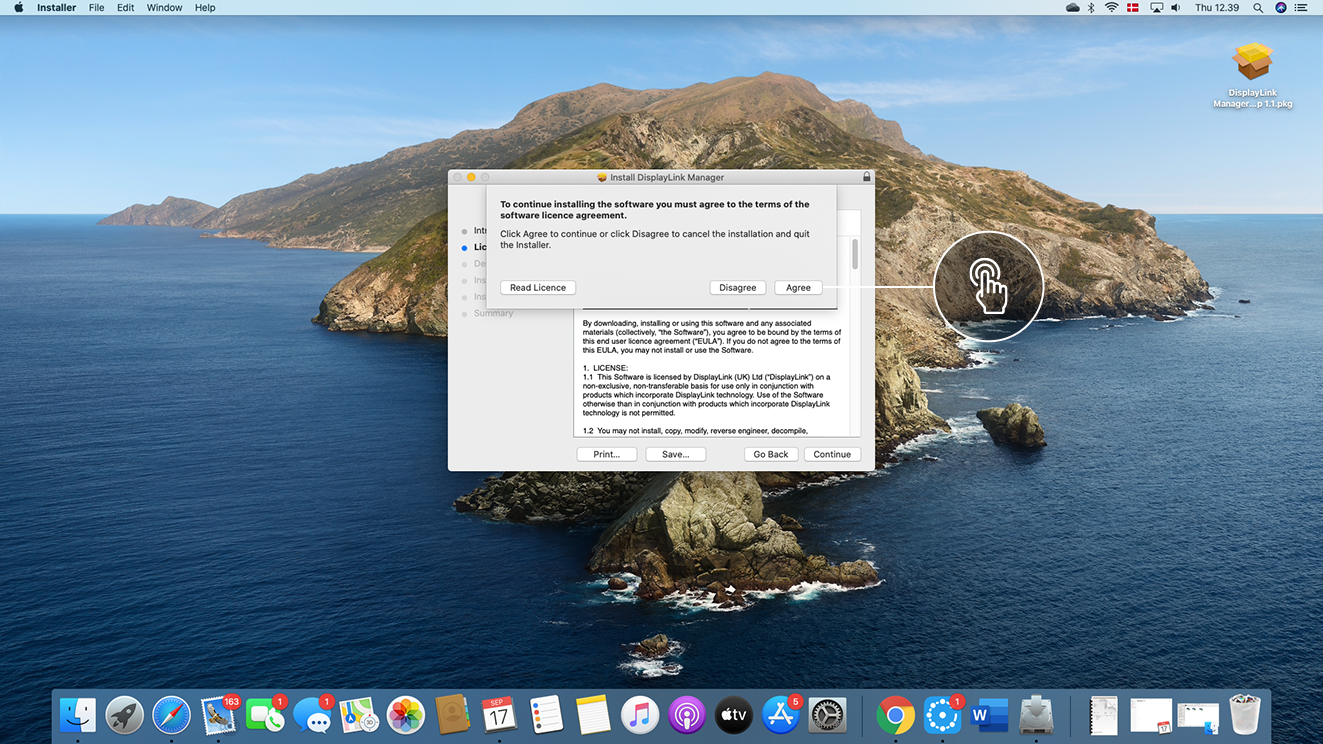
5. Click Install
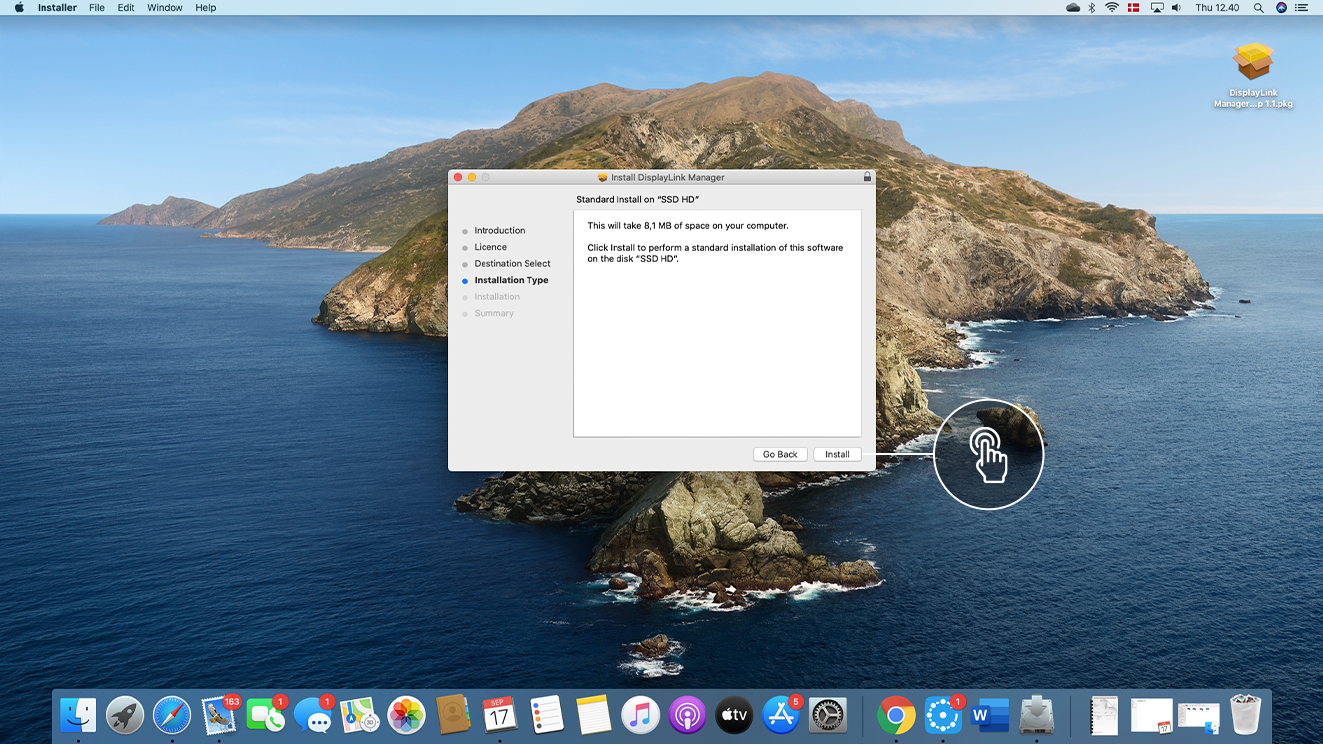
6. Login with your Mac username & password
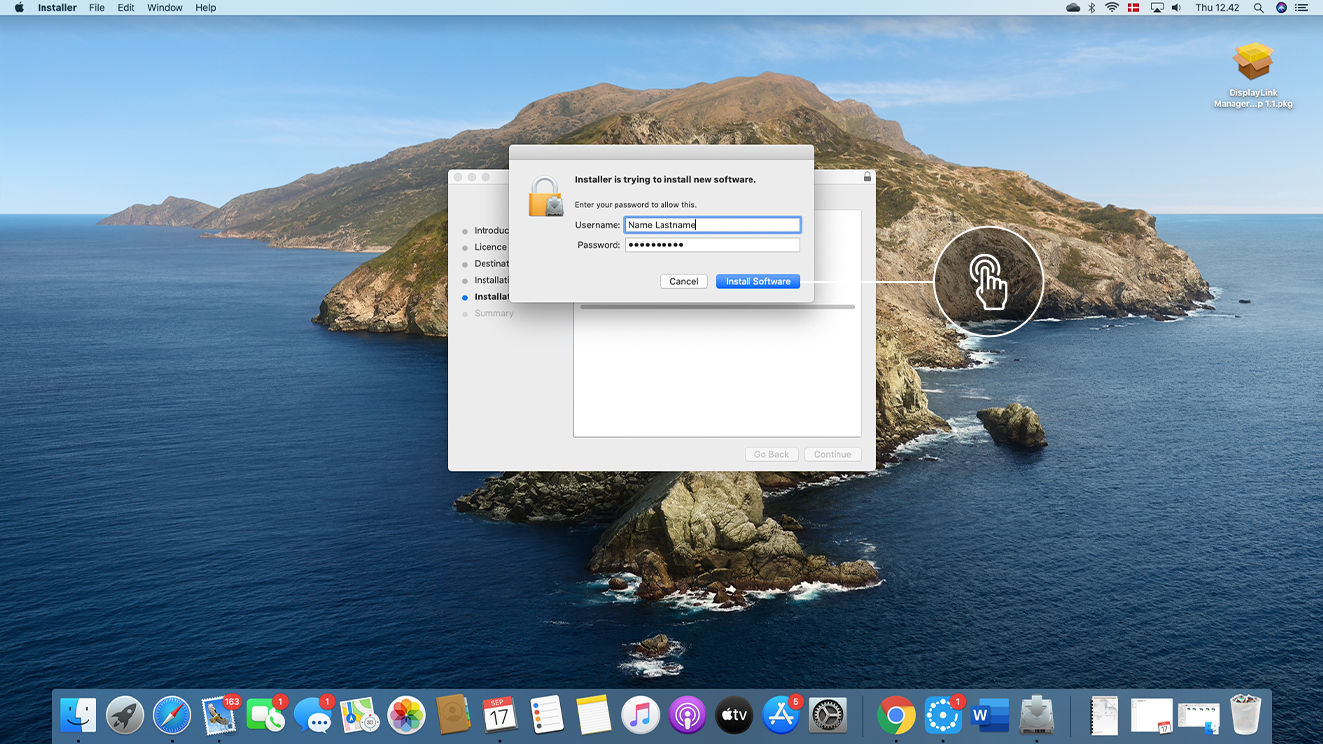
7. Installation complete, click Close.
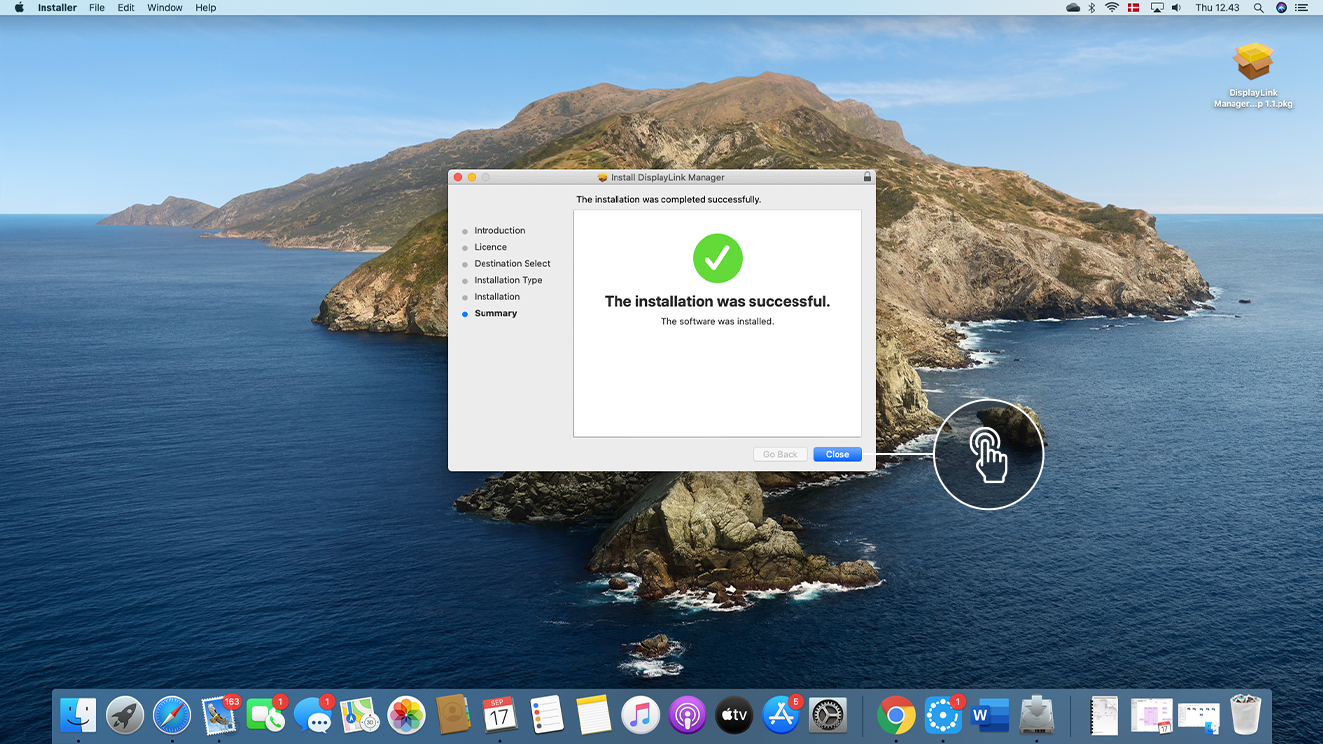
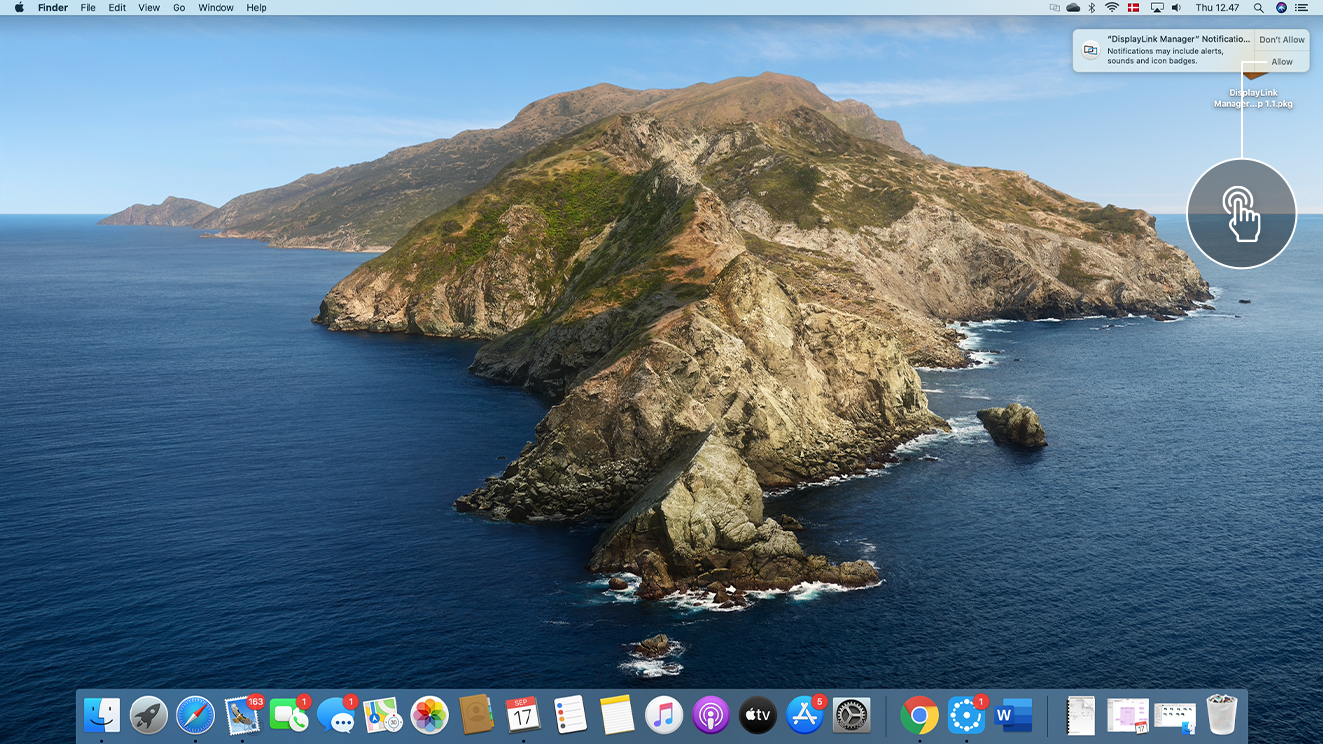
8. DisplayLink Manger starts automatically. Allow DisplayLink to show notifications (Optional)
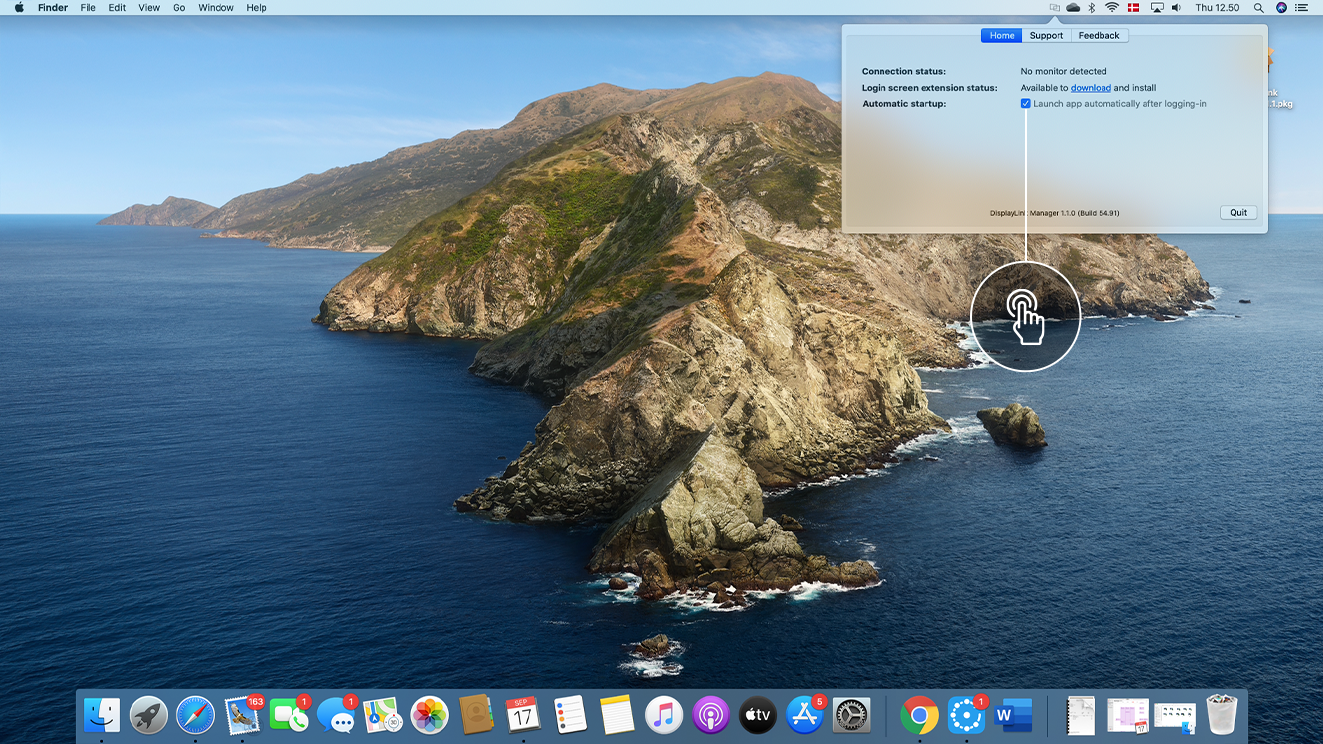
9. Click on the DisplayLink Manager icon at the top and enable this option "Launch app automatically after logging-in"
10. NOW, connect Devio SCR-10 to your Mac using the USB cable. Click on the popup, if it appears.
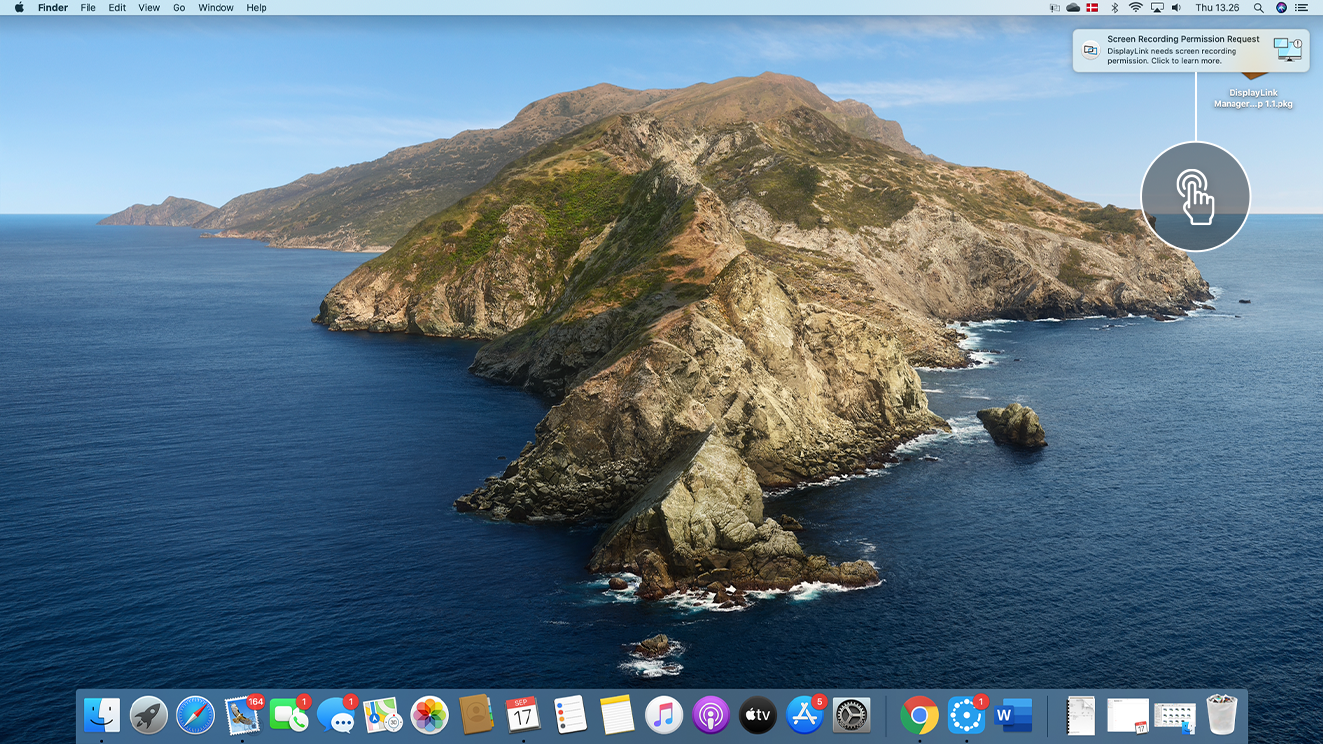
11. Click ‘Open System Preferences’ or go to System Preferences > Security & Privacy > Privacy. NOTE: It is crucial that you click the marked button below, and not the blue button marked blue by default.
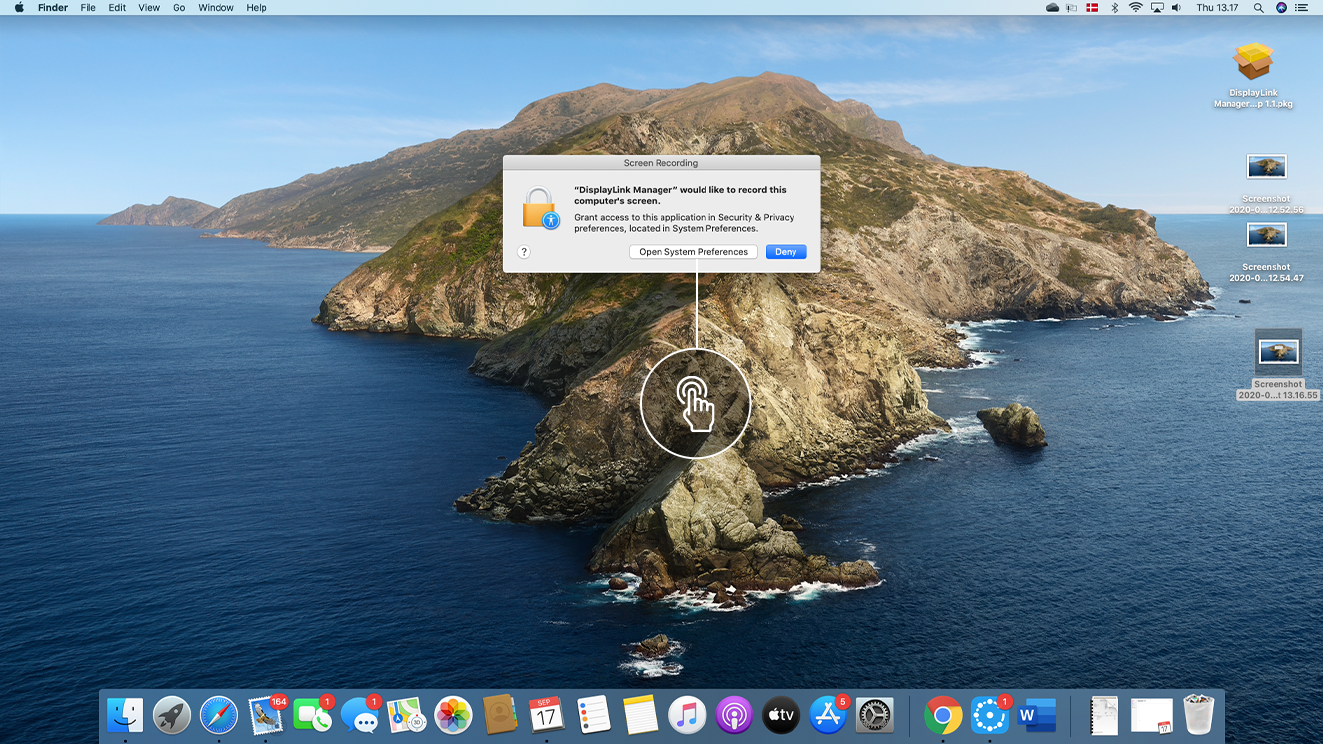
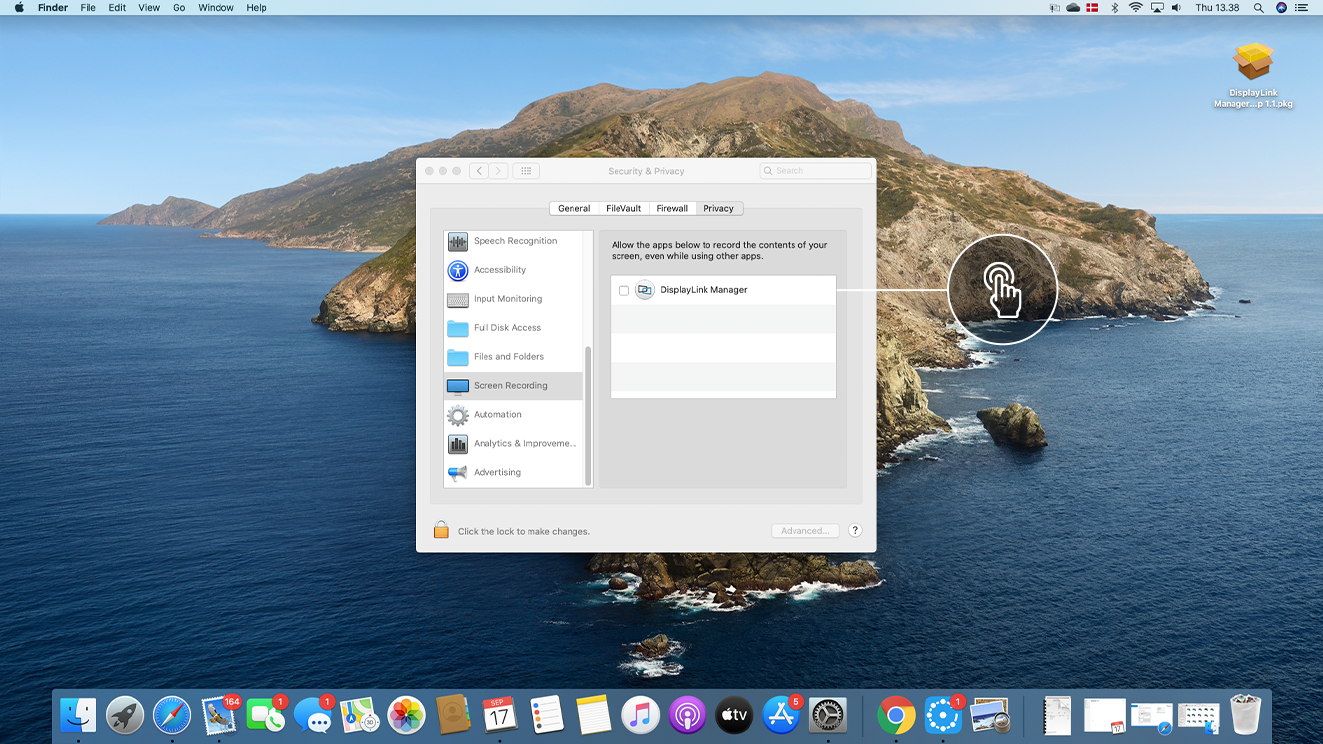
12. Scoll down to find ‘Screen Recording’ and mark ‘DisplayLink Manager’, so that it is enabled
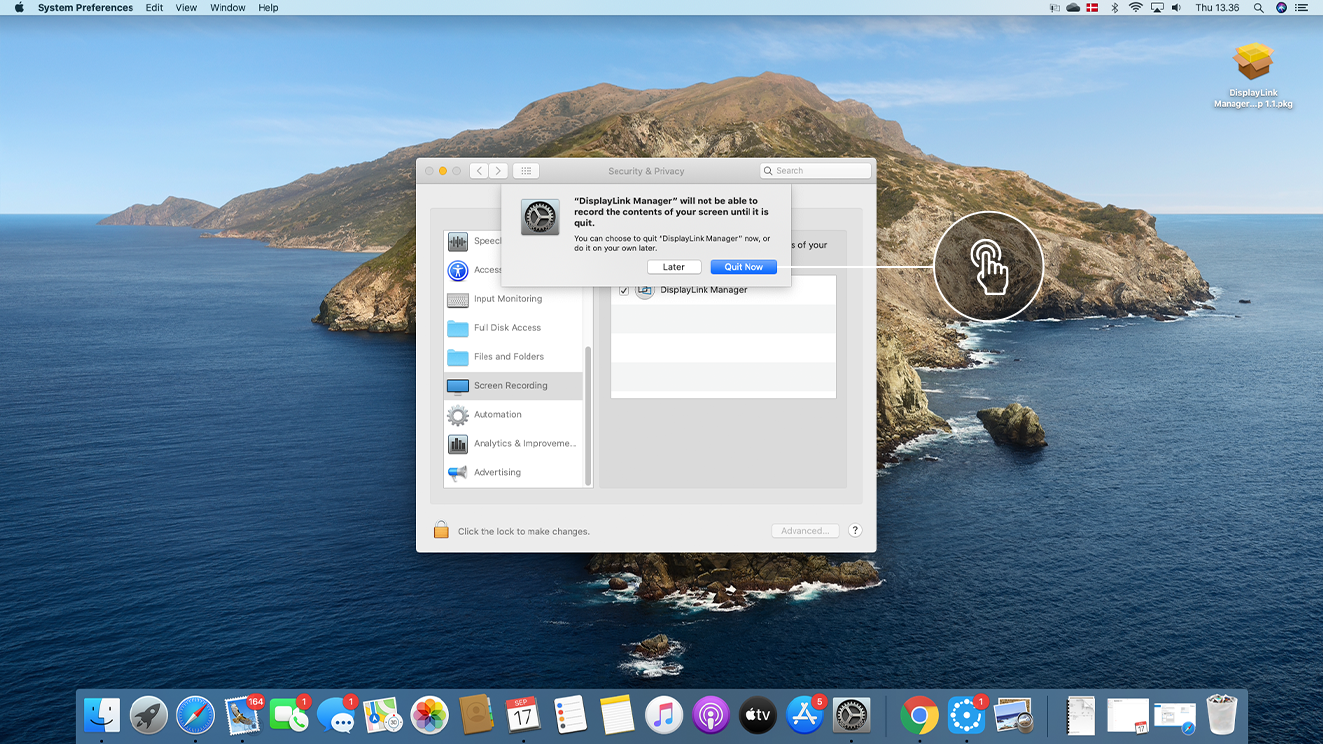
13. Press ‘Quit Now’.
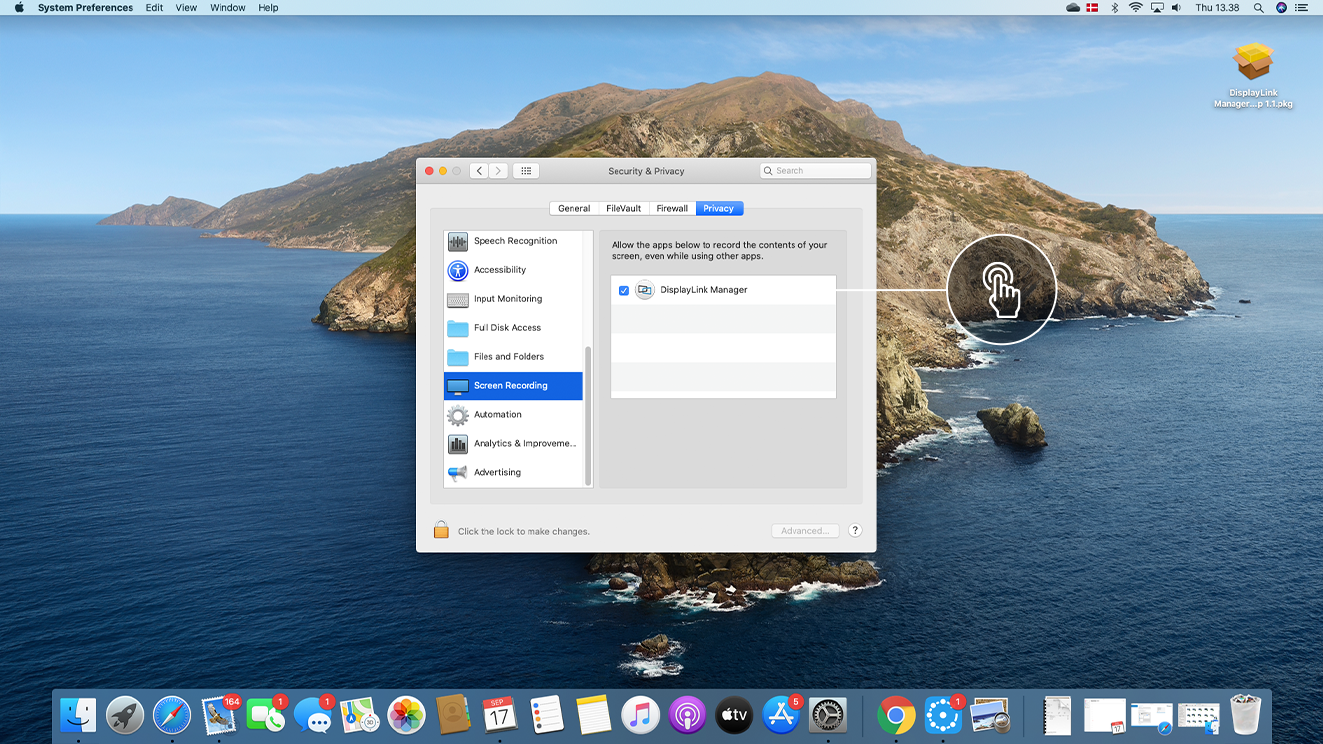
14. Verify that 'DisplayLink Manager' is enabled. Then close the 'Security & Privacy' window.
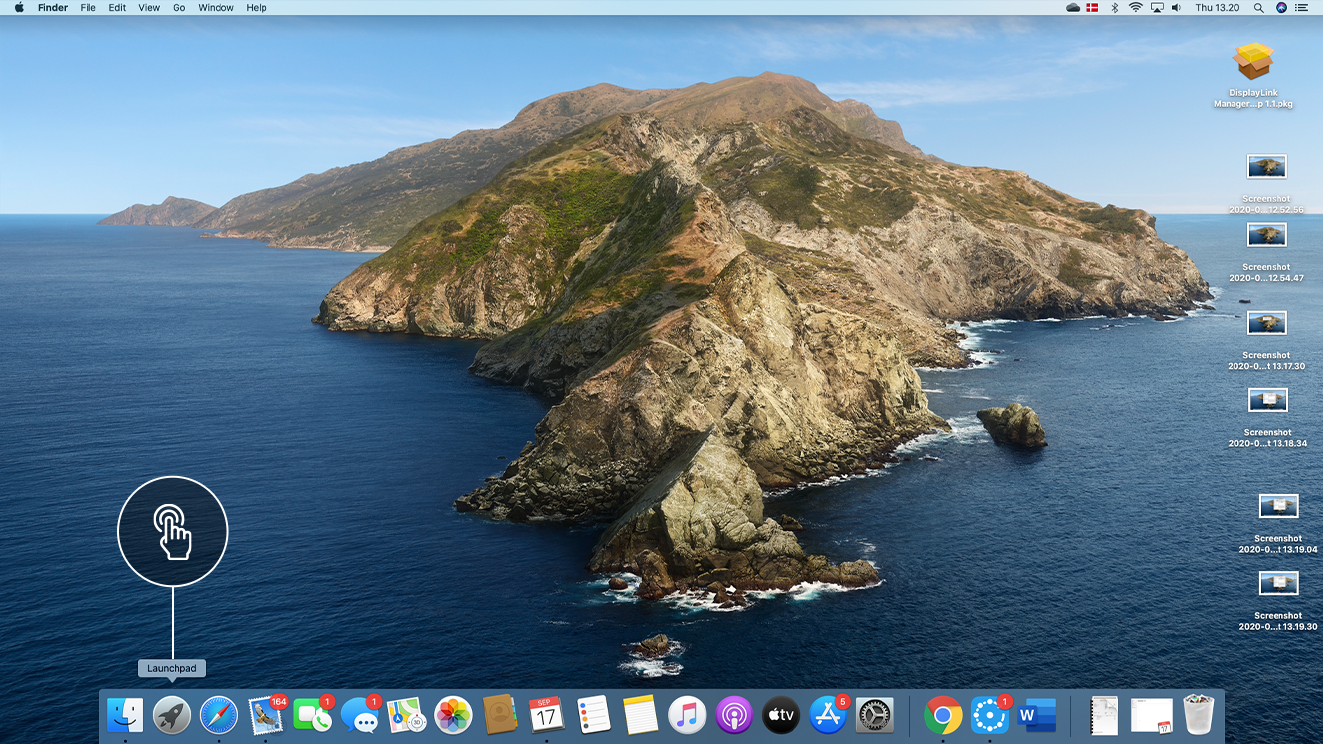
15. Almost there! Open LaunchPad
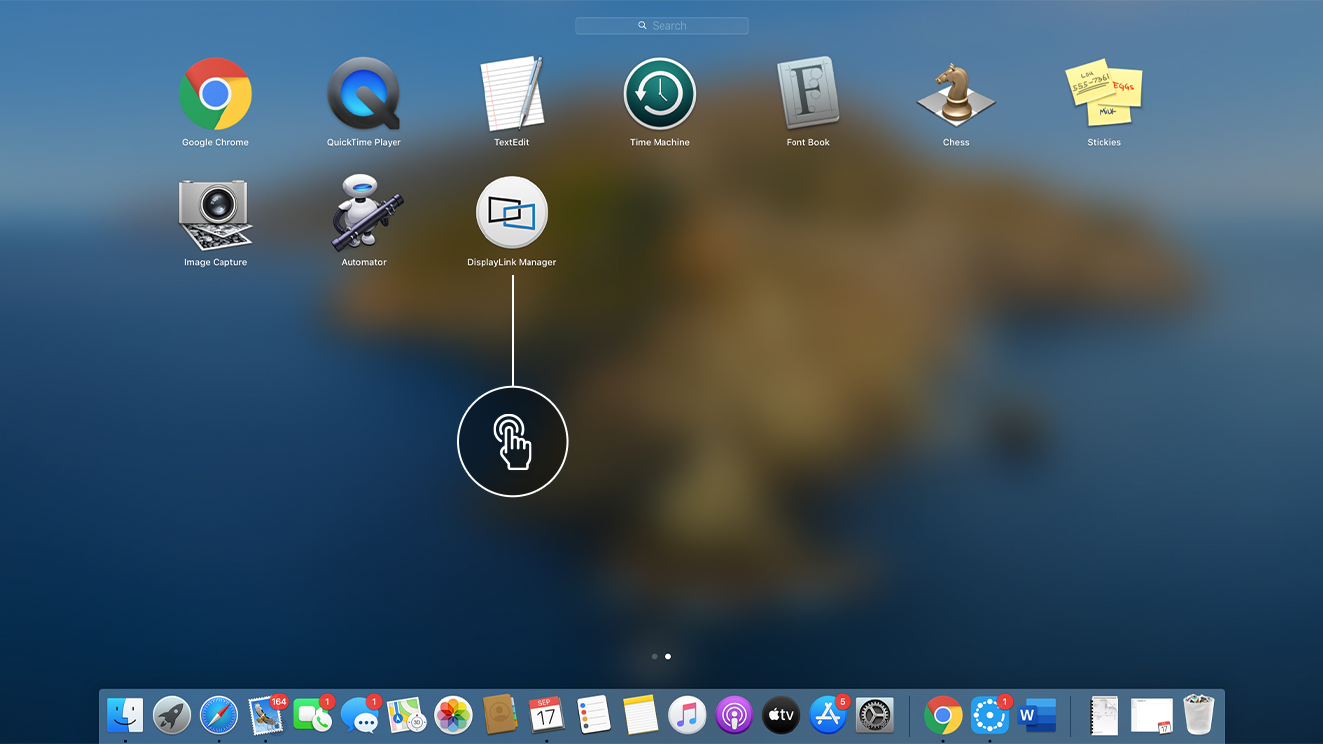
16. Select DisplayLink Manager
Congratulations! Picture should now be showing on your display device. You are now ready to use Devio SCR-10 whenever you start your video conference.
See this article for making sure the output devices are configured correctly to your Mac.
Windows
The Devio SCR-10 is powered by DisplayLink™ technology.
When using Windows 10, the drivers should be automatically installed when plugging in Devio SCR-10.
However if you experience any issues please find and install the latest drivers for Windows here.
NOTE: If you need drivers for Windows 8, Vista or XP please scroll down on the above link and look under the Legacy drivers section.
Please follow the instructions in the DisplayLink driver installer.
Congratulations! You are now ready to use Devio SCR-10 whenever you start your video conference.

