Step 4: Connect Booking System to Evoko Home
Now that the necessary booking system preparations have been made and Evoko Home is installed we can start integrating the two.
To connect Evoko Home to your booking system, you need to complete a wizard in your web browser. The wizard varies slightly depending on the booking system so please see the section that applies for your installation in this article.
Connect Evoko Home to M365 using oAuth and RBAC
- Find the Evoko Home Wizard by navigating to http://localhost:3000 in your browser. (It will revert to https://localhost:3002 in your browser)

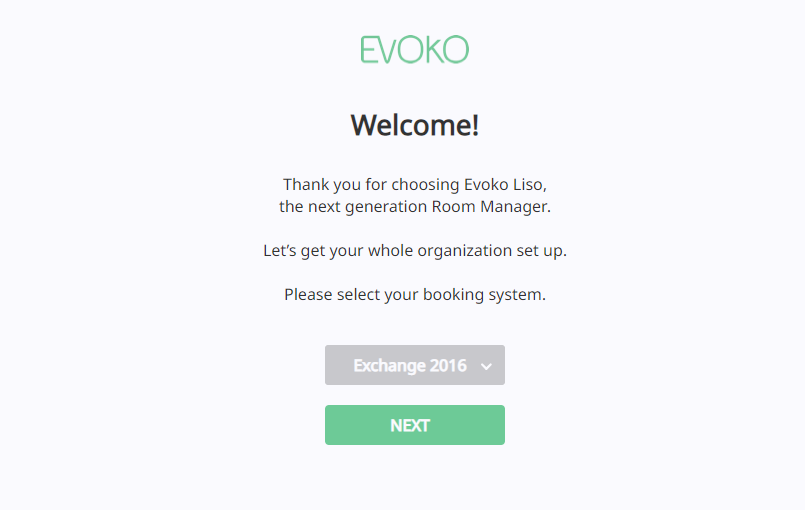
- From the drop down list, select Microsoft 365 and press Next.

- Prompt: Internet Access: For Firmware downloads and connecting Supported Services you can connect the Evoko Home server to the internet directly or through a proxy. We will be connecting directly in this exercise. Press Next

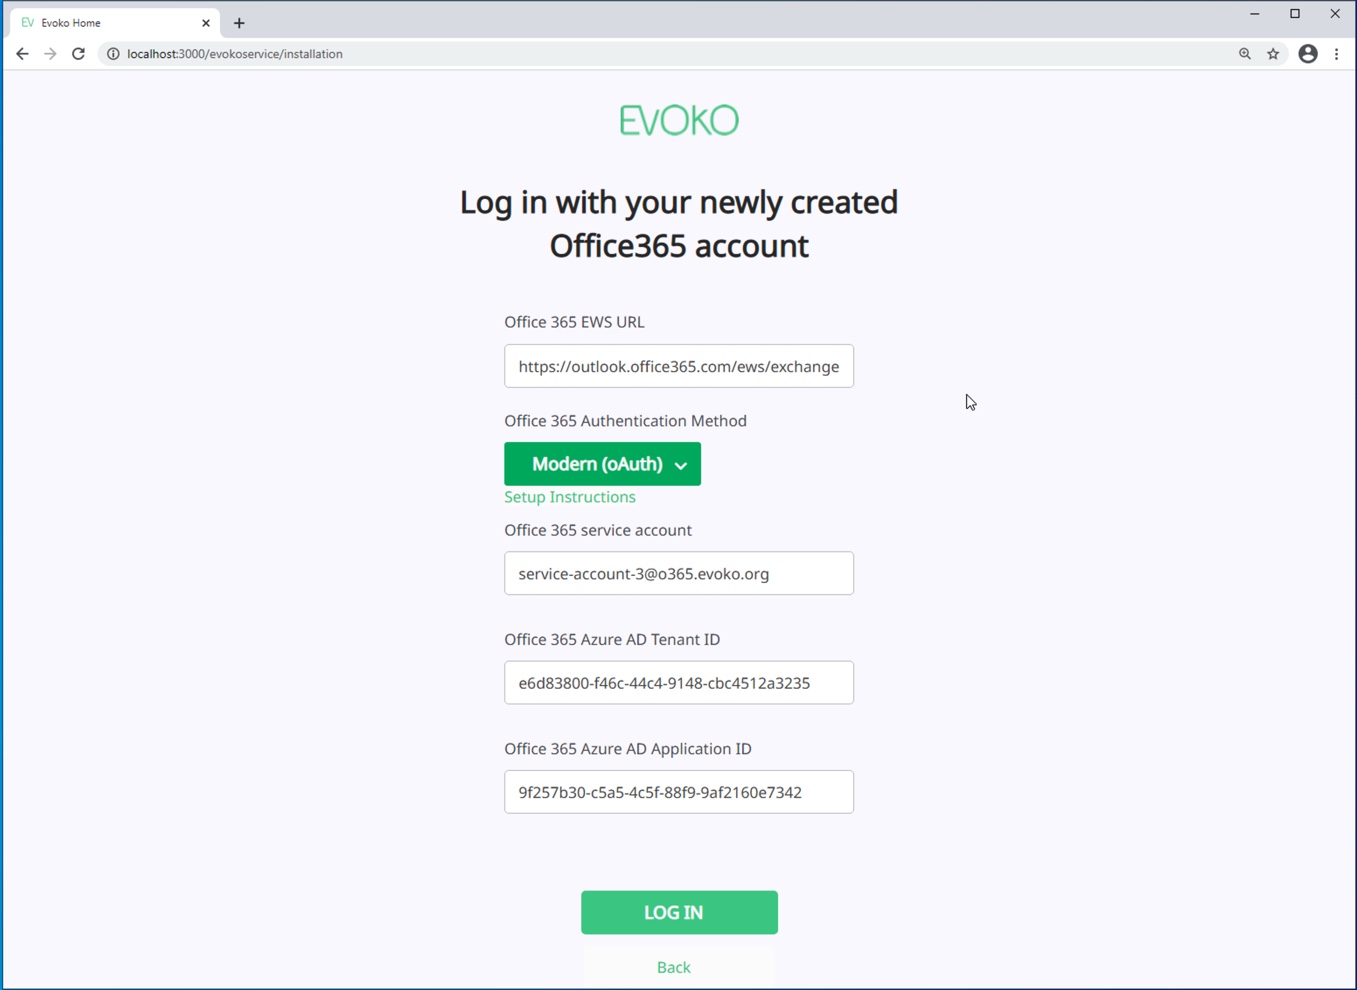
- You will now connect your Microsoft 365 Environment to the Evoko Home Service. During the initial setup there were [4] key items that were needed to be identified that you will now need at this step. Those items include:
- Microsoft 365 Service Account
- Microsoft 365 Azure AD Tenant ID
- Microsoft 365 Azure AD Application ID
- Microsoft 365 Azure AD Client-secret

- Enter the information from Azure AD into the respected fields as shown below. Press Log In when done.

- If the correct AD information was used it will pass and present you with HTTPS Port information. You can keep this default to [3002]. Additionally at this step you can upload necessary SSL files if you would like. For this exercise we are going to proceed with the default certificates. Press Next

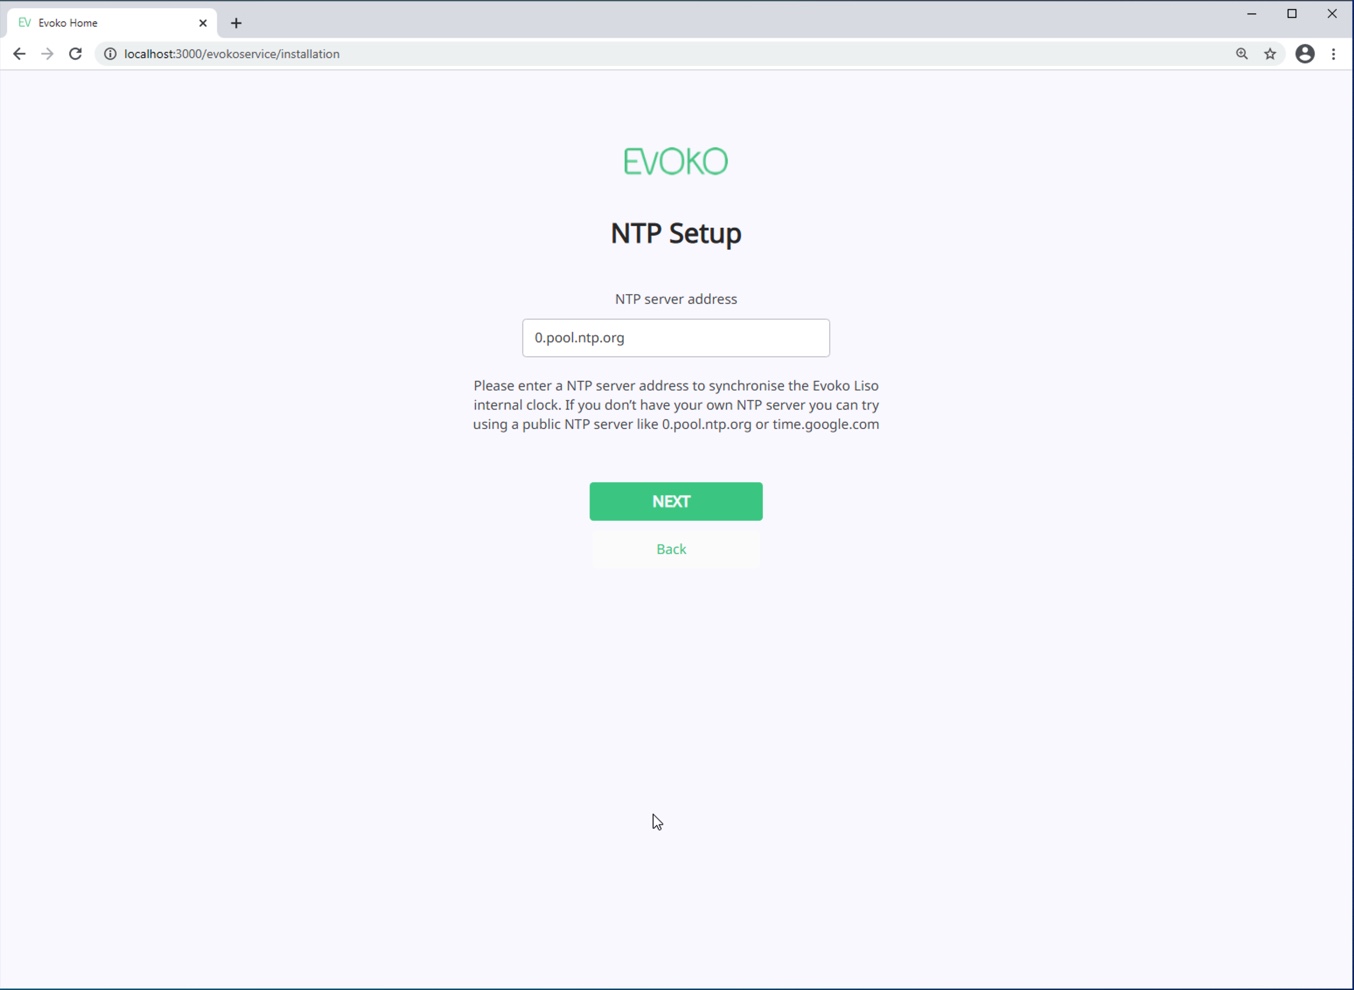
- Prompt: NTP Setup: You will be prompted to enter an NTP server address to synchronize the Evoko Liso internal clock. If you do not have your own NTP server you can try using a public NTP server like 0.pool.ntp.org or time.google.com (for this exercise we will use 0.pool.ntp.org). Press Next

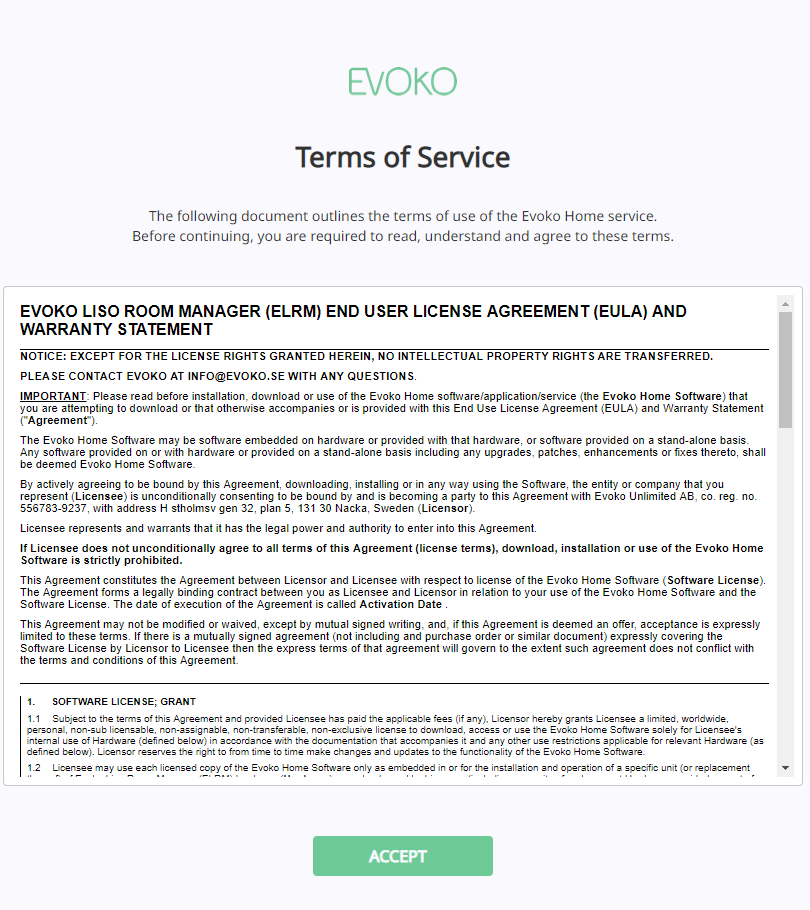
- You will be presented with the Terms of Service. Press the Accept button.

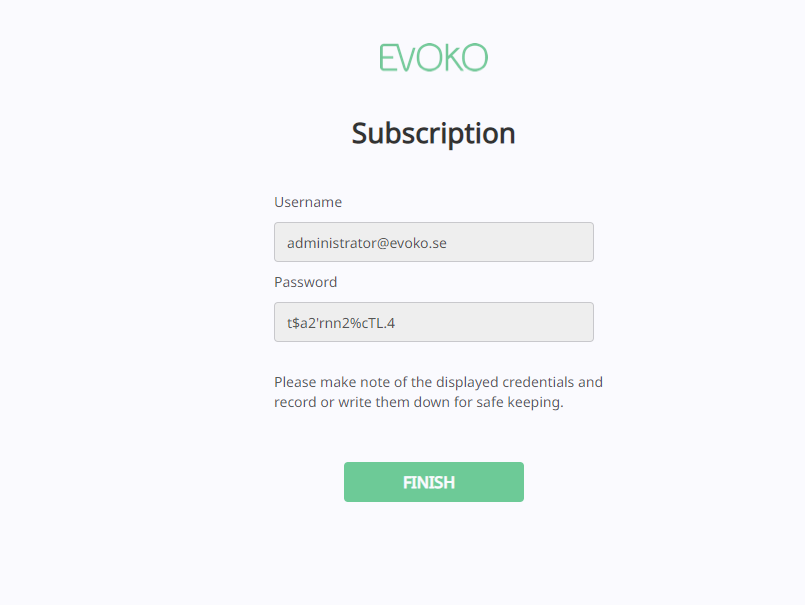
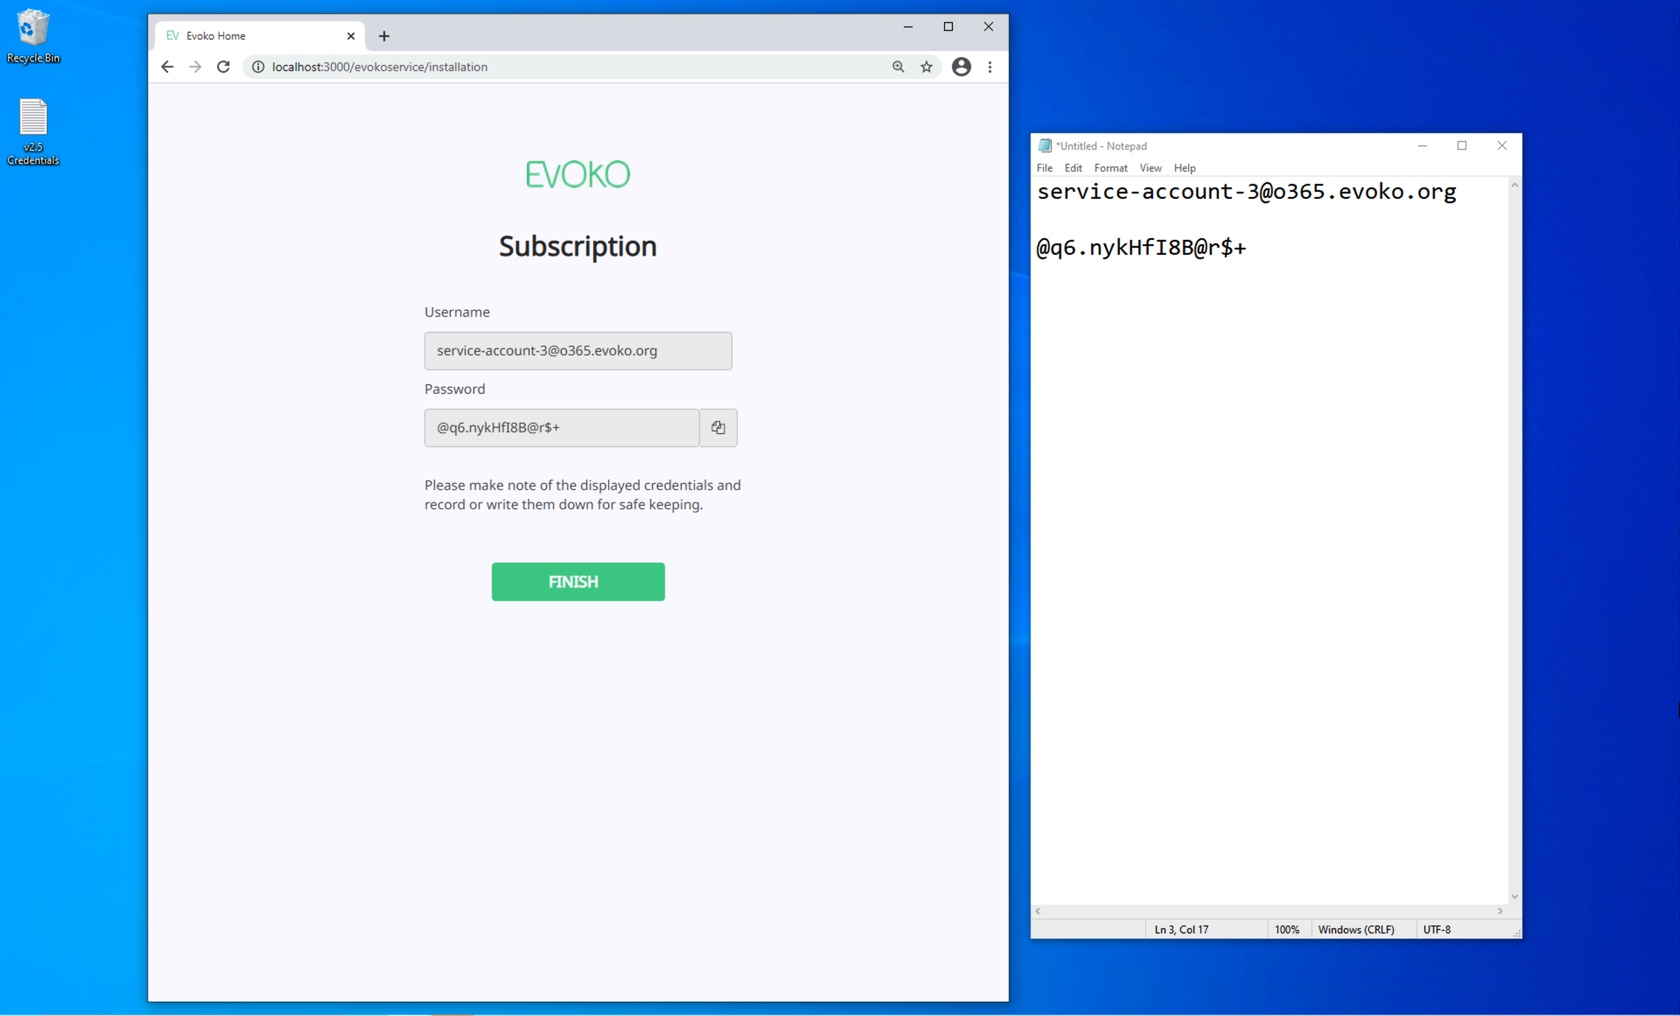
- You will be prompted on the next page with your log in credentials. It is very important that you copy this password down to your notepad as this will be the password you use as an Administrator to log into Evoko Home. Before you press Finish - Copy Down the Password! (It is also emailed to the inbox of the account used).

- Press Finish and it will prompt you to enter the credentials you just copied down. Enter the credentials and press Log In.
- You can now move on to the Basic Evoko Home Setup Steps in the Getting Started Guide
Connect Evoko Home to M365 using oAuth
- Navigate to the Evoko Home configuration URL, in most hosted cases this will be localhost:3000.
- To connect Evoko Home to your Microsoft 365 environment you need to go through the Evoko Home web wizard. Start by selecting “Modern (OAuth)” from the drop down on the credentials page.
- Add the created service account and copy/paste the Tenant ID and Application ID from the previous steps for the appropriate fields. Once done click “Login”.
- The wizard will now wait for you to log in using the provided URL (https://microsoft.com/devicelogin) and provided code.
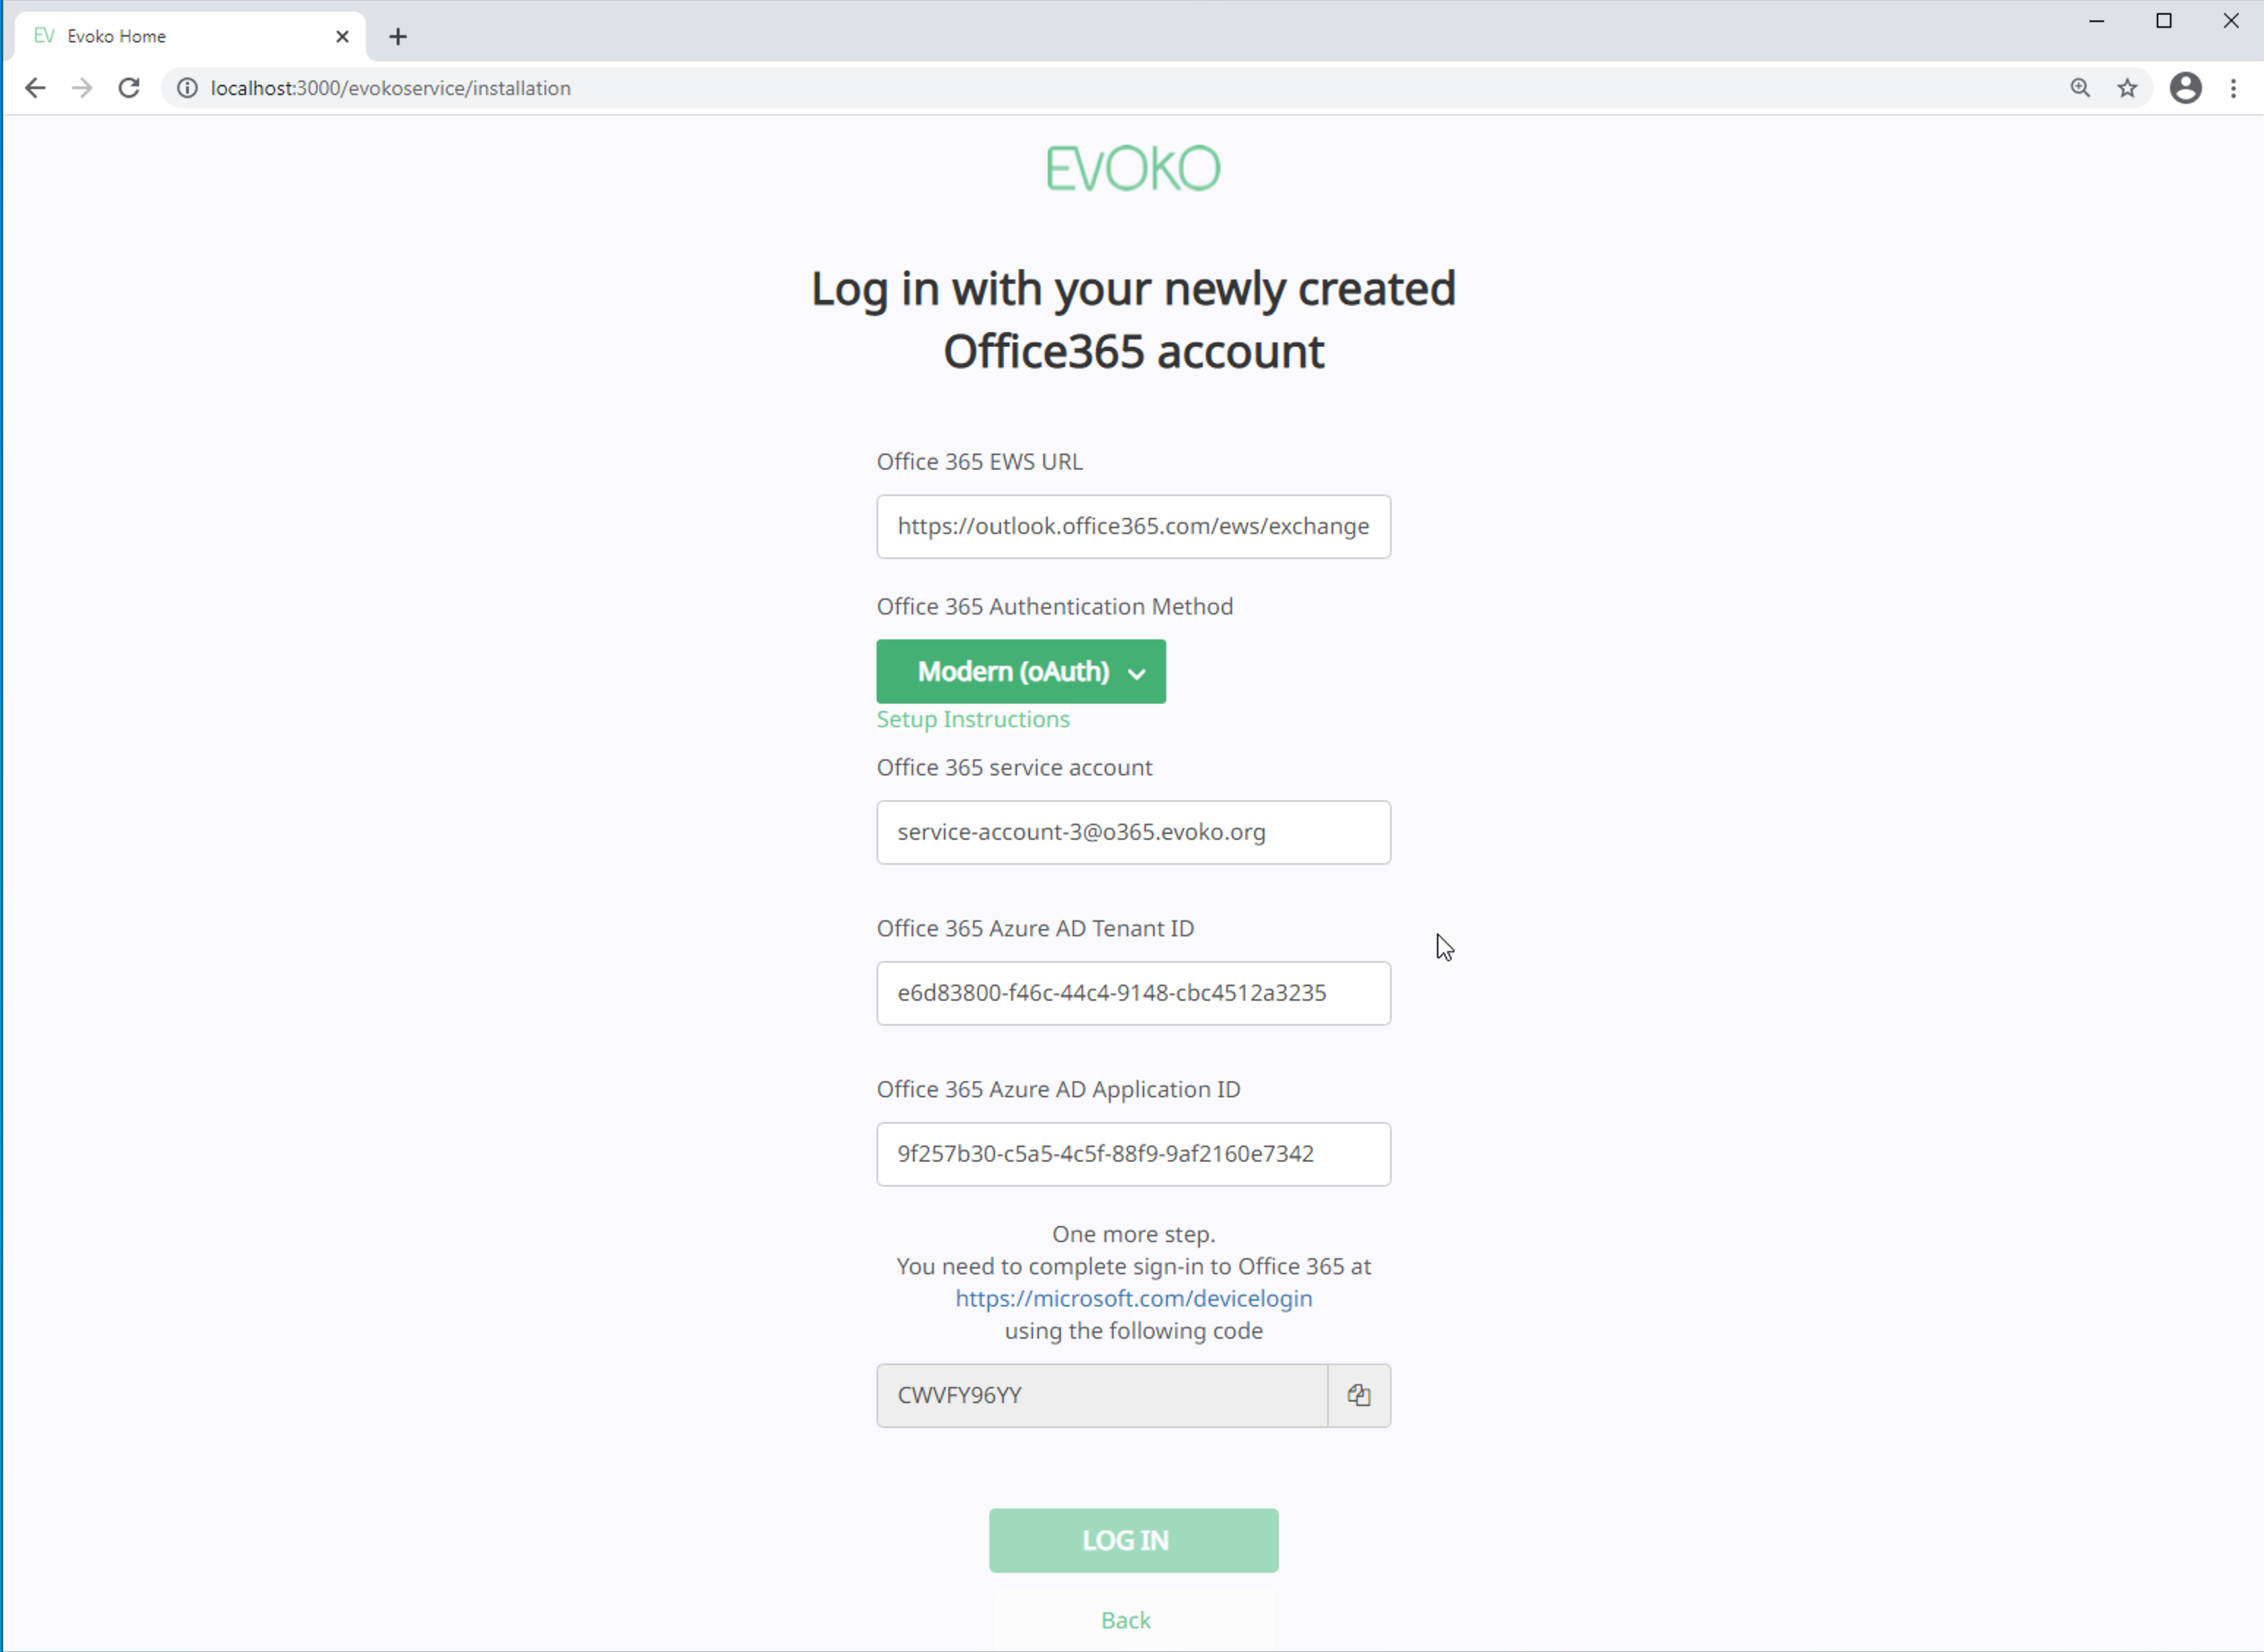
- On the provided URL, enter the code from the wizard and click Next
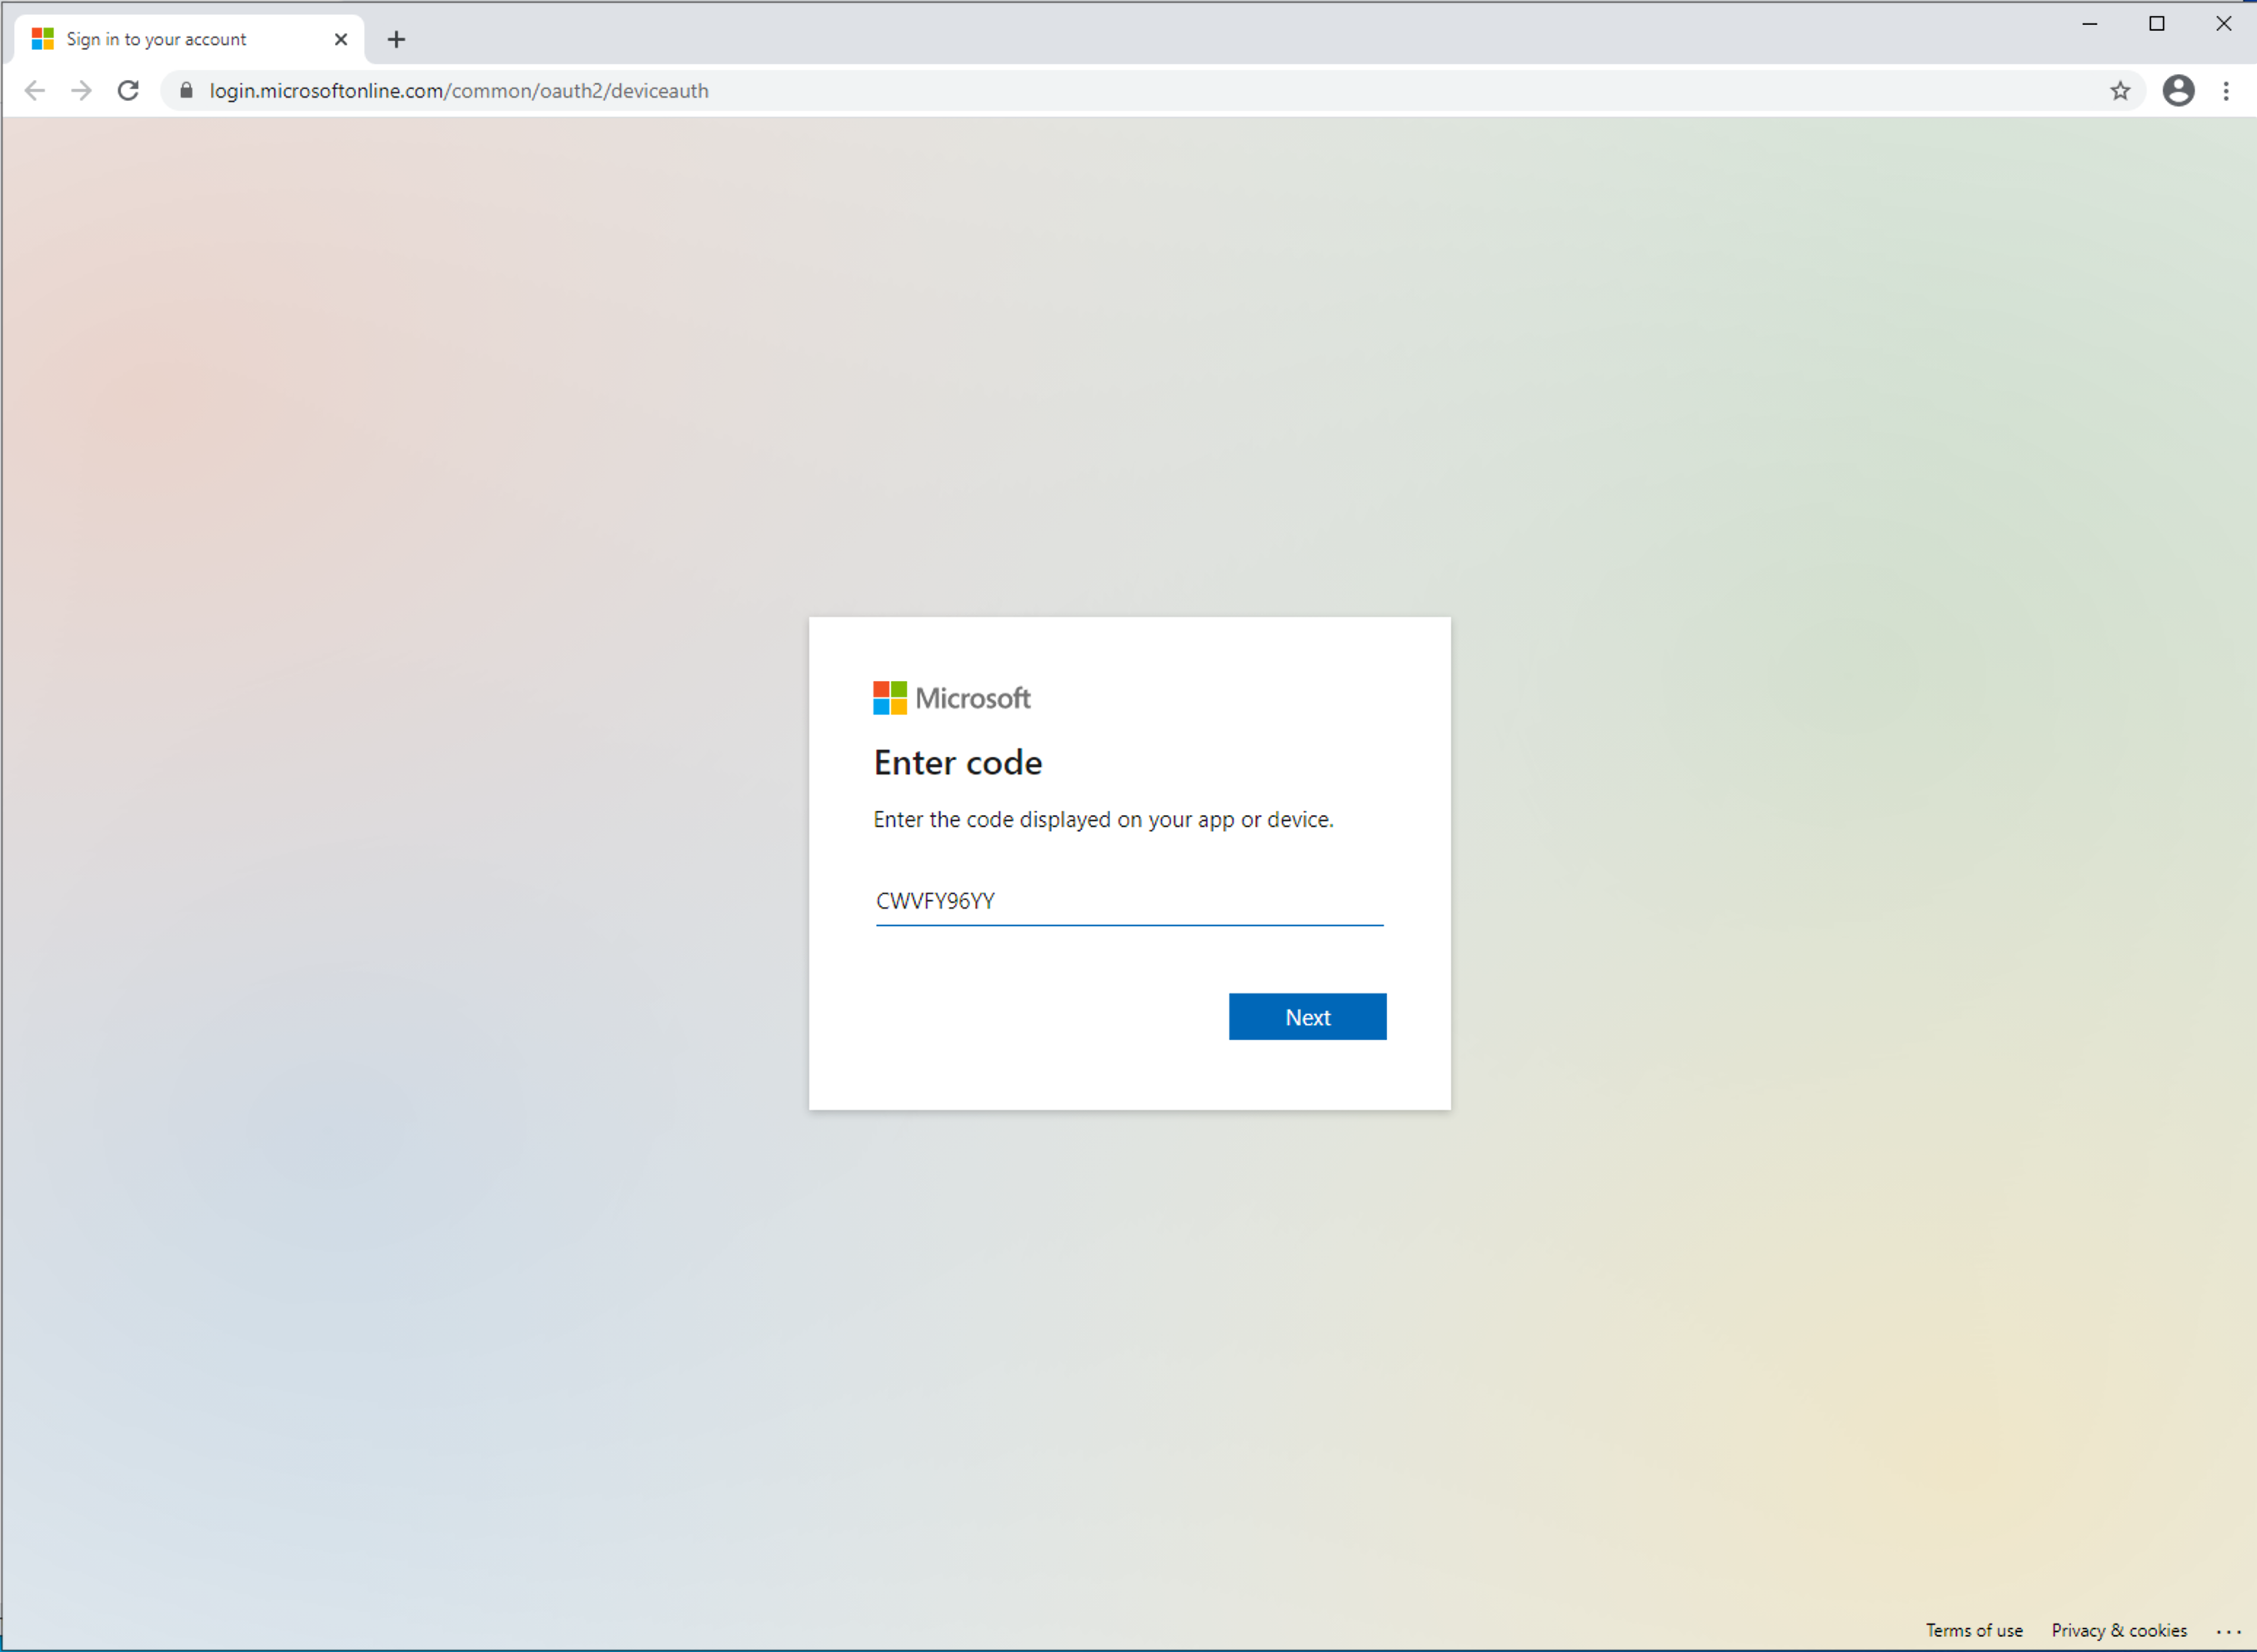 Notice the application name you configured for this and log in with your service account and password.
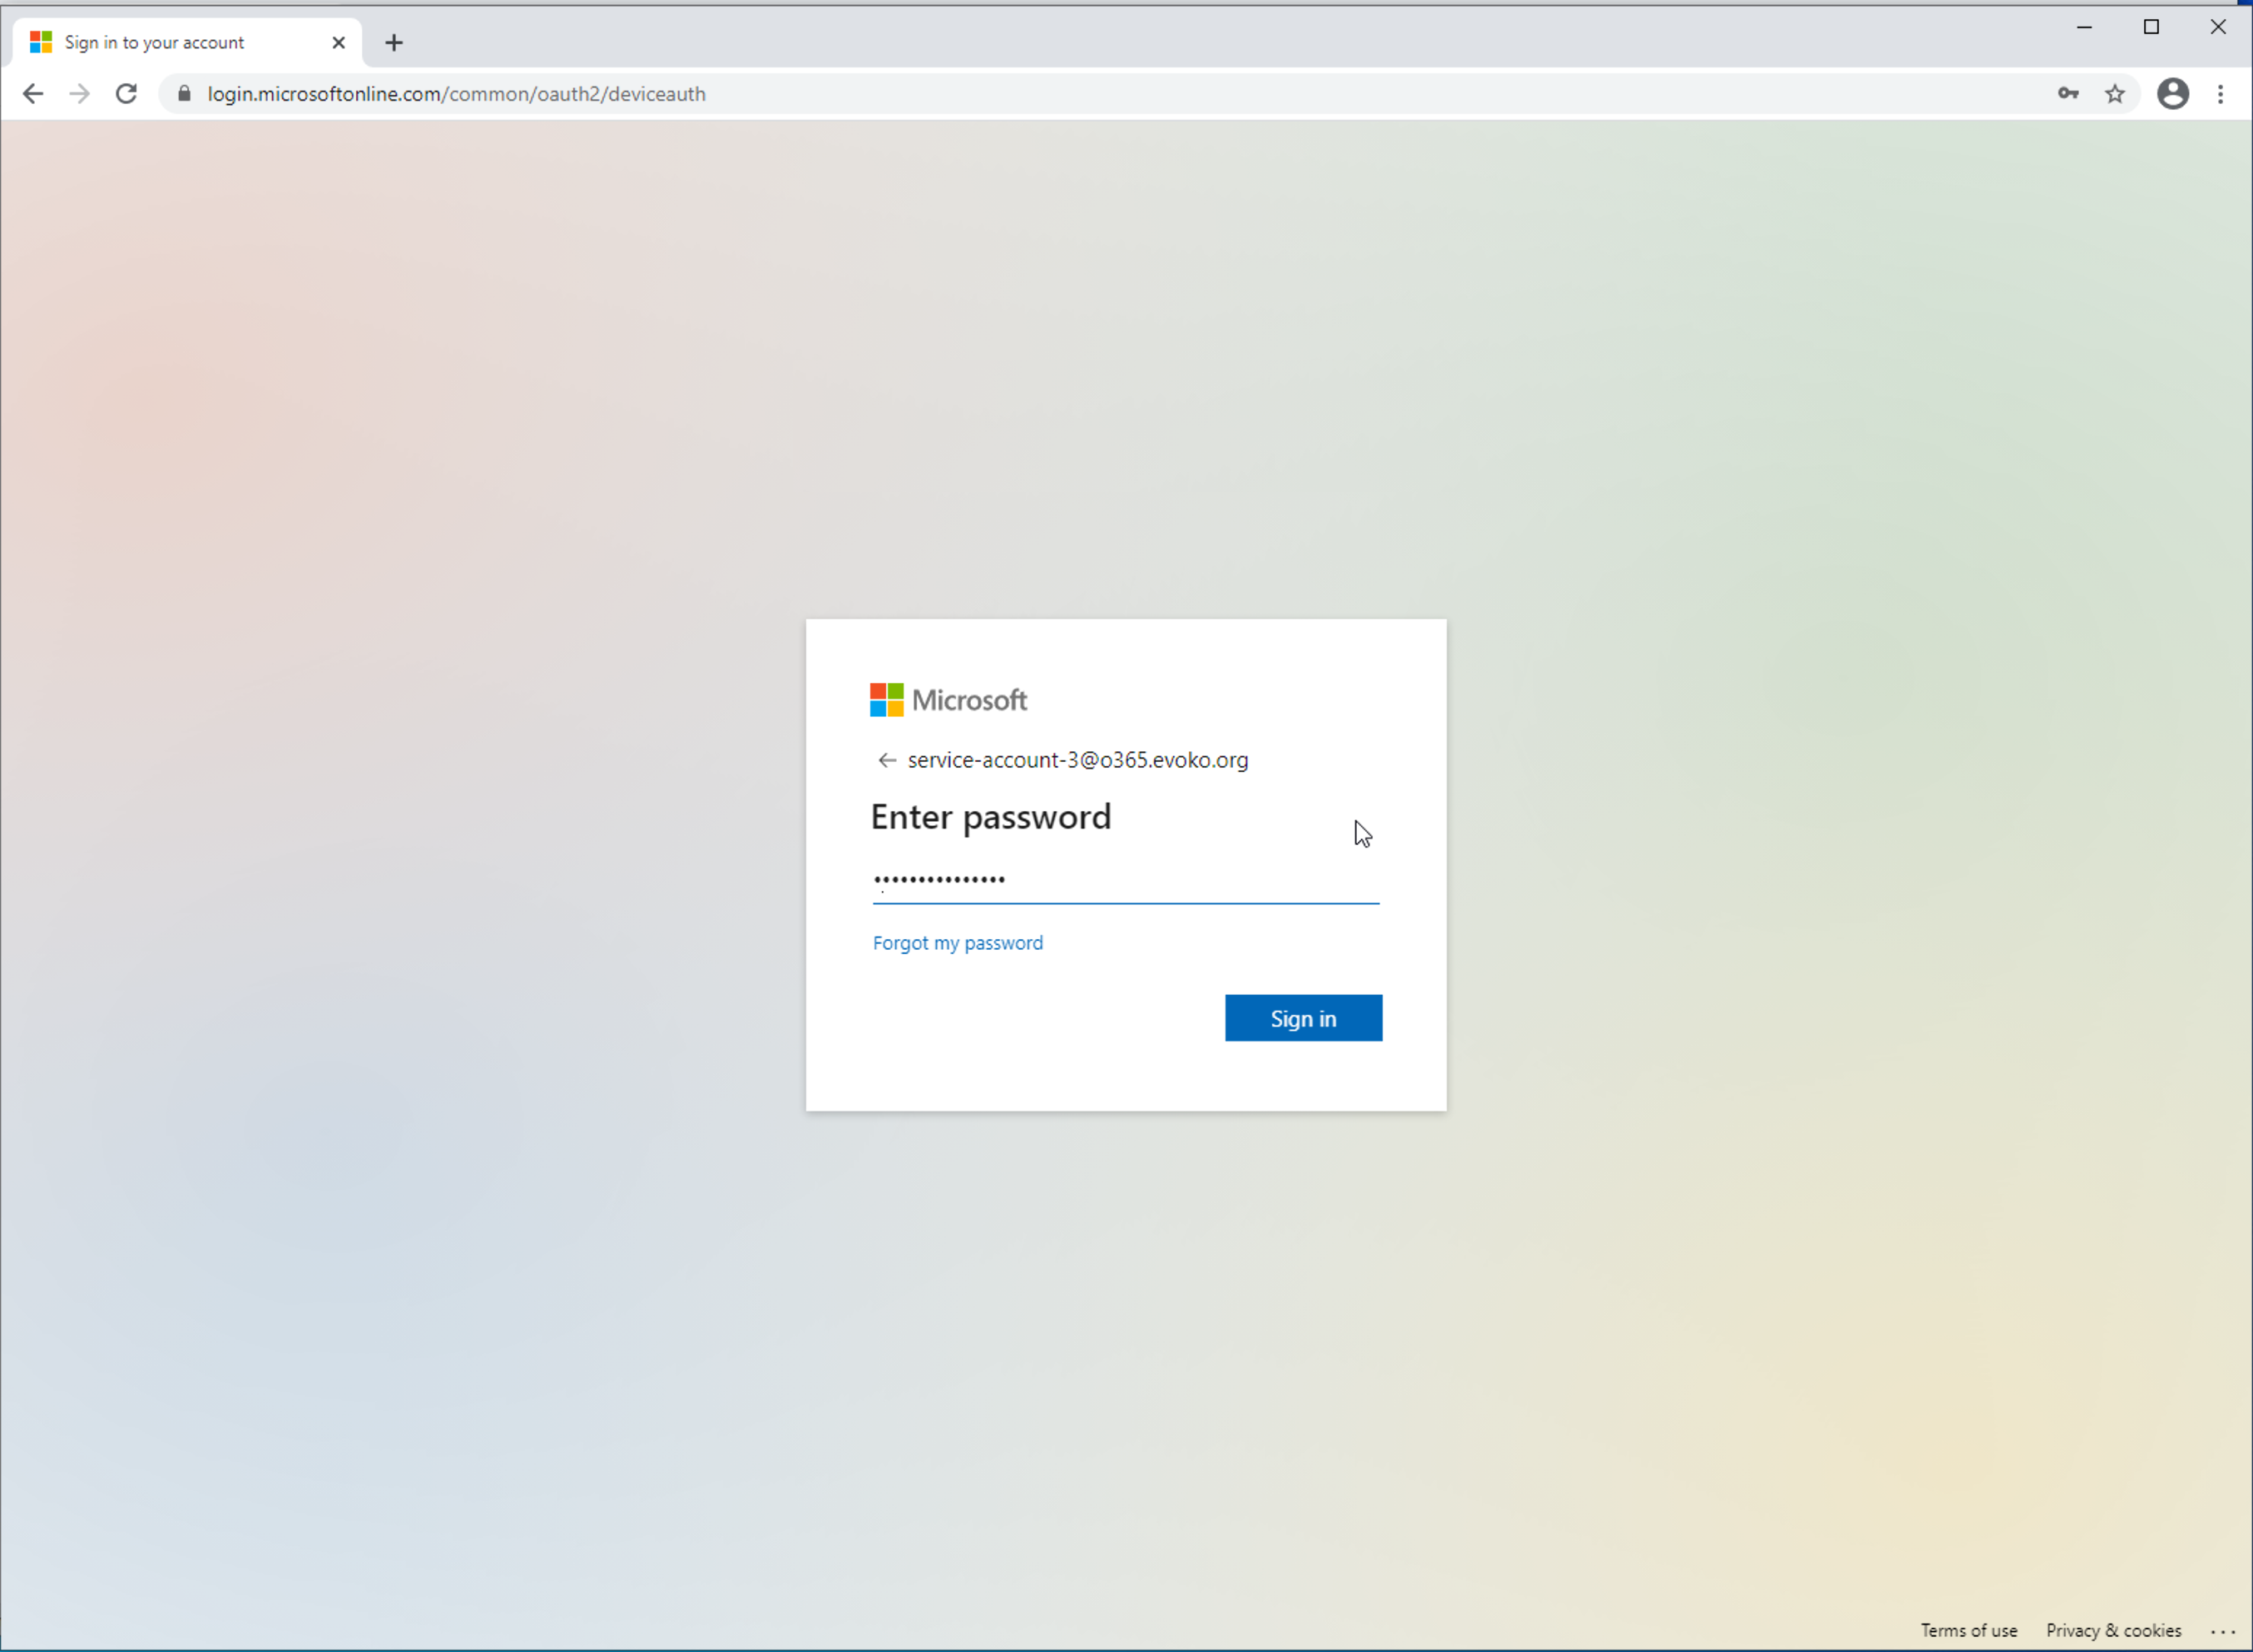
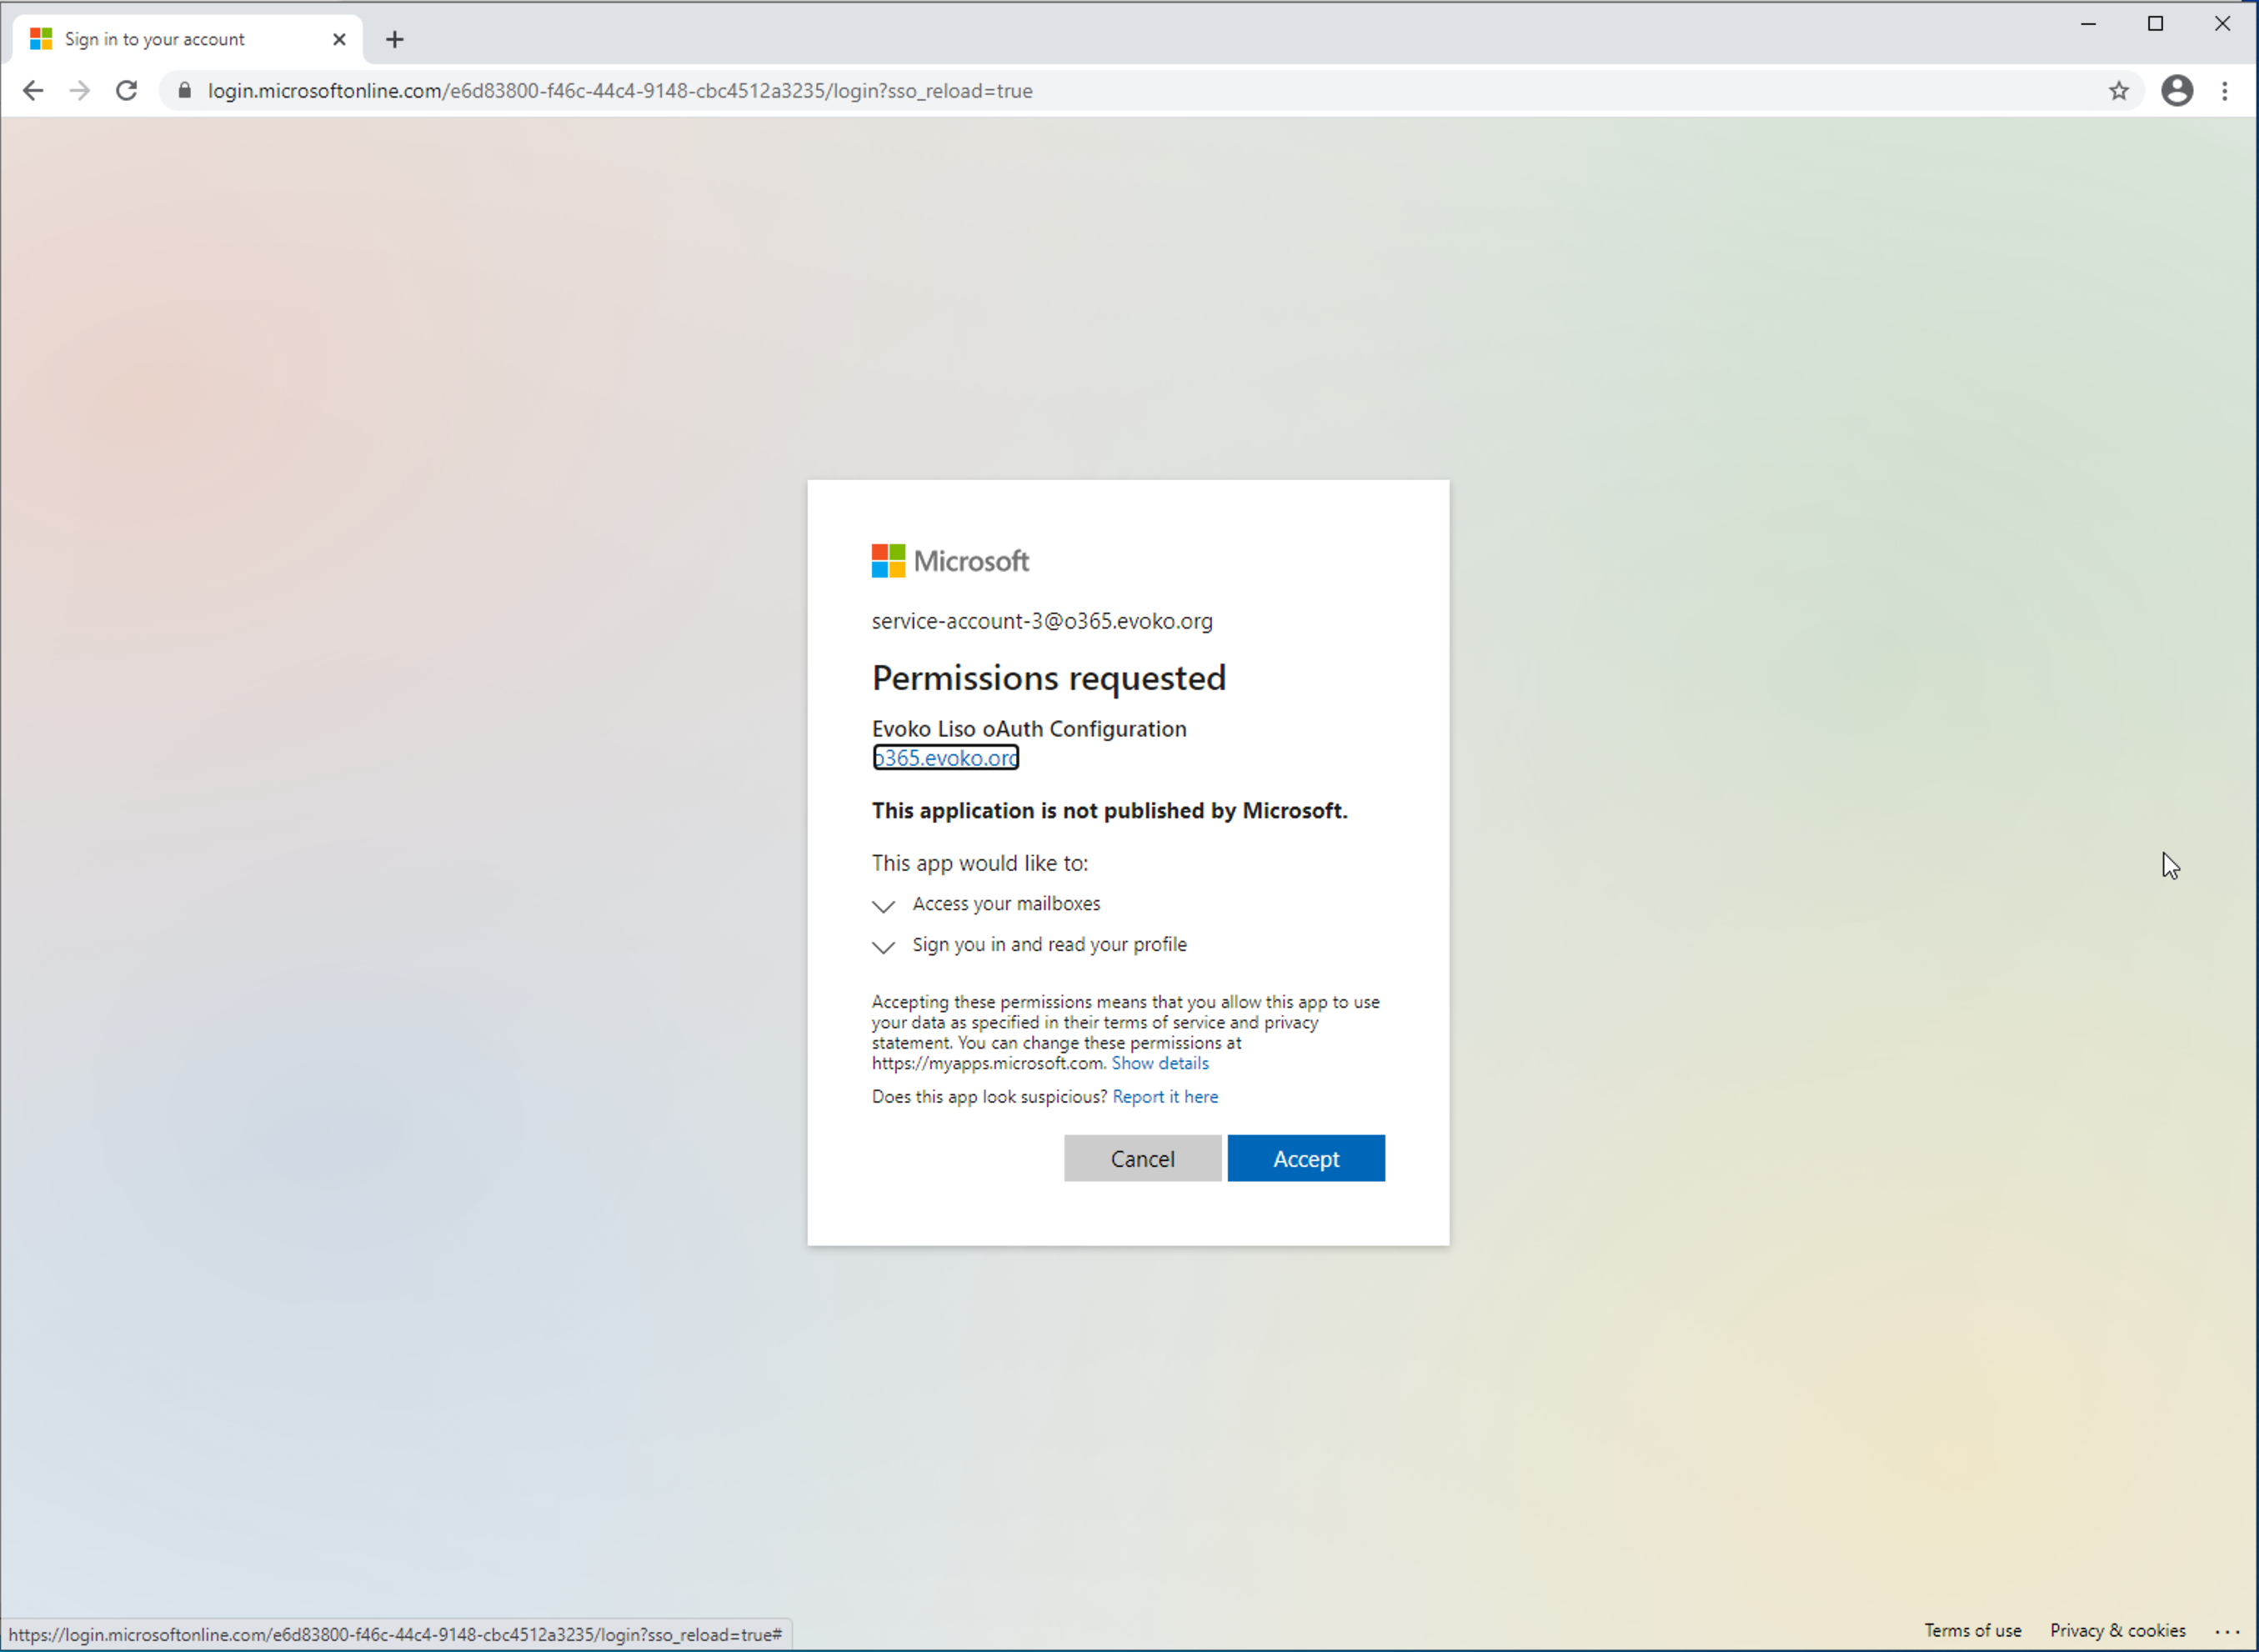
- Once you sign in using service account credential, it will prompt for the consent dialog. This happens only for first login to this application, subsequent login remembers the consent. Review the dialog and click "Accept".
- You should now see the following screen which informs you to safely close this window.
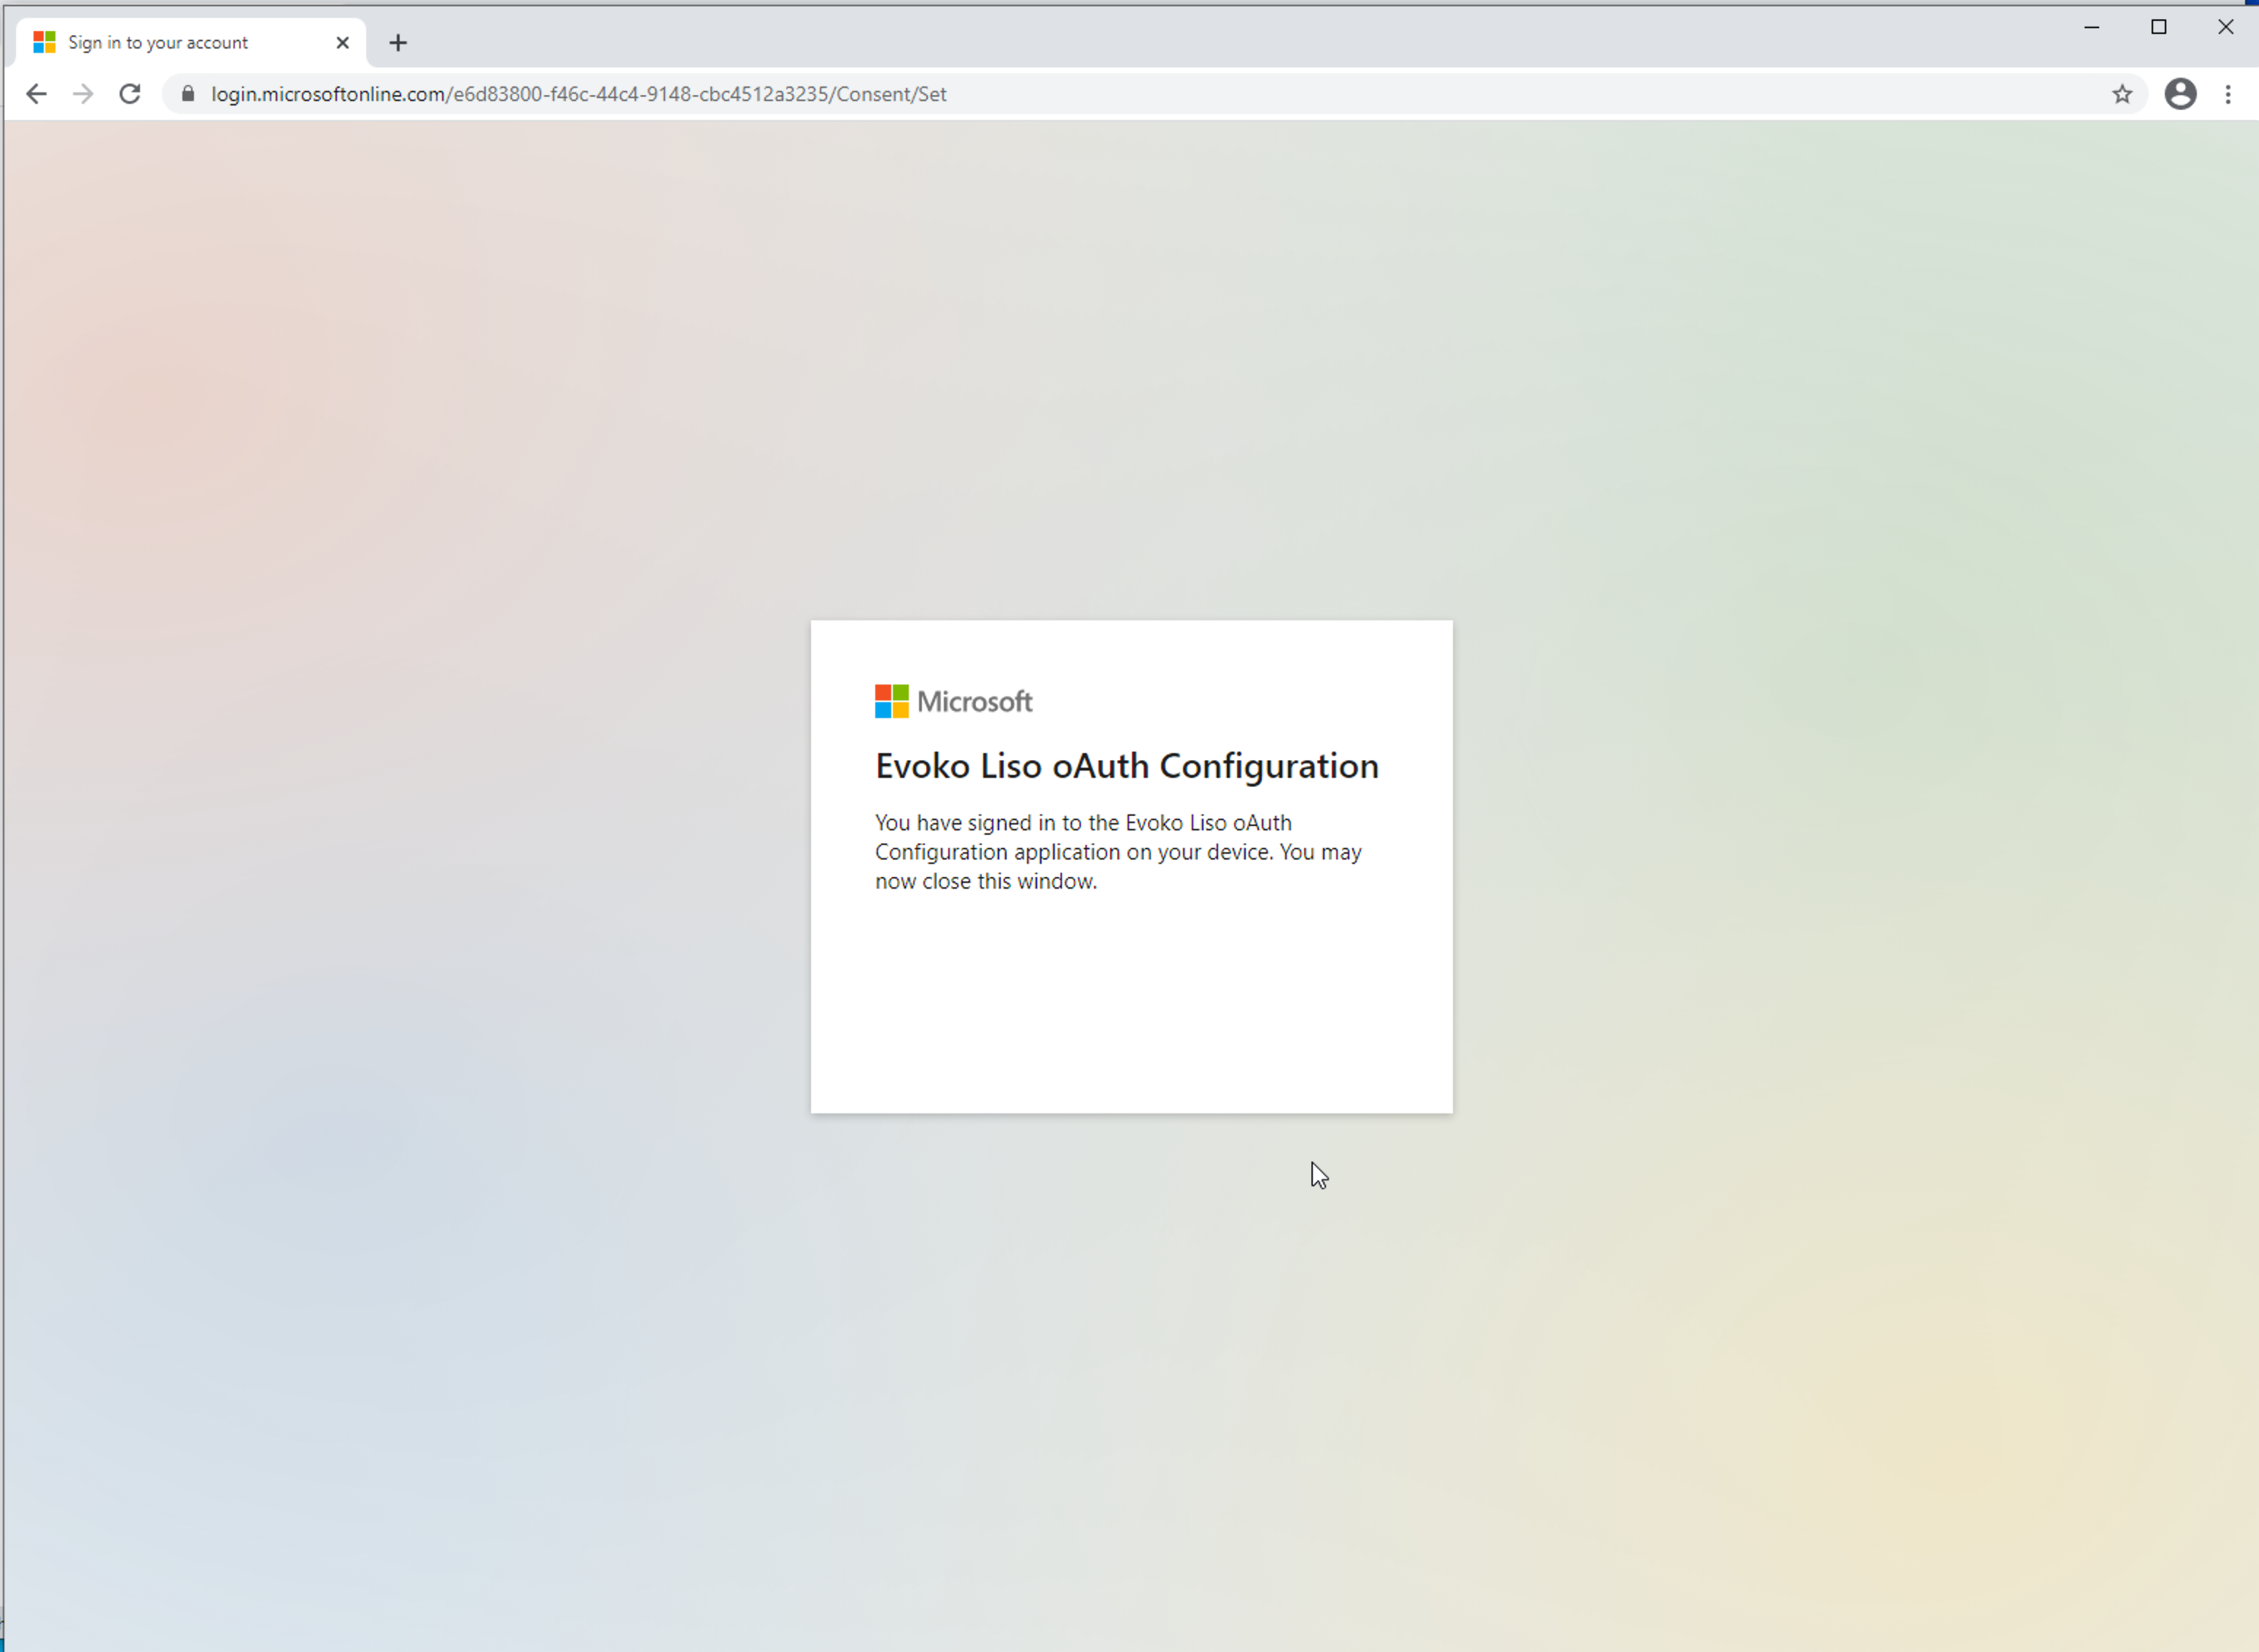
- Switch back to the Evoko Home Setup Wizard and continue to the next step. Your screen should look like this:
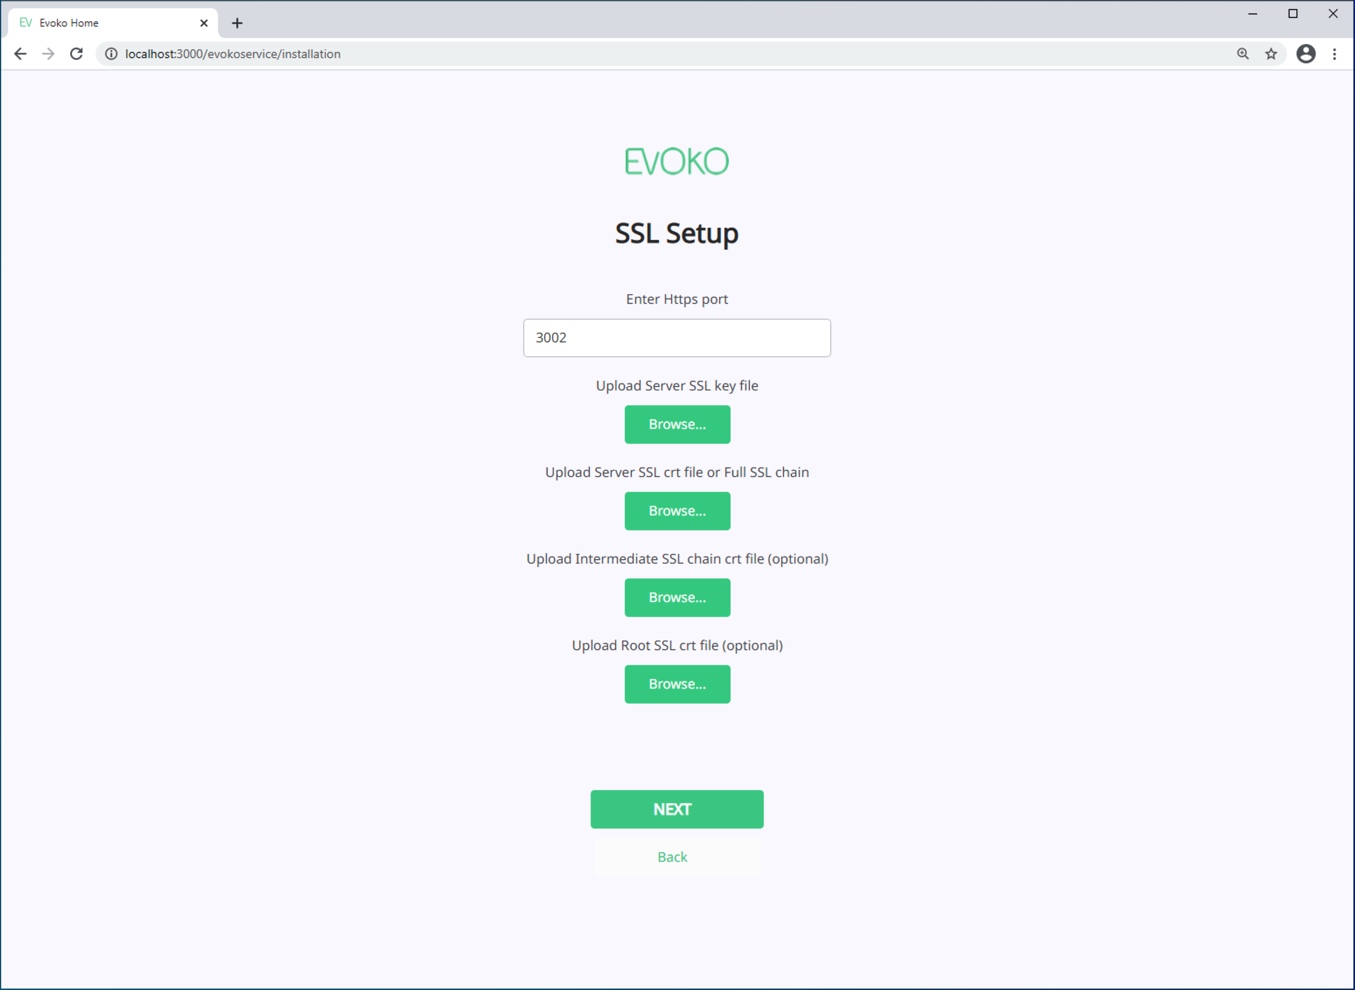
- The Default Port for Evoko Home is 3002 - if you do not wish to change that or upload any of your own certificates, press next.
- Here you will prompted to enter an NTP Server Address for Evoko Home to use. We recommend using 0.pool.ntp.org if your organization allows access to it. Some larger organizations may have their own internal NTP server. Press next when ready.
- Here you will be prompted to accept the Evoko Terms of Service. Press Accept!
- Here on the final page you will be presented with the Username and Password that will be used to log into Evoko Home as an Admin. Its very important that you copy this information to notepad before hitting finish as the text will disappear!
- Once the information is copied to notepad Press Finish
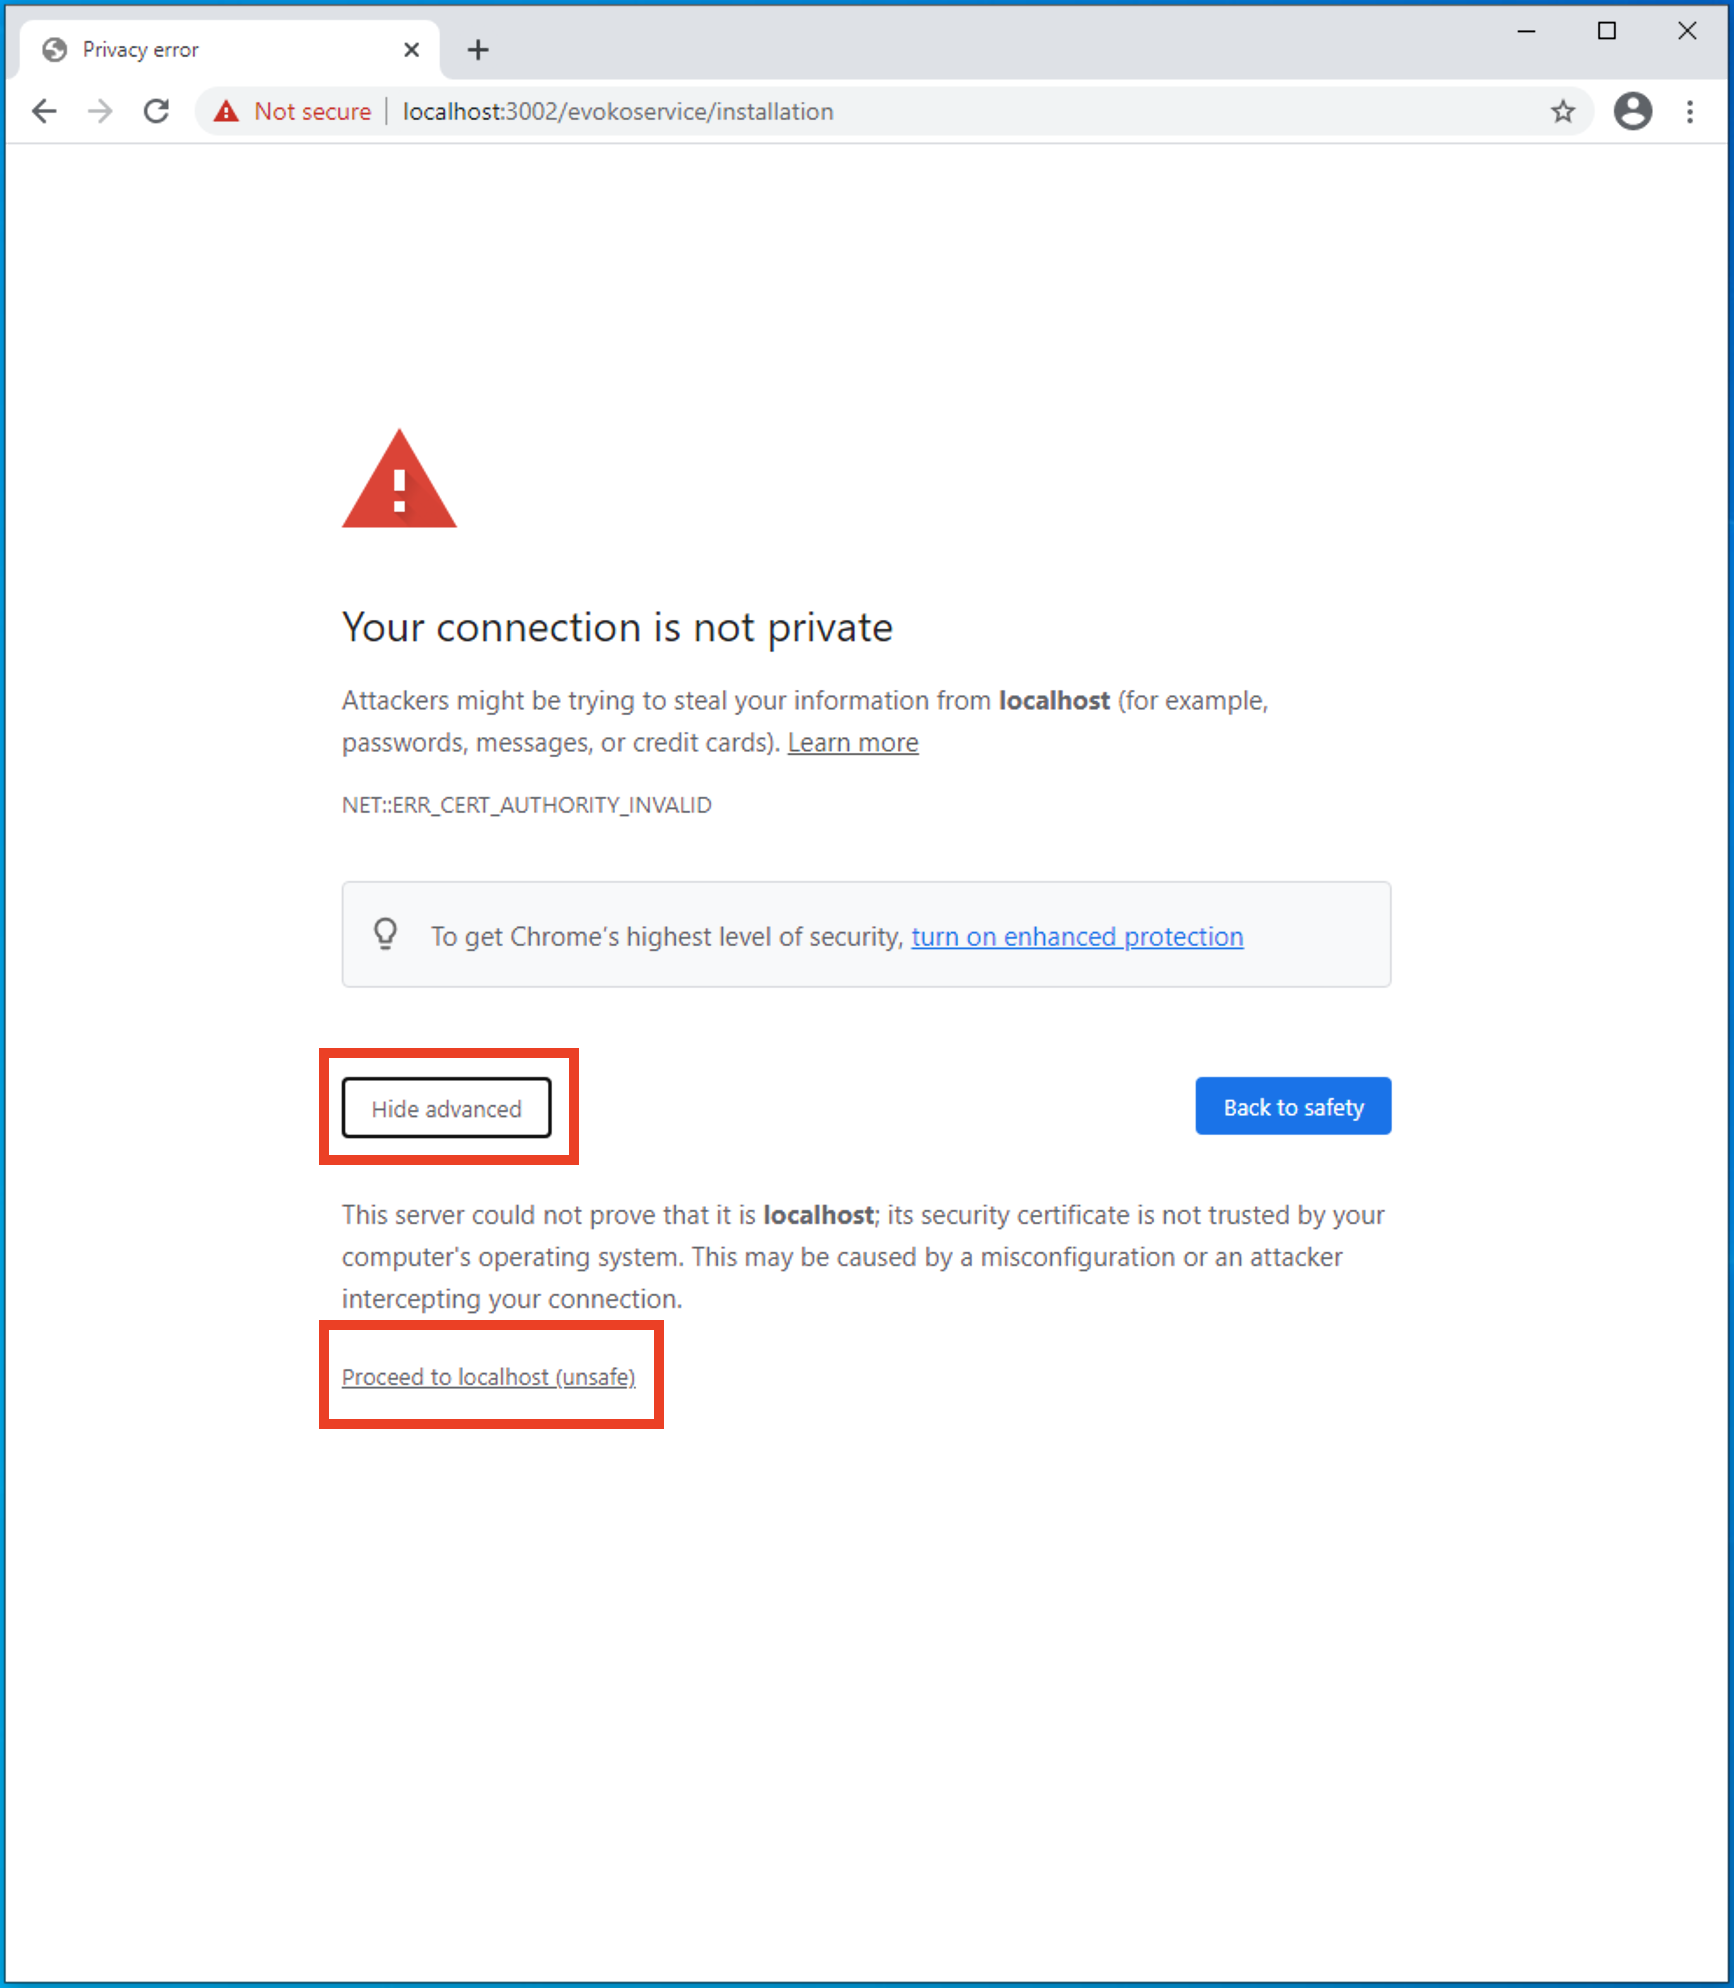
- If you did not upload your own Security Certificates during the wizard you may get a message indicating that your connection is not private. If you do get this message press Proceed to Localhost.
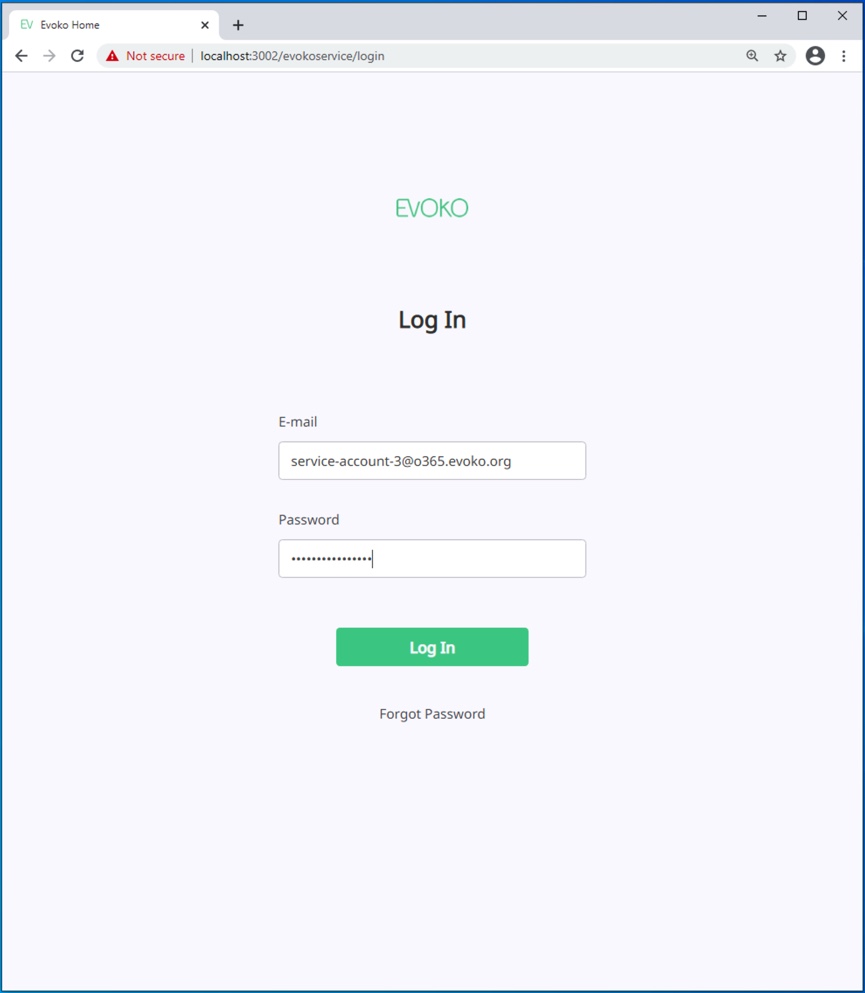
- You will want to log in with the Username and Password that Evoko Home prompted you at the end of the wizard (this should be the information you copied to the notepad).
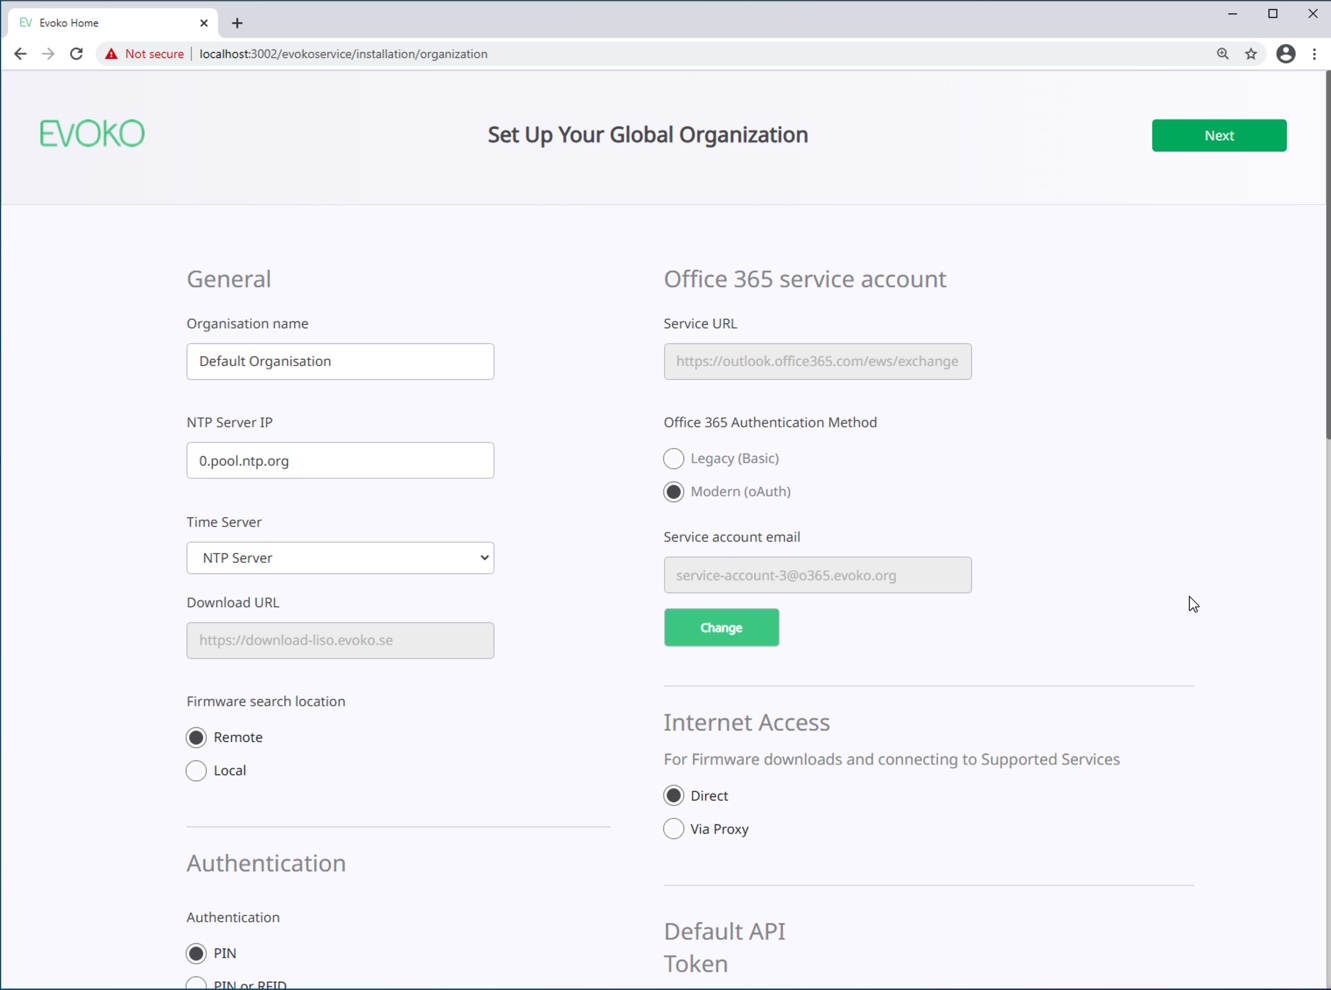
- Success! You have now completed the setup with Modern Auth and you can now move through Setting Up Your Global Organization in Evoko Home! This will let you add locations, and room resource accounts from O365!
Connect Evoko Home to Google Workspace
After successful installation Evoko Home will be ready to connect to the booking system through the wizard. Select your booking system from the drop down menu and continue with the details below for Google Workplace.
- Navigate to the Evoko Home configuration URL, in most hosted cases this will be localhost:3000.
- To connect Evoko Home to your Microsoft 365 environment you need to go through the Evoko Home web wizard. Start by selecting “Google Workspace” from the drop down on the credentials page.
- We strongly recommend not to use the Super Admin as the admin email here as it will cause you a lot of problems on the Google side. Instead - we recommend you create a new user with admin permissions and assign the sharing rights "make changes to events" or "make changes and manage sharing" for your resource rooms as explained in the Google Workspace Setup Guide.
- Enter the service account that was created.
- Browse to the P12 Key locally from the Evoko Server, press Open.
- The P12 field should show a green check mark like this.
- Enter the admin email that was created for Evoko Home like shown here:
- Press Log In
- Enter the https application port you like to use (most customers use the default 3002). Additionally you can upload your own SSL/TLS certificates and hit next. If no certificate is uploaded, a unique auto generated self-signed certificate will be used. In this guide we will be using the auto generated certificate. Press Next to continue:
- Next you will need to enter an NTP address to synchronize the Evoko Liso internal clock. If you do not have your own NTP server you can try using public NTP servers. We default to use 0.pool.ntp.org as shown below. Press Next when done.
- Next you will need to agree to the conditions of the EULA if you dare! Press Accept.
- The credentials show on the next page are generated for your login to the Evoko Home interface. You will want to make note of these as when you click "Finish" you will be prompted to validate the recently made credentials.
- Press Finish
Connect Evoko Home to Exchange 2016, 2019
-
To connect Evoko Home to your Exchange 2019 / 2016 / 2013 environment you need to go through the Evoko Home web wizard. Start by selecting your booking system and then click Next. (In this example we have chosen Exchange 2016, the steps for Exchange 2019 is the same).
-
Enter the credentials (e.g.
service-account@domain.tld) for your service account granted with application impersonation along with your Exchange server EWS URL (e.g.https://exchangeserver.tld/EWS/Exchange.asmx) and a administration email (e.g.administrator@domain.tld). Then click Log In.
-
Enter the https application port you would like to use (default
3002). Additionally, you can opt to upload your own SSL/TLS certificate (this needs to be done fromlocalhostand not a remote host) and then click Next. If no certificate is uploaded, a unique auto generated self-singed certificate will be used.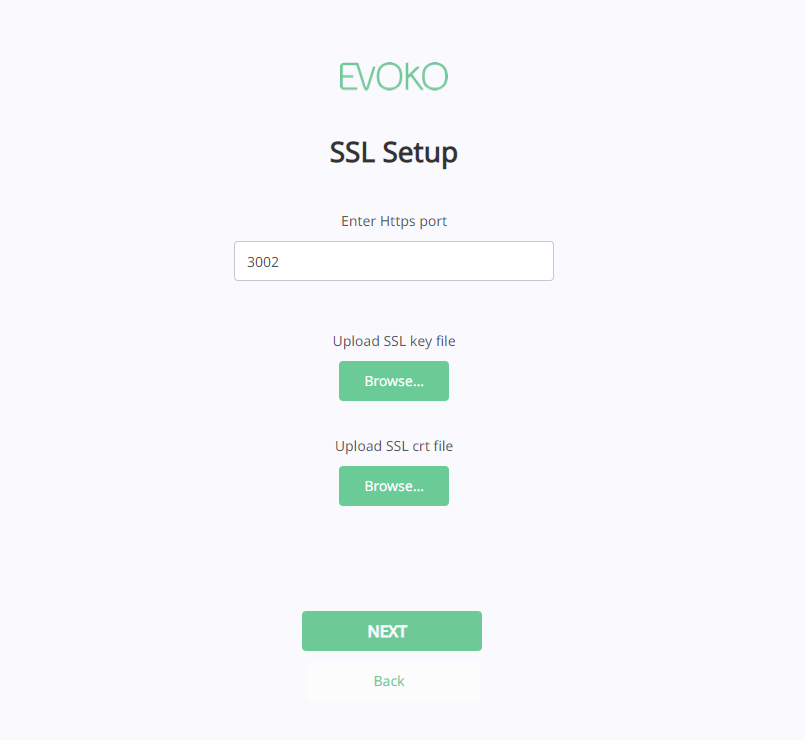
-
Enter an NTP server (e.g.
pool.ntp.org) that the Evoko Home server and the Evoko Liso units will have access to and then click Next.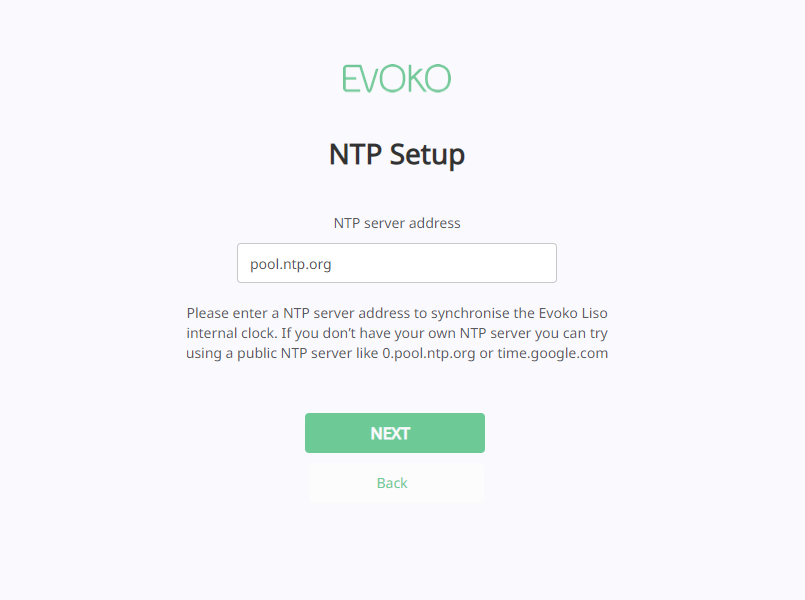
-
Agree to the conditions of the EULA and then click Accept.
-
Credentials should have been generated for your instance of Evoko Home, please make note of these credentials since they are shown only once and then click Finish.