Enabling AVB on Netgear S3300 switches
Note: Biamp Systems does not currently recommend the use of the S3300 switches for AVB systems with Tesira devices. Biamp recommends using any of the switches listed on our List of AVB-capable Ethernet switches. Please contact support@biamp.com for technical assistance.
This article explains how to configure a Netgear S3300 (aka GS728TX / GS728TXP) series Ethernet switch to pass AVB traffic. Note that a License Key must be purchased separately in order to enable the AVB features on this switch. The license is called an "EAV License" (Ethernet Audio Video).
There are three main steps in getting the switch fully configured. First, register the switch on Netgear's website and activate the license key. Second, install the license key on the switch. And finally, enable the protocols that AVB requires.
Activate license key
A Netgear EAV License must be purchased separately from the S3300 series switch. Please contact your Netgear reseller to obtain this license. The license code will be emailed to you as a string of letters and numbers, and this license must be activated on Netgear's website in order to obtain the actual license file.
- Go to the MyNETGEAR website.
- Login to the site if you already have an account, otherwise register a new account.
- Register the switch with Netgear to activate the warranty. If you registered a new account, then you have already registered the switch. Otherwise, click the Register a Product link and enter the serial number.
- Click on the My Products link to see a list of your registered products. Then, click the Activate License Key For Registered Product button. Enter your license code, and download the license file. Save the license file to your computer, as it will be used in the next step.
Apply license file to switch
The next step is to connect to the switch and send the license file, which will enable the AVB features in the switch.
- Connect your computer to the switch with a network cable.
- The switch has a default IP address of 192.168.0.239. Therefore, ensure that your computer's IP address is set in the same 192.168.0.xxx range. (The only exception to this rule is if the switch is connected to a larger network that has a DHCP server, in which case the switch will accept an automatic address from the DHCP server instead. In this case, you'll need to use Netgear's Smart Control Center software to discover the switch's IP address. Smart Control Center can be downloaded from Netgear's download site.)
- Open a web browser, and type in the IP address of the Netgear switch into the address bar. The default IP address of the switch is 192.168.0.239, but the IP may be different in some cases (see step 2 above).
- When prompted for a password, enter the default password, which is "password".
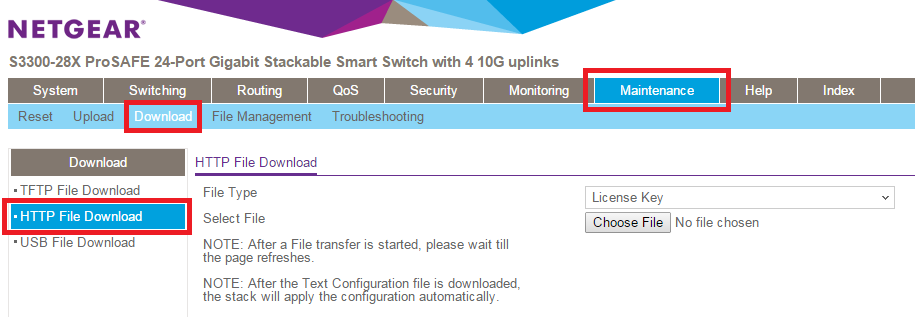
- Click on the Maintenance tab, then click on the Download sub-page. On the left side, select HTTP File Download.
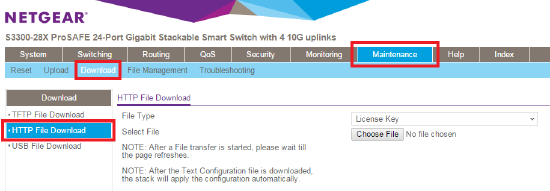 For File Type, choose License Key. Click Choose File and browse to the license file that you previously downloaded from the MyNETGEAR website. Then, click the Apply button in the top-right corner.
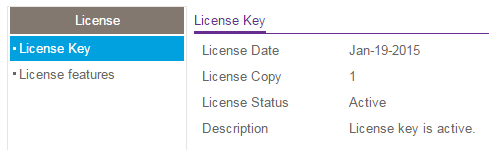
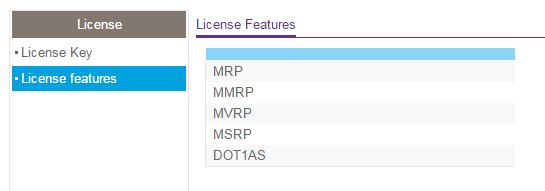
- To confirm that the license key was successfully added, you can go to the System tab, and then the License sub-page. You should see that the license key is active, and if you click on License Features, you should see MRP, MMRP, MVRP, MSRP, and DOT1AS.
 |
 |
Reset to Factory Defaults
It is necessary to reset the switch to factory defaults after the AVB license has been applied to ensure the default settings are correct.
- Open a web browser.
- In the browser address field, type the IP address of the smart switch.
- The default IP address is 192.168.0.239 and the default subnet mask is 255.255.255.0. You are prompted to enter your password.
- Type the password in the Password field. The default password is password. Passwords are case-sensitive.
- Click the Login button.
- After the system authenticates you, the System Information screen displays.
- Select Maintenance > Reset > Factory Default.
- Select the check box.
- Click the Apply button. The smart switch then restarts in a factory default configuration.
Enable AVB protocols
Now that the AVB features of the switch are accessible, the specific AVB protocols must be enabled.
- Click on the Switching tab, then click on the 802.1AS sub-page. Set the 802.1AS Status to Enable. Then, click Apply in the top-right corner.
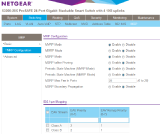
- Click on the Switching tab, then click on the MRP sub-page. Set the MVRP Mode to Enable. Set the MSRP Mode to Enable. Set the Periodic State Machine (MVRP Mode) to Enable. Ensure that all other options are disabled. Also, set MSRP Max Fan In Ports to 28. Then, click Apply in the top-right corner.
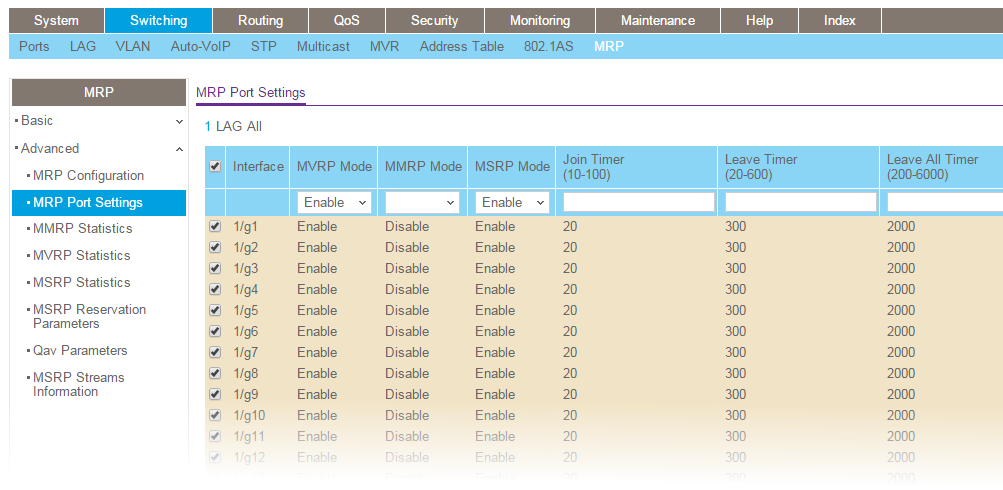
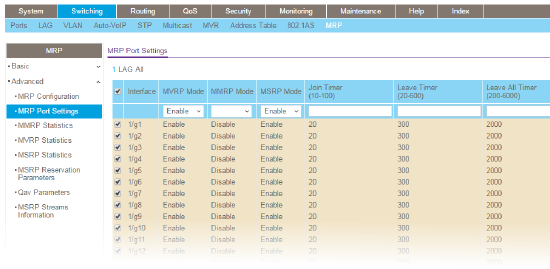 On the left side of the MRP page, click Advanced and then click MRP Port Settings. Click the checkbox in the top-left corner of the table to select all ports, and then enable both the MVRP Mode and MSRP Mode for all ports. Then, click Apply in the top-right corner.

MSRP settings changes required
There are additional prerequisites to the MSRP join- and leave timers to ensure proper AVB functionality with Tesira 2.4.2 (and higher) firmware releases. Firmware version 2.4.2 and higher include some modifications to Biamp's AVB firmware that were required to attain certification with the AVnu Alliance. These firmware modifications necessitate changes to the Netgear switch configuration. The Netgear switch configuration must be updated prior to upgrading to Tesira firmware versions 2.4.2 and higher.
- While still on the MRP sub-page click on the Advanced > MRP Port Settings. In the blue header row at the top of the list click the checkbox to select all ports and then select Enable for MVRP Mode and MSRP Mode and enter values of 20 for the Join Time (default in S3300 series), 120 for the Leave Timer, and 2500 for the Leave All Timer. Then, click Apply in the bottom-right corner.
After following the above steps, the switch should be ready to pass AVB traffic.