Vidi 250 mounting hardware resources
The Vidi 250 camera ships with a basic top monitor mount as well as an under display mount in the box as an included accessories. In some cases, the Vidi 250 will be required to be installed permanently in a room environment using additional mounting hardware. There are available side display and wall mounts available to provide additional flexible options. To help with planning for the mounting of these cameras, we have provided some mount sizing measurements along with dimensional drawings that can be used in elevation drawings or other design build documentation. This article will outline the four available mounting options for the Vidi 250 camera.
- Top Mount - Camera comes attached to this mount in the box and allows it to be installed on top of a TV or monitor.
- Under-Display Plate - (included with the camera) When adhered to the bottom of the display, the top mount is snapped into the plate clips.
- Side Mount - (accessory) Allows the camera to be positioned on the side of a TV, Monitor or other video device.
- Wall Mount - (accessory) Allows for a permanent installation to a wall or furniture.
Provided Top and Under-display mounts
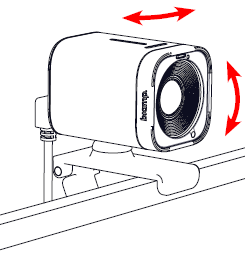
Top Mount Installation:
- Pull the lower arm of the mount down.
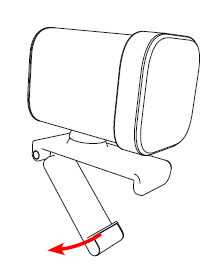
- Position the mount onto the top of the display and push the lower arm against the back of the device to secure.
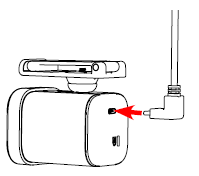
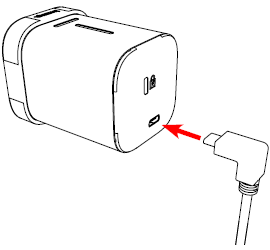
- Plug the USB cord into the back of the camera.
- Remove the lens cap and aim the camera.
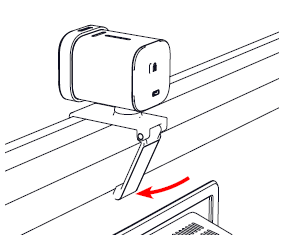
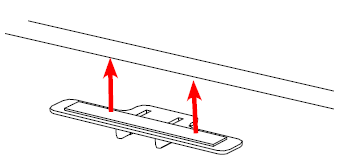
Under-Display Plate installation:
- Adhere the adhesive plate to the underside of the TV or monitor. To ensure proper adhesion, properly clean the mounting surface and apply
pressure to the mount for 30 seconds. If possible, wait 24 hours before mounting the camera to ensure maximum bond.
- Turn the camera and mount upside down and push the top mount into the under-display plate clips as shown. The camera/mount will be able to move forward and backward slightly.
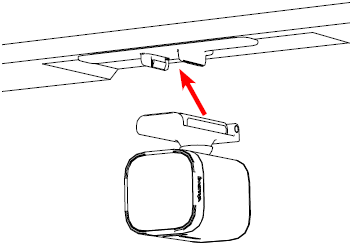
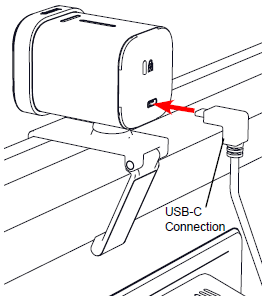
- Plug the USB cord into the back of the camera.
- Remove the lens cap and aim the camera.

- Choose the under-display orientation during setup.
Note: You must download the Camera Control App to control the image orientation when mounting the camera under the display.
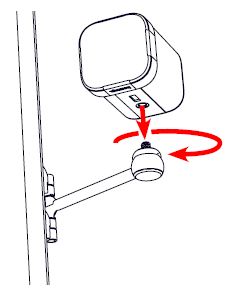
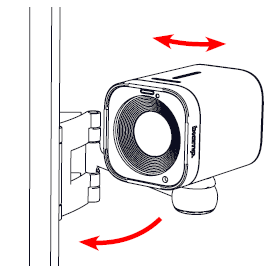
Wall Mount (VMA 200-WM) installation:
Position the wall mount on a vertical surface (wall or furniture) close to the TV or monitor and mark the hole locations. Prepare the surface or pre-drill the holes as necessary.
- Attach the mount to the surface (shown with screw / anchors).
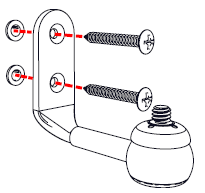
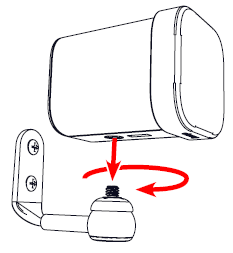
- Remove the camera from the top mount and screw the camera onto the mount until tight.
- Plug the USB cord into the back of the camera.
- Remove the lens cap and carefully move the camera to point to the desired location.

Side Mount (VMA 200-DM) typical installation:
- Open the side clamps and position on desired side of a TV or monitor. Uncover the adhesive strips and press onto the display to hold the camera in place. For best adhesion clean the mounting surface of any oil, dust or grease prior to adhering the bracket. Attach the bracket and apply pressure to the adhesive areas for about 30 seconds. It takes approximately 24 hours for the joint to reach about 90% of the maximum bond strength. If feasible, delay mounting the camera until the next day.
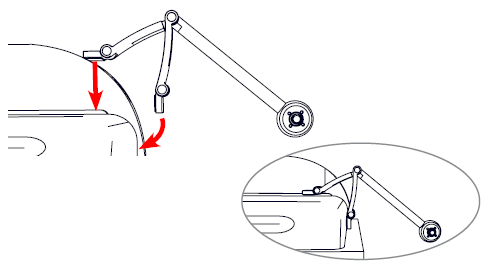
- Screw the camera onto the screw-mount until tight. Keep the lens cap on.
- Plug the USB cord into the back of the camera.
- Remove the lens cap and carefully move/rotate the arm and camera to point to the desired location.
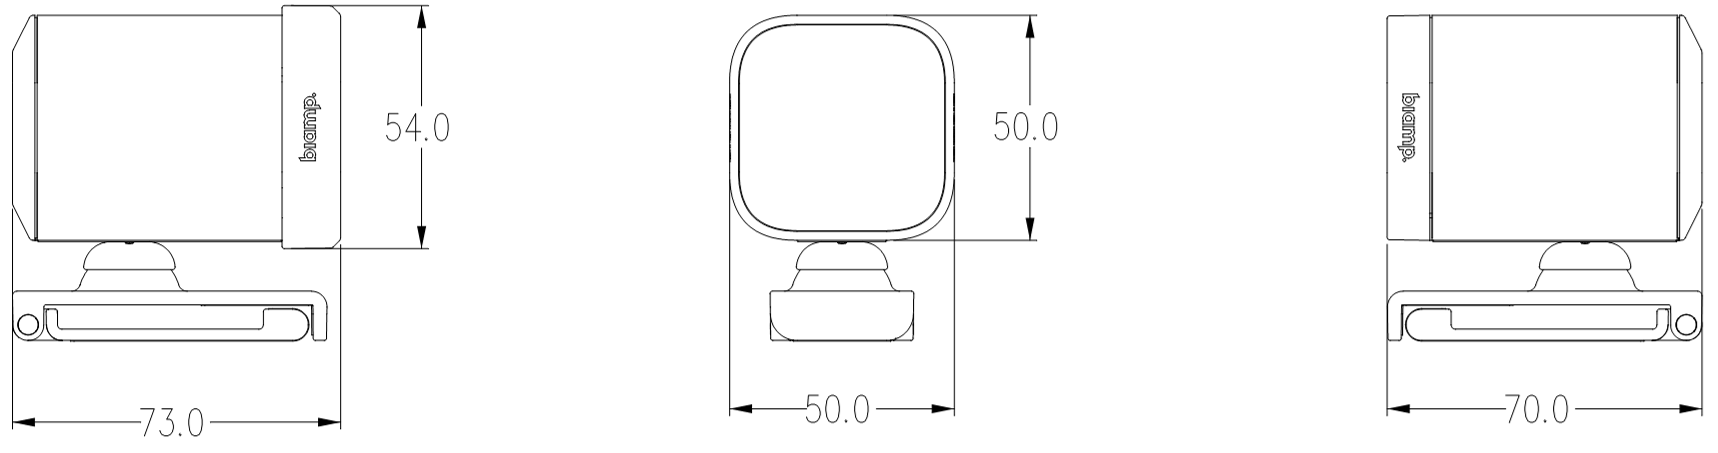
Vidi 250 dimensional drawings:
Dimensional drawing of the Vidi 250 is included below for reference. Dimension are shown in millimeters. A full set of CAD files for the Vidi 250 is available for download from link in the section below.