Creating and modifying presets in Tesira
Presets are a quick and efficient way to recall a known configuration of one or more DSP blocks within the configuration file, even across multiple partitions. A preset is part of the Tesira configuration file (.tmf) and can be triggered or recalled via Tesira software, a Biamp Canvas file, an external trigger (TEC-1, EX-LOGIC), or a control system command (via RS232 or Telnet/SSH). This article describes the different ways to create and edit presets in Tesira file.
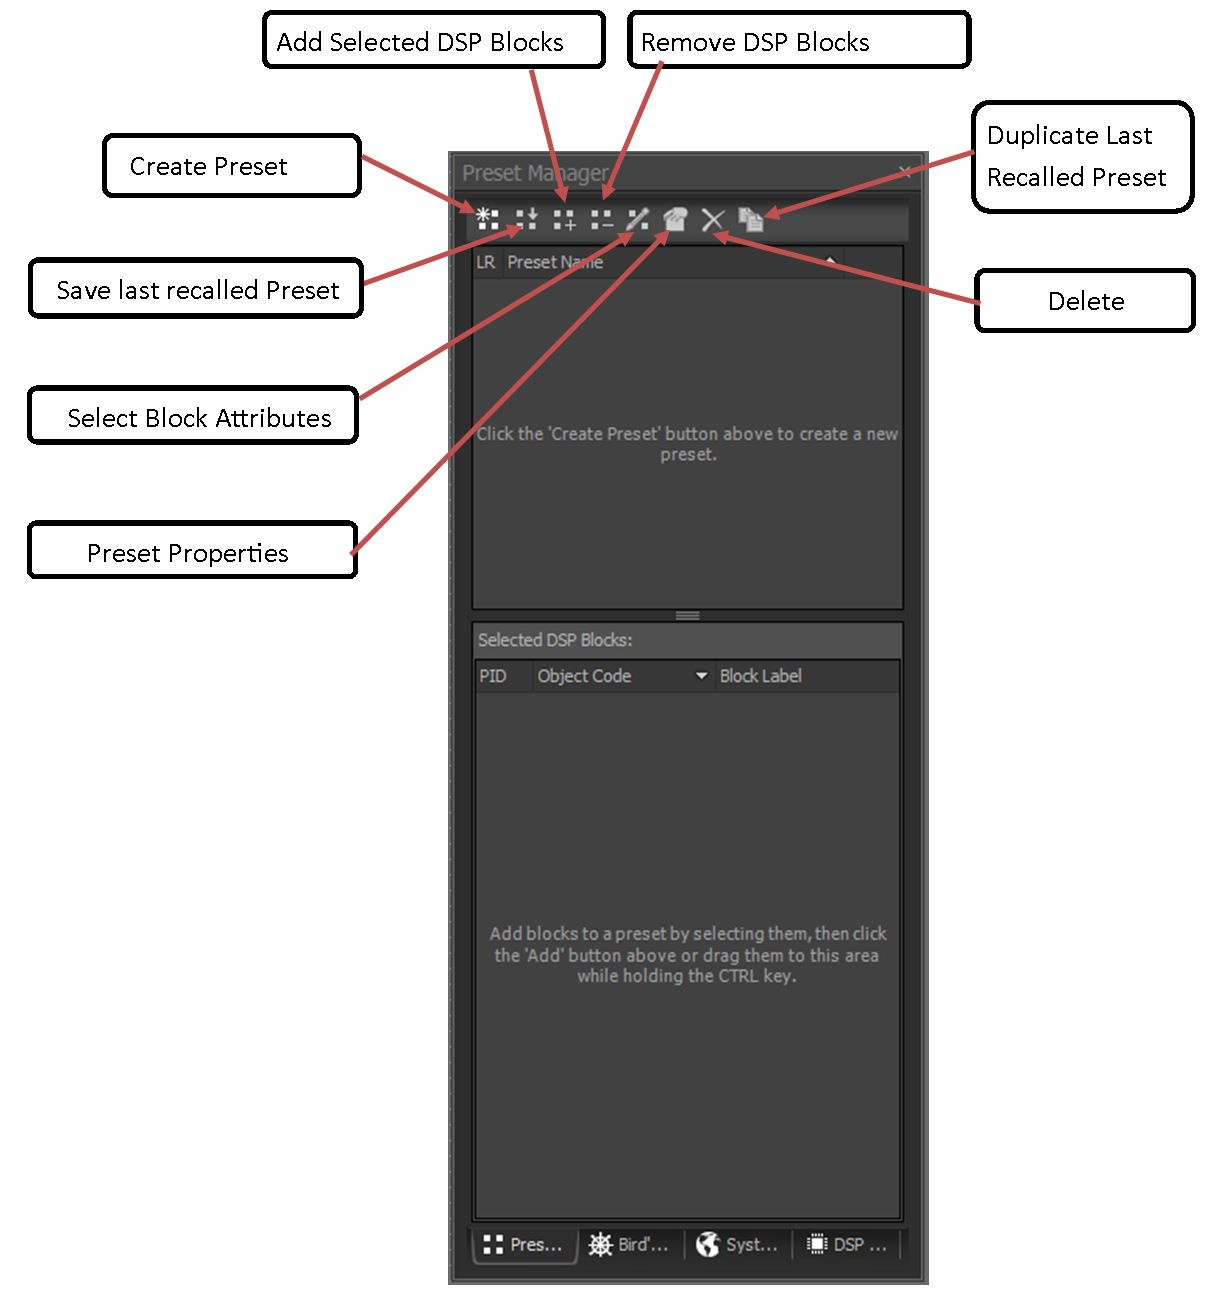
The Preset Manager
Presets can be created and edited from within the Preset Manager. The Preset Manager window can be accessed by going to View→Docking Windows→Preset Manager.
There is also a shortcut (encircled) on the 'Layout Toolbar' to access the Preset Manager Window:

Adding blocks to a preset
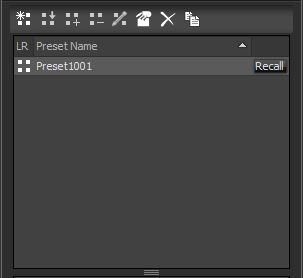
In the preset window, press 'Create Preset'. This will list Preset 1001 in the Preset List pane (Upper pane). The Preset Name can be changed at this point or by right-clicking and selecting 'Rename'.
Add Selected DSP Blocks button
CTRL-drag blocks
Right-click, Add to active preset
Right-click, Create new preset
Similar to previous method, select one or more DSP blocks, right-click and select "Create New Preset" from the context menu. This action will add a new Preset to the Preset list pane, and will also include the selected DSP blocks in that new preset.
Editing presets
To modify an existing preset, select the preset in the list and press the "Recall Preset" button (or just double-click on it to recall it). The active icon ![]() will appear next to the preset name, indicating that it is the active preset.
will appear next to the preset name, indicating that it is the active preset.
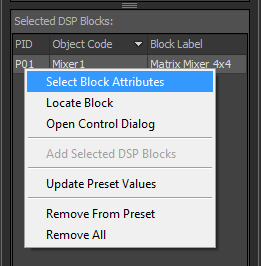
To edit a block included in the preset, directly open the control dialog for that block in the program, or right-click on the block in the "Selected DSP blocks" area and select "Open Control Dialog" from the context menu. Selecting "Locate Block" from the same context menu will highlight the block in the program.
Once the required changes have been made in the configuration/blocks, the settings can be saved into the active preset by pressing  (Save Last Recalled Preset).
IMPORTANT: The Save option only saves to the last recalled Preset or the ACTIVE preset (represented by the active icon). Always make sure that the preset being edited has the active icon next to it. If not, hit the RECALL button to activate it.
Duplicate Last Recalled Preset  : This button creates a new preset replicating all the settings and including all the blocks from the last recalled/currently active preset. This is a quick way of creating a series of presets with the same set of blocks but with different settings, e.g., presets for the Matrix Mixer with each one having different audio routing.
Preset properties
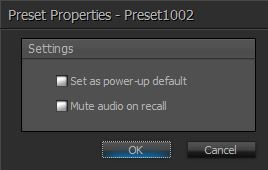
The preset properties button gives access to these settings:
 This dialog can also be accessed by the right click context menu for the preset.
Set as power-up default: Selecting this option for a preset will designate the preset to be recalled on power-up or reboot of the system. Only one preset can be set as power-up default.
Mute audio on recall: This option will mute system audio for a preset recall.
Note: In a multiple Server system, a start-up preset is applied only to blocks in a device which power cycles, blocks in the start-up preset which are in other devices do not change status.
Fine Grain Preset
Creating presets as described thus far will affect all parameters and attributes within the selected block(s). For example; For a 'Level Control' block, a normal preset will always change the state of the 'Mute' button and the 'Fader' control back to the original state. However, if you only required to change the Mute state and not affect the fader position/value there is no way to do so with the above methods.
 A preset programmed to affect only select parameters of a block(s) is referred to as a Fine Grain Preset.
The right click context menu on any of the blocks under 'Selected DSP Blocks' provides the option to 'Select Block Attributes'.
This opens a seperate window which displays all changeable attributes of that block organized in categories (Inputs, Outputs, Crosspoints etc.) with checkboxes to select or unselect them to be part of the preset action.
This dialog can also be accessed by the Select Block Attributes button in the Preset manager window (Shown under 'The Preset Manager'.
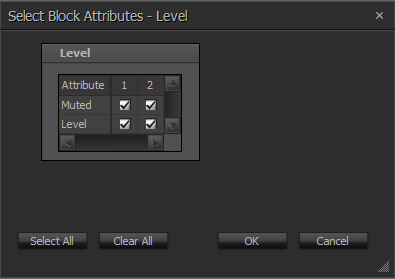 Here is an example of a Select Block Attribute dialog for a 2 channel Level Control Block.
Note that all attributes are checked by default. In this example the preset will always change the Mute and Level fader to the state at which the preset was saved.
Unchecking any of the checkboxes will exclude the associated function from that preset.
A right click on any of the checkboxes will present a context menu to check/uncheck row, columns or all.
 Unchecking one ore more attribute within the Select Block Attribute dialog and clicking OK will result in the associate block listing under Selected DSP blocks to change to a Salmon color from the default white.
A salmon colored listing indicates the associated block is under fine grain control.