Connecting to a Tesira system
This article describes how to connect to a Tesira system to retrieve, edit, and load its configuration file.
The tasks covered in this article are:
- Getting connected to a system. This step must be taken before moving on.
- Making changes online (while you are connected to a live system).
- Making changes offline (with a copy of the configuration file you downloaded from the live system).
- Updating a live system with changes that you made while offline.
The first step is to open the Tesira software, where you will receive two prompts for selecting the document mode and partition type. These settings only pertain to creation of new design files. Since our goal is to connect to an existing system, choose any option to continue.
Connecting to a system
With the Tesira software open and the proper network considerations, click connect  in the network toolbar
  , or follow System > Network > Connect To System. You will be prompted with the system connect window.
- The system list shows all discovered systems on the network. By selecting all devices, the device list will display all discovered devices whether in a system or not.
- The device list shows the devices in the selected system. Any device without a system will have a device ID of 0 and no system ID or description.
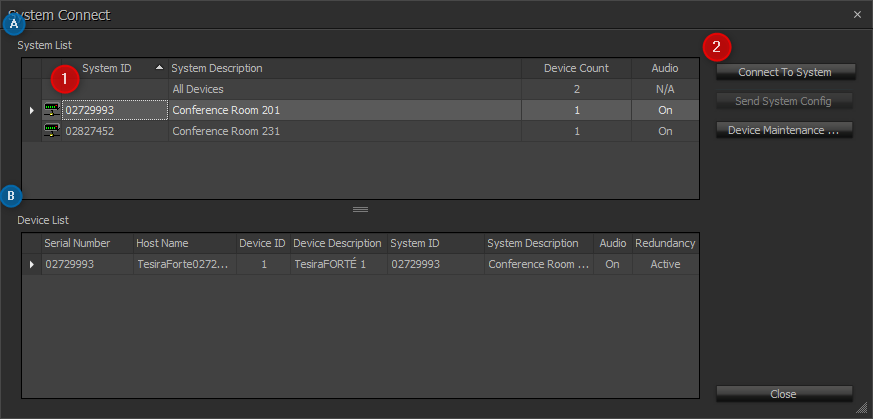
To navigate the System Connect window:
- Select the desired system (check the device list (B) to see the units in that system)
- Connect to system
If the system is password protected, you will enter that now.
Once successful, you should see system connected in the status bar.
Online configuration edits
While connected to the system, you will only be able to make certain types of changes:
- Adjusting a block's control dialog (the window that opens when you double click on a block*).
- Creating, deleting, or editing presets (see the preset manager article for more info).
*The VoIP Control/Status block has settings in its control dialog that require you to be offline.
Be aware that all edits made online affect the audio in real-time.
After making online edits, your configuration file has been modified. You may want to save a copy for safekeeping. See Retrieving the configuration below.
Retrieving a configuration
In order to retrieve the configuration you must disconnect  in the network toolbar
  , or in System > Network > Disconnect From System.
Disconnecting from a live system will retrieve an offline copy of the configuration that can then be saved.
Offline configuration edits
Once offline, you will be able to make all possible edits. Changes made offline will not effect the live system's audio.
Here are a few of the most common edits with links for more information:
- Adding, removing, or editing signal lines to alter the signal path.
- Altering blocks through the Object Context Menu where you can access a block's text, parameters, port properties and properties sheet.
- Adding new blocks from the Audio Object Toolbar:

- Adding a new device to an existing system.
For more information on what you can do with Tesira, please see our TesiraFORTÉ online training.
Updating a configuration with offline edits
To update a configuration with an offline file, select send configuration  . This can be found in the same place as connect and disconnect from system, the Network toolbar , and System > Network > Send configuration. The send configuration button will begin a series of dialog boxes, here is how to navigate them:
- Prompt to save, if the file has not yet been saved.
- Enter system description, this defaults to the file name.
- Update system configuration window, which tells you what actions will be occurring when selecting send update. This window holds key information regarding the system's audio state, here is a breakdown of what is being shown:
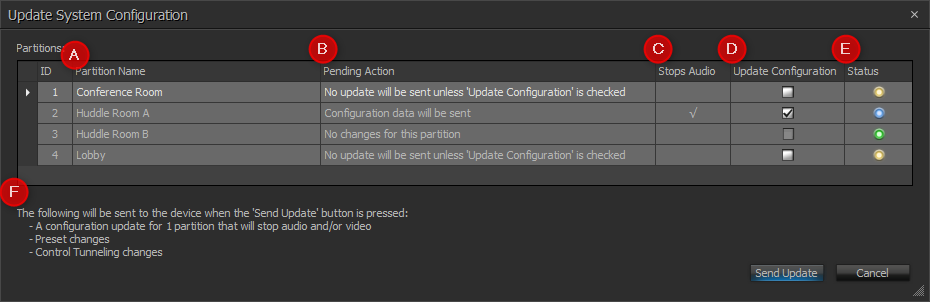
- Partition name shows a list of all partitions in the file.
- Pending action, details what action will take place for each partition.
- Stops audio shows which partitions will require the audio to stop (see manage partition audio (5) to restart audio).
- Update configuration, a way to force an update if control dialog changes were made on that partition.
- Status, a visual representation of what will occur in the update process. Green: no change. Yellow: no change, discarding offline edits. Blue: full update.
- A detailed view into what will happen to the overall system.
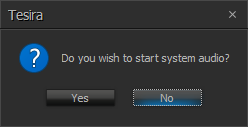
4. Start system audio.
5. 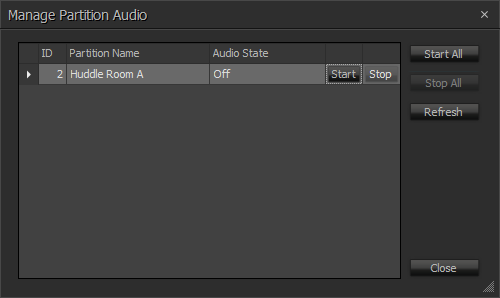 Manage partition audio, where you will be required to start audio for each partition in the file by selecting start for the specific partition, or start all.
You will only be prompted to start audio for the partitions stopped in the update system configuration window.
Once the Audio State is On, you can close the dialog box.
Further reading
If you have any questions please check out our Tesira FAQ, and for more in depth learning on Tesira, please see our TesiraFORTÉ online training. Here are a few links to related articles: