Custom blocks
A custom block is a collapsible container that can have one or more processing blocks that are connected together with their corresponding settings. There are multiple reasons for using Custom Blocks as they can facilitate and speed up the process of making configuration files while eliminating repetitive work.
Goal
After completing this article, you will be able to create custom blocks from scratch or from existing files.
Creating from scratch
- Open a new Tesira file.
- On the object bar, go to specialty blocks and select custom block.

- Click anywhere on your screen to insert the custom block.
- Enter the number of audio inputs, audio outputs, logic inputs, and logic outputs required and click ok.
- A blank Custom Block will appear on your screen with the internal APT (Audio Pass Thru) and LPT (Logic Pass Thru) connections. The APT and LPT blocks are where audio and logic signals pass in and out of the custom block. The custom block can be resized if needed.
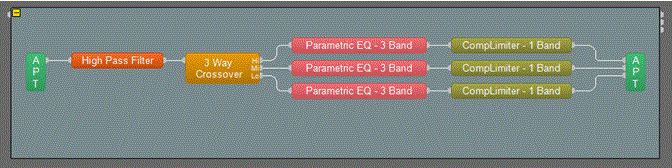
- Drag and drop processing blocks from the object tool bar into the custom block as if you were programming a normal configuration file. All the wiring will be done within the Custom Block. A finished custom block would look something like this:
- Click the collapse icon on the top left corner of the custom block to collapse.
- As with any other block in Tesira, you can change the color and text of the block. You can also password-protect a custom block by entering a password in its property sheet. Password-protected custom blocks cannot be uncollapsed without first entering the correct password.
Creating from an existing file
- Open the Tesira file in which you'd like to create the custom block.
- In the file, select all blocks that will be a part of the custom block.
- While the mouse pointer is on top of one of the selected blocks, right-click and select “Create Custom Block”.
- In the dialog, enter the number of inputs and outputs needed then click OK.
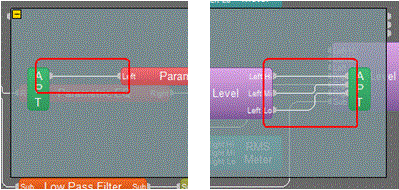
- Note that all the selected blocks have been pulled from your file and placed in the custom block with all their connections and settings. The only connections needed are those that go to the APT and/or LPT blocks as shown below:
- Click the collapse icon on the top left corner of the custom clock to collapse.
- Connect the custom block to the same connection nodes where the extracted blocks were connected to.
Naming custom blocks
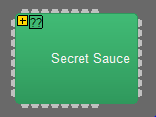
Once you’ve created a custom block, it is possible to modify the name to better indicate your intended application.
To modify the name displayed on the block, you can either
- left-click on the block and hit Enter to edit the block’s text, left-clicking outside of the block to finish, or
- right-click on the block and choose “Edit Text” to edit the block’s text, left-clicking outside of the block to finish, or
- go to the Properties for your custom block and modify the field “Block Label” under the Display Properties tab.

Adding the new item to the Processing Library
Add the custom block to your desired Processing Library Catalog via copy-and-paste or CTRL-and-drag. Once it is in the Library you can modify its name in the list of Processing Library items to better reflect the application of your new custom block
 .
.
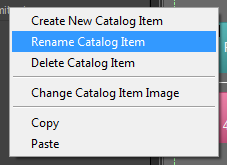
Change the name by either double-clicking on the name under Items and entering the new text, or right-clicking on the name and choosing “Rename Catalog Item”.
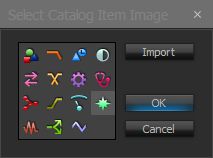
Modify the icon representing the new custom block by right-clicking on the name and choosing “Change Catalog Item Image” and choosing a representative icon from the menu.
Password-protecting a Custom Block
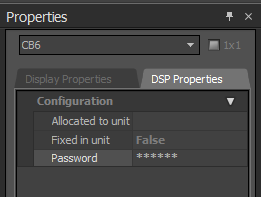
If you want to keep the contents of your custom object secret or protected from modification, you can add a password to the block. Go to the Properties → DSP Properties for your custom block and modify the field “Password”. The block is now protected. The password can be modified or deleted at any time from within the block.
Another cool trick – groups of objects
Do you find that you always use the same set of processing items on your inputs? If you select a group of processing objects and add them to your Processing Library as a set you will get a new item representing that group of objects. Drag it into your design and Voila!, a new time-saving method is found. This method can be used as an alternative to custom blocks.
Further reading
Custom blocks can be saved in the processing library for future use.