Fixing a ROOT certificate error

This article provides an automated quick-fix method for addressing instances when the ROOT certificate either fails to install or is removed when a new Tesira Software installation is loaded. The article also provides a 15-step manual process in case the quick-fix option does not resolve the issue.
Problem symptoms
Symptoms indicating a ROOT certificate error following a new Tesira Software install:
- The Tesira software takes an extended time to open.
- Or, the only way to close the program is to forcibly end it using Windows Task Manager.
The quick-fix method
- Click on the following link to download “CertTest-TOOL.zip” which contains the installer and cert file
- Extract the files from the zip folder. Run the executable file certtest.exe which will automatically install the certificate.
- You should see the following Certificate Install tester popup appear when the installation completes.

The longform manual method
Manually install the root certificate if the quick-fix method fails to resolve the issue. Note: This method requires downloading and using the zipped Cert Test Tool mentioned in Step 1 of the quick fix.
- Open the RUN command with Ctrl + R in Windows.
- Run MMC.EXE.
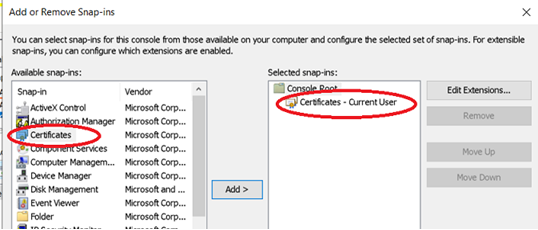
- Click on File and select Add/Remove Snap-in.
- Click on Certificates and Add> to selected snap-ins:
 .
.
- Click OK and expand the Certificates option under Console Root.
- Click on Trusted Root cert option.
- Click Certificates and note whether Biamp Production Root CA is shown.

- in systems with the error, this Biamp Production Root CA is not shown.
- To Install, use the Biamp_Production_Root_CA.crt file downloaded in "Quick fix method" in this article.
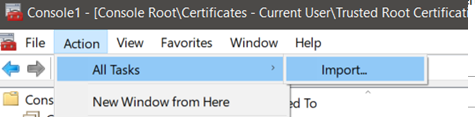
- On the toolbar, select Action > All Tasks > Import.
- Click Next.
- Browse the imported file location and click on the file.
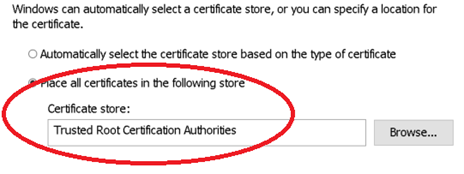
- Use the Trusted Root Certification Authorities store option for placing the imported file.
- Click Next, then click Finish.
- Save the settings to Console.
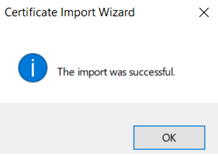
The certificate should now be visible in the Trusted Root Certificates list. The Tesira software should work normally.