Avaya SES configuration for Tesira using the VoIP web interface
Biamp’s VoIP-enabled products have the ability to make and receive phone calls over many different Voice-over-IP (VoIP) systems that adheres to the SIP (Session Initiation Protocol) standard. This article details the steps required to configure an Avaya SIP Enablement Service (SES) VoIP system to work with Biamp's Tesira VoIP products, using the built-in web interface on the VoIP endpoint.
Please first review the requirements for using the VoIP web interface to configure a Tesira VoIP endpoint.
Avaya creates and maintains application notes for certified products manufactured by Avaya's DevConnect Technology Partners. Avaya's full application note for configuring an Avaya SES system to use Tesira VoIP endpoints can be downloaded from this link. Information specific to creating the endpoint is below.
Avaya Configuration
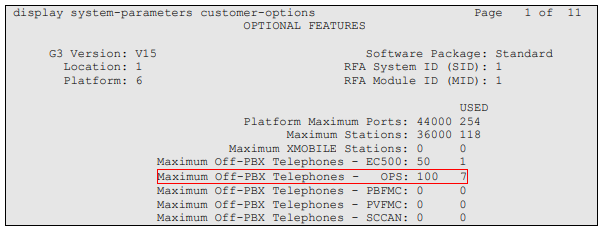
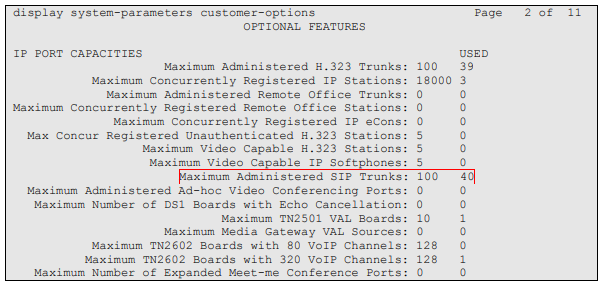
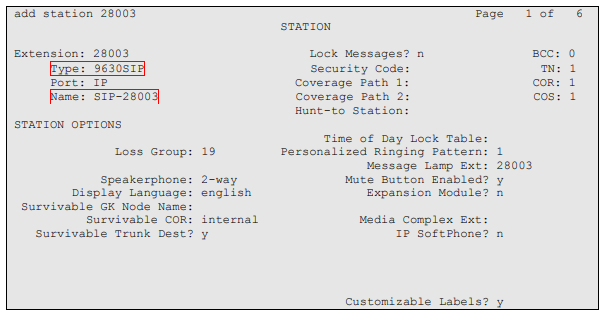
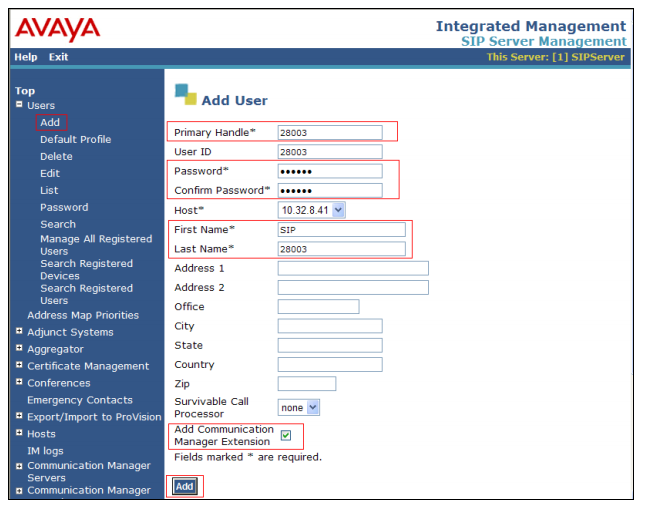
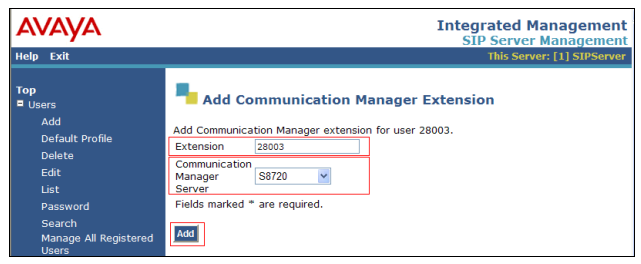
Configure Avaya SIP Enablement Service (SES)
Once you have entered this information we can move on to configure the Tesira VoIP endpoint
Tesira Configuration
Accessing the VoIP web page
 To access the VoIP web page, connect a computer to the VoIP network, open a web browser, and enter the IP address of the VoIP port. If successful, a login page will be displayed.
Default username: admin
Default password: admin
If you do not see a login screen, ensure the following:
- The Tesira device must be running firmware version 3.8 or newer.
- The Tesira system must be running a configuration file that includes a VoIP block.
- This Tesira system must have either HTTP or HTTPS access enabled on the VoIP port, as described here.
Network Configuration
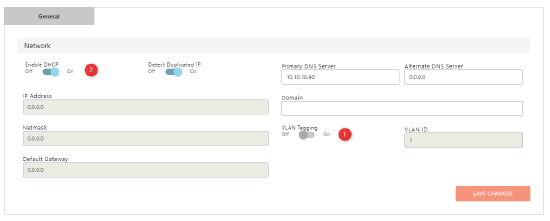 Under the Network window, set “VLAN” to “Enabled” if your VoIP network uses a tagged VLAN. If the network uses an untagged VLAN or no VLAN, leave this value as disabled”. If VLAN is enabled, enter the correct VLAN ID.
- Leave “DHCP” set to “Enabled” if the Tesira VoIP will obtain an IP address automatically from a DHCP server. Otherwise, set “DHCP” to “Disabled”, and manually enter an appropriate static IP Address, Subnet Mask, and Gateway for the Tesira VoIP endpoint
To access the optional advanced network features, click the "Switch to Advanced" button.
To write the settings to the VoIP card click on "Save Changes" and then "Apply Saved Changes". After the changes have been saved, you will be brought back to the login page.
Protocol Configuration
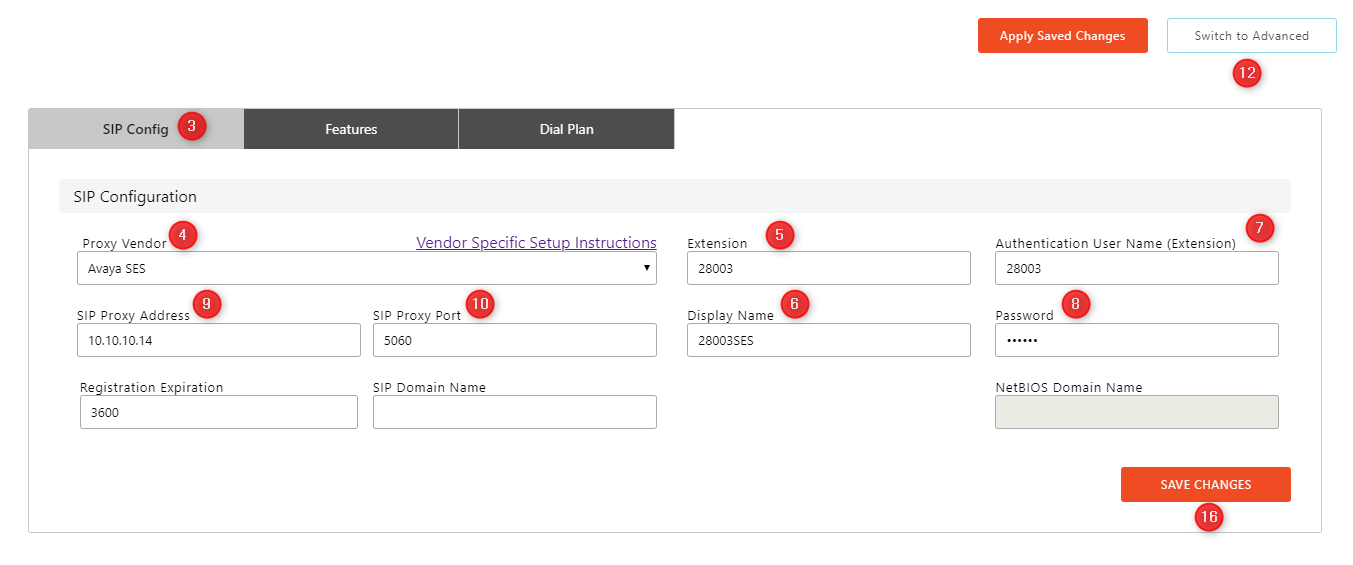 Navigate to "Line 1 Setup" at the Left side of the browser window and Make sure you are looking at "SIP Config".
- Set Proxy Vendor to Avaya SES.
- In the Extension field enter in the number form the Primary Handle. (see "Configure Avaya SES", step 4)
- In the Display Name field, optionally enter a name for the extension for Caller ID purposes. Note that this name may be overridden by the proxy server, and therefore may not show up as the Caller ID name.
- In the Authentication User Name (Extension) field enter the number from the Primary Handle field (see "Configure Avaya SES", step 4)
- In the Password field enter the password for the Extension.(see "Configure Avaya SES", step 4)
- In the SIP Proxy Address Enter the IP address of SIP enablement services.
- In the SIP proxy Port Field Verify that the port is Correct
- If you’re configuring two lines, select “Line 2 Setup” at the left of the browser at the top of the page and repeat steps 4-10.
- For more advanced features click on "Switch to Advanced".
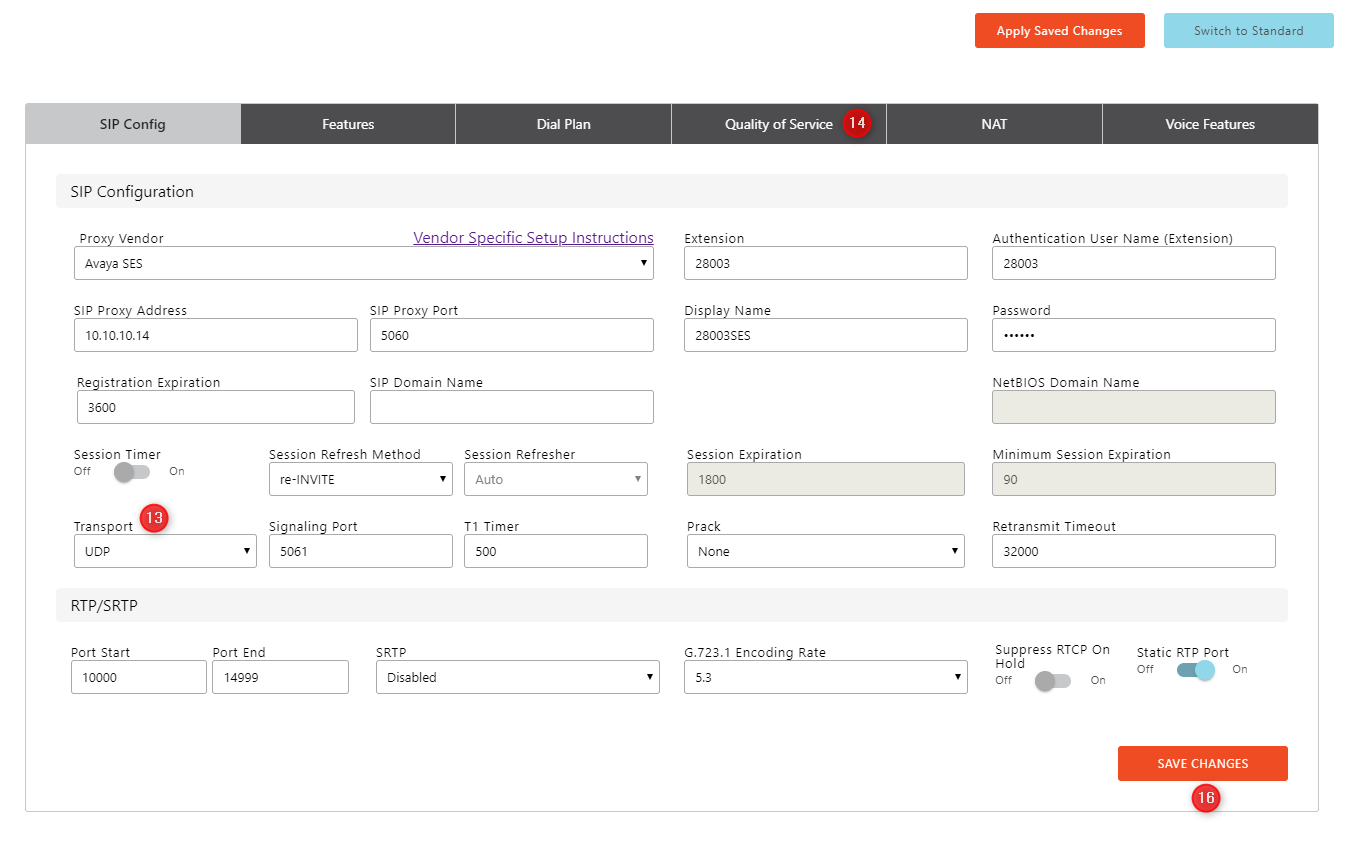 ensure that “Transport” is set to the same transport type that is used on your network, UDP, TCP, or TLS. UDP is the default setting
- If your network prioritizes VoIP traffic using Quality of Service (QoS), select the “Quality of Service” tab and enter the appropriate settings for your network. Otherwise, skip this step. By default, Diffserv is the default selection on the Tesira endpoints.
- All other settings can remain at their default values in most cases.
- Once all settings have been added, save the changes by clicking "Save Changes".
To send the changes to the Tesira VoIP interface, click "Apply Saved Changes". This will send the new settings to the VoIP interface. The VoIP interface will then briefly reboot, and start working based on the new settings.

