Generic VoIP configuration for Tesira using the VoIP web interface
THIS DOCUMENT DOES NOT APPLY TO Forte X.
Biamp’s VoIP-enabled products have the ability to make and receive phone calls over many different Voice-over-IP (VoIP) systems that adheres to the SIP (Session Initiation Protocol) standard. This article details the basic and Advanced fields and where to find them using the built-in web interface on the VoIP endpoint.
Please first review the requirements for using the VoIP web interface to configure a Tesira VoIP endpoint.
Before proceeding with this tech note, verify if your VoIP provider has a vendor specific guide. Our VoIP page on cornerstone will show available guides.
Tesira configuration
Configuring the Tesira will have to come after configuration your Proxy server. Once the endpoint is created within the VoIp proxy host proceed to configure the Tesira.
Accessing the VoIP web page
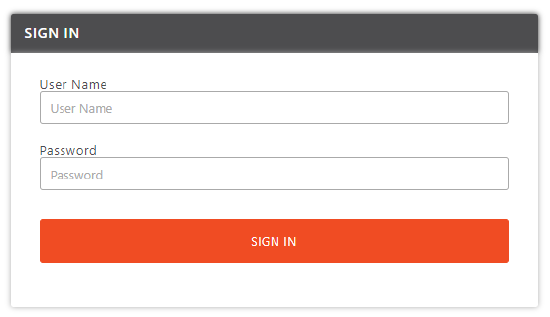
 To access the VoIP web page, connect a computer to the VoIP network, open a web browser, and enter the IP address of the VoIP port. If successful, a login page will be displayed.
Default username: admin
Default password: admin
If you do not see a login screen, ensure the following:
- The Tesira device must be running firmware version 3.8 or newer.
- The Tesira system must be running a configuration file that includes a VoIP block.
- This Tesira system must have either HTTP or HTTPS access enabled on the VoIP port, as described here.
Network Configuration
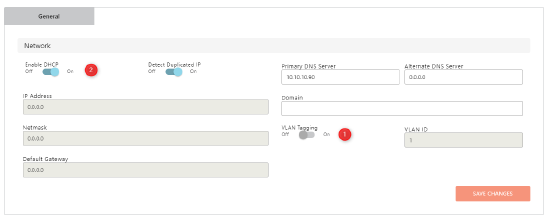
 Under the Network window, set “VLAN” to “Enabled” if your VoIP network uses a tagged VLAN. If the network uses an untagged VLAN or no VLAN, leave this value as disabled”. If VLAN is enabled, enter the correct VLAN ID.
- Leave “DHCP” set to “Enabled” if the Tesira VoIP will obtain an IP address automatically from a DHCP server. Otherwise, set “DHCP” to “Disabled”, and manually enter an appropriate static IP Address, Subnet Mask, and Gateway for the Tesira VoIP endpoint
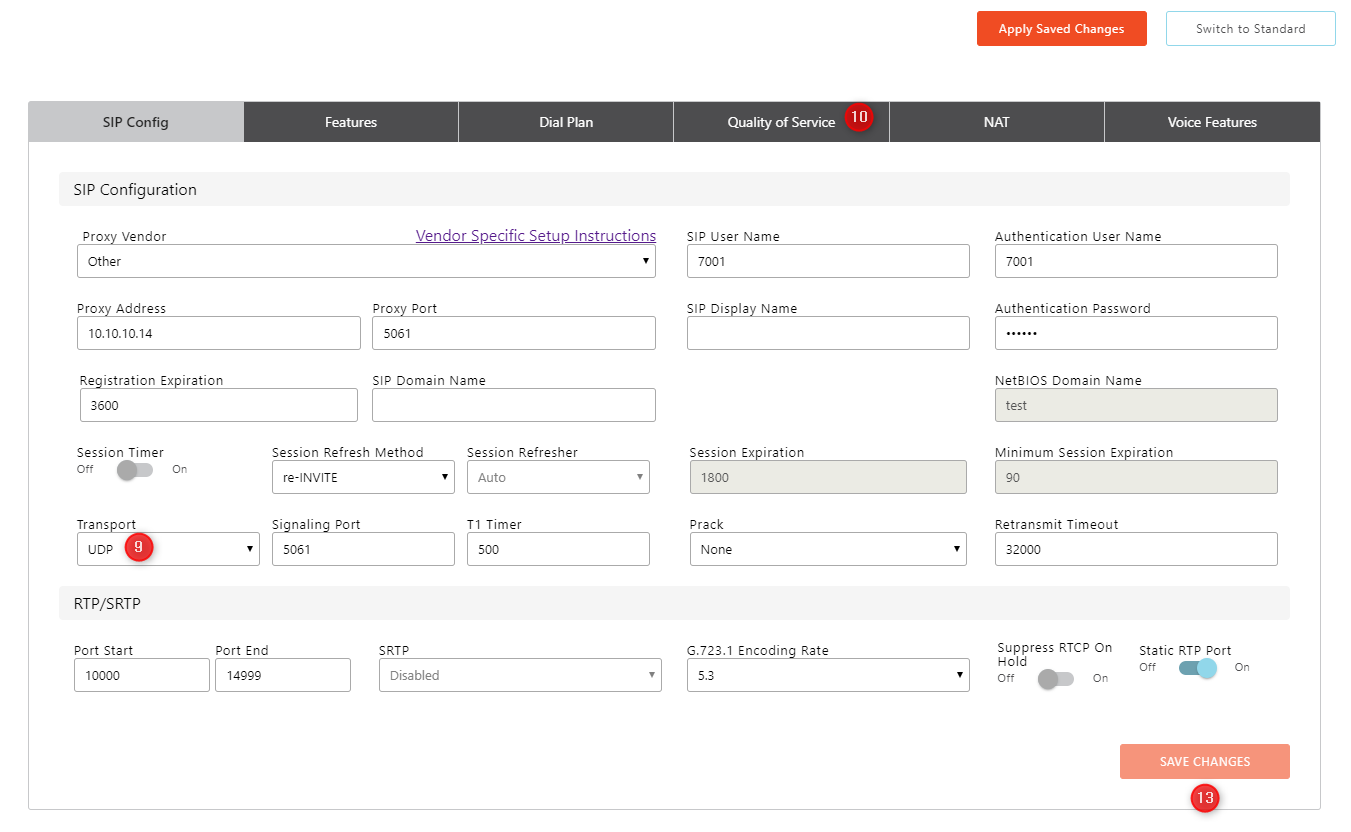
To access the optional advanced network features, click the "Switch to Advanced" button.
To write the settings to the VoIP card click on "Save Changes" and then "Apply Saved Changes". After the changes have been saved, you will be brought back to the login page.
Protocol Configuration
Take note as the Terminology between your VoIP Vendor and Biamp may vary. Below is a list of terms that Biamp uses and their purpose:
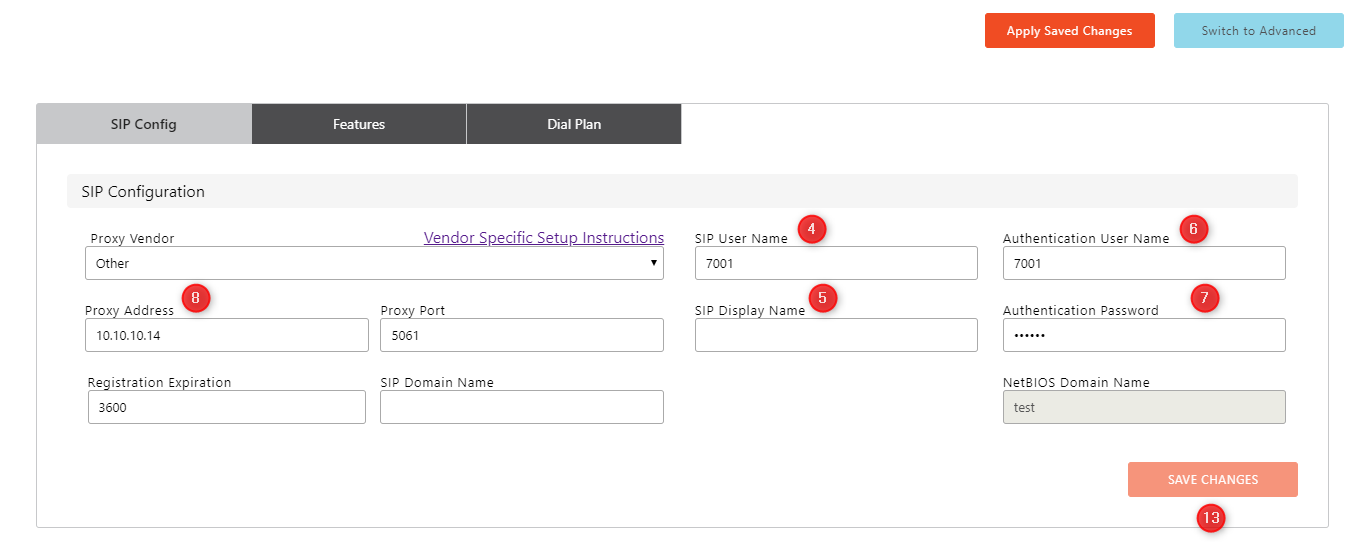
- Proxy Vendor - allows the user to choose the entry that matches the phone system the VoIP Phone is integrating with. for all unsupported networks use "Generic"
- SIP User Name- the alphanumeric string that identifies the VoIP extension on the network. It is the number or string to dial to reach this extension.
- Authentication User Name - the credentials needed to register and authenticate with the VoIP proxy server.
- SIP Proxy Address - the network address of the VoIP proxy server.
- SIP Proxy Port - this is the network port the VoIP endpoint should use to communicate with the proxy server.
- Display Name - the string used for Caller ID name purposes.
- Password - credentials that must be entered.
- Registration Expiration - determines the interval in which the VoIP line will attempt to re-register with the Proxy.
- SIP Domain Name - SIP domain name to be used if required.
- Navigate to Line 1 setup on the left of the screen, then select the "SIP Config" tab.

- Enter Your SIP Username.
- In the Display Name field, optionally enter a name for the extension for Caller ID purposes. Note that this name may be overridden by the proxy server, and therefore may not show up as the Caller ID name.
- Enter your Authentication username
- Enter the Authentication Password
- In the “Proxy Address” field, enter the IP address of the Proxy host that the Biamp VoIP endpoint with register with
- Under the “SIP Config” tab on Line 1 Setup, ensure that “Transport” is set to the same transport type you used on your VoIP network. To see this setting, you need to switch into "Advanced mode".
 If your network prioritizes VoIP traffic using Quality of Service (QoS), select the “Quality of Service” tab and enter the appropriate settings for your network. Otherwise, skip this step.
 - If you’re configuring two lines, select “Line 2 Setup” at the left of the browser at the top of the page and repeat steps 4-8.
- All other settings can remain at their default values in most cases.
- Once all settings have been added, save the changes by clicking "Save Changes".
To send the changes to the Tesira VoIP interface, click "Apply Saved Changes". This will send the new settings to the VoIP interface. The VoIP interface will then briefly reboot, and start working based on the new settings.
