Shoretel VoIP configuration for Tesira using SageVue
Biamp’s VoIP-enabled products have the ability to make and receive phone calls over many different Voice-over-IP (VoIP) systems that adheres to the SIP (Session Initiation Protocol) standard. This article details the steps required to configure a Shoretel VoIP VoIP system to work with Biamp’s Tesira VoIP products, using Biamp's SageVue management software.
Please first review the requirements for using SageVue to configure a Tesira VoIP endpoint.
Preliminary steps
The first step in setting up the ShoreTel system is to verify that the proper amount of SIP licenses are in place. Each Tesira VoIP endpoint card can support up to two lines and multiple cards may be present in a Tesira system. The ShoreTel system will require a SIP Phone License for each extension assigned to Tesira. The steps to verify the license count are detailed below. If it is discovered that there are not enough licenses available contact the VoIP Admin.
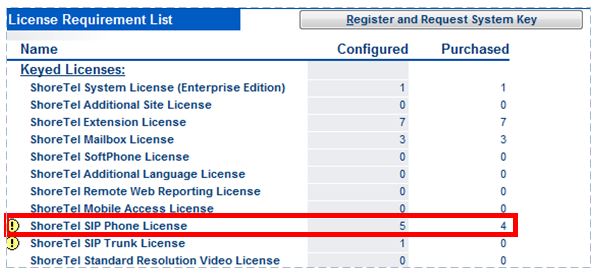
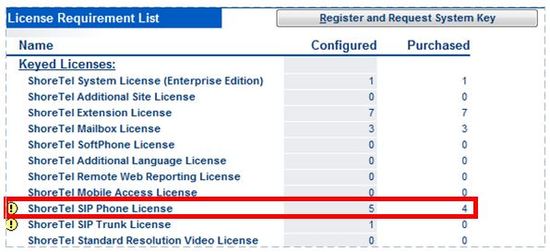 Go to Administration ->System Parameters-> Licenses -> Requirements.
 - ShoreTel SIP Phone License Purchased must be equal or greater than the number of lines to be assigned to the Tesira VoIP card. Purchased Licenses will move to Configured Licenses after the ShoreTel system has been fully configured.
Configuring the ShoreTel server
Creating a new user
Add a new User to the ShoreTel system.
- Go to Administration —> Users -> Individual Users
- Select the site that you would like to add a User to.
- Click "Go"
Setting up the new user
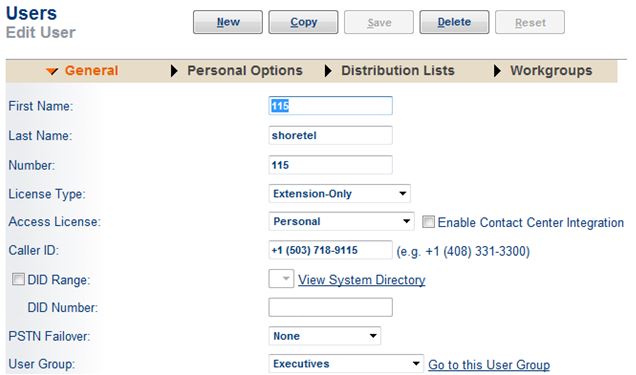
The steps below outline the process setting up the new user account in ShoreTel. All of the following steps are located in the Edit User page accessed from the previous step. Note that any configuration settings not explicitly detailed in this section can be left at the default value.
- Enter a name for the user.
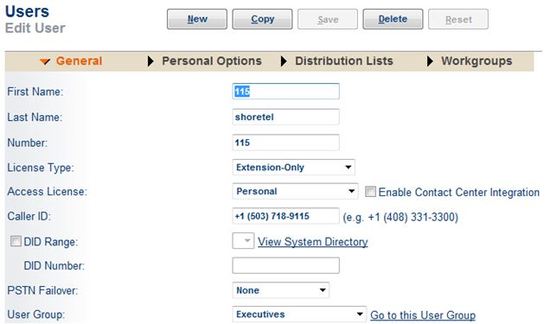
- Enter the extension number to be used in the Number field.
- Change the License Type to Extension Only or Extension + Mailbox. The latter should be used if a Voicemail account will be created for the card.
- Change the Access License to match what would be expected of the card in the current ShoreTel setup. This setting does not effect the Tesira VoIP functionality, it simply helps in ShoreTel organization.
- Enter Caller ID if desired.
- Enter DID info if desired.
- Set PTSN Failover to None.
- Set the User Group that makes the most sense in the ShoreTel setup.
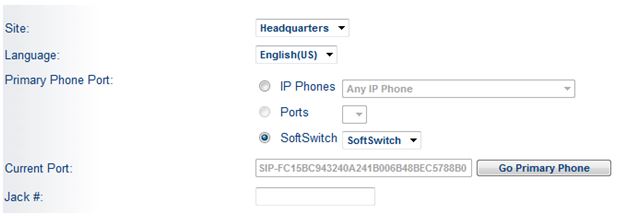
- The correct Primary Phone Port selection is based off of the entry in Step 3. Apply the setting based on the criteria below:
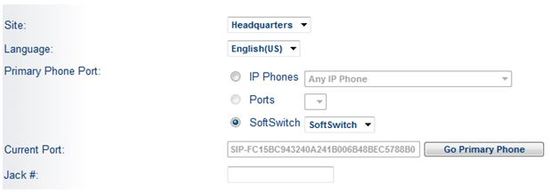 If Extension Only was used in Step 3 select SoftSwitch for the Primary Phone Port. Then select SoftSwitch from the pull-down menu.
 - If Extension + Mailbox was used in Step 3 select IP Phones for the Primary Phone Port. Then select Any IP Phone.

Setting the call stack size
Tesira VoIP endpoints can handle up to 6 call appearances on a single line. Separate call appearances can be used to place calls on hold to open another call, support call waiting, and utilize the conference feature. Note that conferencing in Tesira is limited to a 3-way call per line. It is recommended that you limit the number of appearance available to a maximum of 6 in the ShoreTel system. It may also be desired to limit the number of appearances lower than the 6 available in Tesira. Setting the ShoreTel limit lower will further limit the number of calls appearances at a single extension.
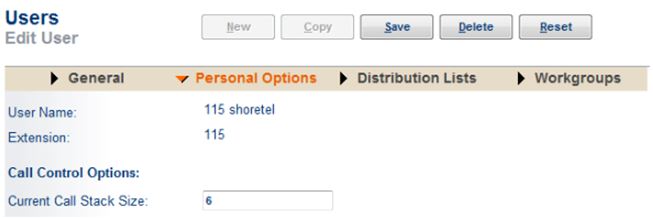
- From the Edit User screen select the Personal Options Tab.
- Set the Current Call Stack Size to support the maximum number of call appearances desired on the extension.
- Click “Save”
Tesira configuration
After all ShoreTel settings have been entered, follow the steps below to set up the Tesira card:
Accessing VoIP settings in SageVue
|
|
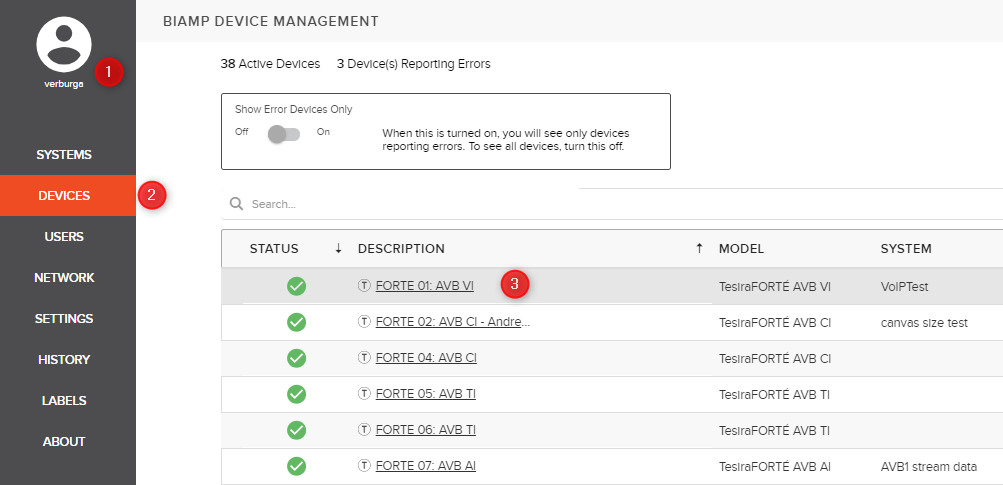

- Open a browser and login to your Sagevue webpage.
- Navigate to "Devices" on the right side of your browser.
- Click on the device description of a device running a configuration that has a VoIP interface
- Navigate to the VoIP configuration tab. (If you cannot access the VoIP settings make sure your account has read/write permissions for VoIP settings. More information on user roles can be found on the online SageVue help page.)
- Select the correct interface that adjustments are going to be made on.
- If you'd like to set the same settings on all VoIP interfaces within this device, enable the "Configure all VoIP cards in this device" option. Note that only fields highlighted in yellow can be updated on multiple endpoints at once.
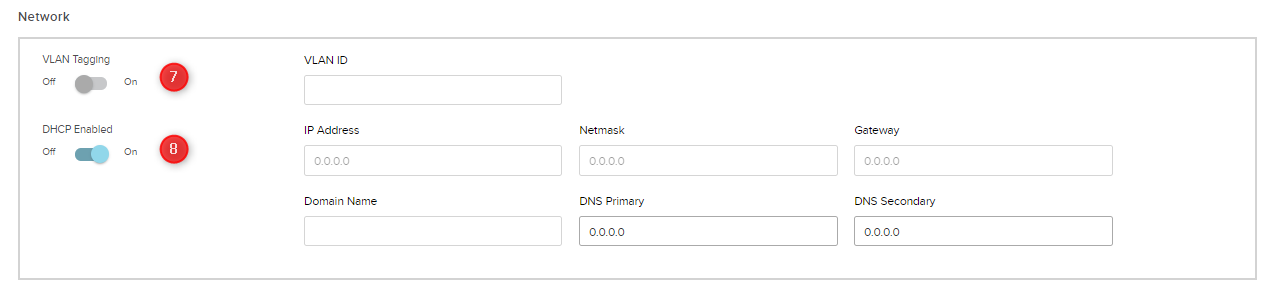
Network Configuration
- Under the Network region of the screen, set “VLAN Tagging” to “Enabled” if your VoIP network uses a tagged VLAN. If the network uses an untagged VLAN or no VLAN, leave this value as “Disabled”. If VLAN is enabled, enter the correct VLAN ID.
- Leave “DHCP” set to “Enabled” if the Tesira endpoint will obtain an IP address automatically from a DHCP server. Otherwise, set “DHCP” to “Disabled”, and manually enter an appropriate static IP Address, Subnet Mask, and Gateway for the Tesira.
Configuring the VoIP settings
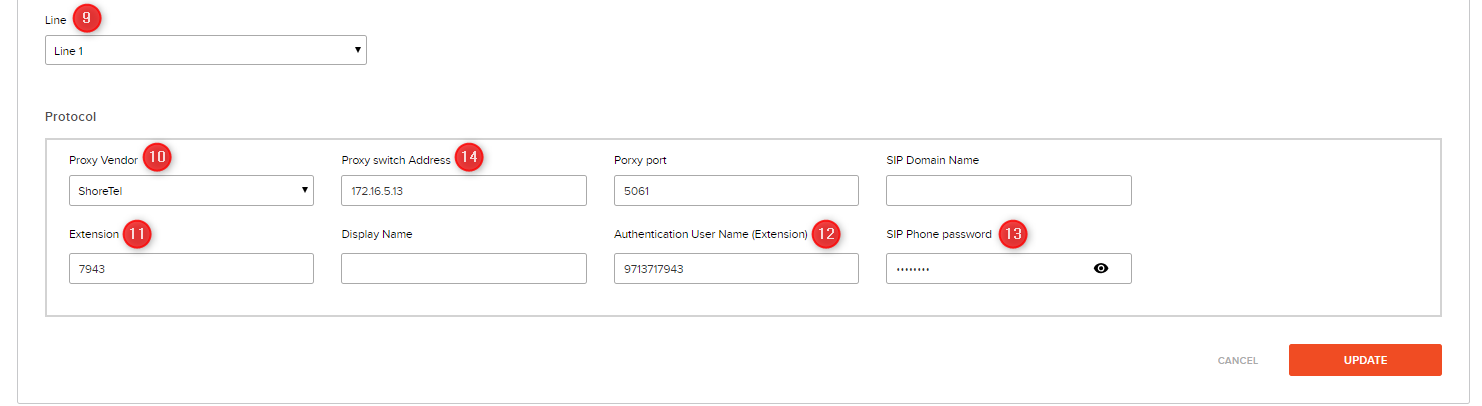
 Select the line you wish to Edit "Line 1" is selected by default
- Select "ShoreTel" as the Proxy vendor
- In the Extension field, enter the Extension Number used in the ShoreTel settings. (see: "Setting up new User", step 3)
- In the Authentication User Name (Extension) field, enter the Extension Number used in the ShoreTel settings. (see: "Setting up new User", step 3)
- In the SIP Phone Password field, enter the SIP Password you used in the ShoreTel settings. (see: "Setting up new User", step 10)
- In the Proxy Address field, enter the IP address of the ShoreTel ShoreGear switch.
- If you’re configuring two lines, select "Line 2 Setup" at the drop down box and repeat steps 10-14.
- All other settings can remain at their default values in most cases.
- Once all settings have been added, click the Update button and the settings will be written to the Tesira VoIP interface.
- More Advanced features such as transport type, QoS settings, and Local Dial Plan can only be changed via the Tesira software or the VoIP webpage. These settings are optional and often don't need to be changed from their default values.