Cisco CallManager configuration for Vocia MS-1
The Biamp Vocia Message Server (MS-1) includes a feature that allows pages to be initiated over any VoIP system that adheres to the SIP (Session Initiation Protocol) standard. This article details the steps required to configure a Cisco CallManager VoIP system to work with the Biamp Vocia MS-1.
Cisco configuration
First, we'll focus on setting up the Cisco CallManager server.
Media Resource Group
The first step to setting up the CallManager system is to create a Media Resource Group and a Media Resource Group List. The instructions below describe the required settings. Throughout this document, any settings which are not mentioned can be left at their default values.
 |
 |
- Go to Media Resources—>Media Resource Group.
- Click the “Add New” button.
- Enter a name and description for the new Media Resource Group.
- Add "MTP_2" to the Selected Media Resources field by selecting it in the Available Media Resources field and clicking on the down arrow.
- Click the "Save" button.
- Go to Media Resources—>Media Resource Group List.
- Click the "Add New" button.
- Enter a name for the new Media Resource Group List.
- Select the name of the previously created Media Resource Group (see step 3 above) in the Available Media Resource Groups field, and click the down arrow to move it into the Selected Media Resource Groups field.
- Click the "Save" button.
Security Profile
Next, a new SIP Trunk Security Profile must be created.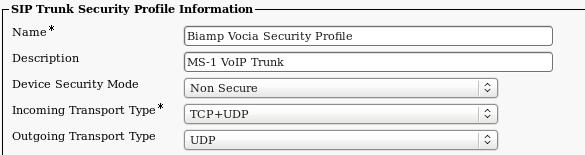
- Go to System—>Security Profile—>SIP Trunk Security Profile.
- Click the "Add New" button.
- Enter a name and a description for the new SIP Trunk Security Profile.
- Set the Security Mode to Non Secure.
- Set the Outgoing Transport Type to UDP.
Trunk
The next step is to create a new trunk using the previously created Security Profile.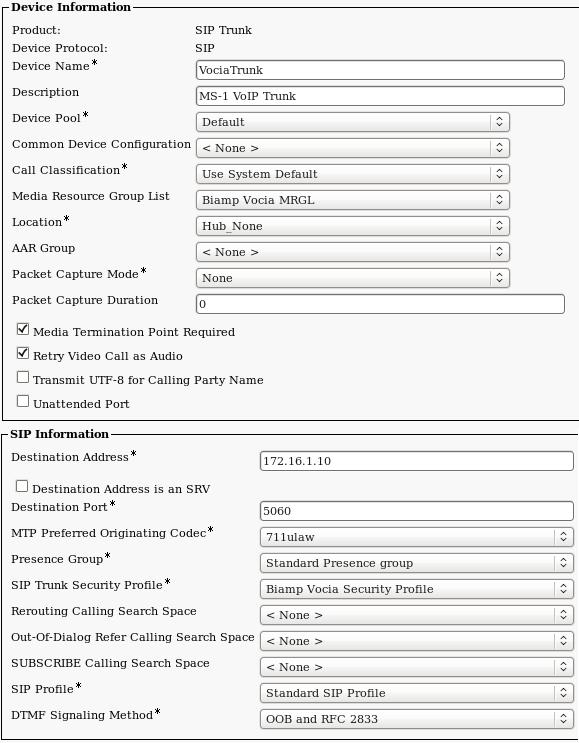
- Go to Device—>Trunk.
- Click the "Add New" button.
- Set the Trunk Type to SIP Trunk.
- Set the Device Protocol to SIP.
- Click the "Next" button.
- Assign a name and description to the new SIP Trunk. Note that the name cannot include spaces.
- Set the Device Pool to Default.
- Set the Media Resource Group List to the Media Resource Group List created previously (see Media Resource Group, step 8).
- Click to select the checkbox for Media Termination Point Required.
- In the SIP Information section, the Destination Address field must be set to the VoIP IP address of the MS-1.
- For the SIP Trunk Security Profile, select the Security Profile created earlier. (see Security Profile, step 3)
- Set the SIP Profile to Standard SIP Profile.
- Set the DTMF Signaling Method to OOB and RFC2833.
Route Pattern
Finally, we need to set up a Route Pattern to define the extension at which the MS-1 will reside.
- Go to Call Routing—>Route/Hunt—>Route Pattern.
- Click the "Add New" button.
- Set the Route Pattern to the extension number that the MS-1 will use.
- Set the Gateway Route List to the previously created Trunk. (see Trunk, step 6)
- Set the Route Option to Route This Pattern.
- Uncheck the checkbox for Provide Outside Dial Tone.
- Set Calling Line ID Presentation to Restricted.
- Set Calling Name Presentation to Restricted.
Reboot CallManager
Once CallManager has been configured, the VoIP server will either need to be rebooted or the CallManager service will need to be restarted from the CallManager Unified Serviceability Control Center before the changes will take effect.
Vocia configuration
After completing the configuration of the CallManager server, several options in the MS-1 will need to be set to match the CallManager settings.
 |
 |
 |
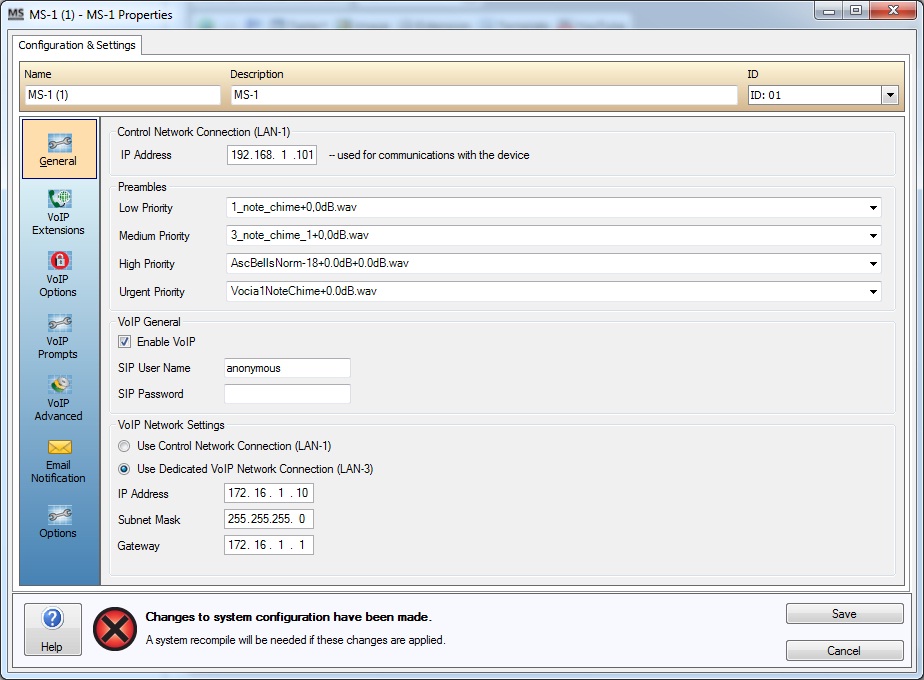
- In the Vocia software, open the MS-1 dialog.
- In the General page, check the checkbox for "Enable VoIP".
- Set the SIP User Name field to “anonymous”. This is the default user name that CallManager uses, and it cannot be changed in CallManager.
- Leave the SIP Password field blank.
- In the VoIP Network Settings section, select the network port that is being used for VoIP communication:
- If the LAN-1 port is being used for both control and VoIP, choose "Use Control Network Connection (LAN-1)". In this case, the IP address of the LAN-1 port (specified at the top of the MS-1 dialog) will be used for both control communications and VoIP. That IP address must match the IP address entered into CallManager (see Trunk, step 10).
- If the LAN-3 port is being used for VoIP (this is more common), select "Use Dedicated VoIP Network Connection (LAN-3). In this case, you must specify a different IP address, Subnet Mask, and Gateway to be used on the LAN-3 port. The IP address entered here must match the IP address entered into CallManager (see Trunk, step 10).
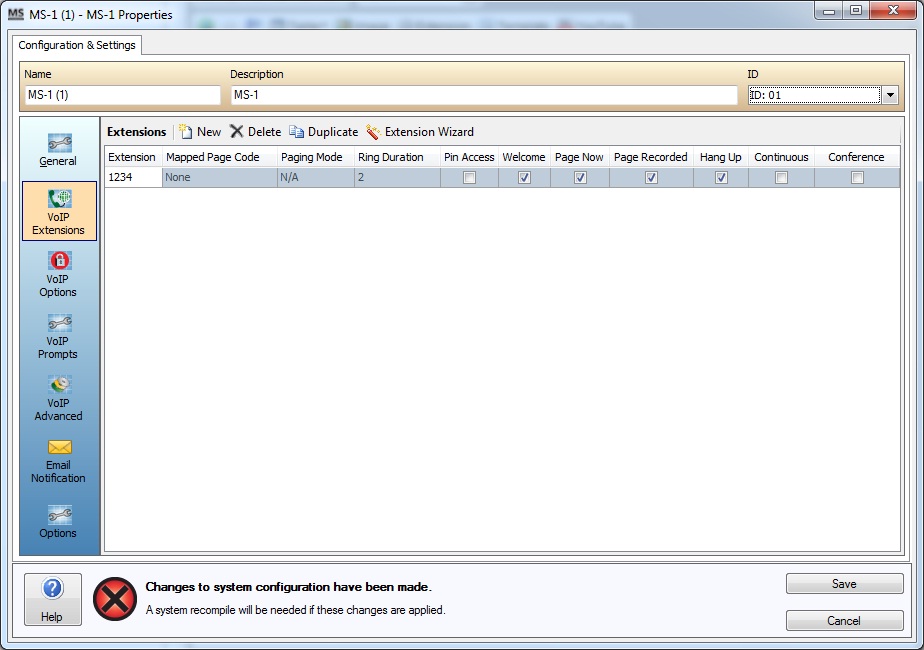
- Go to the VoIP Extensions page. Enter at least one extension number. This number must match the Route Pattern entered into CallManager. (see Route Pattern, step 3). Set the remaining options for that extension as desired. Note that if Pin Access is checked for any extension, a PIN group must be selected in the VoIP Options page (after it has been created in the Universe Properties window).
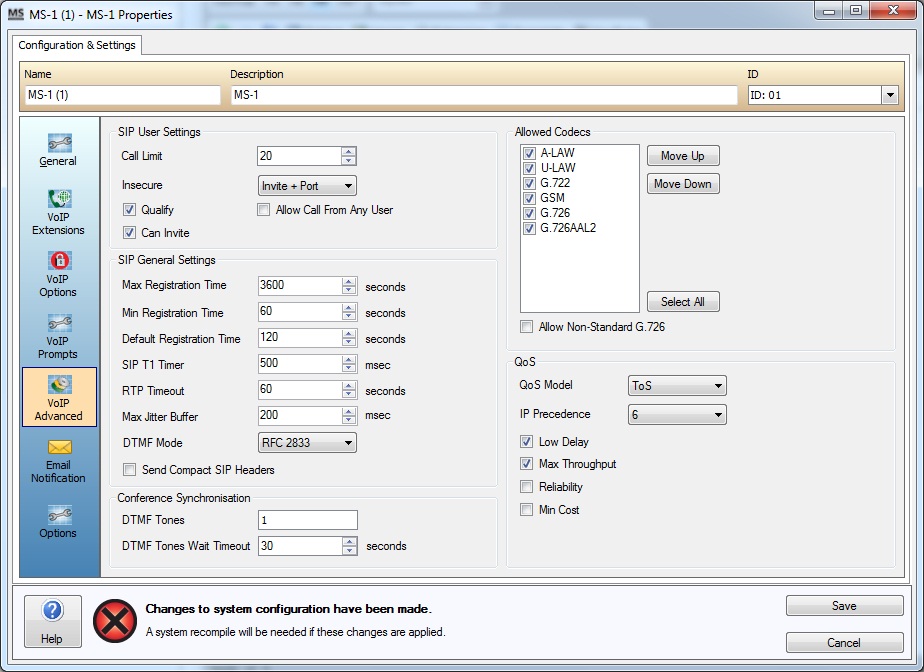
- Go to the VoIP Advanced page. Set the Call Limit field to the maximum number of VoIP calls that you’d like the MS-1 to handle simultaneously. If this limit is reached, any additional callers will hear a busy tone.
- Set Insecure to "Invite + Port".
- Check the Can Invite checkbox.
- Click the Save button, and then send the configuration file to the Vocia system.