Connecting an analog telephone line to a Vocia MS-1 using a VoIP gateway
The Vocia MS-1 is capable of connecting to a Voice Over Internet Protocol (VoIP) phone system to allow paging from any VoIP endpoint on the network. In this case the MS-1 acts as a SIP Trunk to the VoIP system. If the phone system at a Vocia install location is making use of analog POTS lines instead of a VoIP system, there is no way to directly connect an MS-1 to the phone system. It is possible to use a 3rd party VoIP gateway to convert a call using an analog POTS line to a VoIP call.
The 3rd party VoIP Gateway is basically just an analog telephone. As such it will have a dedicated phone number administrated by the site telco team. Once the call rings through to the Gateway the MS-1 will answer it and provide prompts allowing users to generate paging activity.
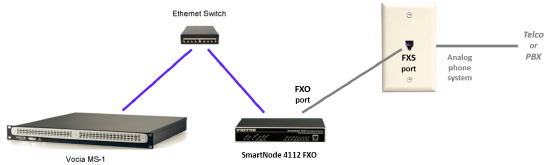
There are a variety of different VoIP Gateways on the market that will accomplish this conversion but in order to aid our customers, Biamp has tested the Patton SmartNode 4112 and this article describes the steps required to integrate these two devices. Note that the Patton device is available in two different configurations, one supporting an FXO telephone line and another supporting an FXS telephone line. The device used in this article is the Patton SmartNode 4112 FXO (Patton PN: SN4112/JO/EUI).
Patton SmartNode 4112 FXO
The SmartNode 4112 FXO is capable of connecting up to two analog POTS lines and converting them to VoIP. The use of both analog lines is not required for system operation and simply adds a backup paging line if the primary line is being used. To set up the Patton SmartNode 4112 FXO to interface with a Vocia MS-1 you will need the following:
- The MS1_2_LINES.txt configuration file provided by Biamp.
- Brief access to a DHCP enabled Network.
- A small Ethernet Switch (Minimum 3 ports).
- A Patton SmartNode 4112 VoIP Gateway with the installation CD.
- A Vocia MS-1 message server.
Procedure
- Configure and load the MS-1 VoIP settings as shown in the screenshots below. If the VoIP IP Address listed here is in the same Subnet as the IP Address of the MS-1, the Biamp provided SmartNode configuration file will not work. Please contact the Biamp Application Engineering Department if this is the case.
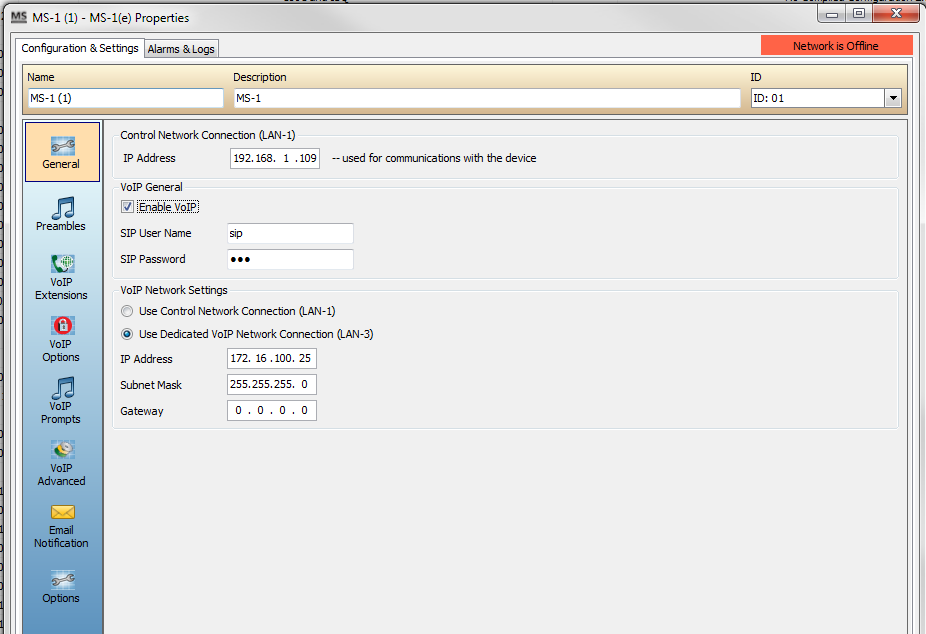
- General
- Enable "VoIP"
- User Name: sip (case sensitive)
- Password: sip (case sensitive)
- Enable "Use Dedicated VoIP Network Connection (LAN-3)
- VoIP Port IP Address: 172.16.100.25
- VoIP Port Subnet Mask: 255.255.255.0
- Gateway: 0.0.0.0
- VoIP Extensions
- Extension Number: 123
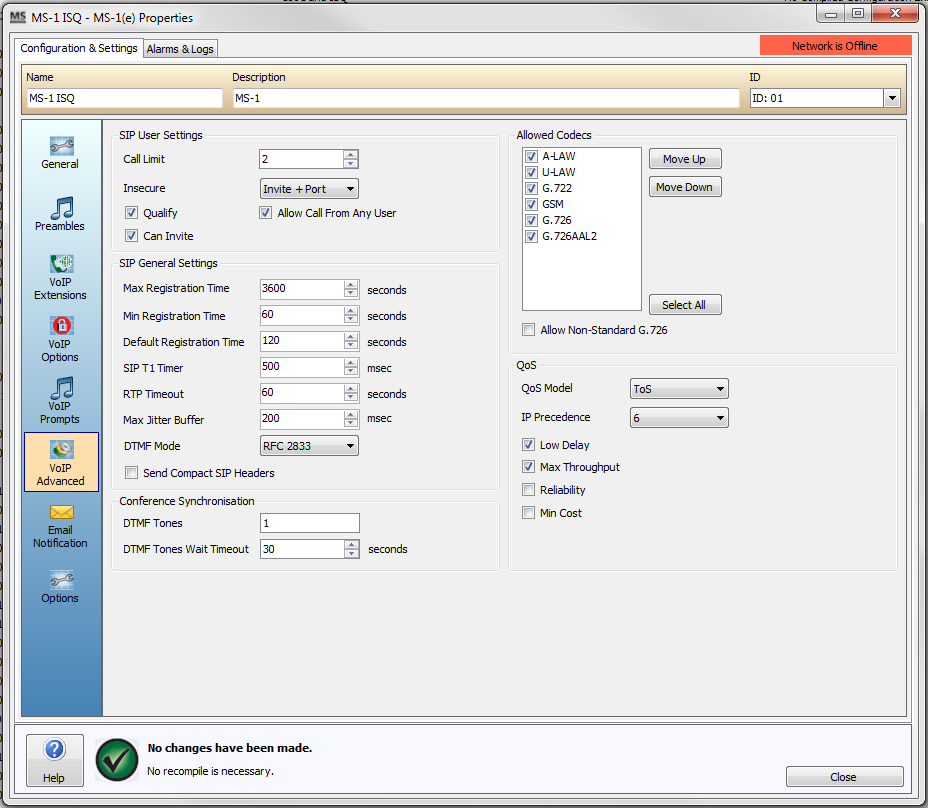
- VoIP Advanced
- Call Limit: 2
- Insecure: Invite + Port
- Enable "Allow Call from Any User"
- General

-
Connect your computer and the ETH 0/0 Port on the SmartNode 4112 to the Ethernet switch.
-
Connect the Ethernet switch to a network that has a DHCP server on it. By default the SmartNode 4112 is set to obtain an IP Address via DHCP. Your computer will also need to be set to obtain an IP Address via DHCP.
-
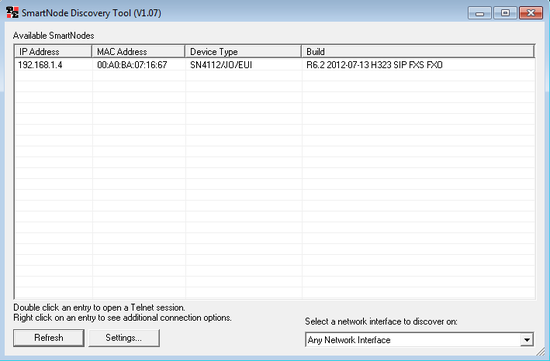
Open the SmartNode Discovery Tool from the CD included with the Gateway. (Tools Folder / SNDiscovery.exe)
-
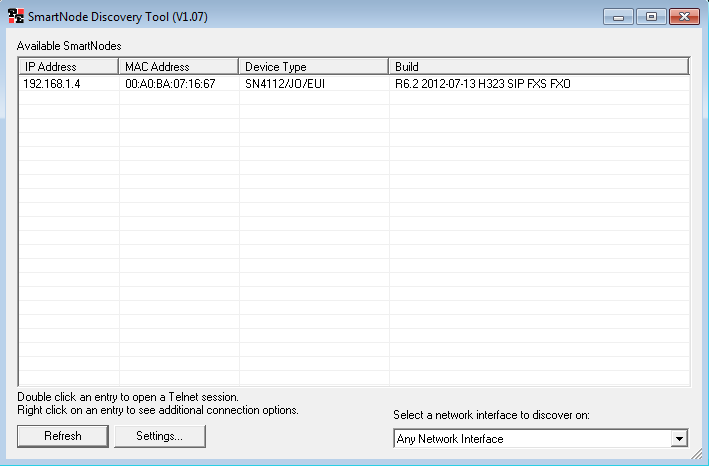
If both your computer and the SmartNode Gateway have been assigned an IP Address you should see the device in the Discovery Tool Window.
-
Double Click the device in the SmartNode Discovery Tool and a Web Browser will open.
-
Enter the default User Name and Password to log into the Configuration Settings of the SmartNode 4122.
-
Default User Name: administrator
-
Default Password: (blank)
-
-
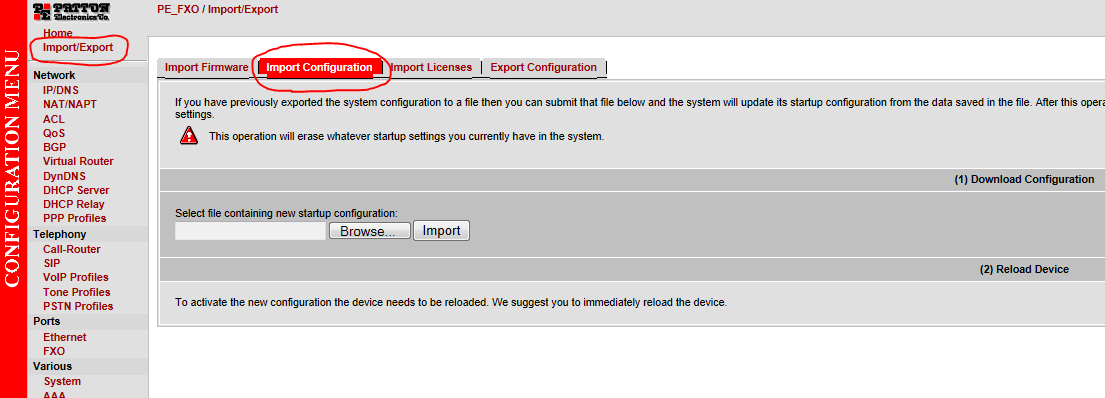
In the Configuration Menu on the left side of the screen select the Import/Export Menu.
-
Select the Import Configuration Tab to enter the Import Configuration Screen.
-
Select the Browse button, navigate to the MS1_2_LINES file, and select Open.
-
When the Startup Configuration has been imported successfully select the Reload button to enter the Reload Device Screen.
-
Select Reload in the Reload Device screen. The SmartNode 4112 device will reboot, this process can take several minutes and you will not be able to connect to the device in your current web browser. The device will be fully restarted when the activity light on the front panel begins to flash.

-
The link from the Ethernet Switch to the DHCP Network may now be removed.
-
Connect the VoIP Port of the MS-1 to the Ethernet Switch currently connected to the SmartNode 4112. This connection will need to remain in place when Vocia phone paging is in use.
-
Connect a phone line to one of the FXO ports on the SmartNode 4112. Two lines may be used to allow two separate pages to route to the MS-1 at once.
-
Once the SmartNode 4112 Gateway has been rebooted the system will be ready to make pages. Part of the configuration file that was loaded to the Gateway sets the unit to a static IP Address of 172.16.100.141. If the unit needs to be accessed again the computer used for configuration will need to be set to an IP Address in the same subnet as the Gateway.
