Interfacing Vocia with cloud-based VoIP systems
Vocia offers several ways of connecting to a Voice Over Internet Protocol (VoIP) phone system to allow paging from any VoIP endpoint on the network. Many of these systems are moving to cloud-based solutions that add a lot of flexibility and expansion options to the phone system. Even though most of these systems use SIP (Session Initiation Protocol), the implementation is not yet standardized. Brand A may or may not work with brand B. This makes it hard for a third party manufacturers to make their systems compatible with all the systems existing in the marketplace.
One thing most of these systems do support in one way or another is backwards compatibility to analog phone lines by way of an ATA or Analog Telephone Adapter. These devices act as a bridge between a VoIP Phone system and any device requiring an analog telephone line. Setting up an ATA to work with a cloud based phone system is pretty common practice these days.
In this article, we'll cover the setup procedure to interface Vocia with a ZOOM phone system using a Polycom OBI ATA 302 or 508 ATA.
Prerequisites
To interface Vocia with ZOOM you'll need:
- A Polycom OBi302 or Obi508 depending on how many phone lines are required. The Obi302 offers up to two analog lines while the Obi508 has up to eight.
- A Vocia POTS-1. These can have two or four analog phone inputs. Multiple POTS-1 devices can be used in a Vocia system.
- An analog phone for setting up and troubleshooting.
Wiring
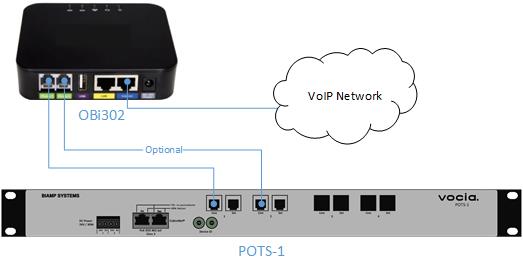
- Connect the blue "Internet" port of the OBi302 or the Ethernet port on the OBi508 to the VoIP network.

- Connect the first green "Phone" port to the "Line" port on line 1 of the POTS-1 using a standard RJ-11 telephone line cable. More lines can be connected in the same manner as required
- Connect the power adapter of the OBi device to a power outlet.
Obtain the IP and MAC addresses of the OBi device
IP Address
- Plug both the Ethernet and Power cables.
- Plug in an analog phone to the telephone port of the OBi device.
- Pick up the hadnset (you'll hear dial tone) and dial ***.
- The OBi device will read the IP address back to you.
MAC Address
The MAC Address of the OBi302 device is listed on the backside of the unit. Alternatively, you can obtain the MAC Address through the web interface:
- Open a web browser and enter the IP address in the address bar.
- When prompted, enter the user name and password.
- Default user name: admin
- Default password: admin
- Navigate to Status > System Status > Product Information on the left hand side of the interface.

Configure Zoom
To configure Zoom, login to your account as an admin and follow these steps:
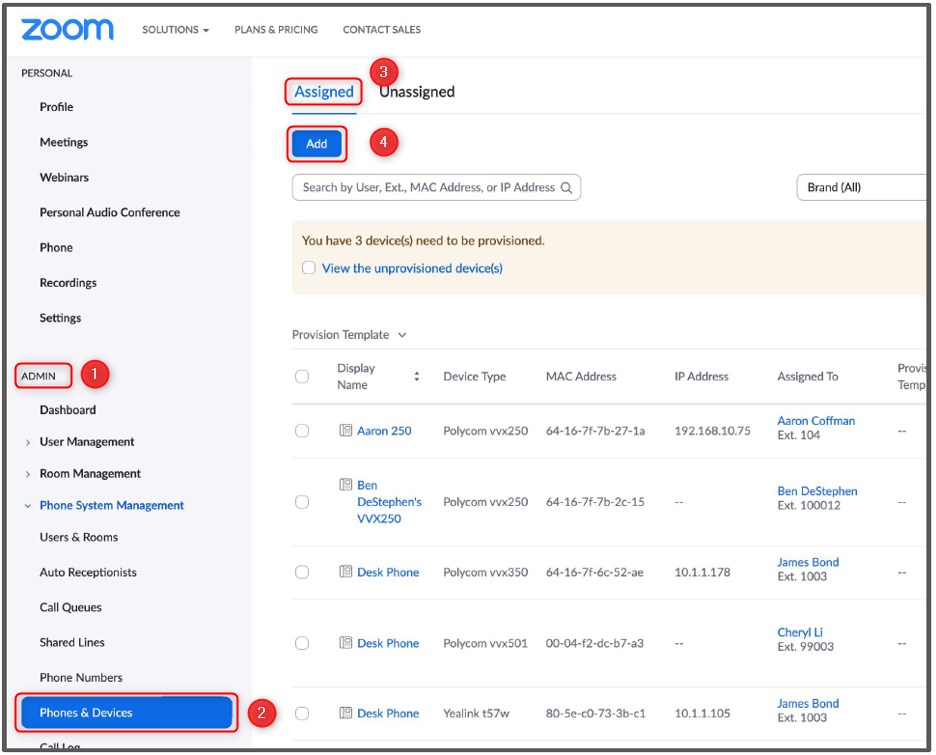
- Navigate to Admin.
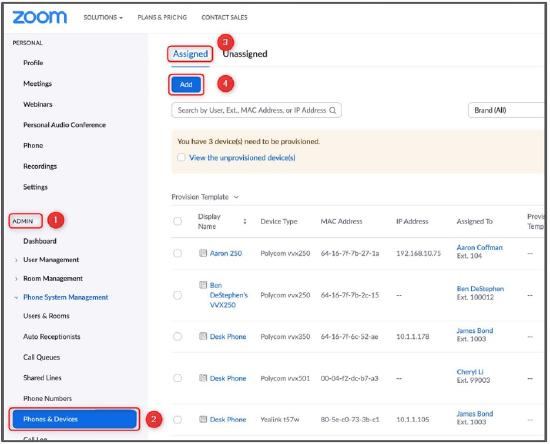
- Expand Phone System Management.
- Click Phone & Devices.
- Under the Assigned Tab, click Add. This will open a new dialog.
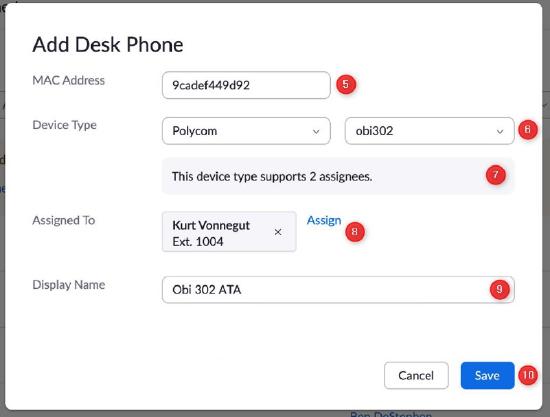
- Enter the MAC address of the OBi device.
- In Device Type select "Polycom" and then select the appropriate OBi model being configured.
- The next field shows how many assignees (phone lines) are supported by the devices.
- Click Assign to choose a user to assign to the device.
- Create a Display Name for the device.
- Click Save.
- The next window will confirm your entries.
- Click Provision on the bottom left of that dialog.
- The window that appears will show instructions
 on how to configure the ATA (covered in the next section). Copy the Provisioning URL at the top of the dialog.


Configure the OBi Device
Before configuring the OBi device it's always a good idea to check that it's running the latest firmware version
- Open a web browser and type the IP address of the OBi device
- Login to the web interface by entering the username and password
- Default user name: admin
- Default password: admin
- Navigate to Status > System Status
- Under Product Information check the firmware version
- OBi302: 3-2-2-5921EX or later
- OBi508: 4-0-5-5980 or later
Updating firmware (if needed)
- In the OBi Device web interface, navigate to System Management > Device Update.
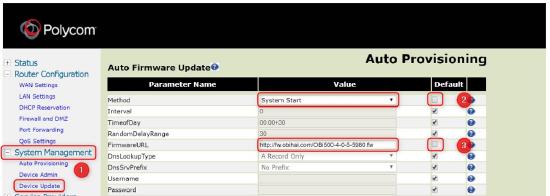
- Under Method select System Start and uncheck under Method.
- Uncheck Firmware URL and paste the latest firmware URL.
- Click Submit at the bottom and wait for the next window to reload.
- Click Reboot.
Register the OBi Device to Zoom
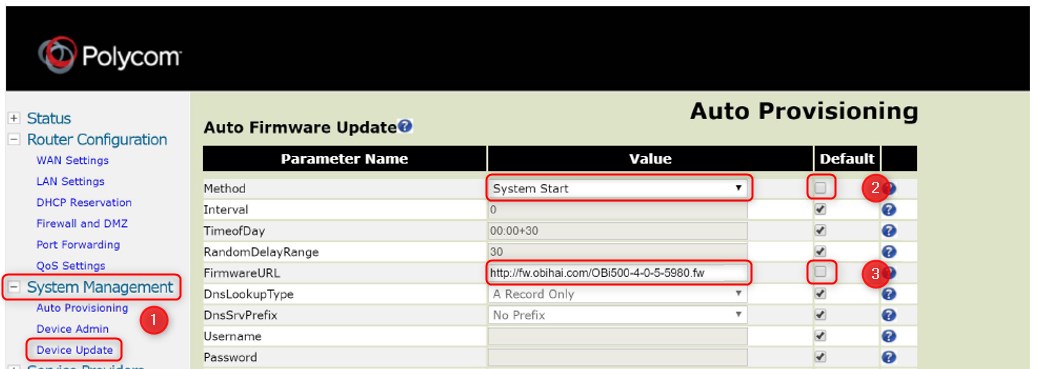
- In the OBi Device web interface, navigate to System Management > Auto Provisioning.

- Under Method select System Start and uncheck under Method.
- Uncheck ConfigURL and paste the Provisioning URL.
- Click Submit at the bottom and wait for the next window to reload.
- Click Reboot.

Configure the Vocia POTS-1
There are multiple options to consider when programing the Vocia POTS-1 for paging. From requesting a security PIN to selecting the actual action to execute to which prompts the user will hear, posiblities are numerous. These next steps only show a basic configuration to allow a general page. It also assumes the system has zones and pages codes already programmed and POTS-1 has been added to the inputs
- Open the POTS-1 configuration window by double clicking on it.
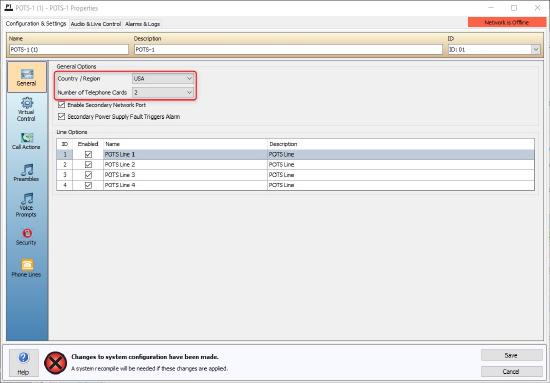
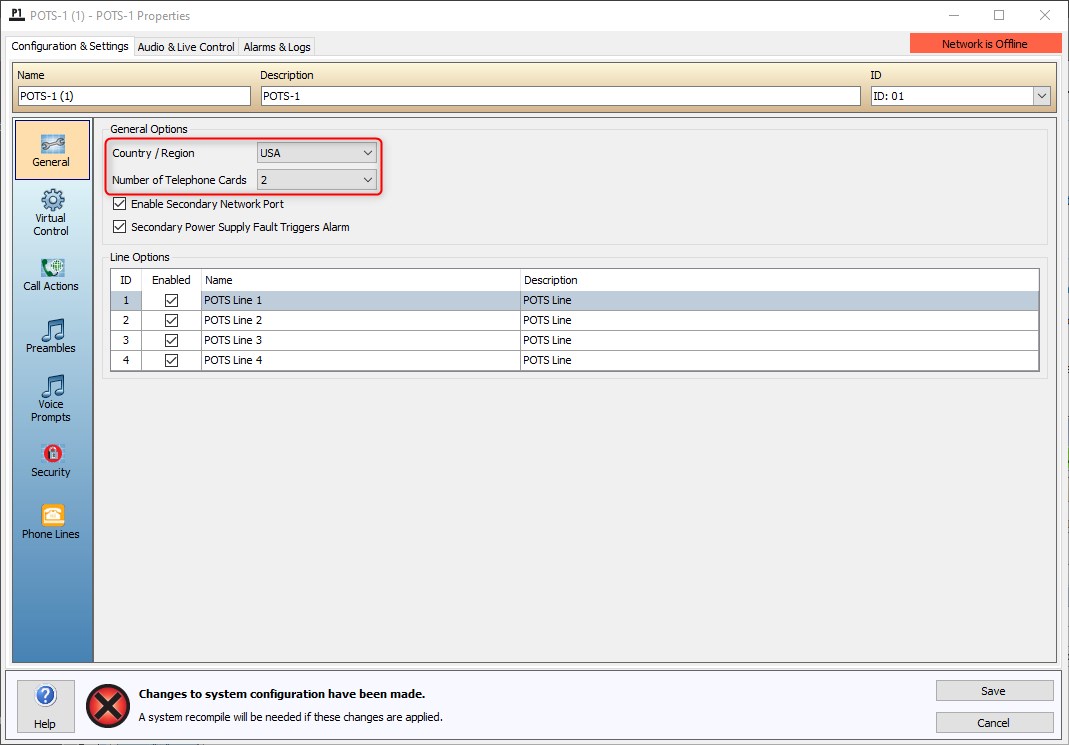
- Under General, make certain that the region and number of lines are st appropriately.
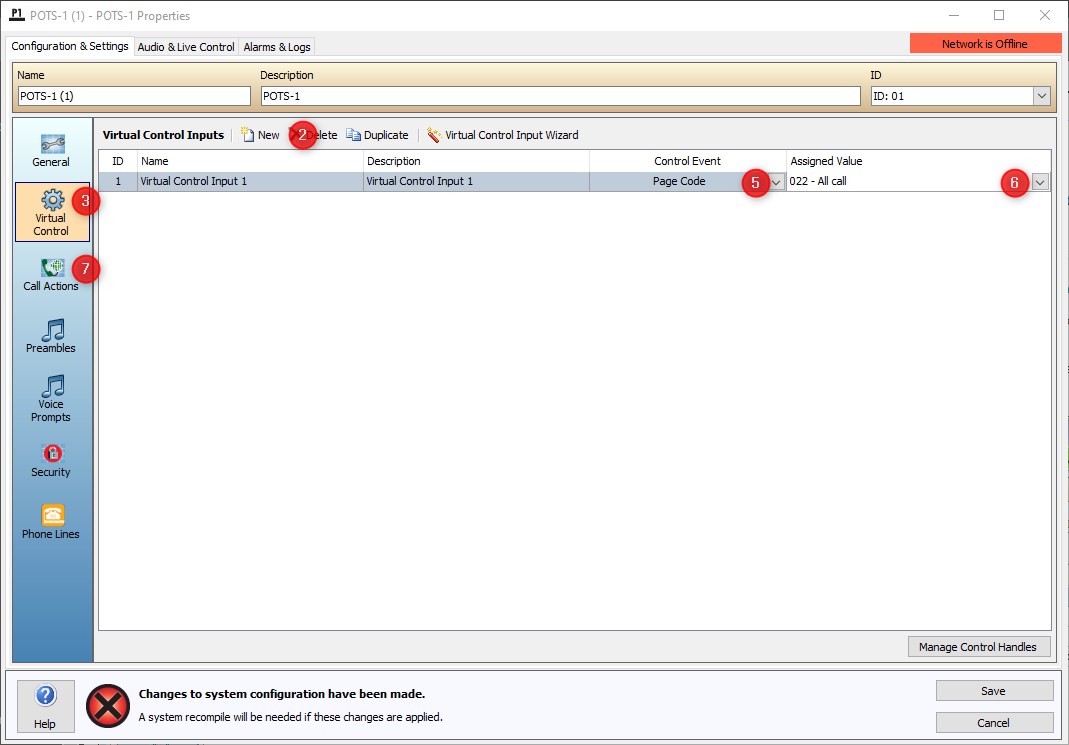
- Click Virtual Control on the left hand side.
- Click New to add a new virtual control.
- Under Control Event select Page Code.
- Under Assigned Value select the page code that will be used.
- Click Call Actions on the left hand side
- Under Virtual Control Input select the virtual control we just created.
- Click Save.
- Compile and send the configuration to the system.
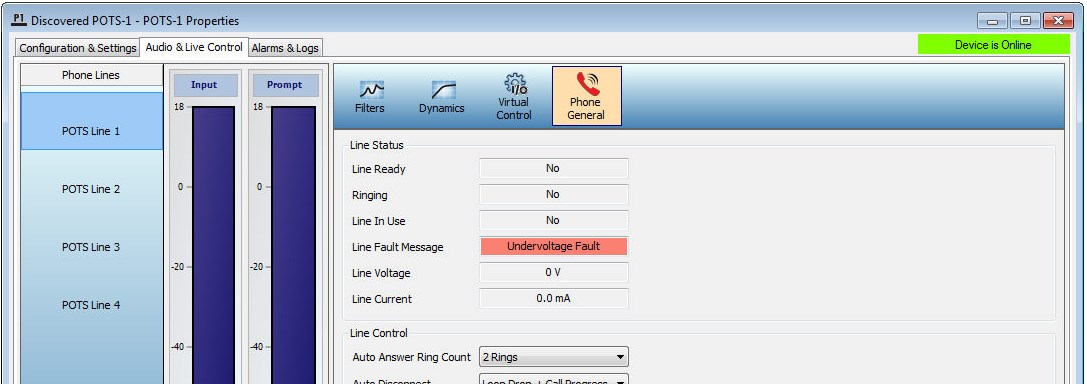
Troubleshooting
The Vocia POTS-1 offers an easy way to check if the phone line is working or not. While connected to the Vocia System, open the POTS-1 configuration dialog and navigate to Audio & Live Control and select Phone General. This window not only shows every stage of a call but also if the phone line is working properly.