Updating firmware on Devio
This article describes how to update firmware on a Devio. Firmware can be updated manually, or a firmware update can be scheduled for a specific time and date.
Typical firmware updates take 5-10 minutes to complete. Do not remove power or interrupt network connectivity during the update. Updating firmware over a WiFi connection or via a remote internet connection is not recommended, as an unreliable connection to the device can result in an incomplete or corrupted firmware update.
Manual firmware update
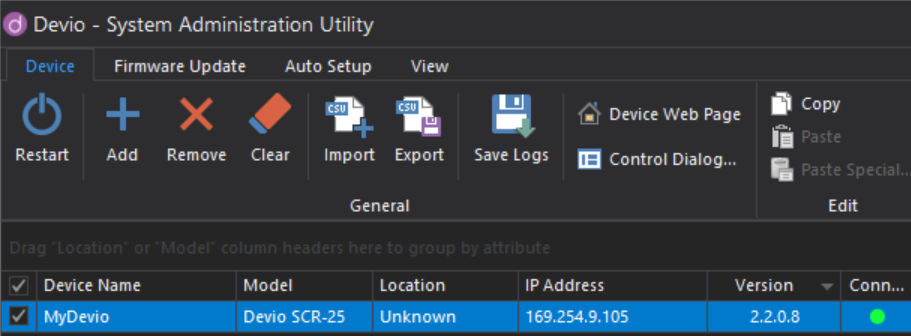
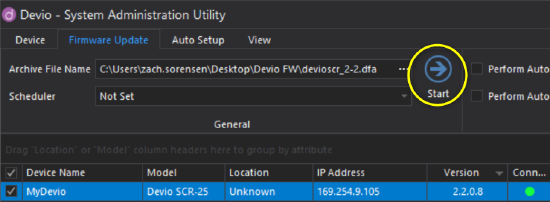
1. Connect to your Devio unit via the SAU (instructions can be found in this article). Make sure that you can see the Devio unit listed and that it has a green status LED in the SAU for "Connected". You will find the current firmware version on the device listed under the "Version" column (in this example, 2.2.0.8).
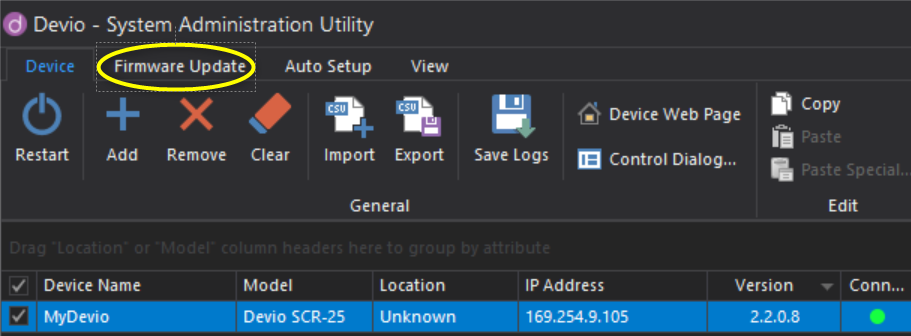
2. Click on the "Firmware Update" tab at the top of the screen.
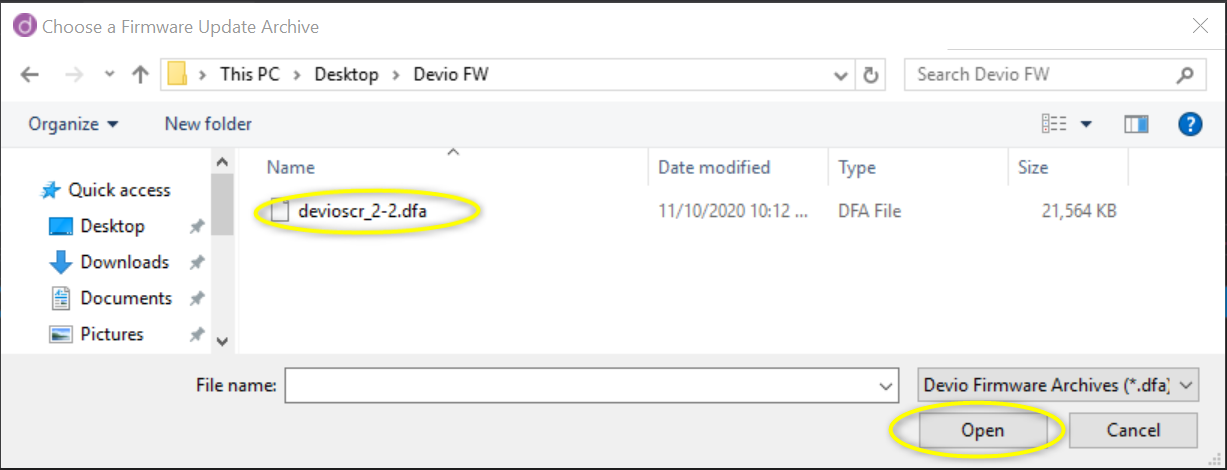
3. Click the "..." to the right of Archive File Name. Locate and select the firmware file (which will have a .dfa extension, for Devio Firmware Archive), then click Open to choose it.
4. Make sure that all devices you wish to update have been selected on the left-hand side of the device list.
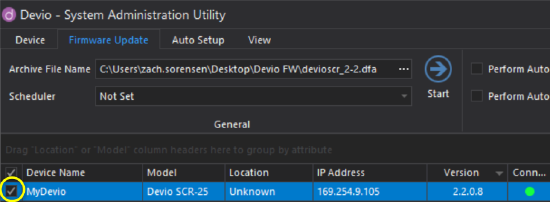
5. Click the blue arrow that says "Start."
6. There will be a pop-up confirming whether you wish to update the firmware. Click "Yes" to begin the firmware update.
7. A blue progress bar will appear to the right of your device in the device list, indicating how much time is remaining and eventually displaying a message as to whether the firmware update was successful.
If the message states, "Firmware update complete," the operation was a success and you may resume use of your Devio unit. You will also see the Version column updated in your device list.
If the message states, "Timed out waiting for restart," check your network connection to the Devio, ensure you are updating to the most recent firmware version, and try again. This message will also appear if the device's IP address changed when the device rebooted at the end of the firmware update. This would occur if the device is set to DHCP and either the DHCP server does not hand out a consistent IP address to it, or there is no DHCP server present at all.
Scheduled firmware update
1. Connect to your Devio unit via the SAU (instructions here: https://support.biamp.com/Devio/Arti...ration_UtilityDevio/Arti...ration_Utility ). Make sure that you can see the Devio unit listed and that it has a green status LED in the SAU for "Connected". You will find the current firmware version on the device listed under the "Version" column (in this example, 2.2.0.8).

2. Click on the "Firmware Update" tab at the top of the screen.

3. Click the "..." to the right of Archive File Name. Locate and select the firmware file (which will have a .dfa extension, for Devio Firmware Archive), then click Open to choose it.Devio Firmware Archive), then click Open to choose it.

4. Make sure that all devices you wish to update have been selected on the left-hand side of the device list.

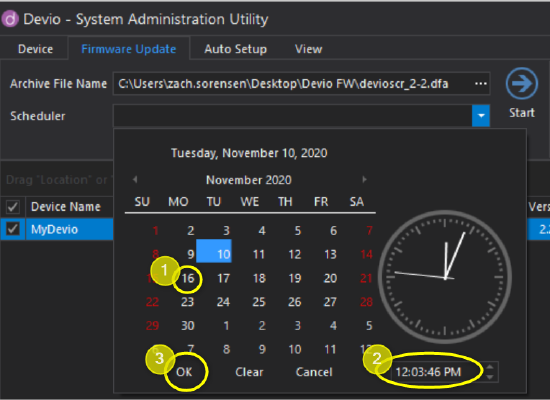
5. Click on the drop-down arrow to open the Scheduler, and select the desired date and time for your firmware update.
6. Choose whether you would like the system to automatically perform Auto Setup once the firmware update is complete.*

*Note that this option will only be successful if the Devio's IP address remains unchanged when rebooted. This means it needs to be either on a static IP address, or have a DHCP server present that will assign it the same IP address every time it joins the network. If the device is receiving a new IP address from the DHCP server when it rejoins the network, or if it is set to obtain a DHCP IP address and there is no DHCP server present (i.e., if it is set to Link Local), then this operation will not be successful. This is because the SAU will perform a reboot on the device after applying the firmware update, after which it will attempt to reconnect to it at the same IP address as before the reboot.
7. Click the blue arrow that says "Start." NOTE: Once you have clicked Start to schedule a firmware update, you will no longer be able to make any changes to the Devio until the firmware update is complete.

8. The blue Start arrow will become a red X and display a countdown until the scheduled firmware update begins. You may cancel the scheduled firmware update at any time by clicking on this X. Once the countdown reaches zero, the firmware update will automatically begin.

NOTE: The SAU software must remain open in order for a scheduled firmware update to occur. If you attempt to close the software while a scheduled firmware update countdown is in progress, the software will display a message confirming whether you want to close the software and, thereby, cancel the scheduled firmware update.
9. Once the scheduled firmware update begins, a blue progress bar will appear to the right of your device in the device list, indicating how much time is remaining and eventually displaying a message as to whether the firmware update was successful.
10. If the message states, "Firmware update complete," the operation was a success and you may resume use of your Devio unit. You will also see the Version column updated in your device list.
11. If the message states, "Timed out waiting for restart!" check your network connection to the Devio, ensure you are updating to the most recent firmware version, and try again. This message will also appear if the device's IP address changed when the device rebooted at the end of the firmware update.
12. If you had selected "Perform Auto Setup after firmware update" in Step 6 and the device's IP address did not change upon reboot, the system will perform Auto Setup now.
