Configuring feedback on a TEC-X controller
This article describes/explains how to get feedback setup on a TEC-X 1000/2000 controller device. In this scenario, a Forte X 400 and a TEC-X 2000 are used as an example but can be applied to any model TEC-X, along with any model Tesira DSP
Programming TEC-X block
First, we'll want to configure the interface of the TEC-X in the block in the configuration file. In this example, we'll get feedback from a Parle Mic input block, an EX-UBT input block, and a level control block. Lets first add in our TEC-X buttons to the interface:
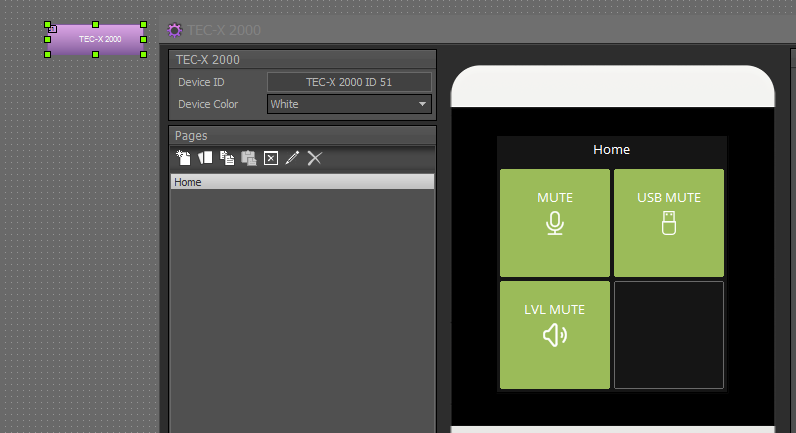
Now let's program each button accordingly to control their respective blocks. Select a button to start with and move over to the "control" section of the configuration window. The "display" tab should be open.
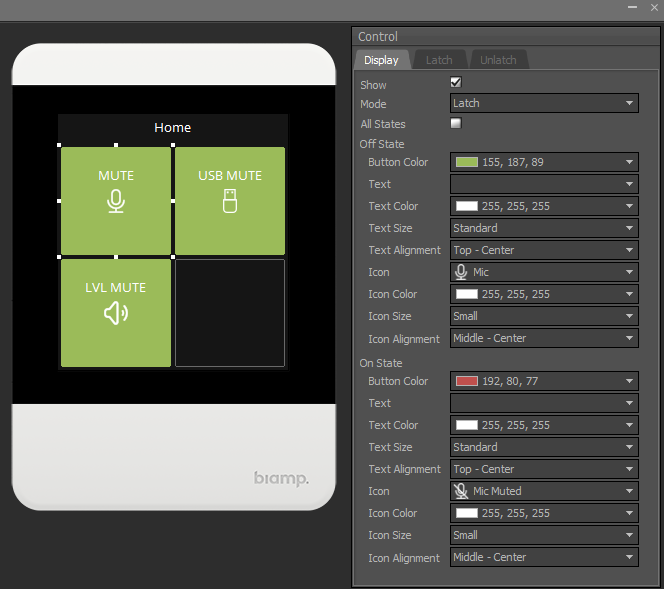
We'll need to change a few settings to get the button to respond. Using the "Latch" button mode gives us two separate states to work with - On and Off. Once we have the button mode changed to Latch, uncheck the "All States" checkbox. This gives us a detailed view of the two separate states the button can present.
In the Off State, change the color of the button to what you would like to see when the input is unmuted, commonly seen as a green color matching the Parle's LED indicator. Add some text and/or icon as you desire.
In the On State section, change the color of the button to the opposite. In this case it will be red, indicating the mic is muted, and also matching the Parle's LED. Again, add text and/or icon that best fits the button's function.
Once the buttons display tab settings are all set, move over to the "Latch" tab.
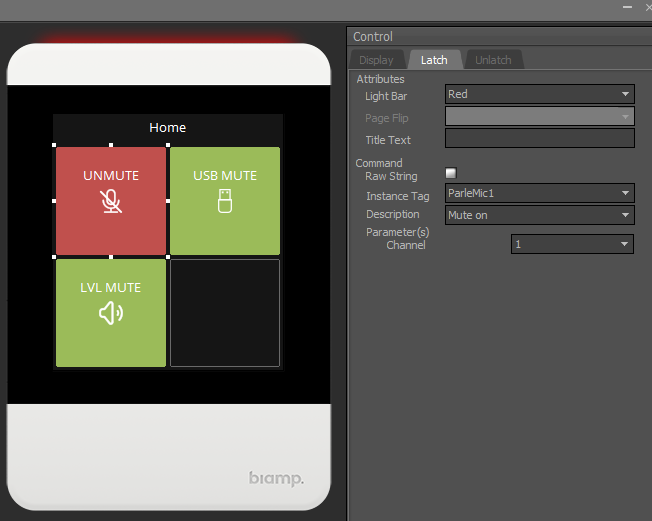
This section is where we will add the functionality to the button. Select the instance tag of the block the button will be controlling. In this case, it will be the Parle Mic input block, or ParleMic1. Once the instance tag is selected, move down to the Description field and set it to "Mute on", along with the respective channel. This will ensure that when the button is pressed, it will mute the Parle mic input block and also change the button state to a Latched state. At the same time the button will change to our red color which matches up with the Parle LED indicator. We can also adjust the light bar attribute to change with the button push.
Now move over to the "Unlatch" tab to configure the other state of the button
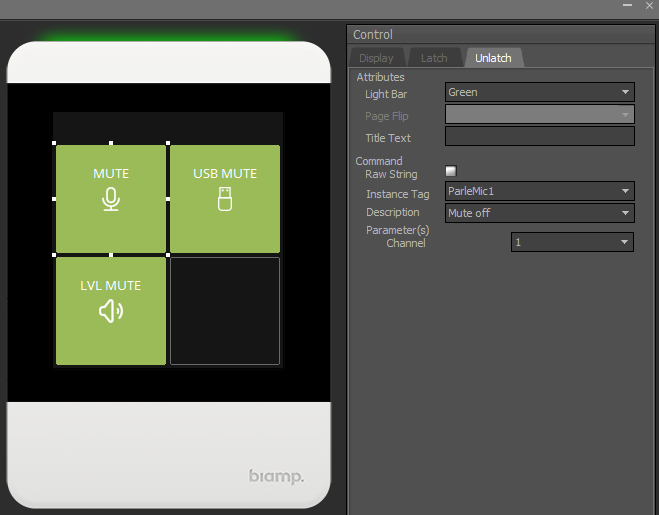
This section will change the appearance of the button when it is pressed again, after it was already latched. In this case, our mic has been muted and we need to unmute it. Select the instance tag of the same block we used in the Latch tab. Once that instance tag is selected, move down to the Description field and set it to "Mute Off". This will ensure when the button is pressed again, that the Parle mic input block will unmute and change the button state to an Unlatched state. At the same time, the button changes back to a green color to indicate the mic is unmuted and match the Parle LED indicator. We can adjust the light bar attribute to change with the button push
The TEC-X block is now configured and ready to be pushed to the system.
Feedback
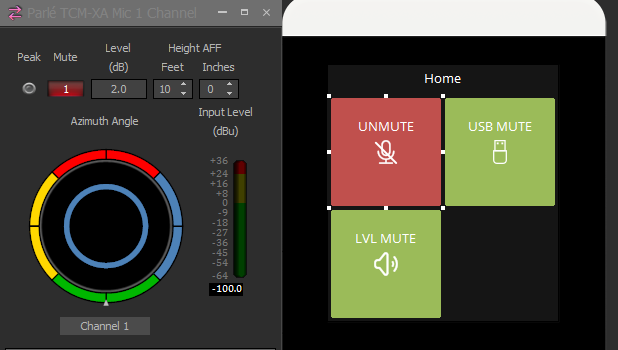
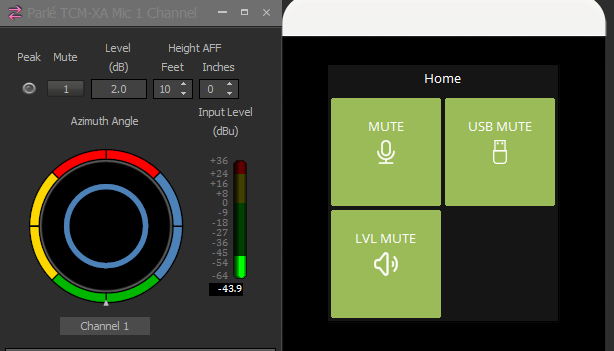
Now that the TEC-X block has been configured, we should be able to have two-way feedback communication. This means when we mute from the TEC-X controller, it will reflect in the Tesira configuration file, and vice-versa.