Using an NPX Paging Station as a message player
The NPX Paging Stations are a convenient way to add paging features to a Tesira system. All available NPX models come with built in AVB and Dante capabilities to integrate with a media network of choice in the Tesira system.
This article explains how to trigger messages that are stored in the NPX paging station from an external device such as a logic input, event scheduler or wall panel control.
The article further explains how to make the message repeat when triggered by a logic signal, for example, from a building alarm system.
NPX message system overview
All NPX paging stations have the capability of storing 50 minutes of message recording split between 10 messages as required.
Messages stored in an NPX paging station are associated with a page code which is normally triggered from the NPX paging station itself.
It is however possible to also recall a page code via a preset in the Tesira software, this preset can then be recalled in many ways for example a physical logic input to the Tesira, the Tesira event scheduler or a wall panel control such as TEC-X.
The following procedure details how to upload messages into the NPX and then how to include them in a preset
Uploading messages into an NPX
Once the Tesira system is complete, including an NPX device you can upload messages into the NPX itself. Note that each NPX in a system has 10 independant message storage slots which share a total storage time of 50 minutes. Messages must be associated to a page code in the Tesira design.
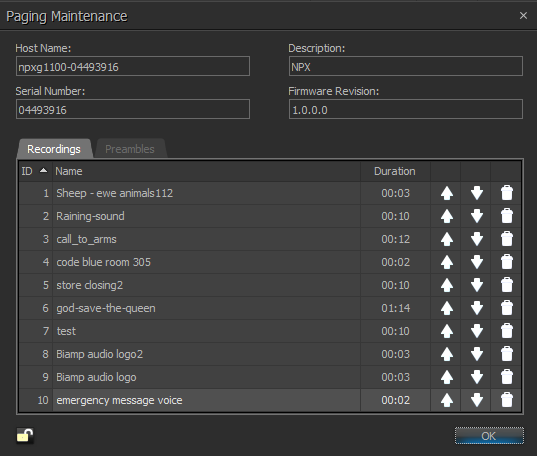
To upload a message into an NPX, firstly discover the available NPX devices by opening Device Maintenance and then Remote Devices. The available NPX devices will then be listed. Select the required NPX device and click on the 'Manage Paging Station' button. This opens the Paging Maintenance dialog with ten slots each for Recordings and Preambles. By default all the slots are disabled. Audio files can be uploaded by clicking the up arrow which opens a standard Windows 'Open' Dialog. Alternately, audio can be recorded directly from the NPX device by selecting a slot and following on screen instructions.
In case there are existing recordings (previously uploaded or recorded on device) or preambles, those can be downloaded and saved to PC by clicking the down arrow icon and can also be deleted by clicking the trash can icon.
Adding a message to a Page Code
Once the required messages have been uploaded into the NPX they need to be associated to a page code, this is done by opening the 'Paging and Zone Control' block in the Tesira System design.
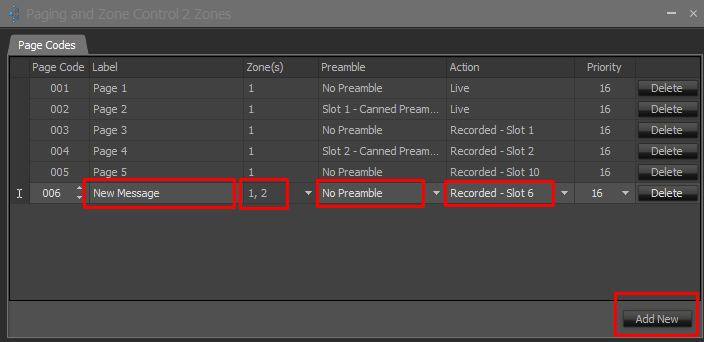
You can add a new page code which includes the required message slot in the NPX. This is done by:
- Click 'Add New'
- Give the page code a label if required ('New Message' in the example below)
- Define which zone the message should be played in the zones column ('1 and 2' in the example below)
- Add a preamble if required ('No Preamble' in the example below')
- Define the message to be played ('recording slot 6' in the example below)
The new page code must now be uploaded to the NPX, this is done by:
- Opening the 'NPX Paging Station' block when connected to the Tesira
- Selecting the new page code (006 in the below example)
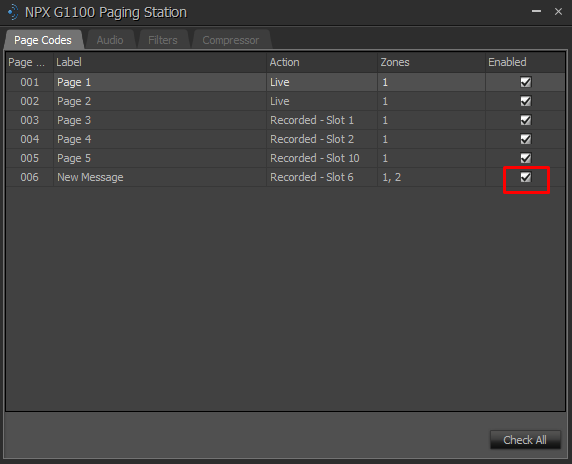
The above page code can then be triggered from the NPX via page code 006
Note that when a page code which includes a message is triggered, it will play the message in the assigned slot of the NPX that it is triggered from. It is therefore possible that different NPX devices have different recordings in their message slots.
Triggering a Page Code message from a Preset
To add a page code to a preset the 'Select Block Attributes' function is used. The following procedure can be followed:
- Right click on the the NPX paging station in the Tesira design
- Select 'Create New Preset' from the context menu
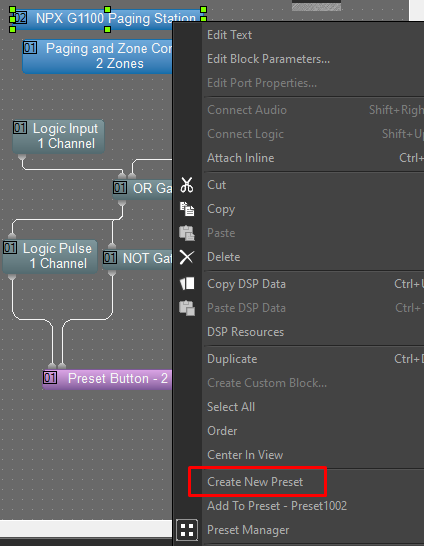
- The NPX will be added to a new preset which can be renamed as required ('NPX 1 message 6' in the example below) in the preset manager
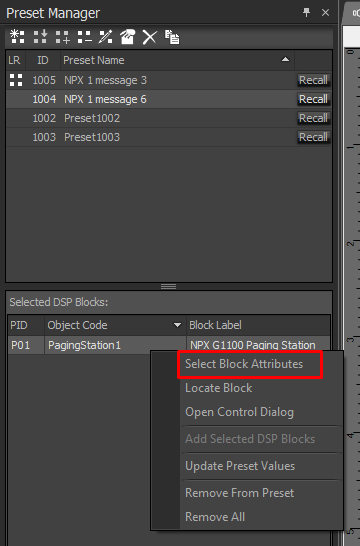
- In the 'Preset Manager' select the preset and right click on the required 'Paging Station' object code in the lower selected DSP blocks list
- Select 'Select Block Attributes' from the context menu
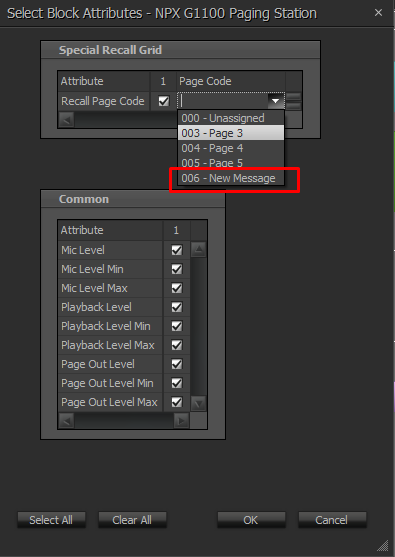
- The following control dialog is then displayed
- You can now select the NPX Paging Station block parameters which you require to be recalled by this preset
- Note that a 'Special Recall Grid' is also available at the top of the control dialog, this is where you can select the page code that you would like to be played when this preset is recalled ('006 - New Message' in the example below). Note that only page codes that include a message are displayed.
This preset can now be recalled from many sources including the preset manager, a preset block in the Tesira software and therefore a logic input, event scheduler or wall mount control panel.
Triggering and repeating a Page Code message from a logic input
It is often required that a message be repeated when triggered by a logic input, for example an emergency message triggered by a logic signal from a building fire alarm system.
Firstly, in the below example we are assuming that the logic signal from the fire alarm system is a dry contact which is closed in the alarm situation. This contact is connected between logic input 1 and ground on a Tesira Forte in this example.
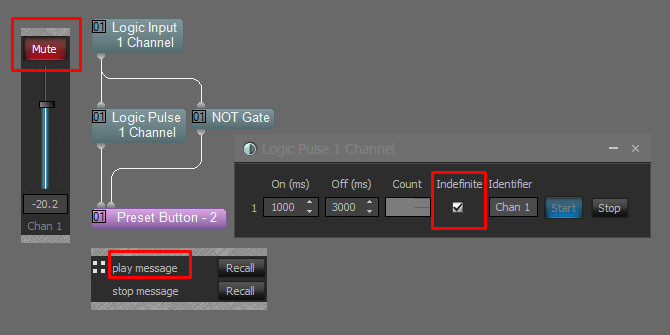
The logic input signal in the Tesira design is fed via a Logic Pulse block which, when the is set to produce a 1 second pulse every 3 seconds when indefinite mode is enabled. The OFF time delay of three seconds is equal to the length of the message recording so needs to be adjusted to match the message length or how often the message should be played. For example it may be required to play the message and then wait 5 seconds before repeating.
The output of the Logic Pulse block recalls a preset (named 'play message' in this example') which:
- Activates the page code which plays the message from the NPX into the zones defined in the page code
- Changes the Logic Pulse block to 'indefinite' mode ON (so that the output pulses every 3 seconds, thus repeating the message playback)
- Mutes the BGM source feeding the paging zone output (so that the BGM source is not heard momentarily when the message re starts)
When the logic signal from the fire alarm turns off a second preset (named stop message in this example) is recalled which:-
- Turns off the 'indefinite' mode inside the Logic Pulse block, meaning that the message will not be played again
- Unmutes the BGM source feeding the paging block
Note that if the logic input turns off part way through the playback of a message, the message will play through to it's end and then stop.
The above example Tesira design file can be downloaded here
**It should be noted that Tesira and NPX are not life safety regulation compliant devices so this should not be used where such compliance is required**
Triggering a Page Code message from the Tesira Event Scheduler
Once you have the required page code messages available in the NPX and presets in place to recall them it is possible to use the Tesira event scheduler system to recall them according to the date, day and time. The following procedure should be used:
- Add an event scheduler block to your design which has the required presets present, you will see the following block and control dialog
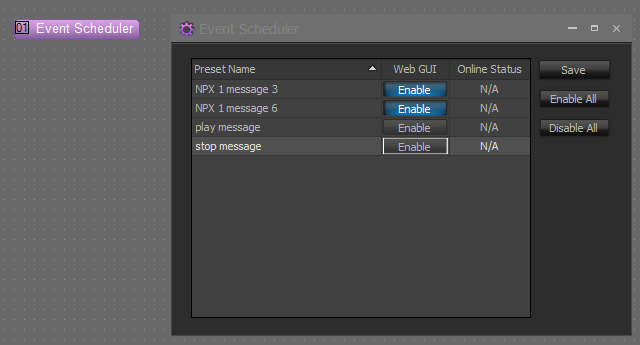
- Enable the 'Web Gui' access to the presets which you require to be available to the end user in the event scheduler web gui
- You now to access the Tesira Web Gui, To allow this the 'Enable HTTPS(+SSH)' option must be enabled in device maintenance, network settings for the Tesira device
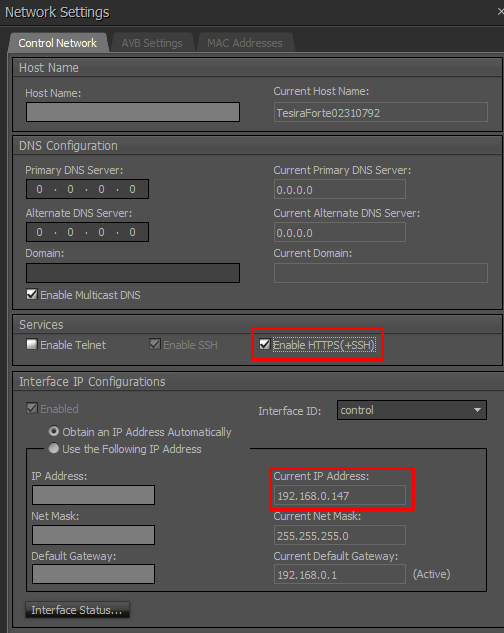
Also note the current IP address of the Tesira as you will use this to access the web app from a browser window:
- You will also want to check that the Tesira real time clock settings so that it is synchronized to internet time, this can be found in the network settings, date/time settings
- Using a web browser, enter the IP address of the Tesira (192.168.0.147 in the above example), you will be asked to enter a user name and password (the default user name is admin and the password is the serial number of the Tesira (02310792 in the above example)). The following web interface will appear:
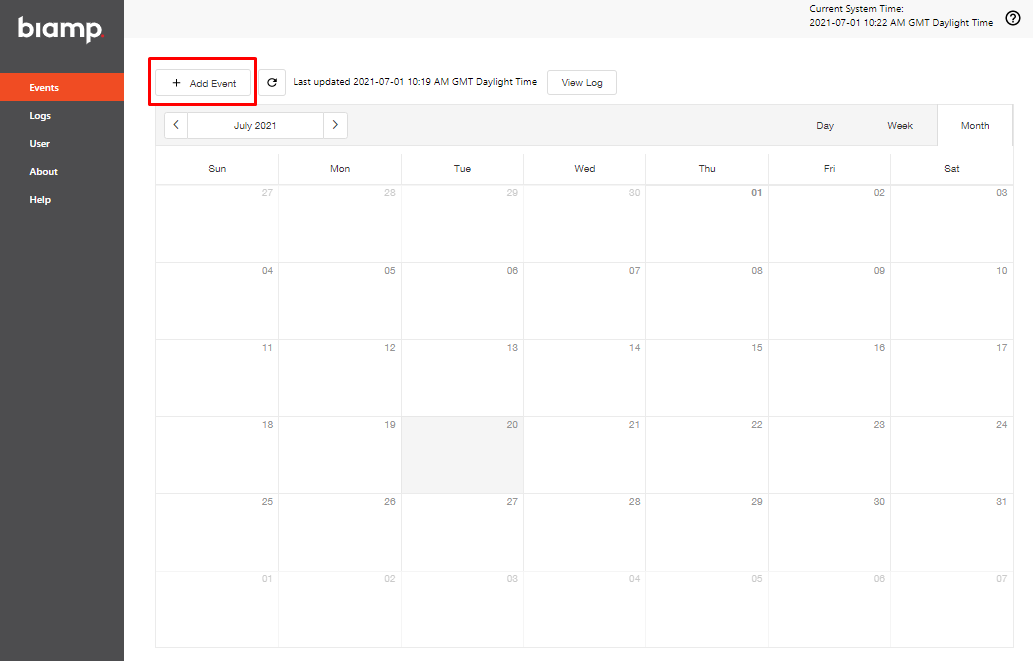
When you click on the 'Add Event' button the following window will appear:
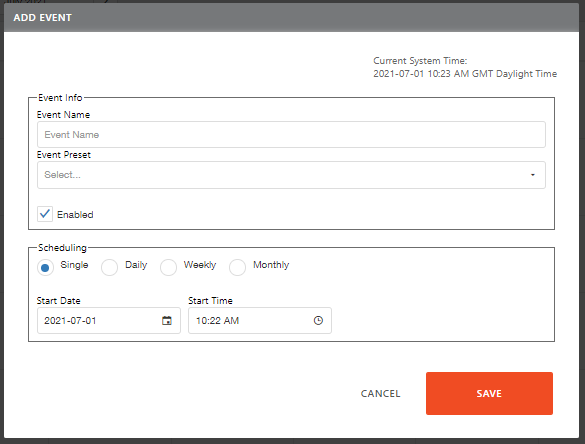
Here you can set the date, time and repeat settings for the required preset to be recalled which will trigger the associated page code and message playback. Further details of the event scheduler nd real time clock can be found here.
Triggering a Page Code message from a TEC-X wall control
Once you have the required page code messages available in the NPX and the presets in place to recall them it is possible to a use a TEC-X wall panel to recall them when a button is pressed. Full details of how to connect and setup a TEC-X with a Tesira system can be found here.
Buttons on the TEC-X can easily be assigned to recall a preset in the Tesira system which is programmed to recall a page code which includes a message. In s way the message can be played manually from the TEC-X wall panel.