Qt X Logic Paging with NPX
Qt X software version 2.3.0 and later adds the ability to trigger a recorded page code from one of the available GPIO ports on physical controllers participating in the system. This provides added flexibility by enabling paging from external systems and devices that interface with the main QT X and NPX hardware. This article outlines physical connections and programming steps required to achieve this functionality.
Please note:
- NPX hardware running firmware 1.3.0 is required to implement this functionality within a QT X system. Qt X controllers cannot host page codes locally. At least one NPX station of any type is required in the active configuration.
- Logic Page configuration is not supported via the Qt X controller's Web UI.
Hardware connections overview
Connections triggering logic pages can use the GPIO port of any controllers in the active system. All available Qt X hardware controllers have physical connections for GPIO logic, and multiple points of contact may be configured within a single system.
Before beginning, you must determine the type of Logic trigger for initiating the page. Depending on the type of 3rd party device performing the triggering, the programming may need to be set up in the software for "Active High" or "Active Low" operation. A typical Push-to-Talk style trigger would be an example of an "Active Low" source while some fire alarm or security applications may need to be "Active High".
Consult with the local Authorities Having Jurisdiction (AHJ) for all life safety applications.
When an incoming contact is closed ("Active Low"), the chosen page will be sent to all selected zones. This also mutes any background music in those zones. The chosen page is adjustable on the Zone Paging Level control. Keeping the state at the default "Active High" will route the recorded page to the selected zone(s) when the contact is closed.
Active High - Incoming Contact Open | Active Low - Incoming Contact Closed


Multiple logic triggers may be programmed within a system using up to all of the available hardware inputs. Page code playbacks are prioritized by the priority setting on a per-code basis in the software.
Programming steps in Qt X software
Step 1: Create at least one page code
At least one page code must be availble to set up. Pages codes may be added in the Configuration tab while offline, or in Paging Code Management on a live system.
In the example below, page codes have been created and assigned as a combination of Live and Recorded the the configuration tab of the Qt X software. Additional page codes may be added by selecting "Add New". Additional information on this process is found in this article.
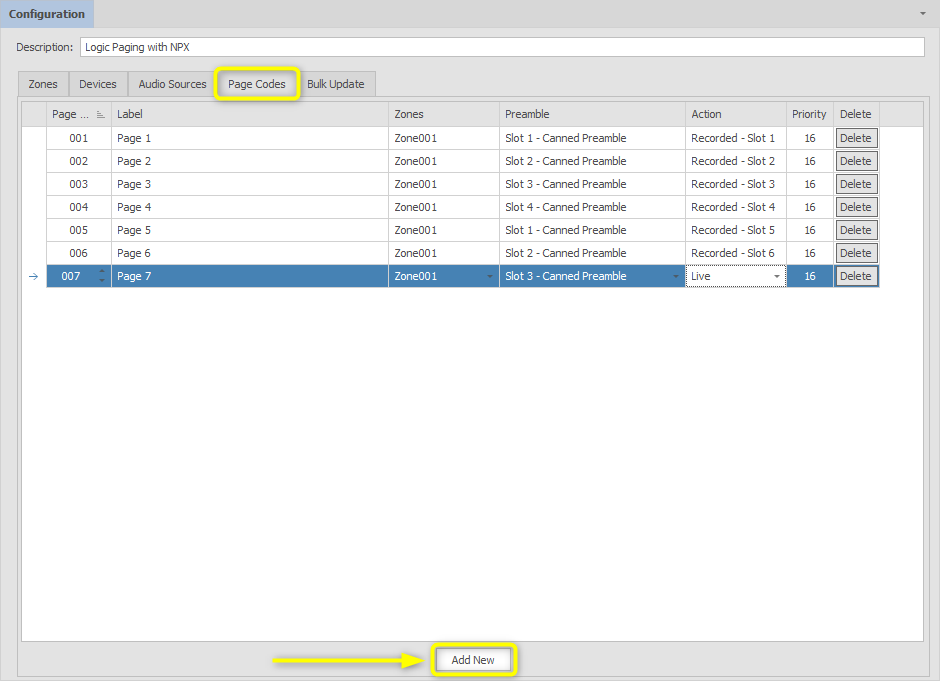
Note: Only page codes that are set to Recorded in the action drop-down will be available to assign to a logic page input. Live page actions are not supported when using Logic Paging or Scheduled Message Playback.
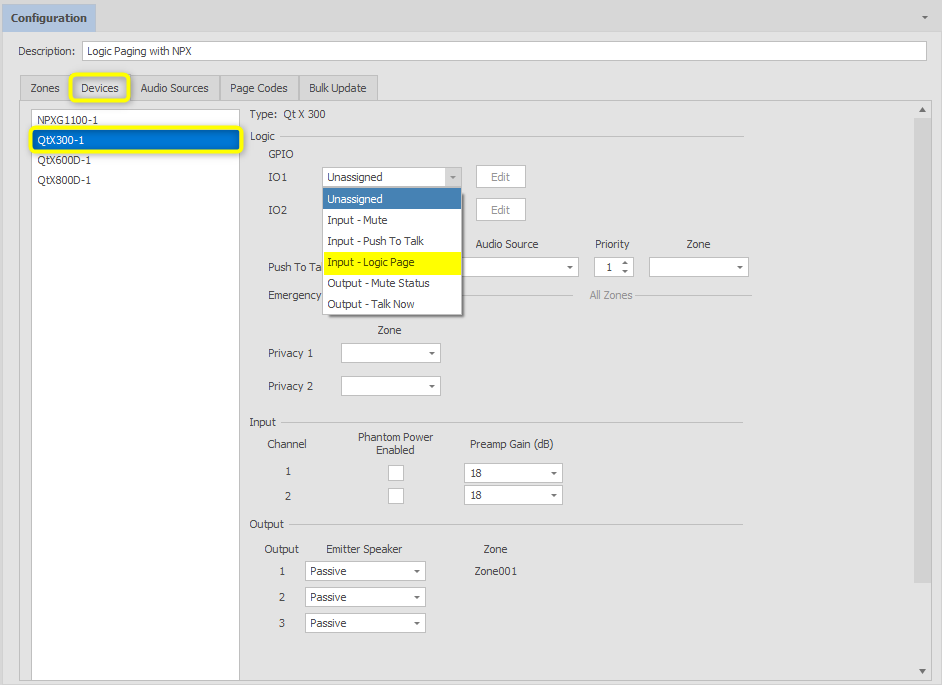
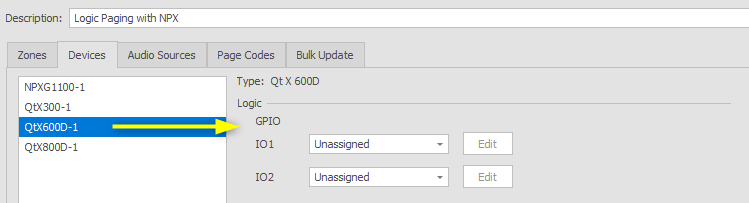
Step 2: Assign the Input Logic page to GPIO per controller
Once a group of Page codes has been added, logic programming is done by selecting the appropriate controller in the "Devices" tab. It is important to select the controller from the list that will be hosting the physical connections as previously described since programming is done on a per-controller basis.
Note: Logic Page creation and Assignment to an NPX paging station must be done offline in the configuration tab and sent as an update to the system. On a running system-configuration, created logic pages are visible in the Paging Code Management pop-up under the "Logic Pages" tab. Page Code selection changes may be done in a live configuration from this location and applied in real time.
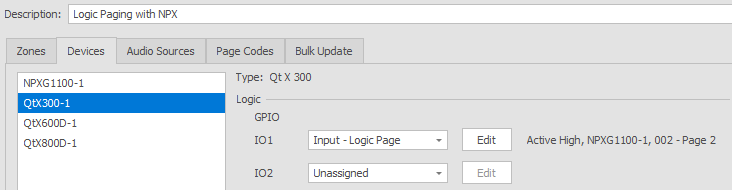
Step 3: Assign a paging station from the drop-down menu
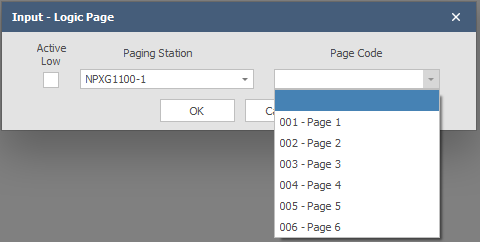
Once a logic page input has been added, select the "Edit" button to assign a paging station and page code. This will open up a pop-up window to enable assignment.
Select from one of the available Paging stations. This pop-up window is also the location where the setting for "Active High" or "Active Low for this GPIO input is selected. The default state is "Active High" with an available tick box to check if "Active Low" is required for this input.

Step 4: Assign Page Codes to Logic Page Inputs
Page Code visibility and available NPX stations: All page codes associated with the selected Paging Station are visible in the dropdown. If a page code has not been "enabled" for a paging station, it will not be visible in the list. Additionally, only Recorded page codes are visible here. Lastly, only NPX paging stations added to the configuration can be selected. Discovered NPX paging stations already assigned to other systems cannot be selected or assigned a page code.
- Assign the codes or codes.
- When complete, select OK to add the changes.
- The selected GPIO configuration, assigned paging station, and page code will be visible to the right of the Edit button. Updates may be made at any time when offline with a configuration file.
- Repeat the assignment steps for the second GPIO port if required. Each GPIO port connection can support a single Paging Station and Page Code assignment.
Optional: Add additional logic Page controls on additional hardware.
Note: Up to (2) Logic Page assignments may be configured per Qt X controller. Additional logic pages may be added by selecting another Qt X controller in the "Devices" list. It is always important to note which controller is selecting when programming GPIO assignment as the physical connections on the selected device will be driving the actions in the configuration.
Note: Each assigned Page Code will only playback once through the system each time the Active High or Active Low signal is triggered. Even when a contact is in a latched state, only a single playback will be available. If multiple repeat playback is required, the message would need to be loaded with a repeat in the recorded file, or utilize the Scheduled Message Playback feature.
Step 5: Send Configuration
Once Logic Page assignments are complete, use the "Send Configuration"  icon to send the changes to the active system.
Viewing Logic Page Assignment in Live System
Live systems properties are accessed via the Devices and Systems menu. This is typically docked at the bottom of the Qt X software application.
Opening the Page Code Management panel
1) Select the "Devices & Systems" icon to show systems discovered on the network.
2) Expand the tree view on the required system and select the NPX paging device or all devices in the system.
3) Select the "Page Code Management" Icon to view assignment and active logic pages.
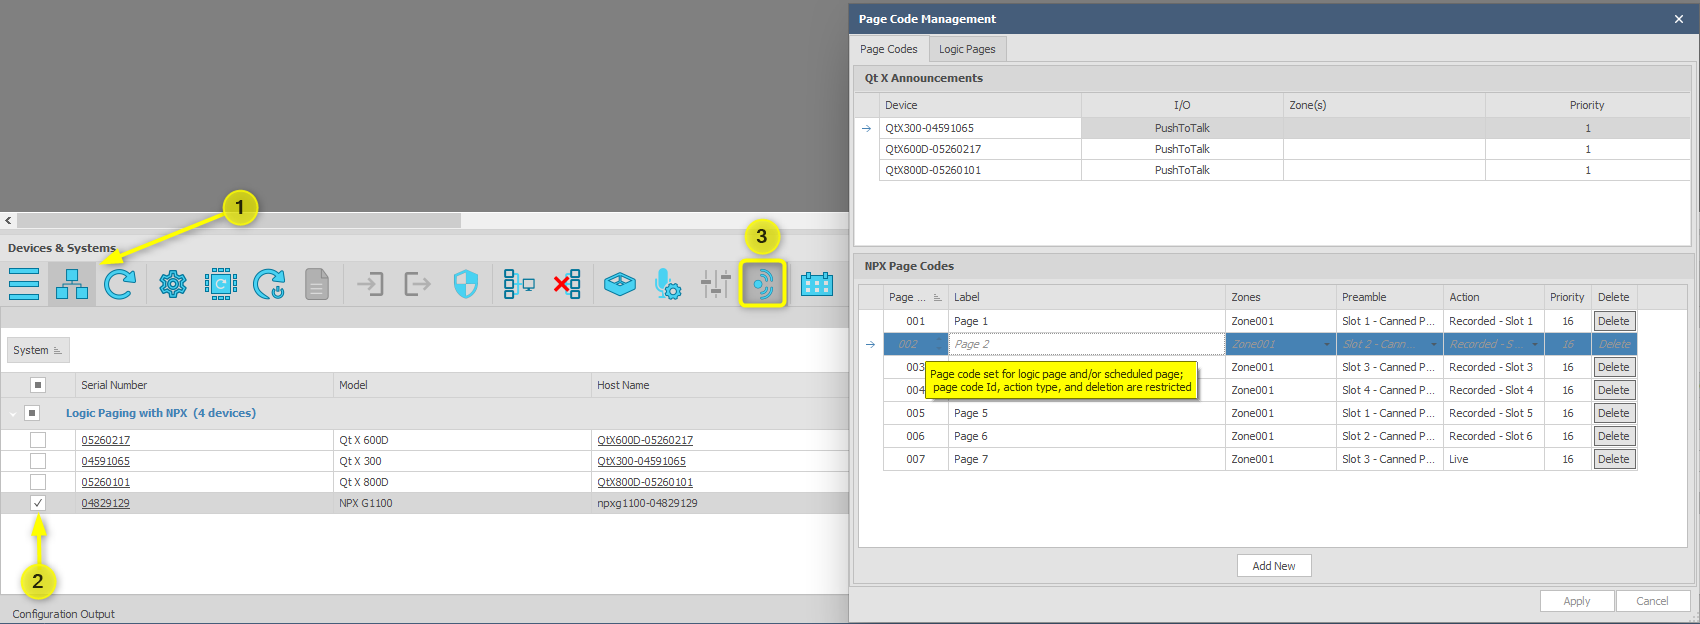
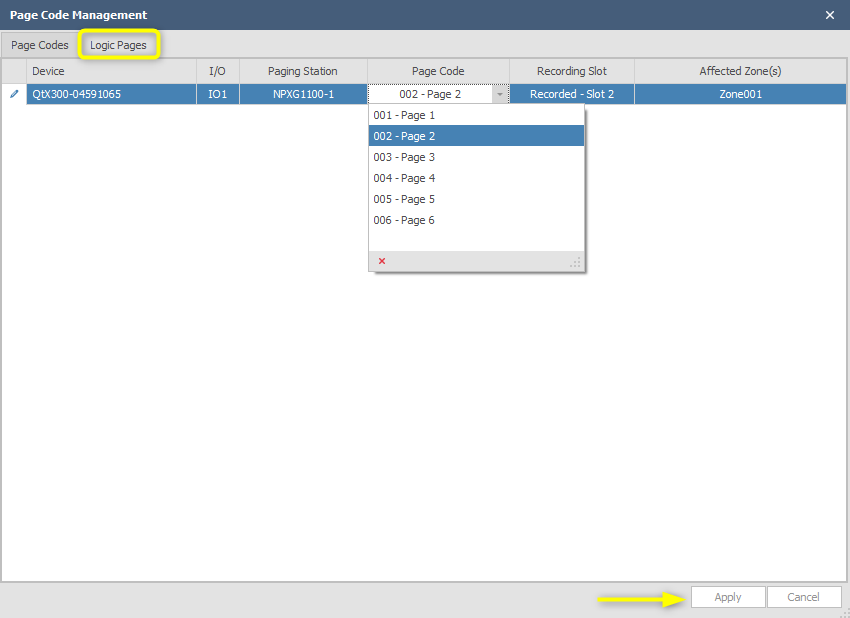
The Page Code and Logic Pages tabs
The Page Code Management pop-up includes two tabs showing the active page codes in the system and programmed Logic Pages. Not that that any page code with an associated Logic Page assigned cannot be deleted. It must be unassigned before it can be deleted. This is done in the configuration portion of QT X software and sent as an update to the system.
Selecting the "Logic Pages" tab shows all assigned devices, I/O, and paging stations that participate in the active system. These settings are fixed in the running configuration and must be changed offline and sent as a new update to system.
Available Page Codes hosted on an assigned paging station may be selected in a live system using the drop-down menu. This allows for customization without requiring a new configuration sent to the system.
- Select "Apply to commit these changes in real time.
Saving Page Code and Logic Page changes
Select "Apply" to commit these changes to the system in real time.
- Tip: Use the "Get Configuration" icon to extract the running file from the system if any offline configuration changes are needed. This ensures changes are made using the latest version of the running system file. The updated file can be saved locally after updates to the system have been applied by resending the configuration.
