Configuring the Modena welcome screen
Modena features a welcome screen that appears on the connected display when not in an active session. The welcome screen may be customized via the Web Administration Console; detailed information on how to enter the Web Administration Console (web admin) can be found here: Accessing the Modena web admin. Once connected to the web admin, select the "Welcome Screen" item on the left hand sidebar.
Main options
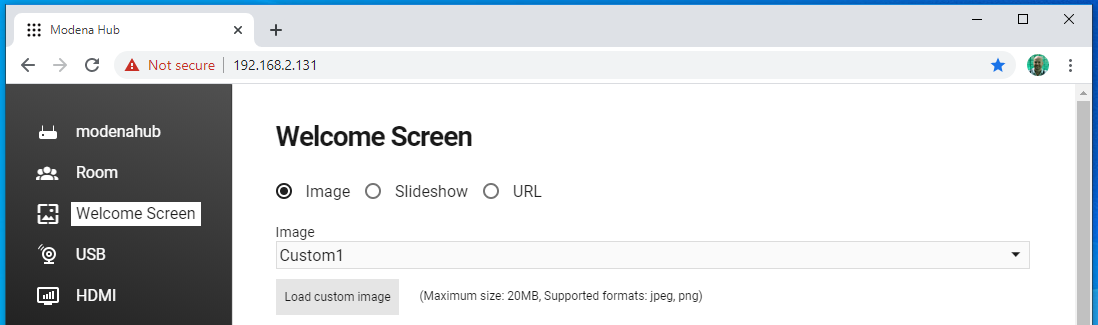
Image
When "Image" is selected, a drop down menu allows you to choose one of the pre-installed images, or to add a custom image. For the latter, the "Load custom image" button opens a file selection dialog. Supported formats are JPEG and PNG. The image size will be reduced if necessary to fit into the available area.
When configuring images on a Modena Server, all custom images ("Custom1" to "Custom6") are shared across the whole network of connected Modena units. Changes done on one of the images (e.g. uploading a new file) will affect all units that are configured with the same custom image. Use the 6 custom image slots to assign different welcome screens to groups of hubs, depending on their usage/location.
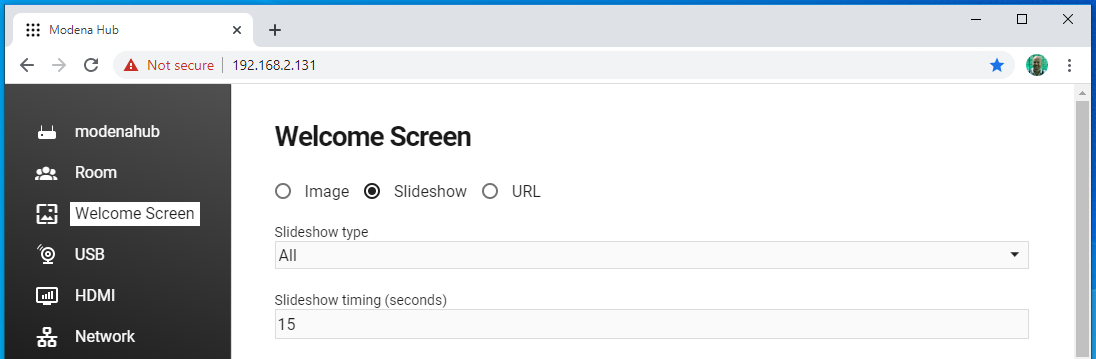
Slideshow
When "Slideshow" is selected, a drop down menu allows you to choose one of the listed themes, or select "All" if you wish to display images from the entire repository. "Slideshow timing" defines the time in seconds for each image to be displayed before being replaced by the next.
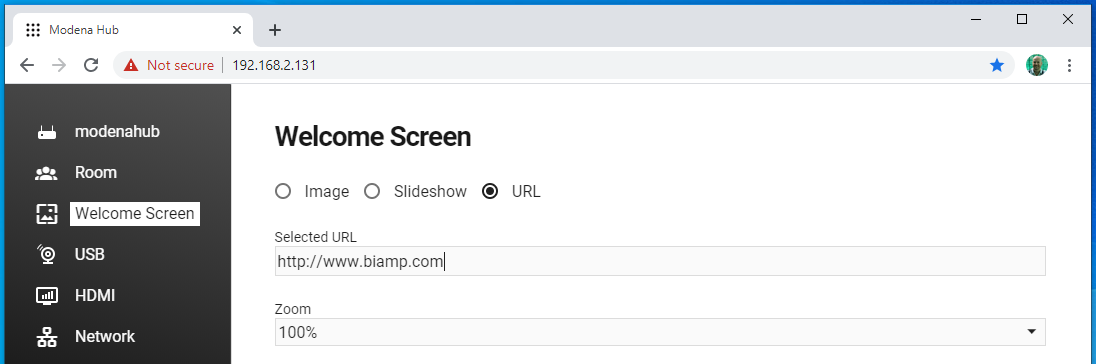
URL
If you wish to use a URL, enter the address of the page you wish to display on the welcome screen. When using this option, the linked URL will fill the welcome screen and will only allow the optional status bar to be added to the display. Set an optional zoom factor if you want to enlarge the linked page.
Appearance
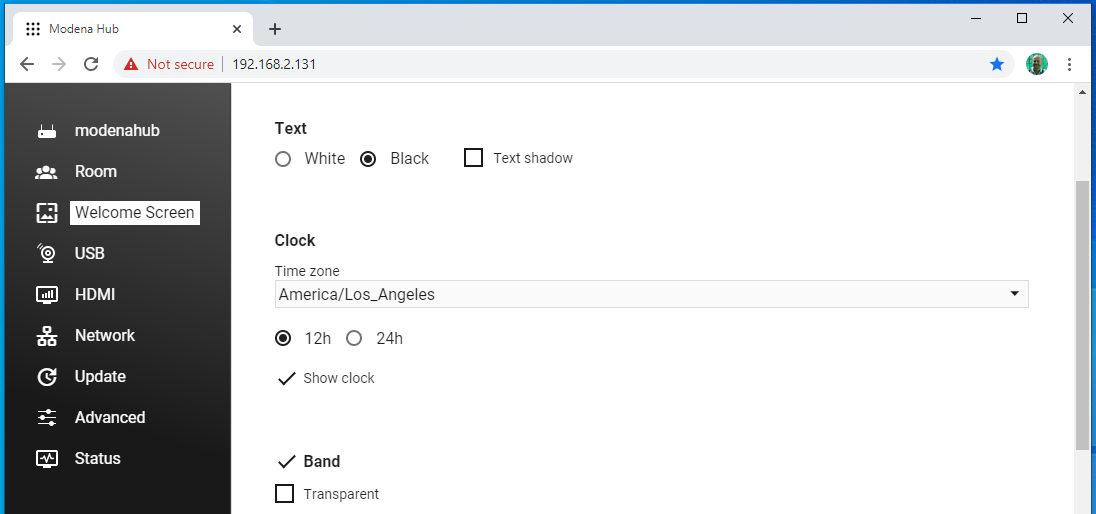
Text
Choose the color of the text that will be shown on top of your background image. This option is not available when a URL background is selected.
Text shadow: Tick the shadow checkbox to add a light shadow to the overlay text.
Clock
The clock requires an Internet connection or an NTP (Network Time Protocol) server. If neither are available the clock will not be shown. The NTP server can be configured in the advanced configuration page. This option is not available when a URL background is selected.
Time zone: Select the time zone for the welcome screen. This may be different from the system time zone of the Modena unit as specified in the General settings.
Clock format: Displays the clock in either 12-Hour or 24-Hour format.
Show clock: When un-checked, the clock is hidden from the welcome screen.
Band
This option, enabled by default, shows a grey side-band below the information area that appears on the left of the welcome screen.
Transparent: Tick this check-box to make the background image visible through the side-band.
Access instructions
This option shows network access instructions on the top left area of the welcome screen.

Show HTTP: Check this box to add the "http://" prefix to the displayed IP address.
Show direct link to room: Check this box to add the "/room-name" suffix to the IP address. Adding this suffix will allow the user to bypass the room selection screen.
Show status bar during presentation: Check this box to add the status bar on the display during the presentation. The status bar displays relevant information related to the room, such as the IP address, room name, the number of connected devices, and the passcode.
Wired interface label, wired interface icon: Use these fields to customize the access instructions for the wired network.
Wired DNS label: If you are using a DNS system on the network, you can customize the label to show the DNS address of Modena Hub.
Wireless interface label, wireless interface icon (Modena Hub+ only): Use these fields to customize the access instructions for the wireless network.
Weather widget
When selected, weather information and forecasts are displayed on the welcome screen. This option is not available when a URL background is selected.
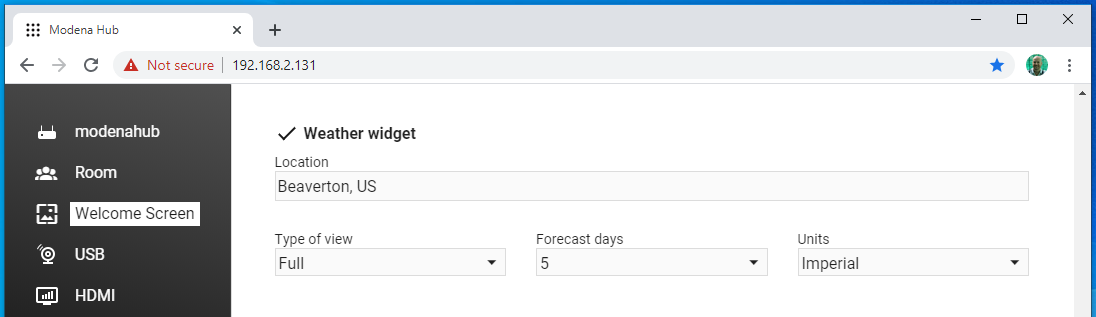
Location: Enter the location you want the weather reported for. Valid formats are:
- City name and country code divided by comma (e.g. Modena, IT)
- Zip code and country code divided by comma (e.g. 97008, US)
Use ISO 3166 country codes. If not specified, US will be used by default.
Type of view: Select the desired view among Simple, Full, Partial, Today, and Forecast.
Forecast days: Defines the number of forecast days to be displayed.
Units: Defines the unit of measurement for temperature information.
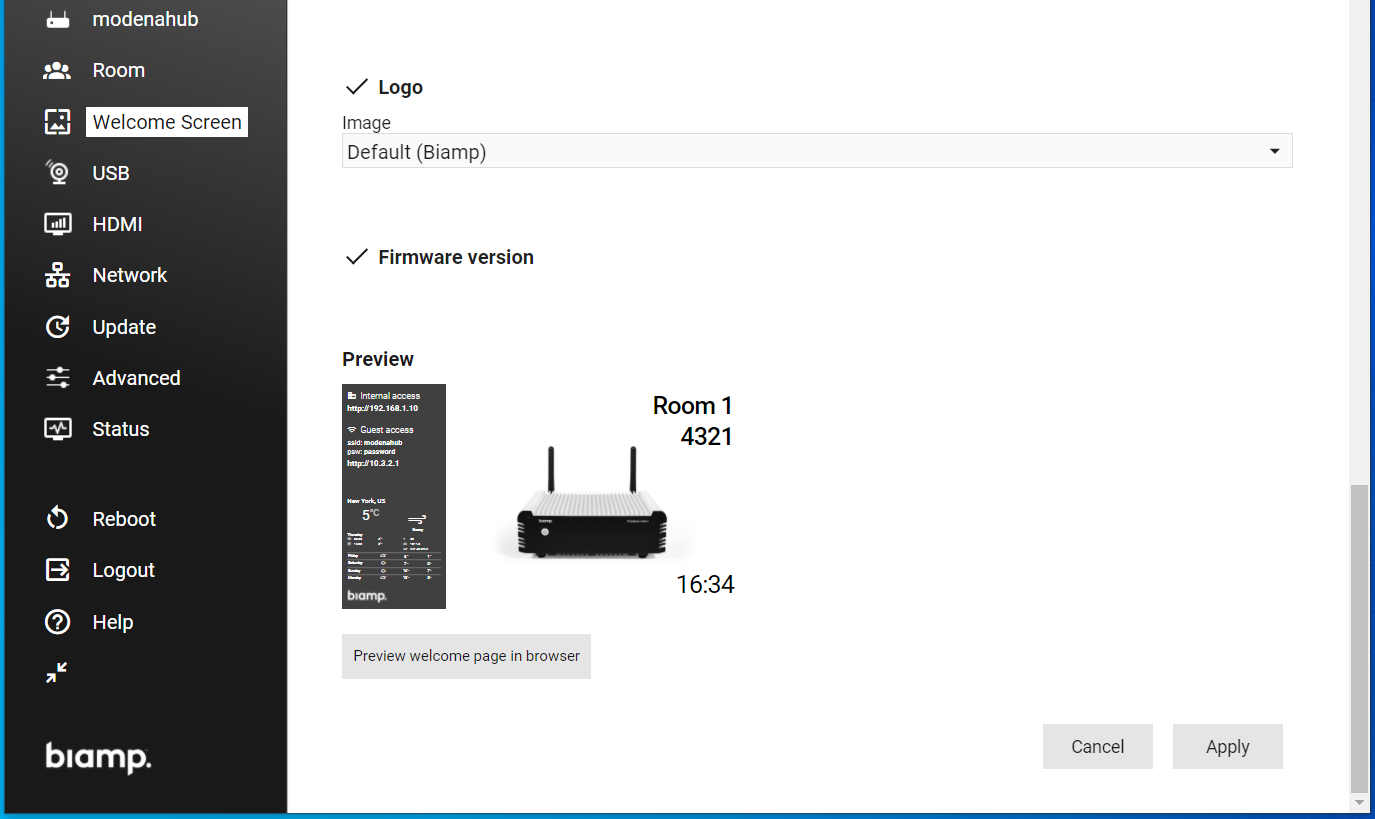
Logo
Tick this checkbox to include a logo on the welcome screen. The Biamp logo is shown by default, but you can upload any custom image.
Firmware version
Tick this checkbox to show the installed firmware version on the welcome screen, next to the logo.
Preview
This shows an image of how the welcome screen will appear, noting that the fields are filled with dummy data. To preview the actual HDMI output image, use the Preview welcome page in browser below.
Preview welcome page in browser
This button opens a copy of the HDMI welcome page in a separate browser tab. This function is useful to check the HDMI output when a screen is not connected, or when troubleshooting. For security purposes, the room passcode and SSID password are hidden.
Further reading
- Next configuration page: Configuring USB devices and HDMI displays on Modena Hub
- Previous configuration page: Configuring the Modena general and room settings
- Index of configuration pages: Modena system configuration