

Creating multi-page TEC-1 configurations
The TEC-1 screen can be used to create the effect of having multiple selection pages, or a selection menu where each selection can transition to a different “page”. This article describes how to achieve this effect.
- Before proceeding with this process, familiarize yourself with the TEC-1 wall control using these videos.
- This process makes heavy use of presets, if you are not familiar with this feature of Tesira, use this guide.
Creating your room page(s)
In this example, we will create a 'Home' screen selection for choosing controls for Room 1 and 2. Each of those provides access to another page that has all the sources in that room listed, where you can select and control levels.
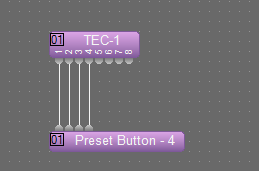
- Add a TEC-1 block to your file and a multi-channel "Preset Button" block, then connect the logic outputs of the TEC-1 block to the logic inputs of the preset block.
- Open up the TEC-1 control dialog and create your room 1 'page' menu for your TEC -1 by creating the control labels for your sources.
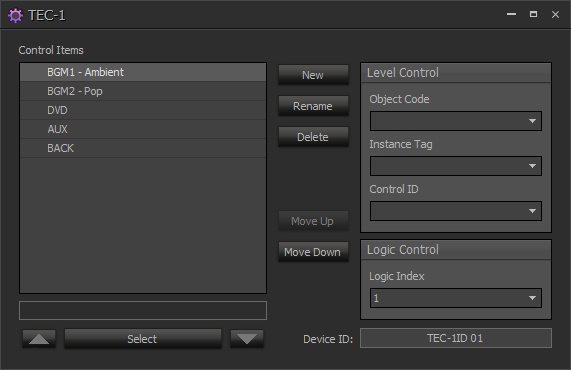
- Map your controls for the source levels by selecting the correct Object Code/ Instance Tag.

- Make sure you provide a "Back" option in your list to provide a return to the home screen. This option will need to be associated with a Logic Control index of your choice.

- Create a new Preset in your system and add your TEC-1 to this preset. This will be recalled every time the user taps on the TEC-1 with the correct menu item selected
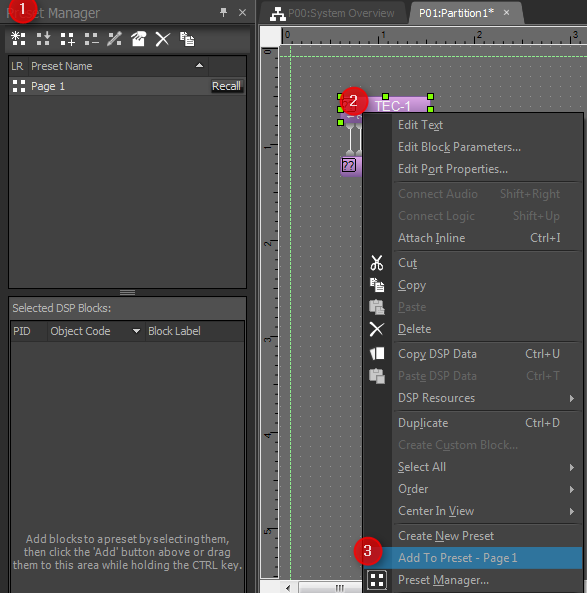
- Repeat this step for Room 2. Make sure to adjust the TEC-1 sources to control the correct level blocks and add the TEC-1 block in this new state to a new preset. Assigning these controls is covered in depth here. One thing to note is that level controls, mute state, and the like will automatically sync with other controls, such as Biamp Canvas.
Creating a Home Page
To create the Home screen, rename control labels 1 and 2 as Room 1 and Room 2. M. Assign logic indexes to control labels 1 and 2, in this case, 1 and 2. Note that your list must always be the same number of items. However, as lists will grow and shrink from a user standpoint simply replace items that you wish to not have visible with a single space. In our example screenshots, the control item list must always be 5 items long, but we can make it look shorter by using a blank space as a name.
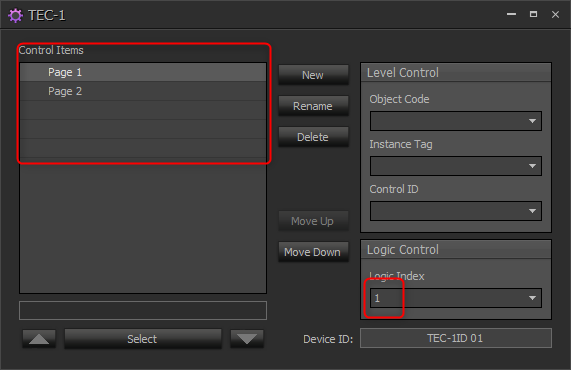
- Open your Preset Button control dialog and select the page presets that were created earlier. Make sure that the logic inputs on the TEC-1 block match the correct preset
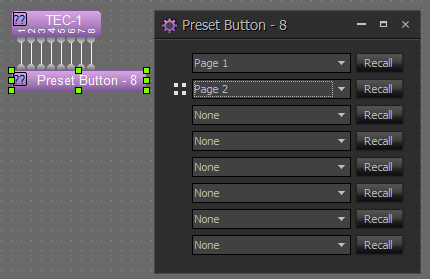
- Save both the TEC-1 block and the Preset button block to a third preset.
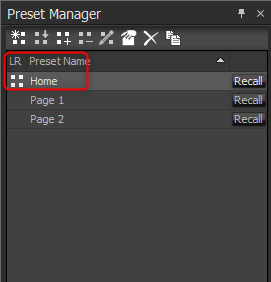
Tying it all together
- Recall the first room preset that you made
- Open the control dialog for your preset button and assign the Home Preset to the correct channel on the preset button that corresponds with your logic input on the TEC-1 control.
- Add the preset button to the preset so that both the TEC-1 and the Preset button are listed in this preset
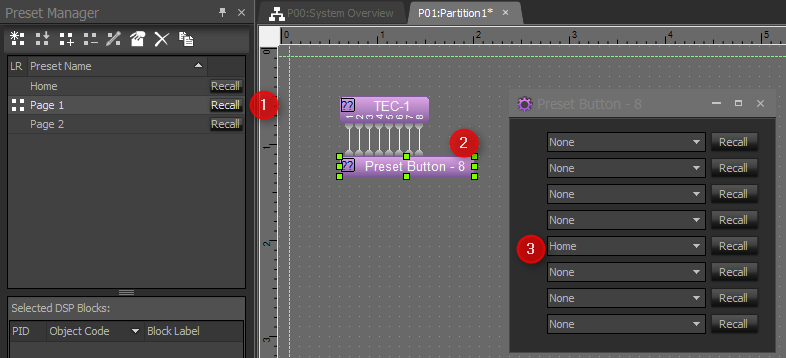
- Repeat this procedure for your other room.
- Once this is complete the end user should see the TEC-1 flip to different pages when they tap on the center of the TEC-1 with the corresponding items highlighted.
- You can also have multiple Physical TEC-1 devices that display the same information and control. Provided that the Device ID on all physical TEC-1 controls matches the same block.
Further reading
Our video series on programming a TEC-1
Mounting instructions for a TEC-1
Creating and modifying presets in Tesira
Creating multi-page controls for a RED-1 - this note is for Audia and Nexia systems