Netgear M4250 - Enabling AVB using the main user interface
This article describes how to enable AVB on the Netgear M4250 switch through the Main User Interface.
November 2023 Netgear AV firmware 13.0.4.17 onwards AVB support is enabled license free.
Please upgrade your Netgear AV switch to the latest release.
Please contact Netgear AV Support for further information.
Enable AVB
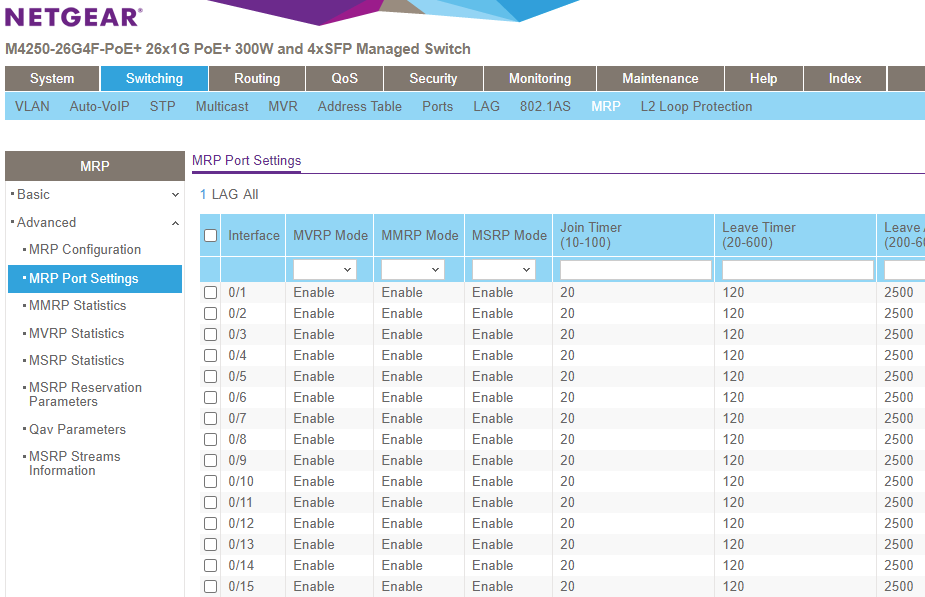
1. Go to Switching->MRP.
2. Select Advanced->MRP Port Settings.
3. Enable MVRP Mode, MMRP Mode, MSRP Mode on all ports that will have AVB devices connected.
4. MRP Timer settings need to be set to the following (values are in centiseconds), then select Apply.
- Join = 20
- Leave = 500
- LeaveAll = 2500
5. Select MRP Configuration
6. Configure as shown here:
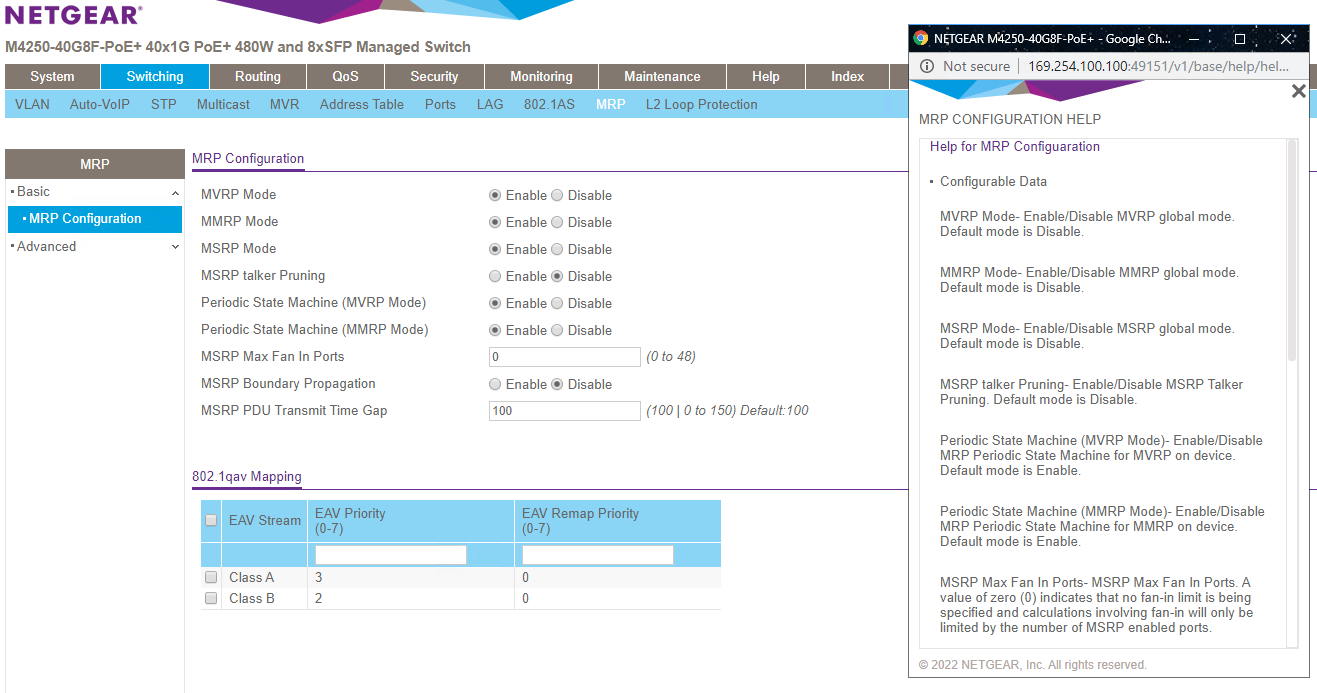
7. Click Apply then click OK on the Alert window that appears.
8. Go to Switching->802.1AS->802.1AS Configuration.
9. Enable 802.1AS Status and click Apply. Select OK on the alert window that appears.
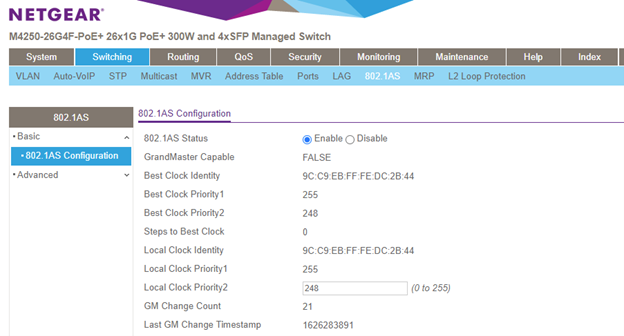
(It is worth noting that the Best Clock Identity will likely be an endpoint MAC. Netgear has chosen the Local Clock Piority1 of 255 which means any Tesira 802.1AS endpoint will be elected for Best Clock Identity.)
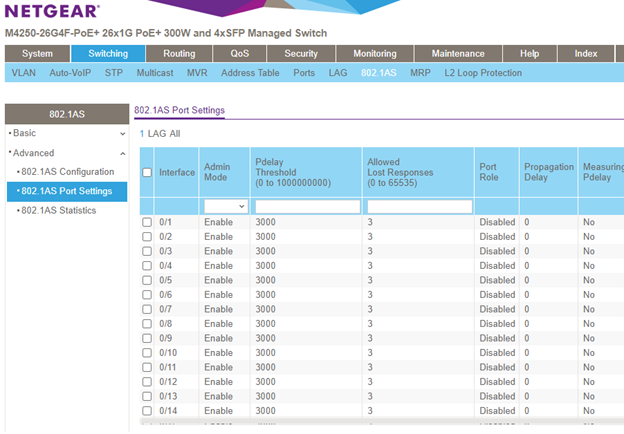
10. Select Advanced->802.1AS Port Settings.
11. Enable Admin Mode on all ports that will have AVB devices connected and click Apply.
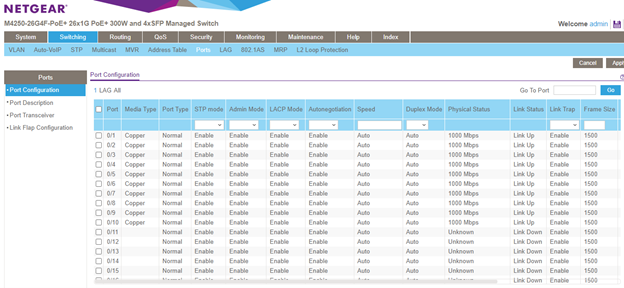
12. Go to Switching->Ports->Port Configuration.
13. Change Frame Size to 1500 for ports that will have AVB devices connected and click Apply.
14. Go to QoS, select trust dot1p in Global Trust Mode then click Apply.

15. Click the save icon to save the configuration.
Netgear M4250 MRP timers
Please follow this article showing how to set the MRP timers to suite AVB endpoints: Netgear M4250 MRP timers